All posts by Bree Hester

New Year’s Eve Cheese Plates for Two

New Year’s Eve Cheese Plates for Two: Ring in the new year with Grand Cru®- and Grand Cru® Reserve-inspired cheese plates, and sip pear martinis in the comfort of your own home.

By: Bree Hester

Years of working in the restaurant industry, having small kids, coupled with a husband that usually has New Year’s Eve duty has cured me of wanting to ever go out for New Year’s Eve again. 

I’ve been there, done that, and much prefer to celebrate the new year with my people, on my couch in front of my fireplace with a movie or a game than fight crowds. And honestly, I don’t want to get dressed up. I’ll wear my fancy joggers for my couch date, but that’s about it these days.

It’s not to say that I don’t make it a special occasion, I do. When the kids were younger (before they had their own NYE plans) we would have raclette as a family. If you have never had it, it’s similar to fondue, but with a little tabletop grill/broiler. It’s so much fun. It takes a long time and we would talk for hours and I loved it.

Now, the kids are either out or are doing their own thing. So my husband Wes and I have a grown-up, yet low-key, New Year’s together. 

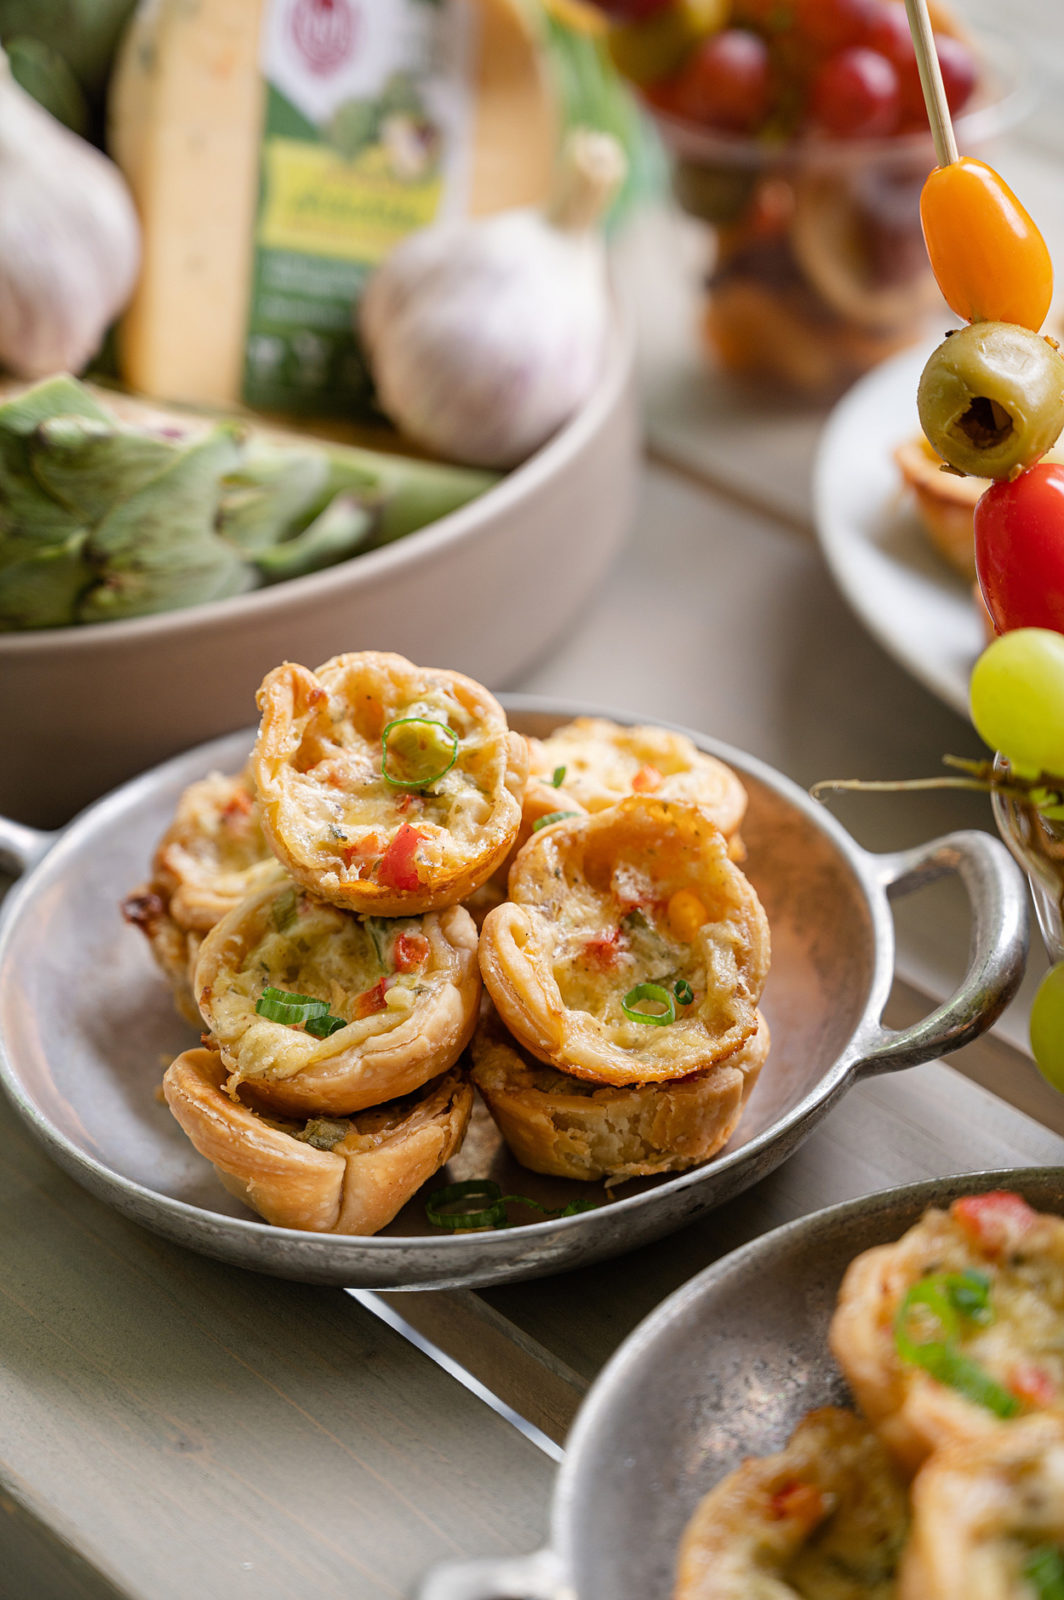
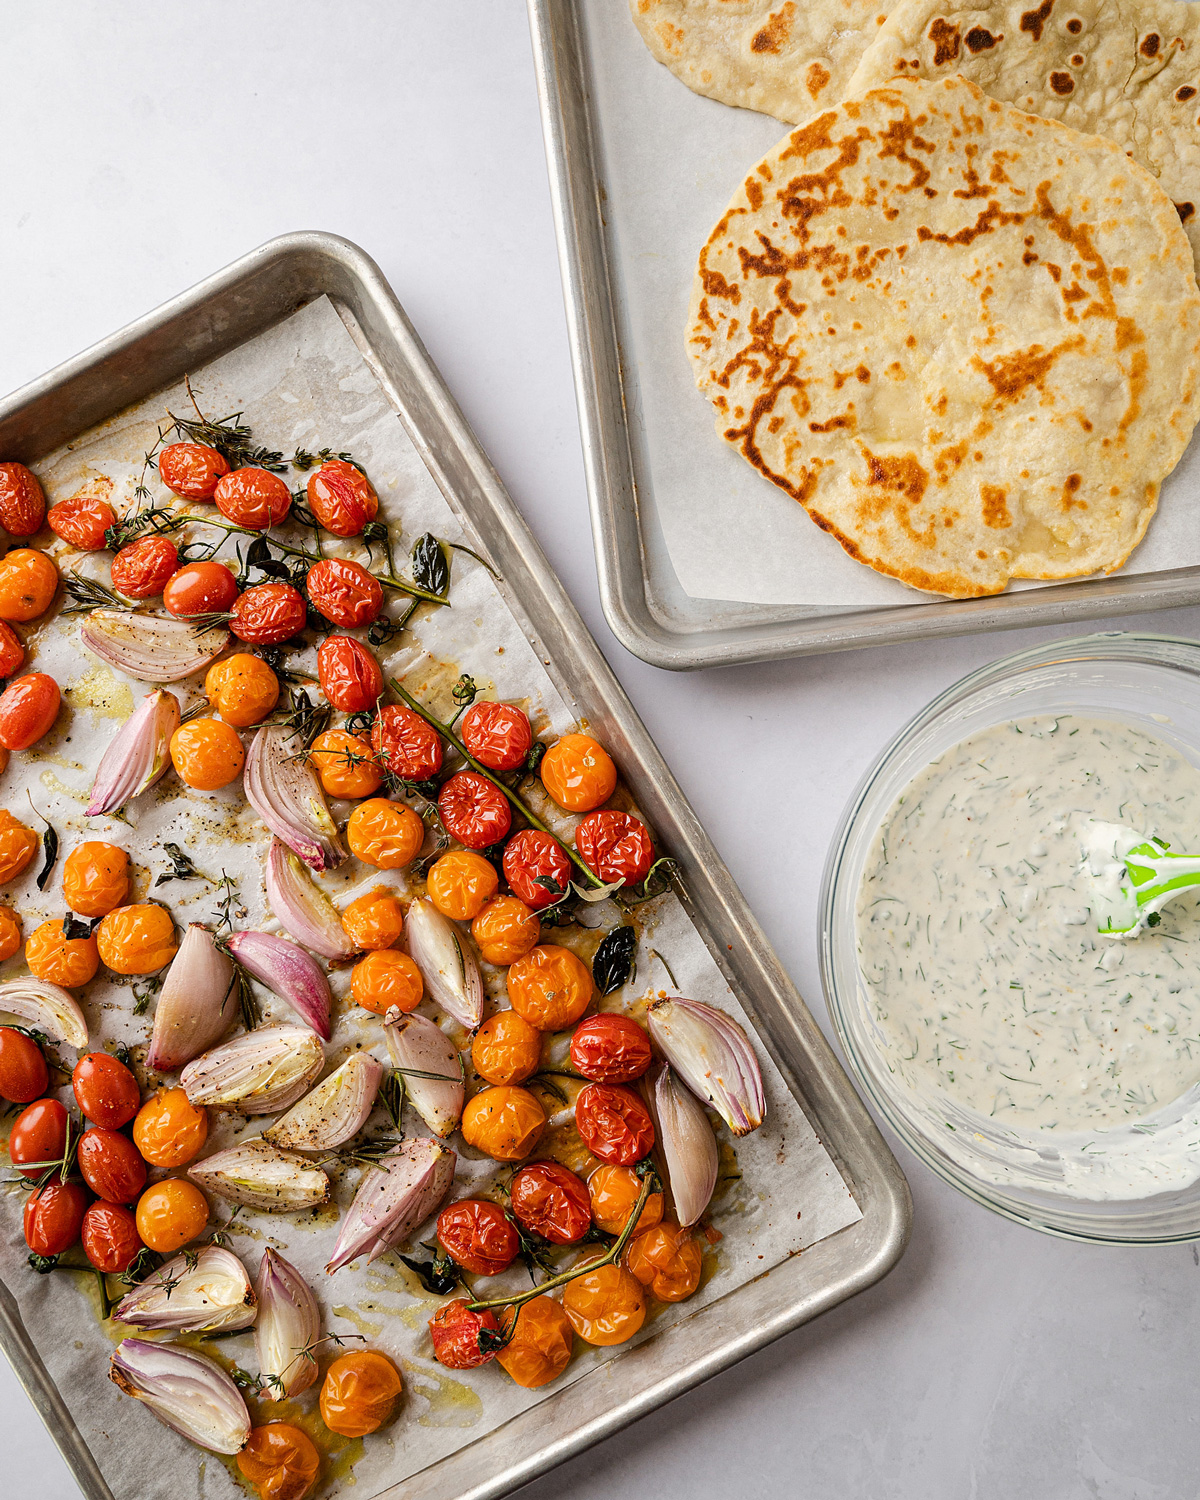
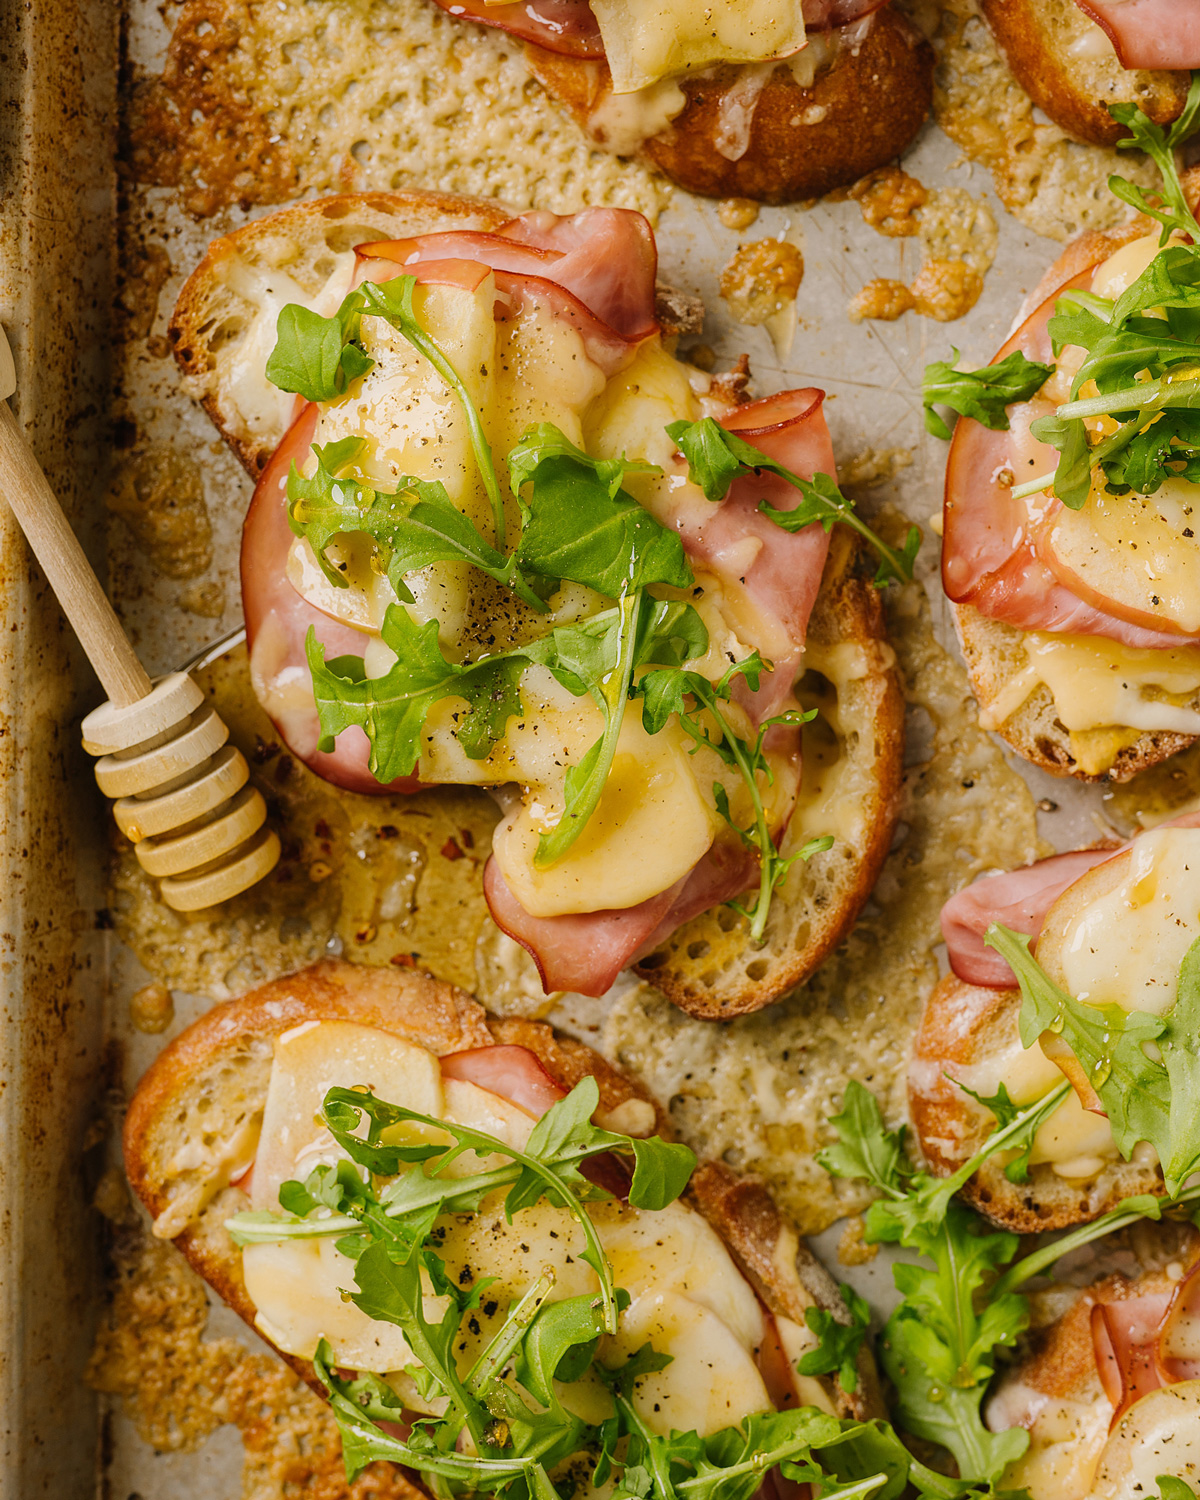
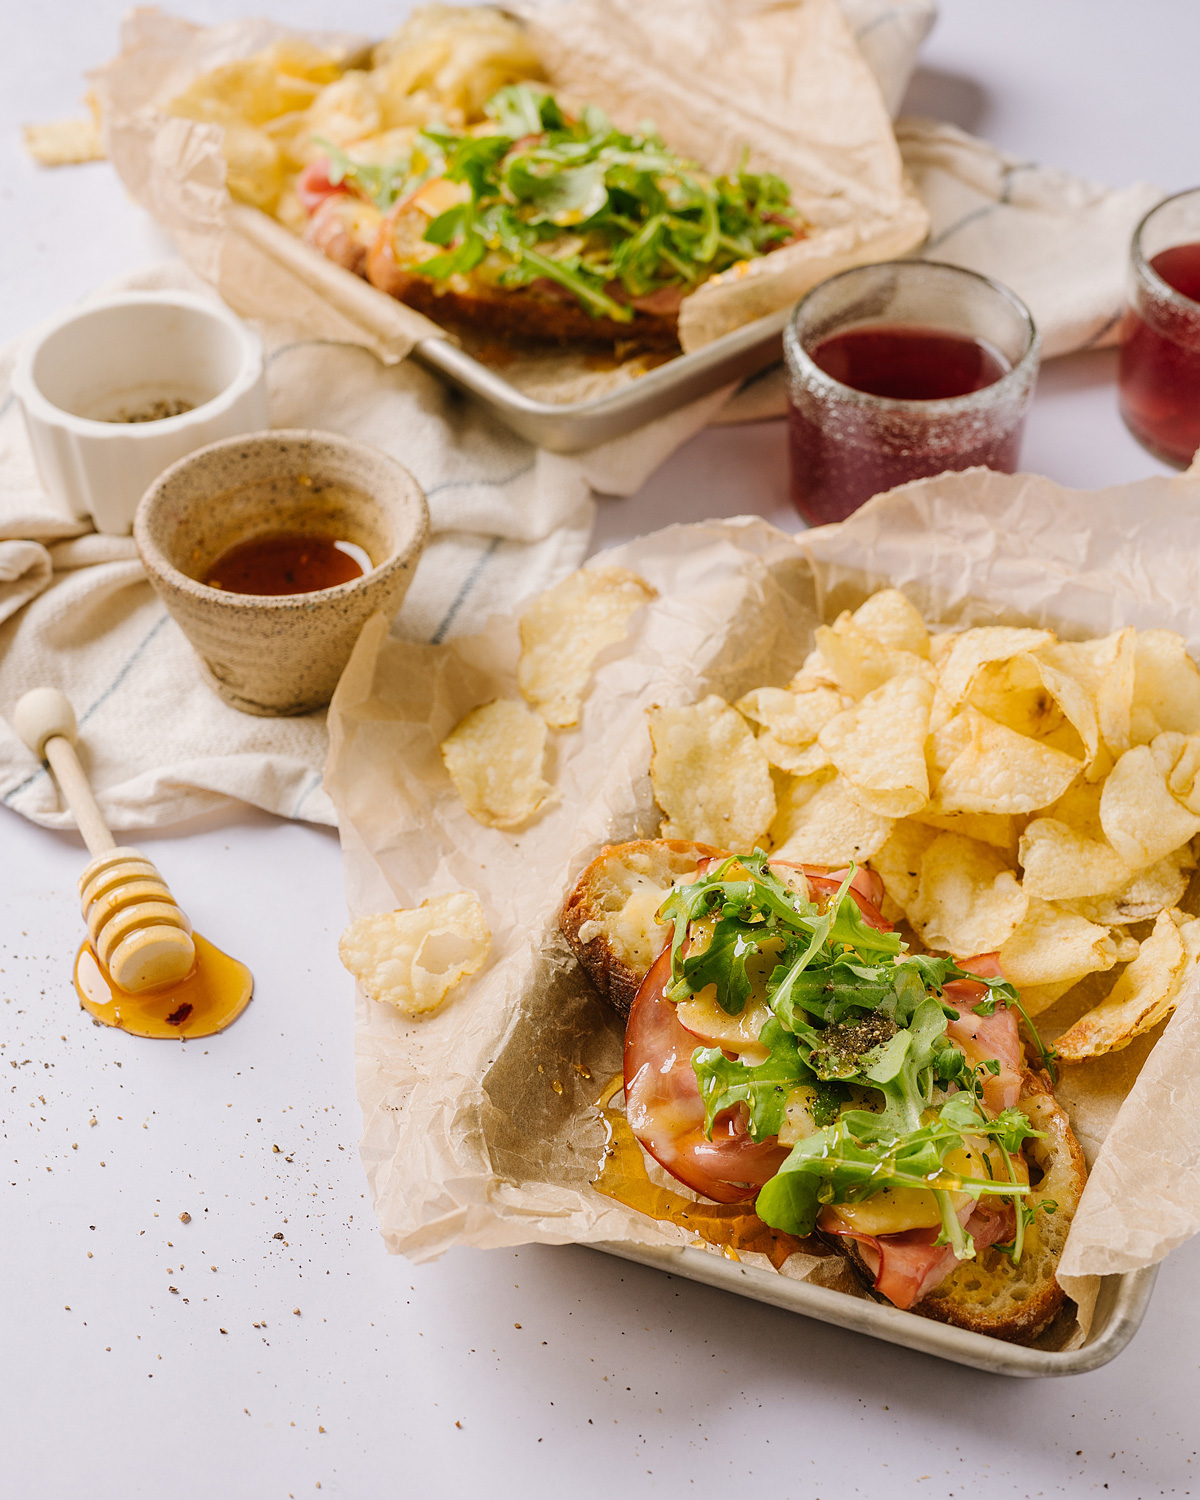
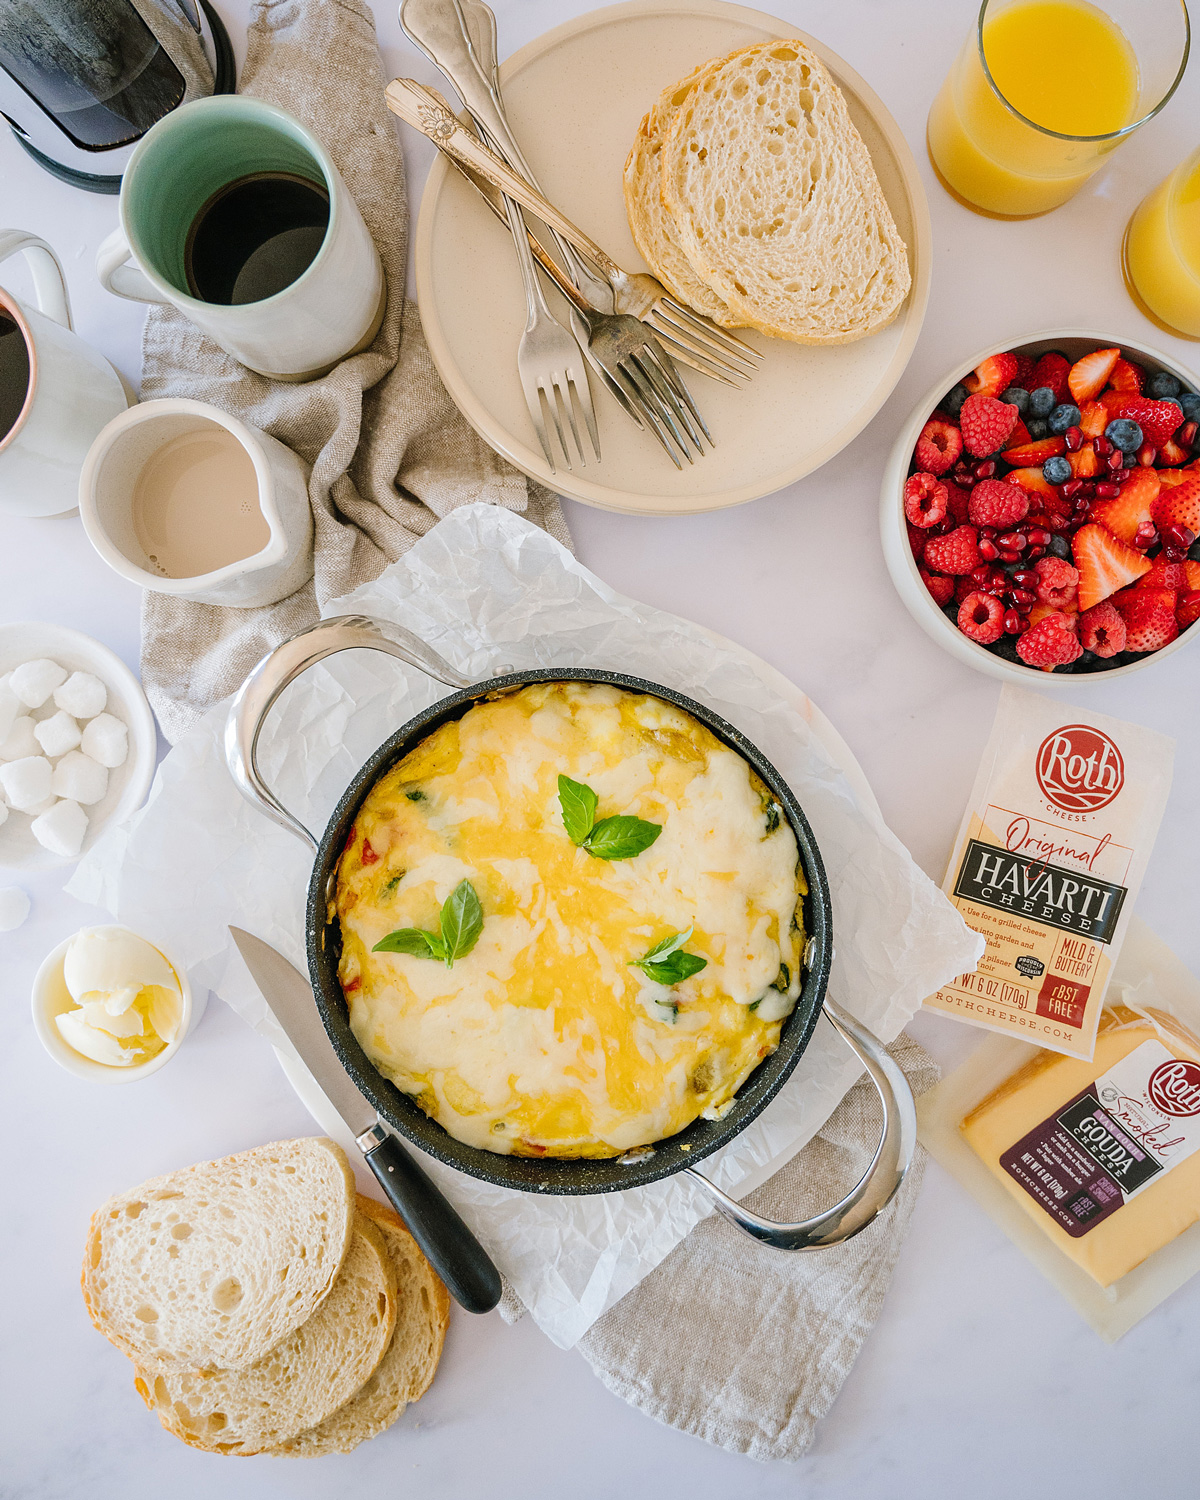
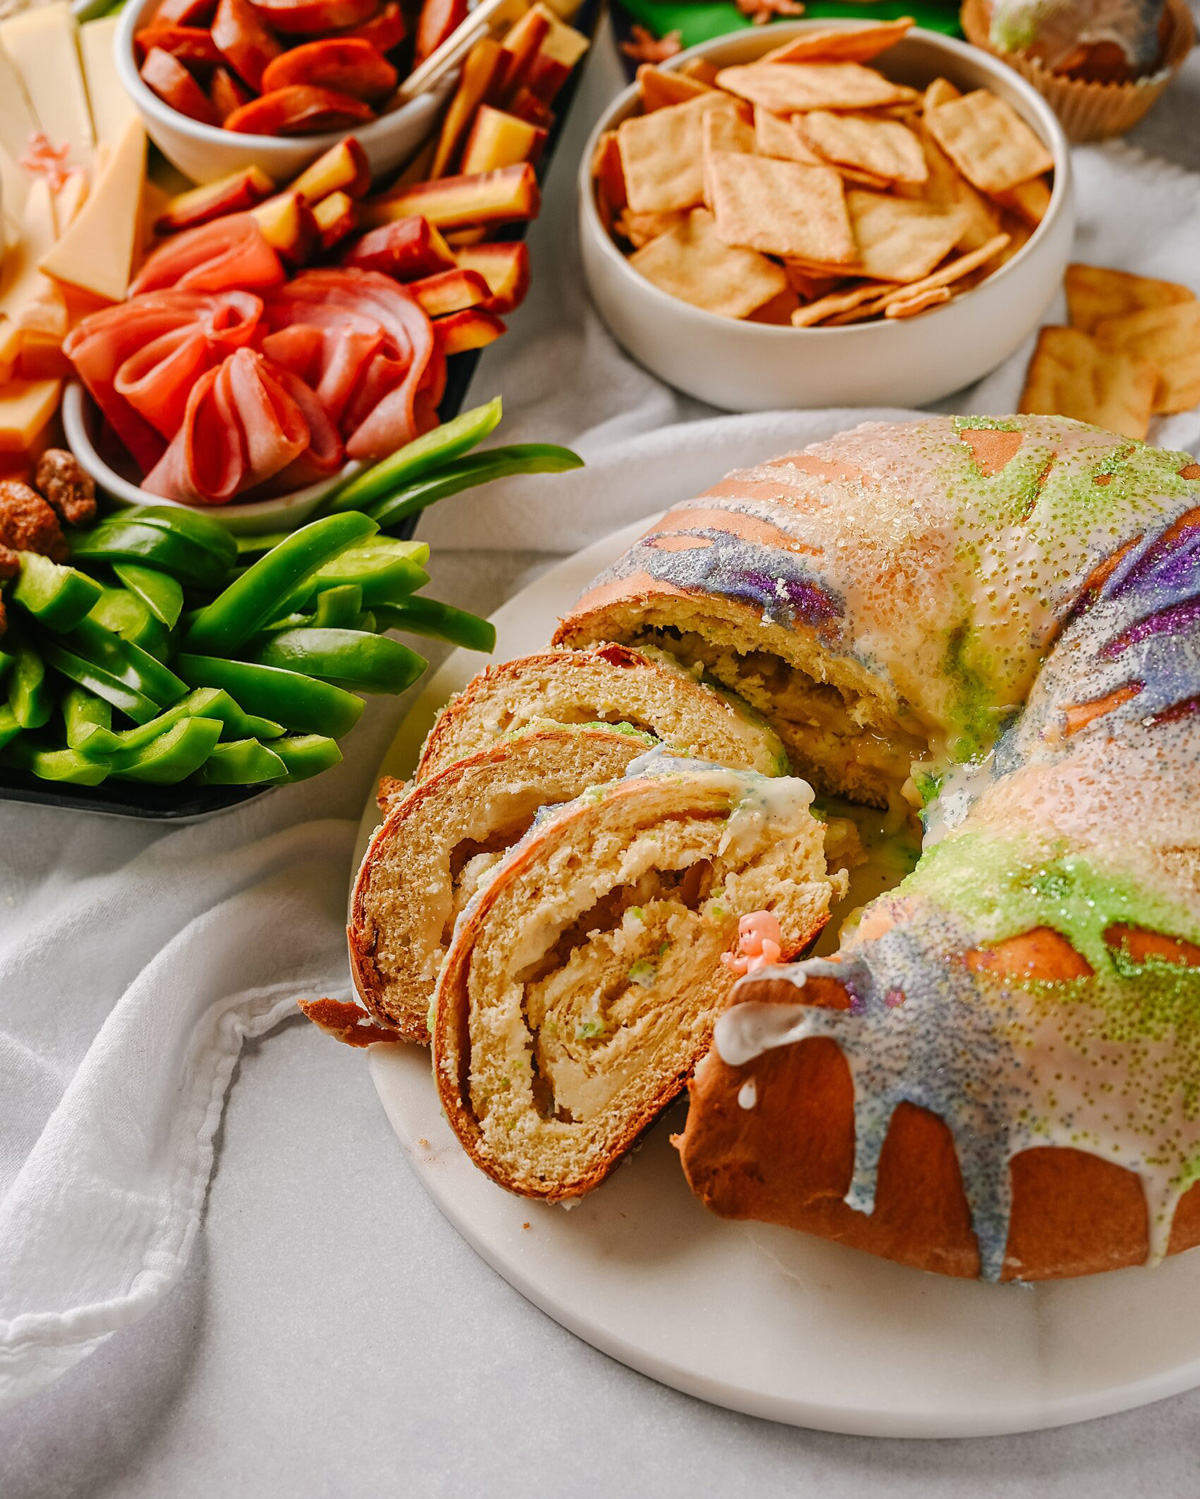
More often than not, I skip making a full dinner and instead opt for an appetizer/heavy snack/dessert situation. It’s really our favorite way to eat. I buy fancy desserts from a bakery, make a really beautiful cheese plate, and maybe a new appetizer recipe I’ve been wanting to try. 

And of course, we sip a festive cocktail while indulging! It’s honestly a romantic and lovely way to spend an evening.

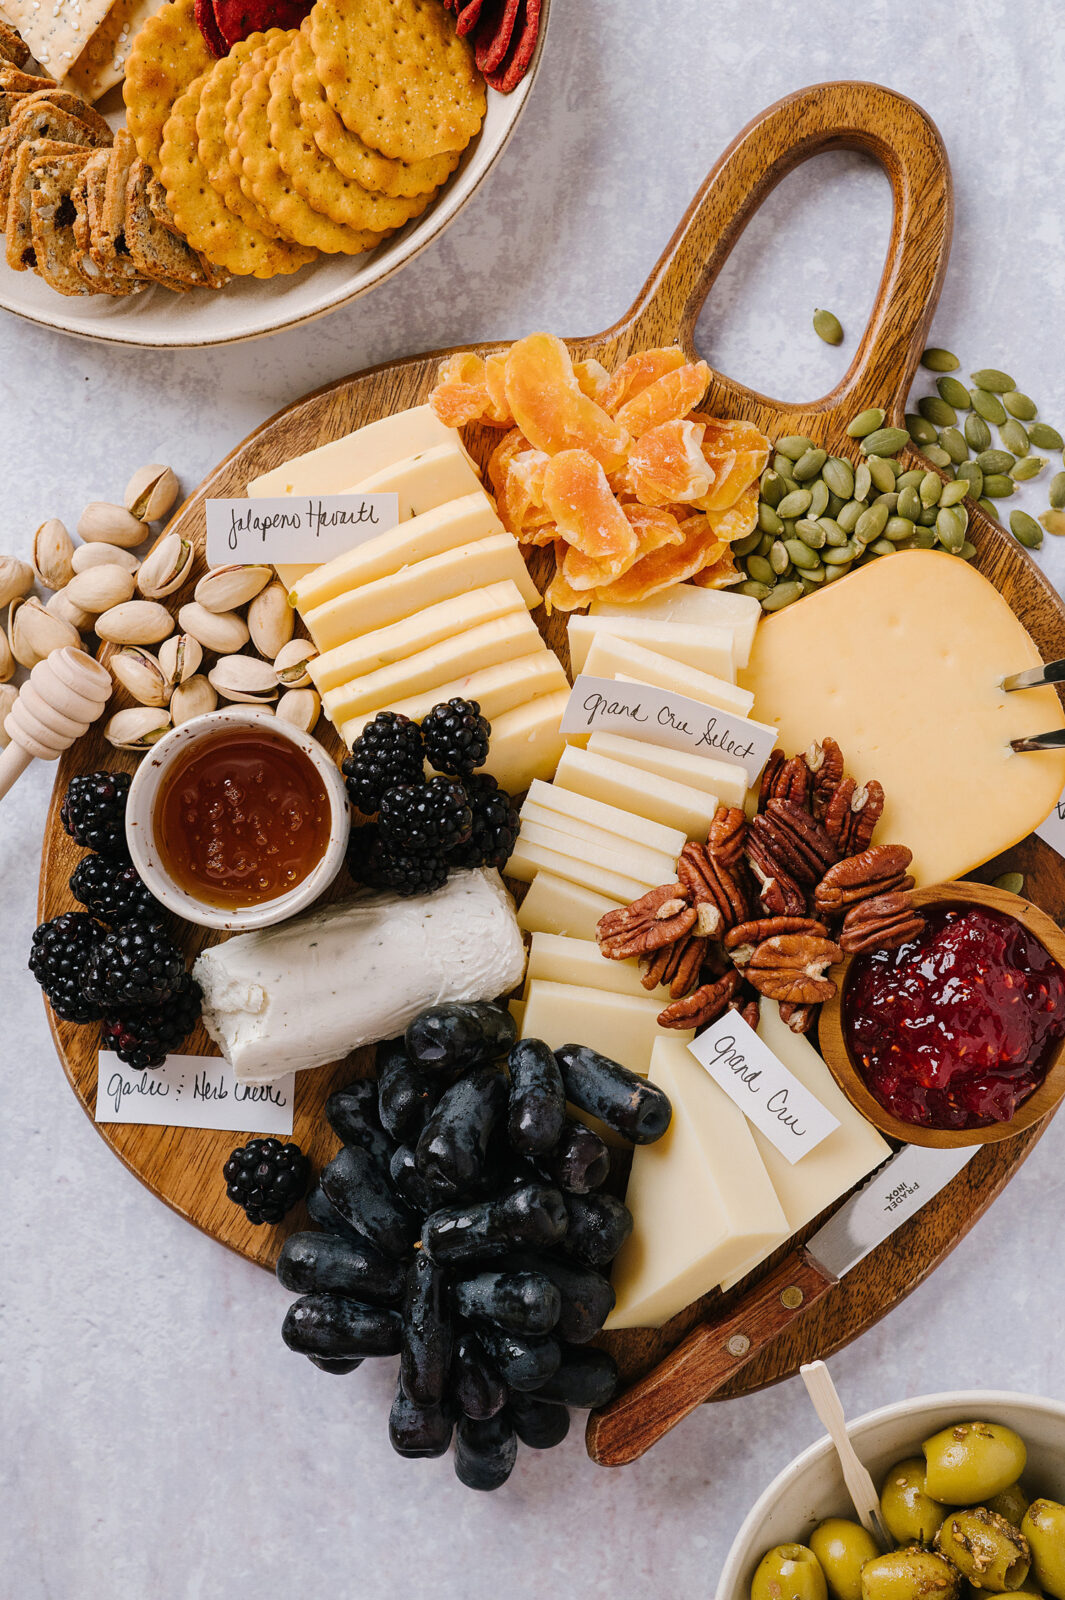
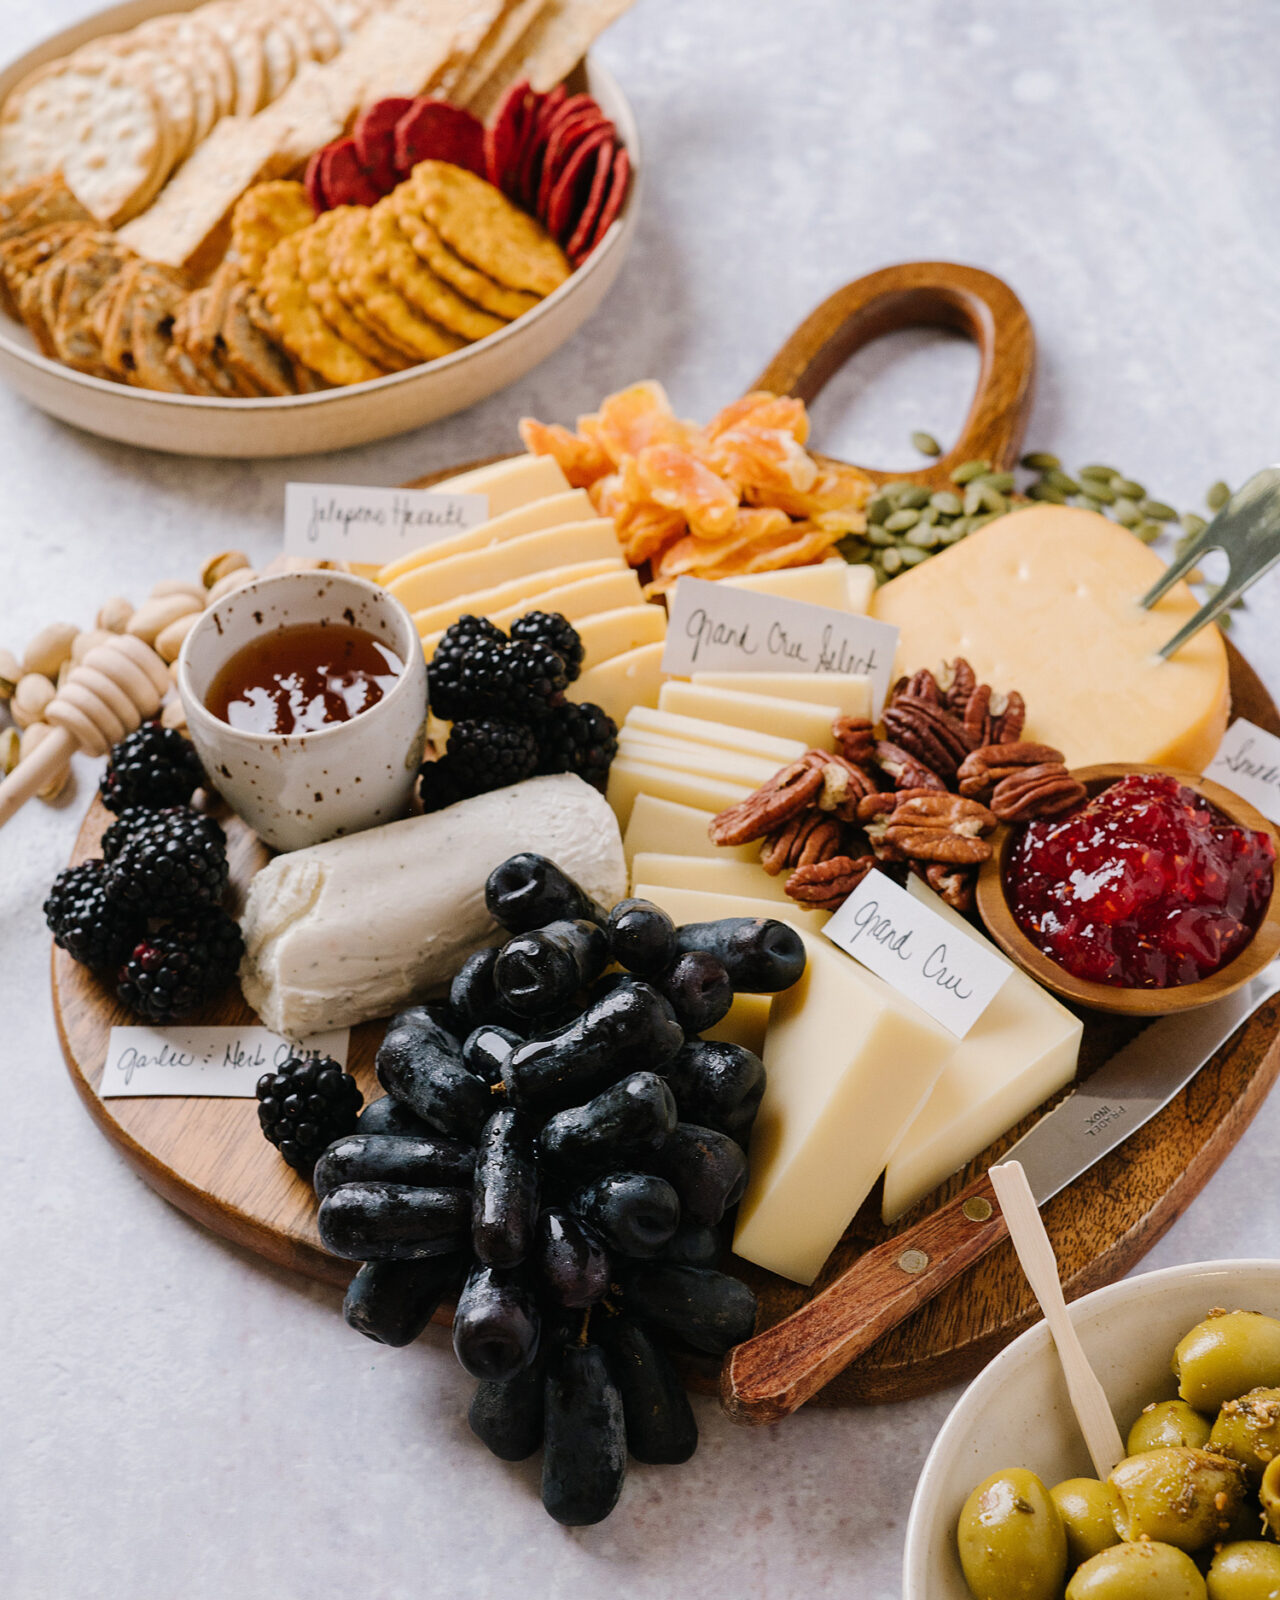
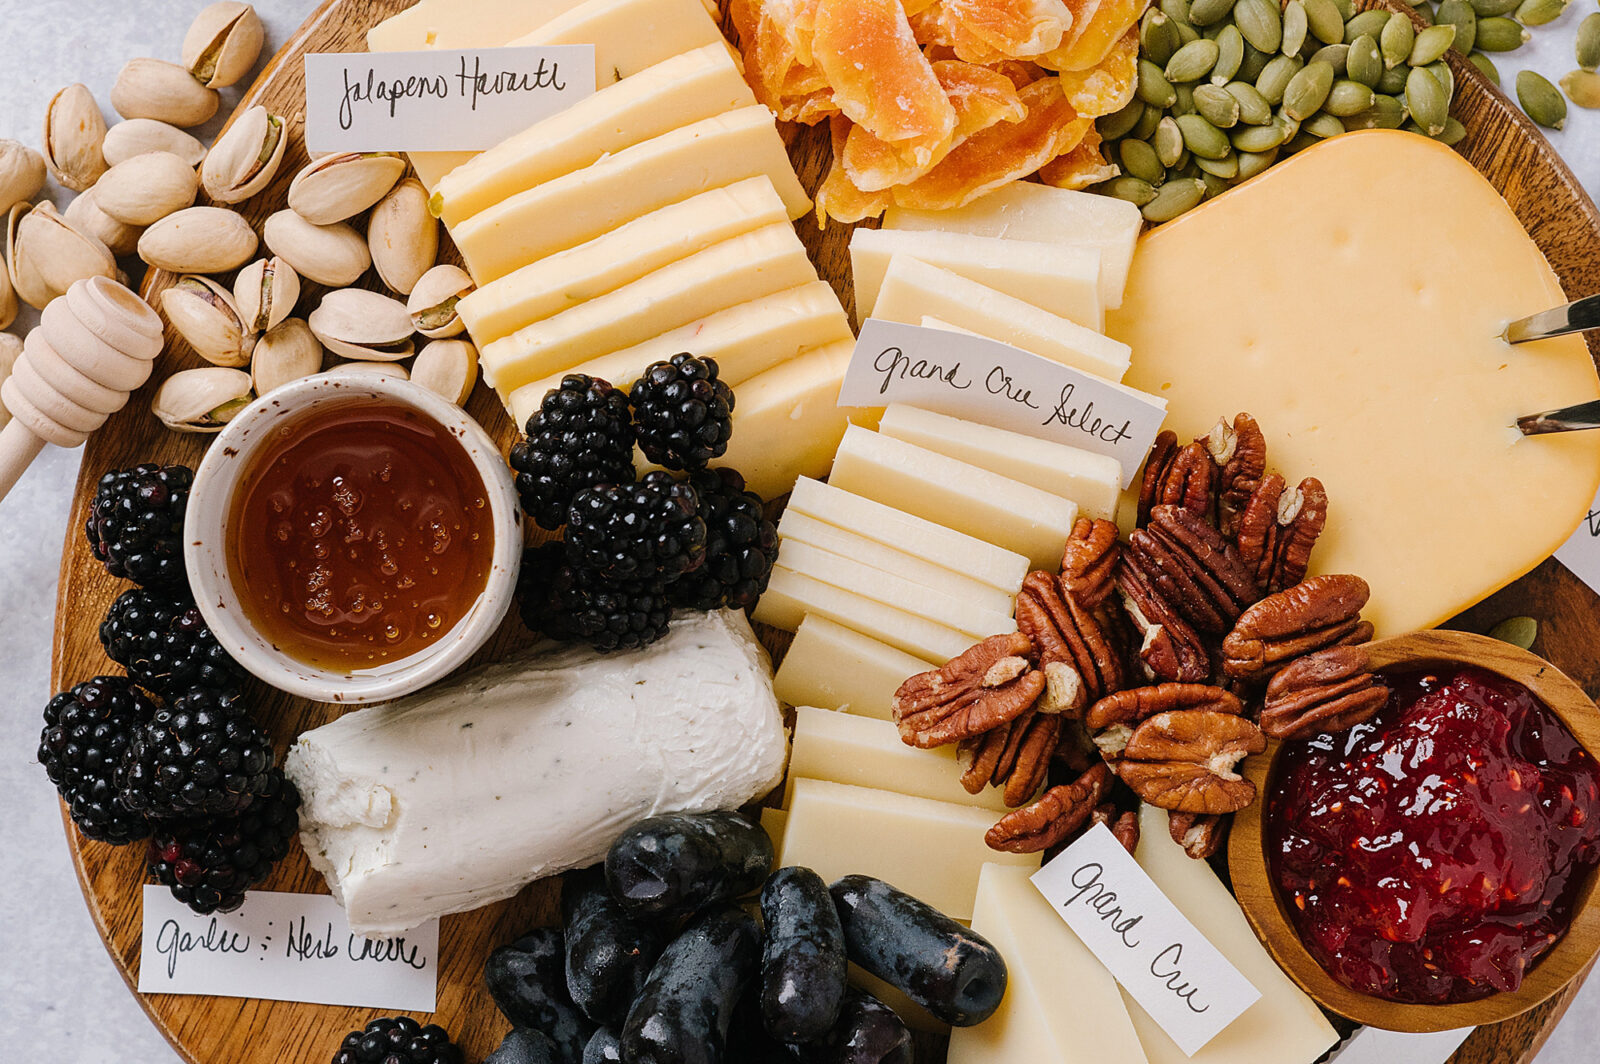
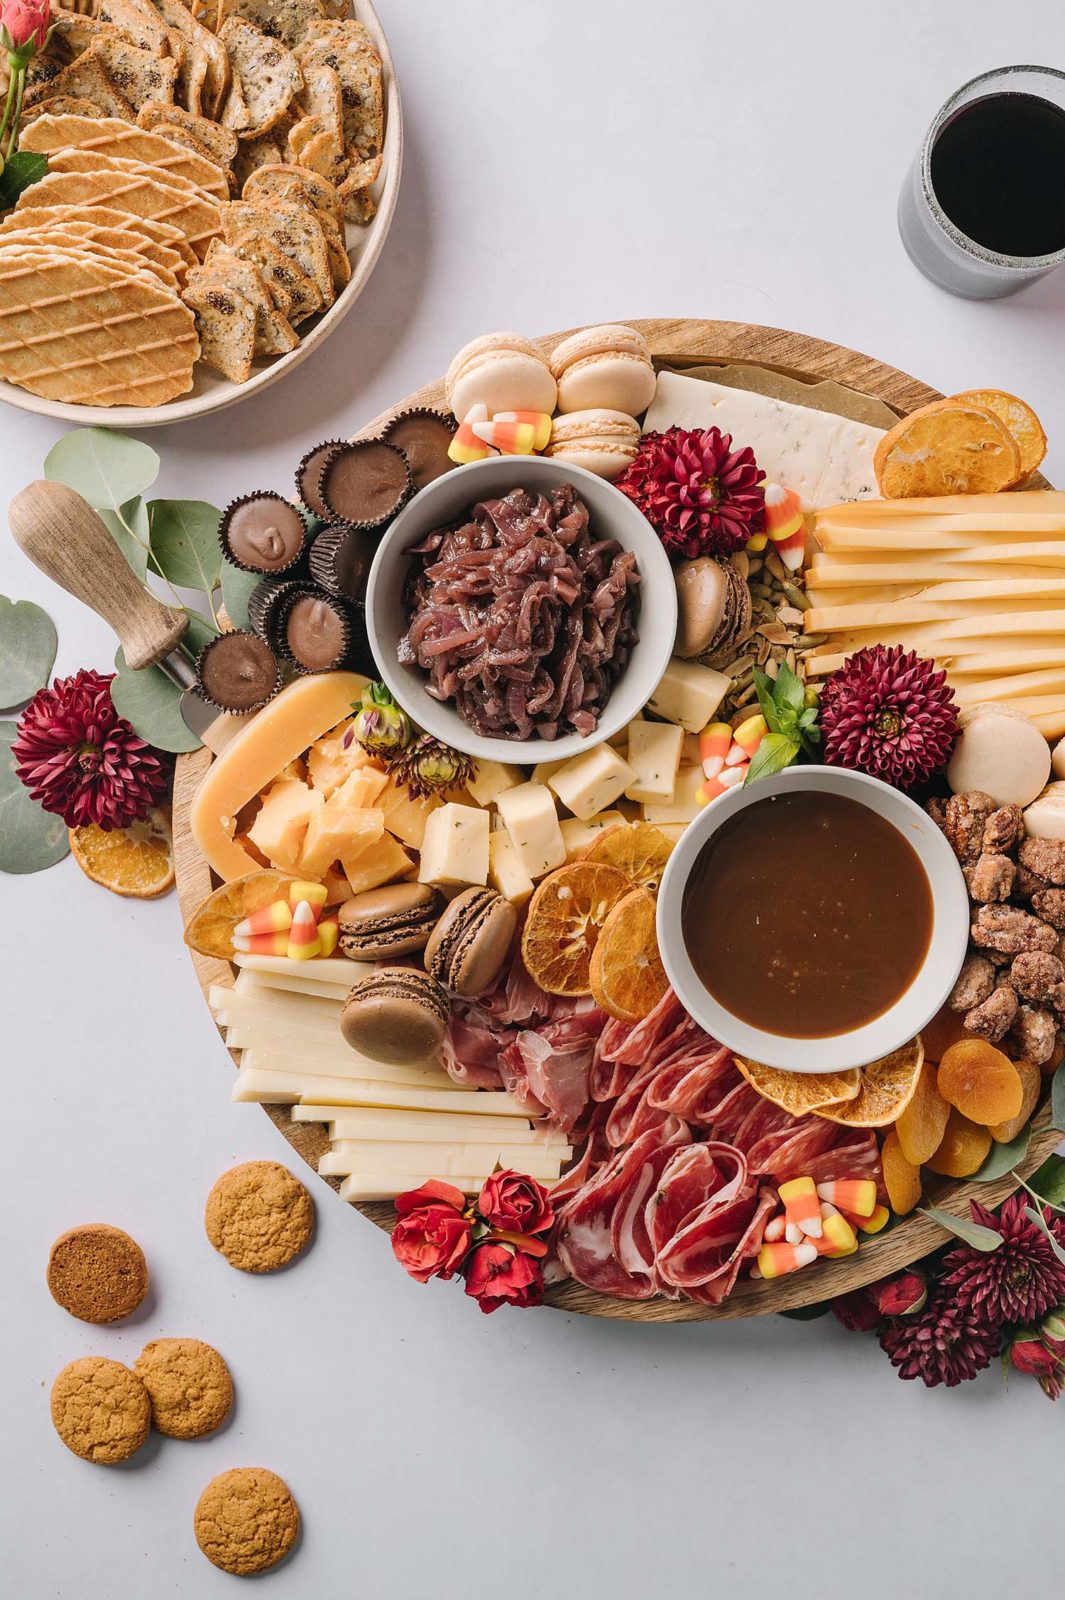
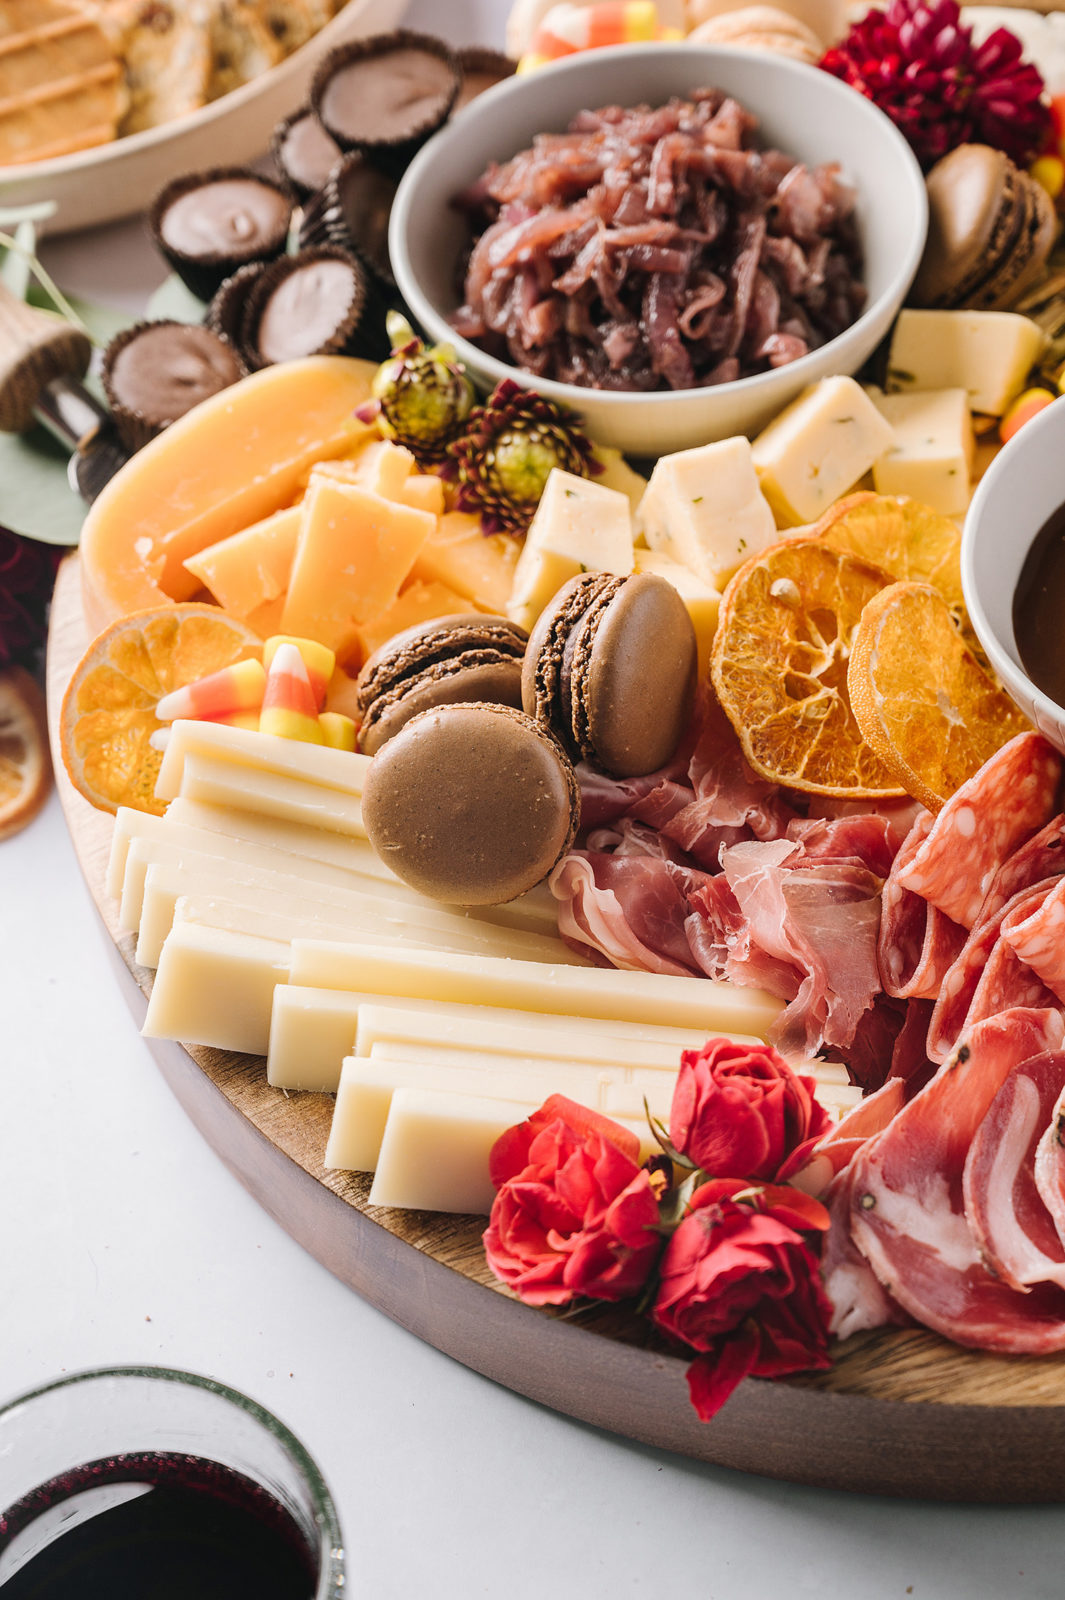
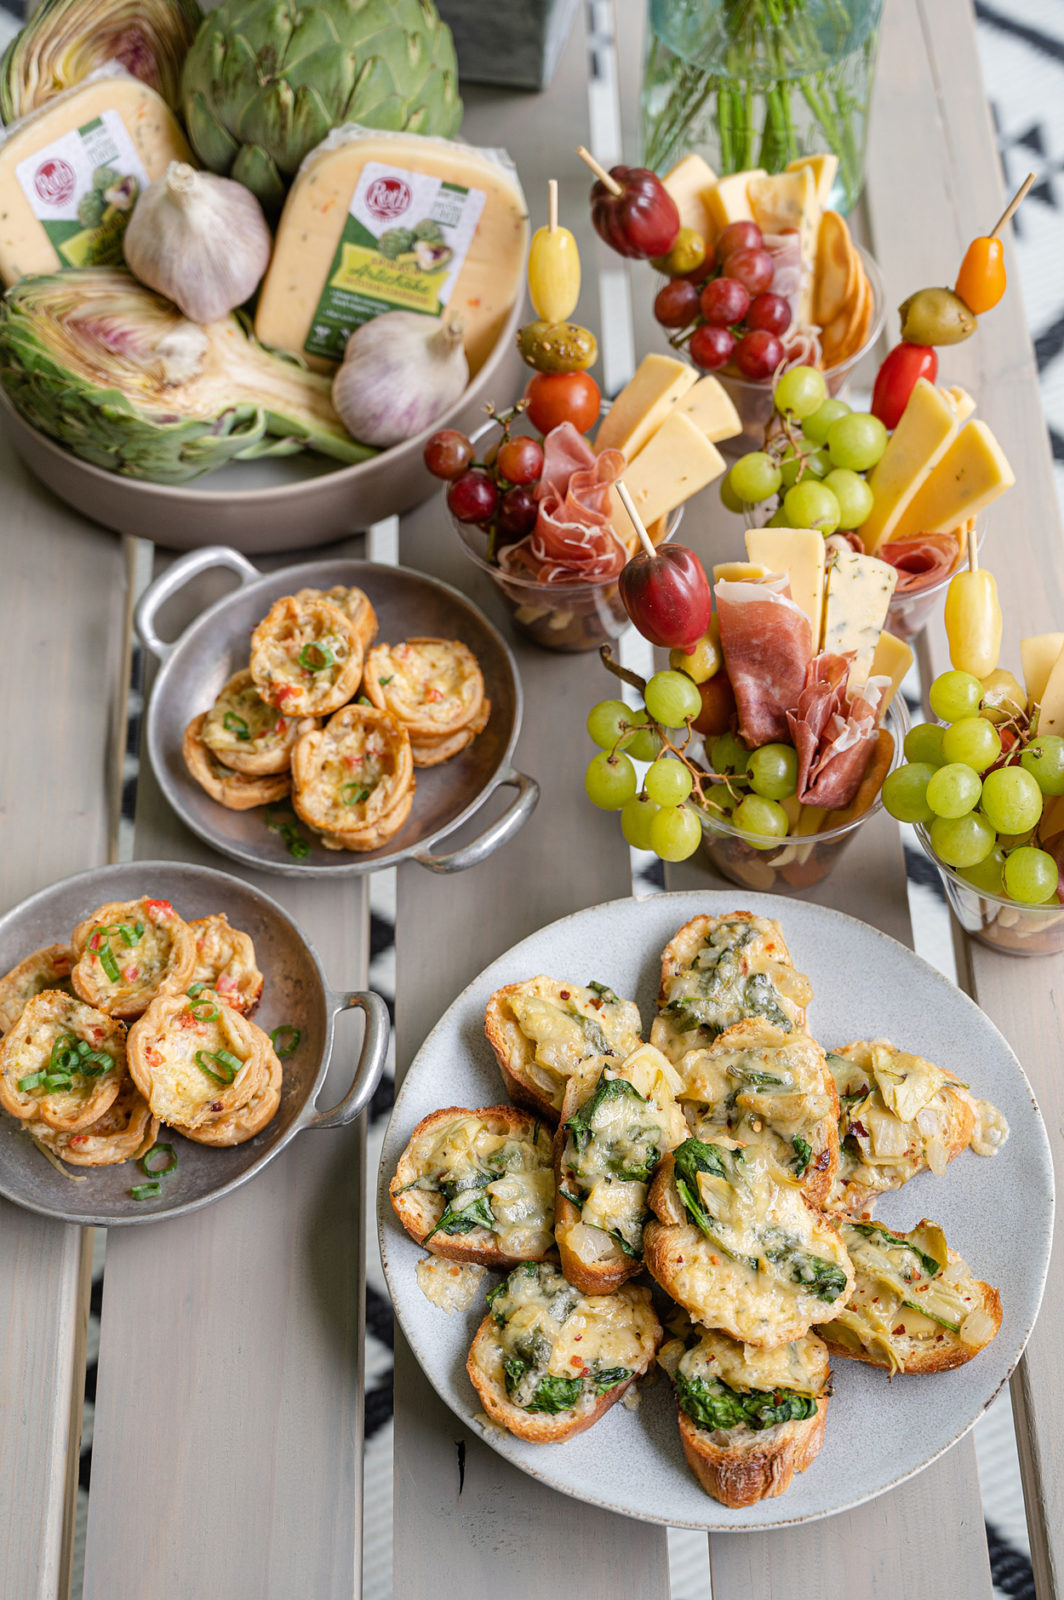
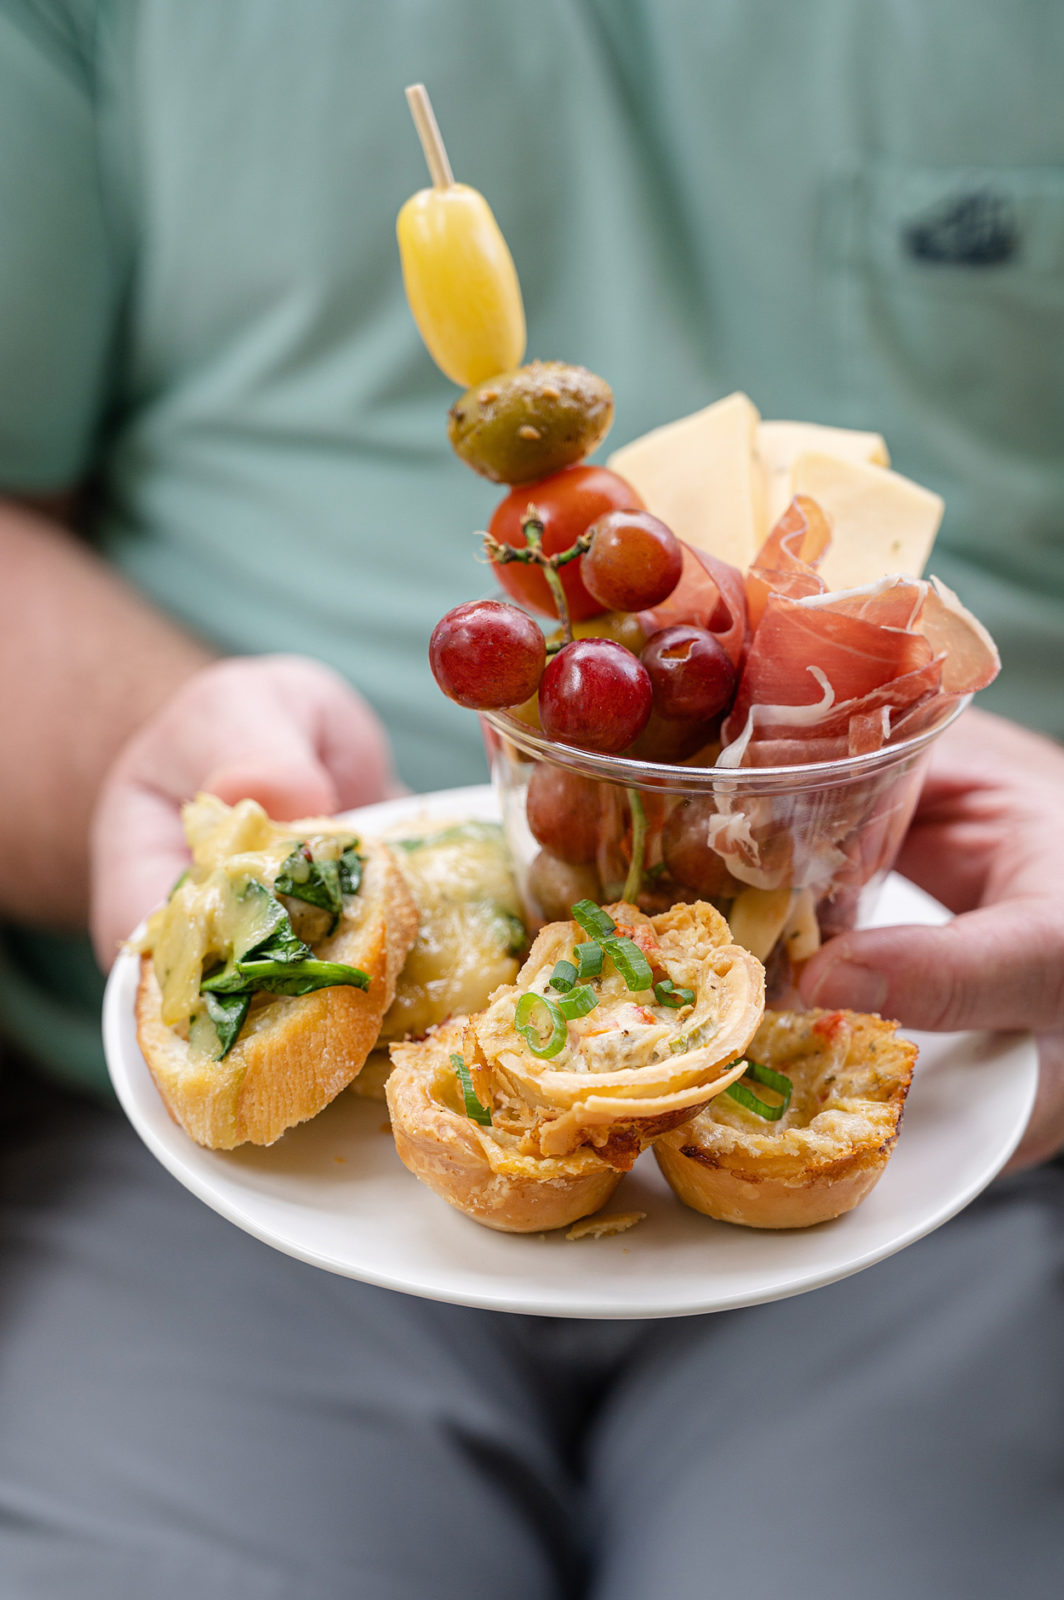
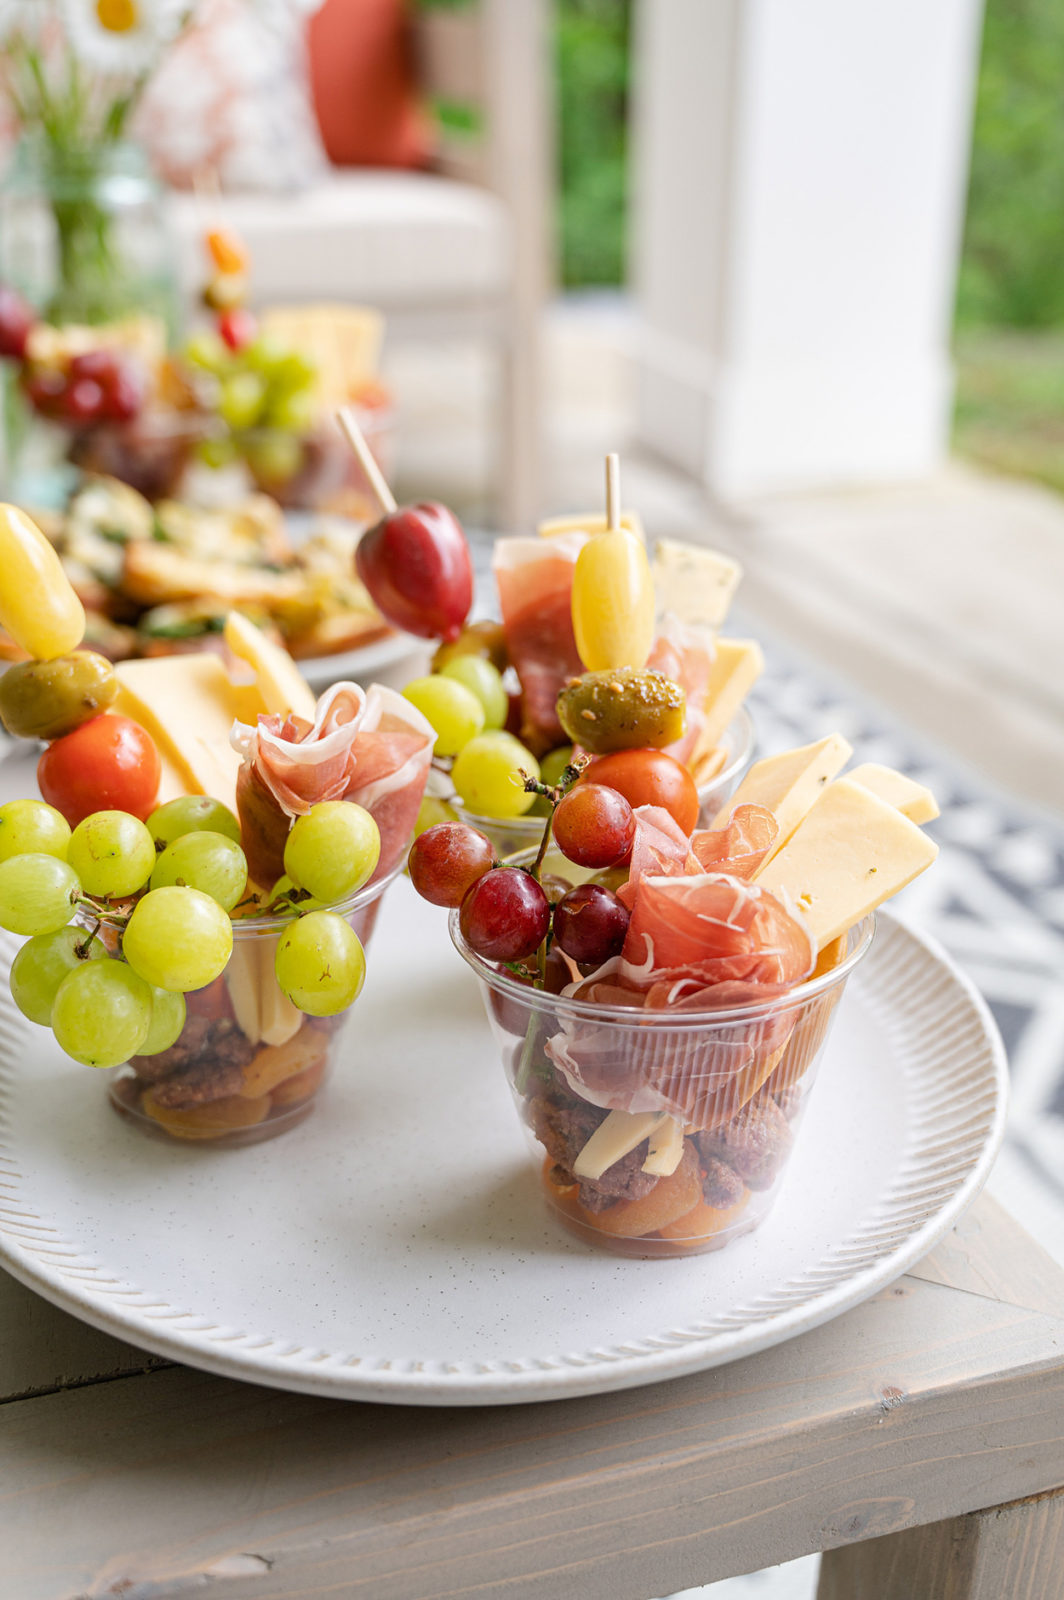
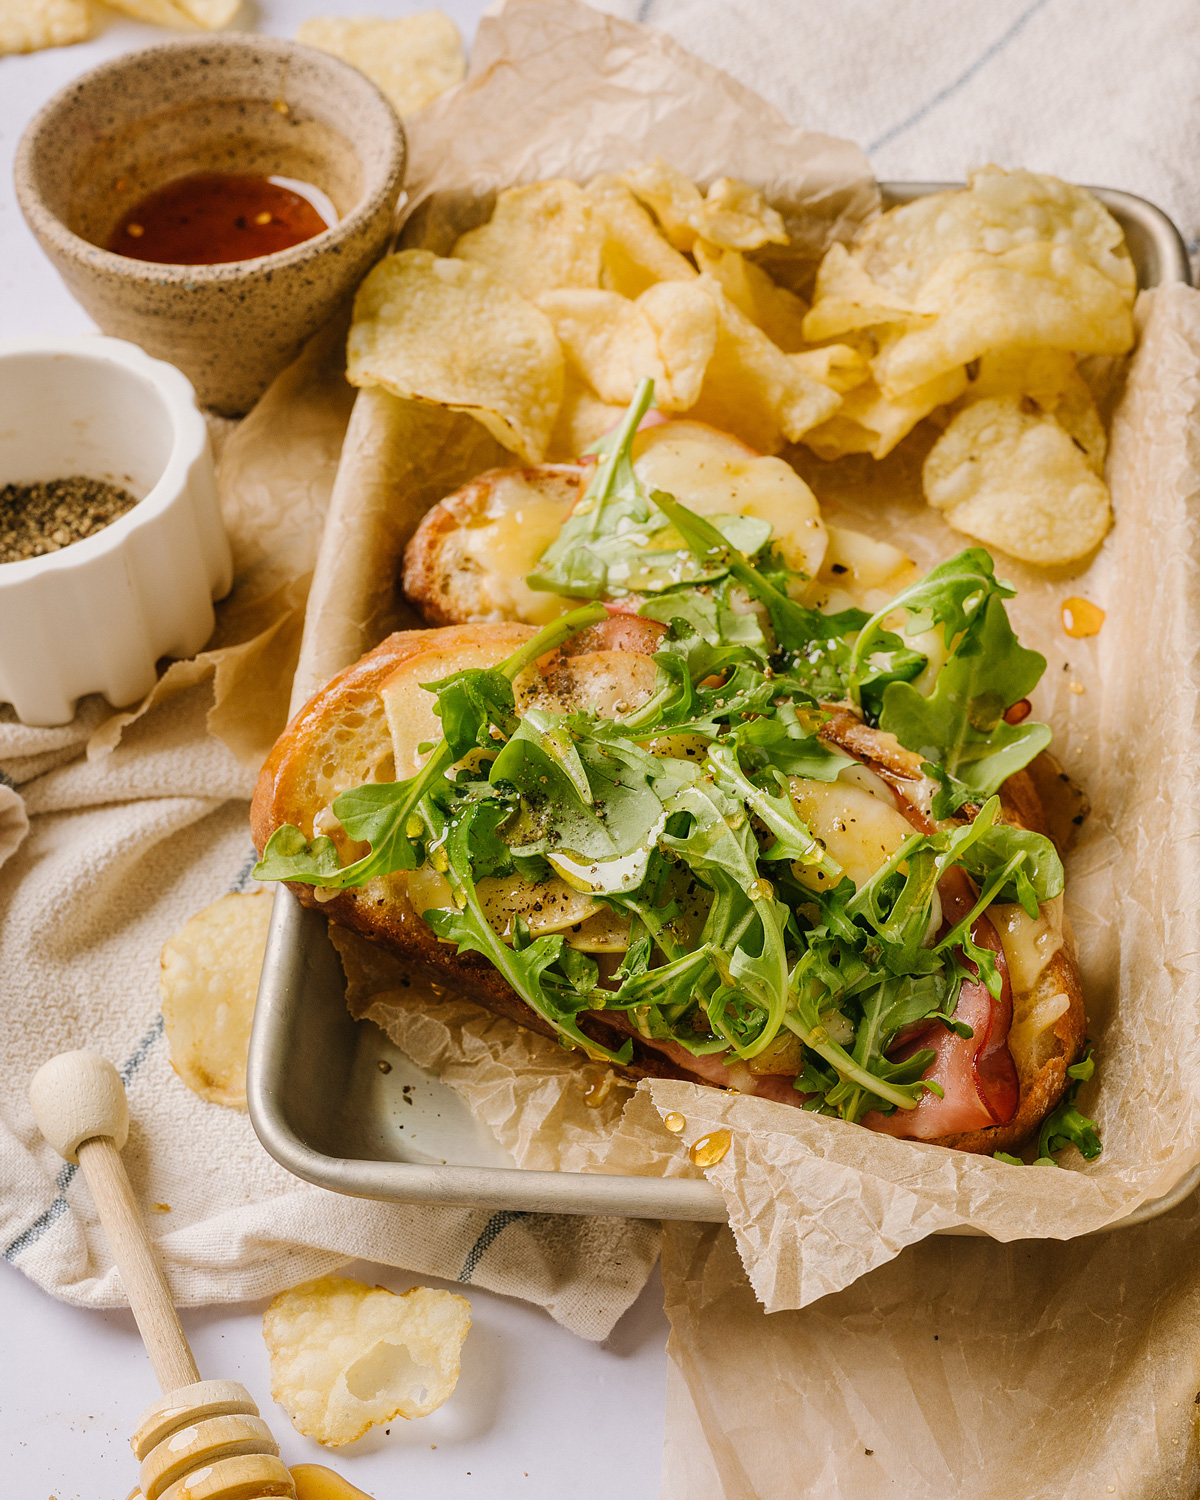
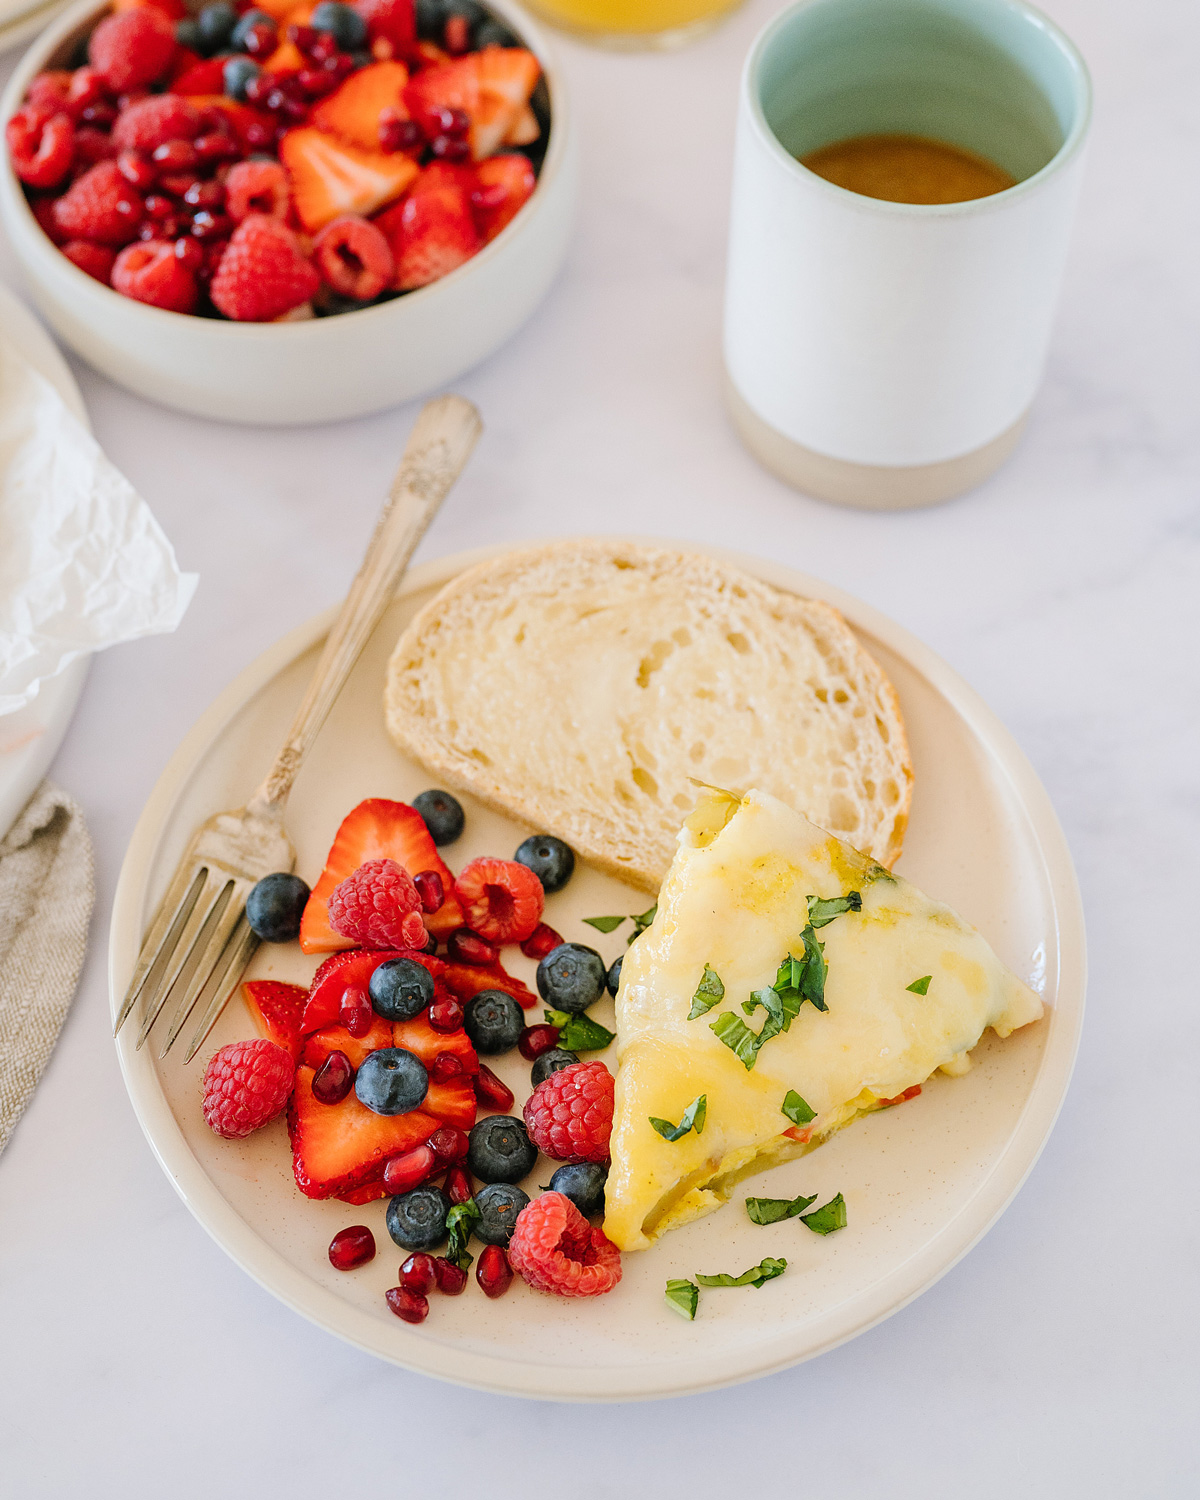
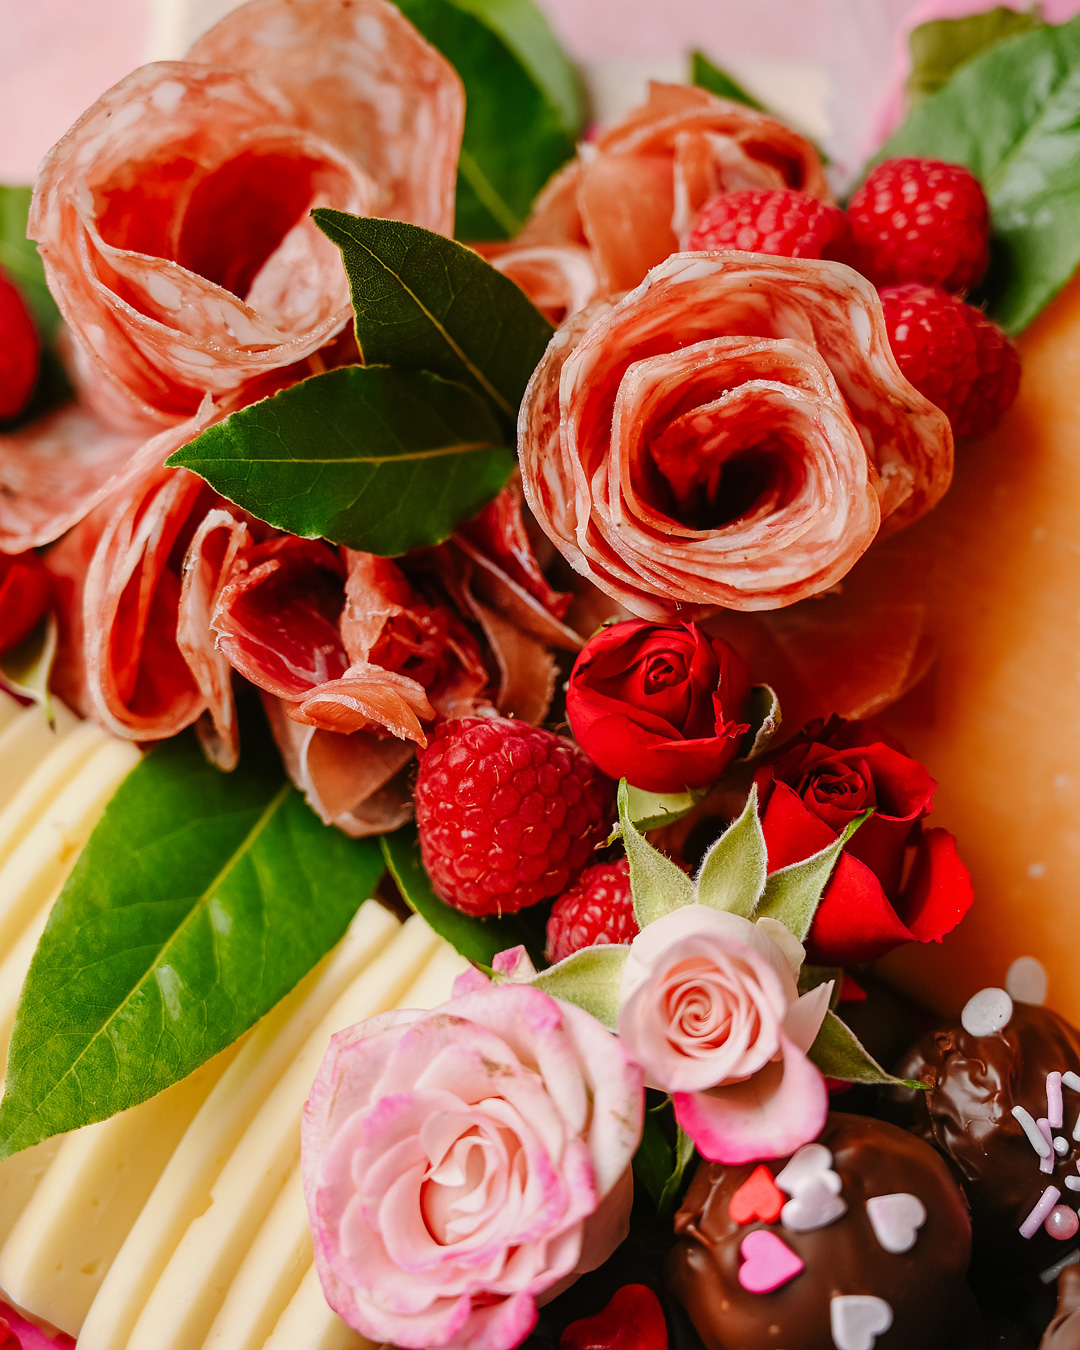
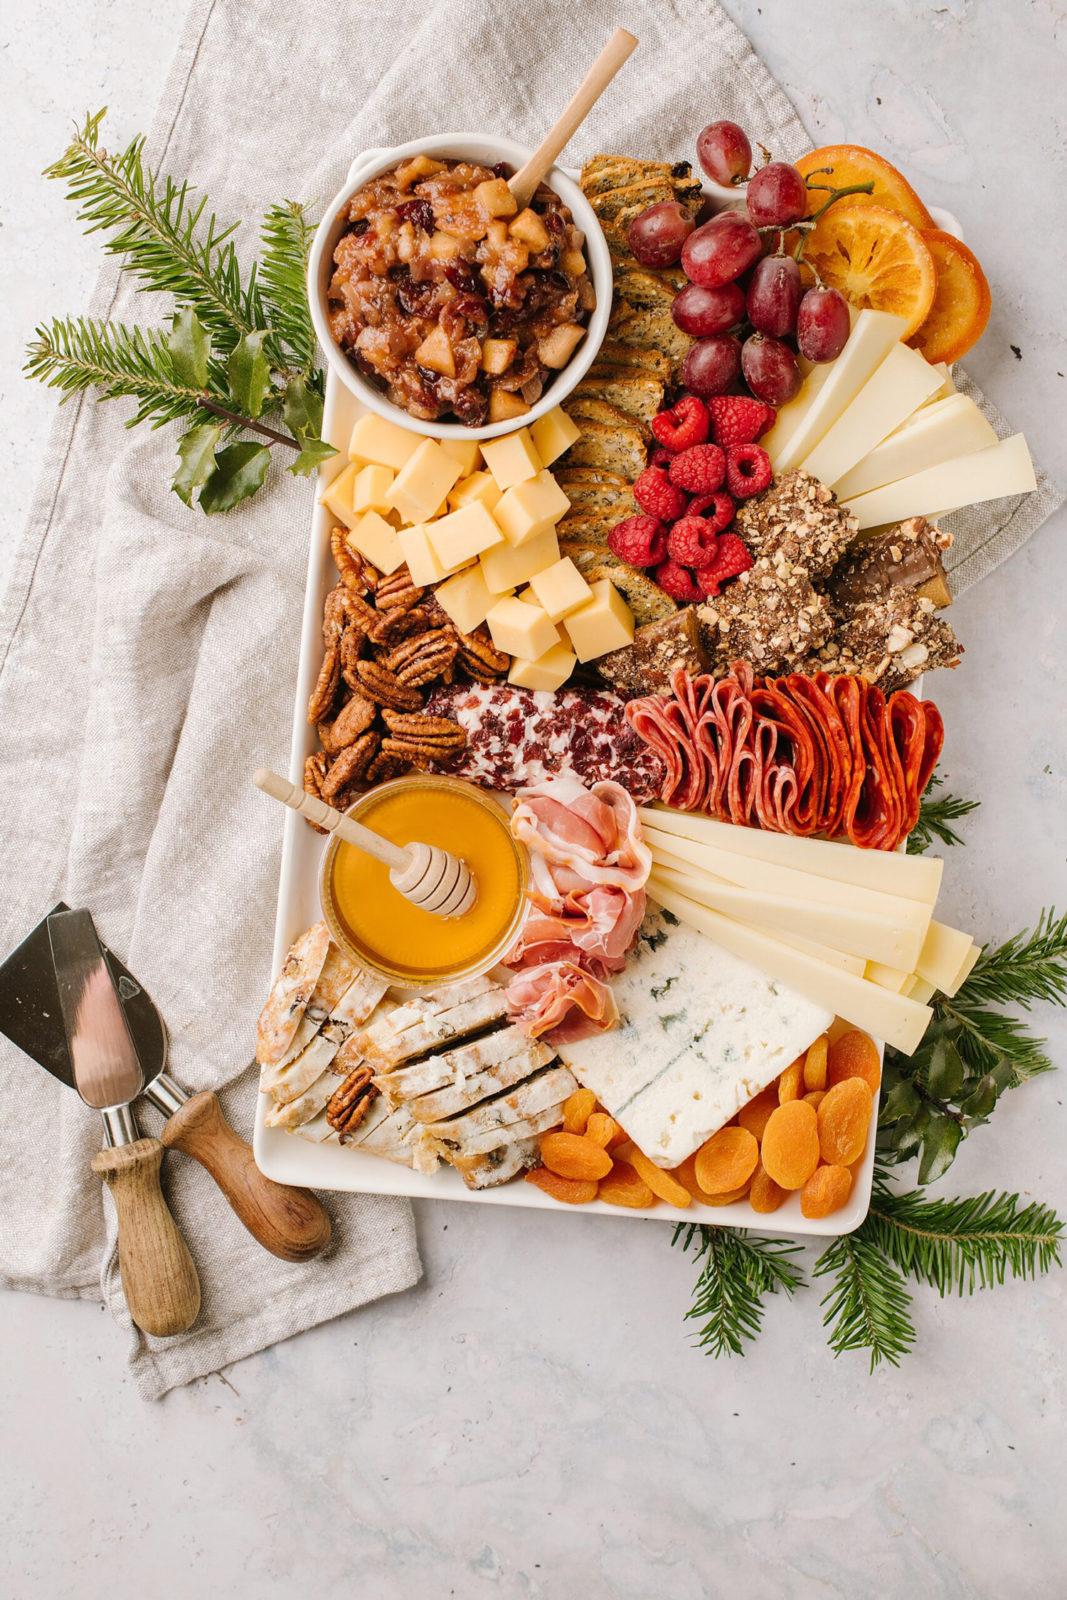
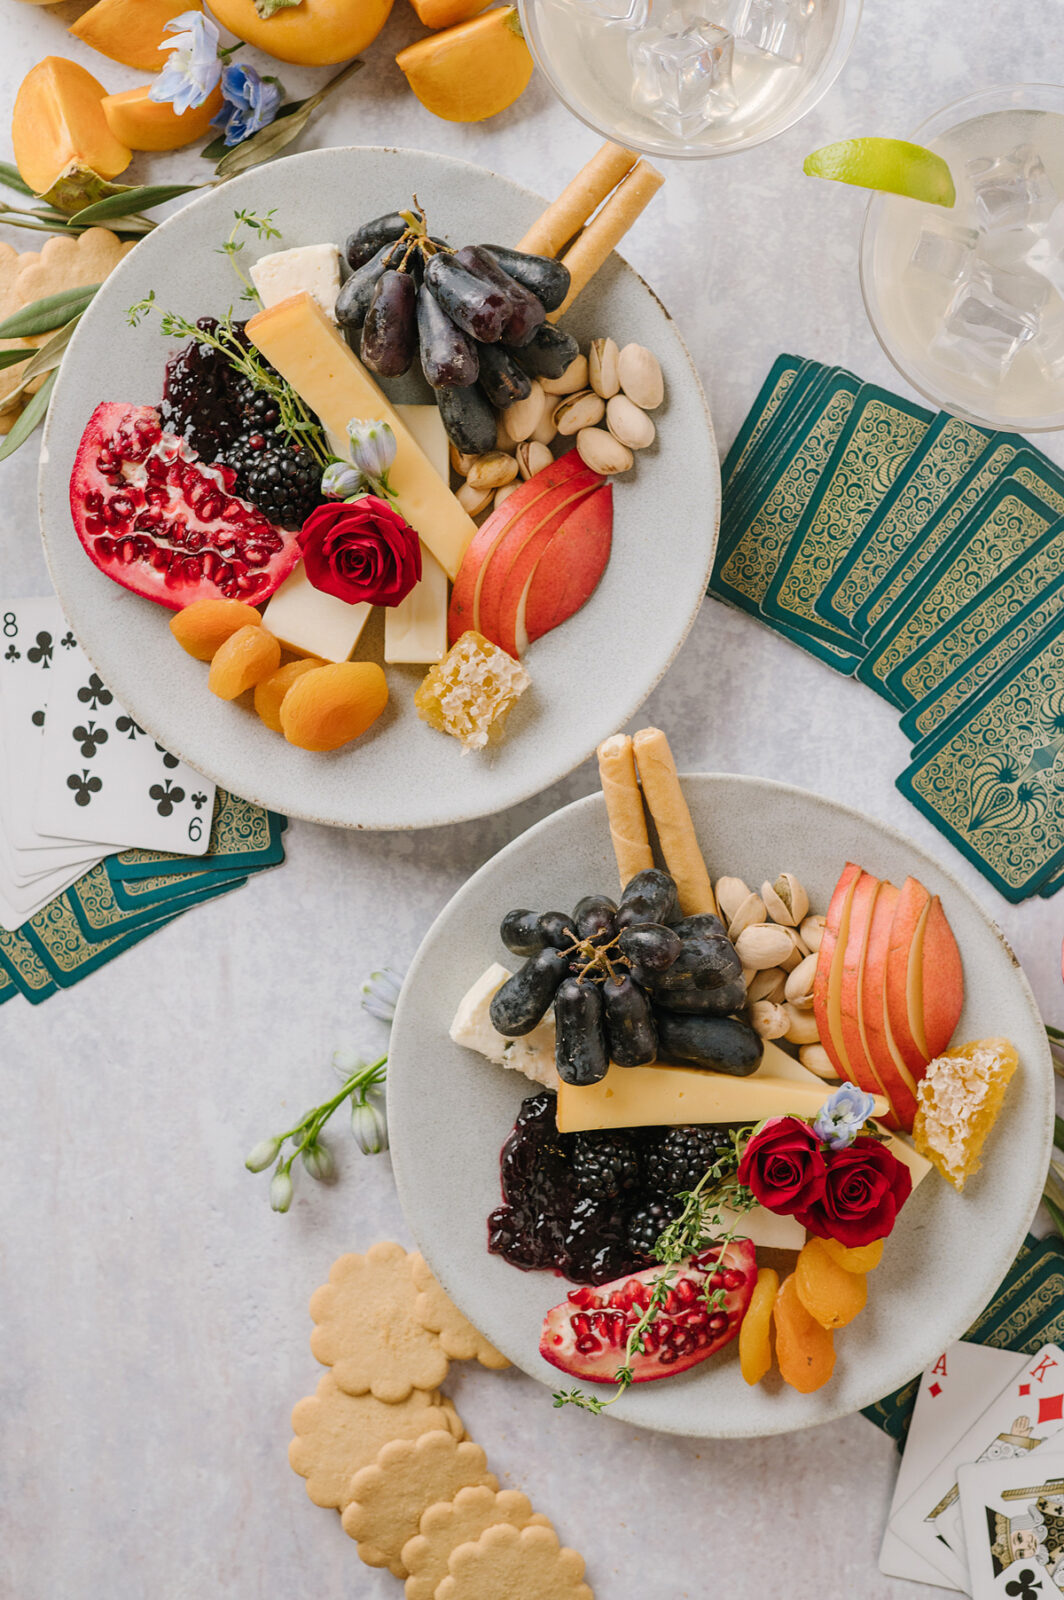
Instead of making a really big cheese board, I was inspired by the cheese plates you can order at restaurants. They are made for one or two people and are often so beautifully plated they look like art. 

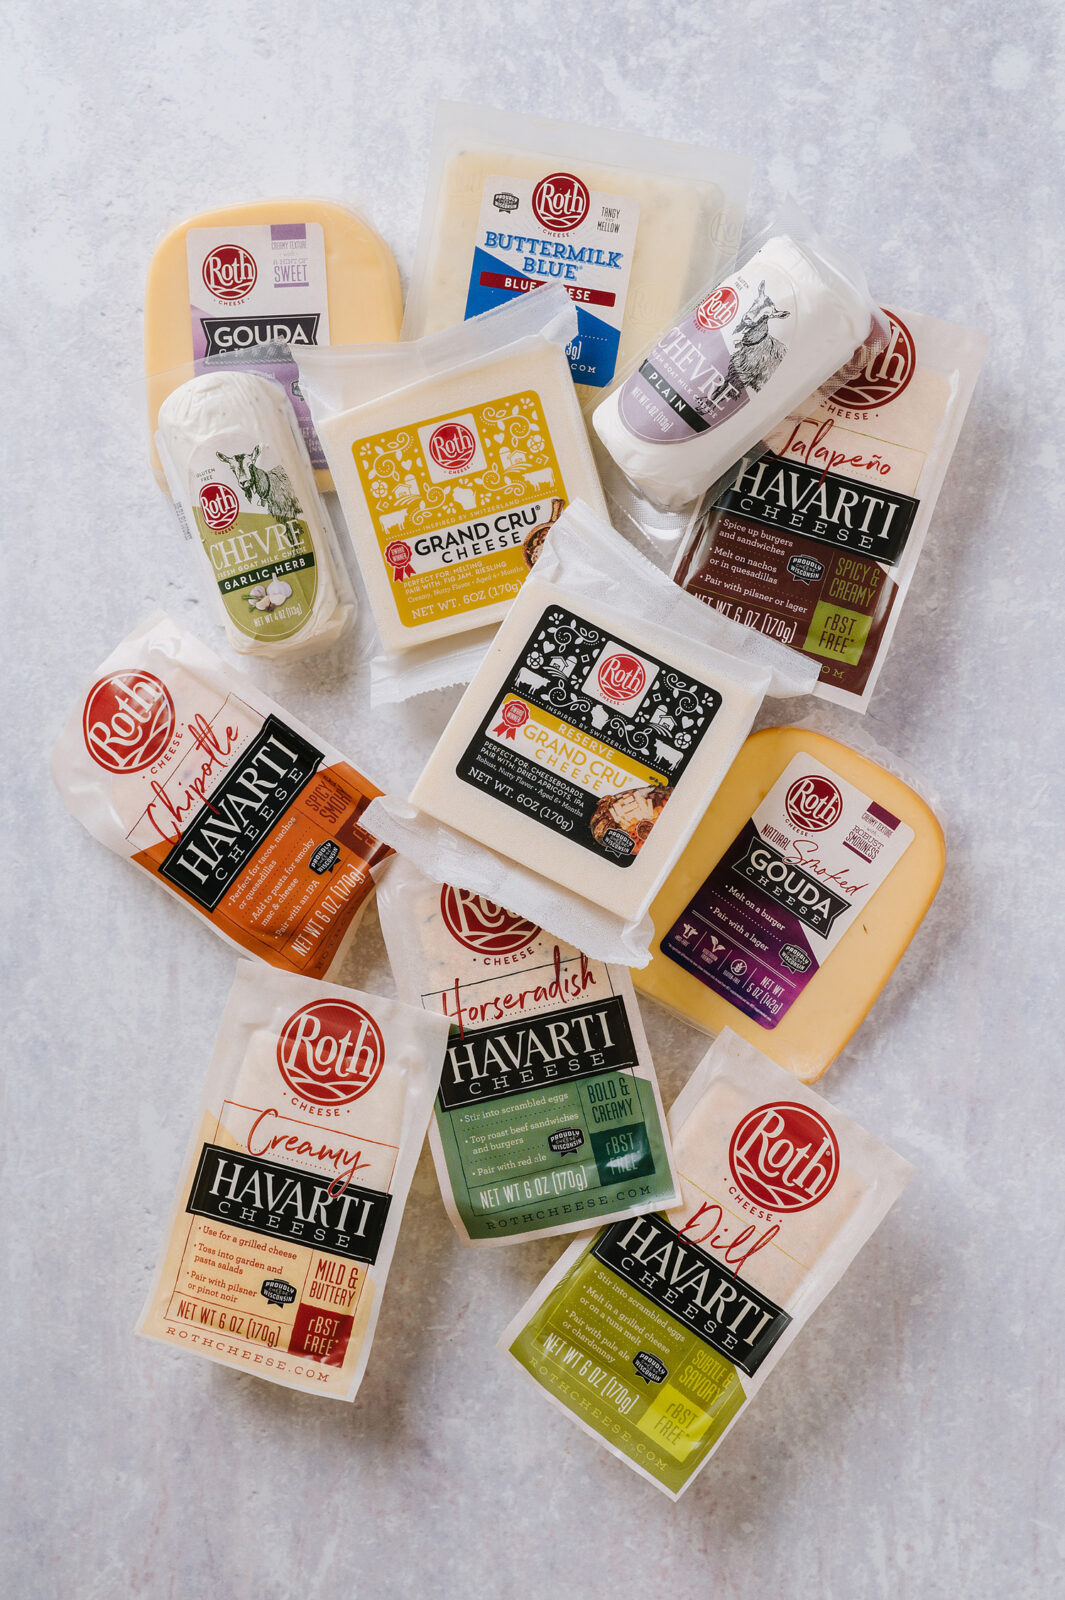
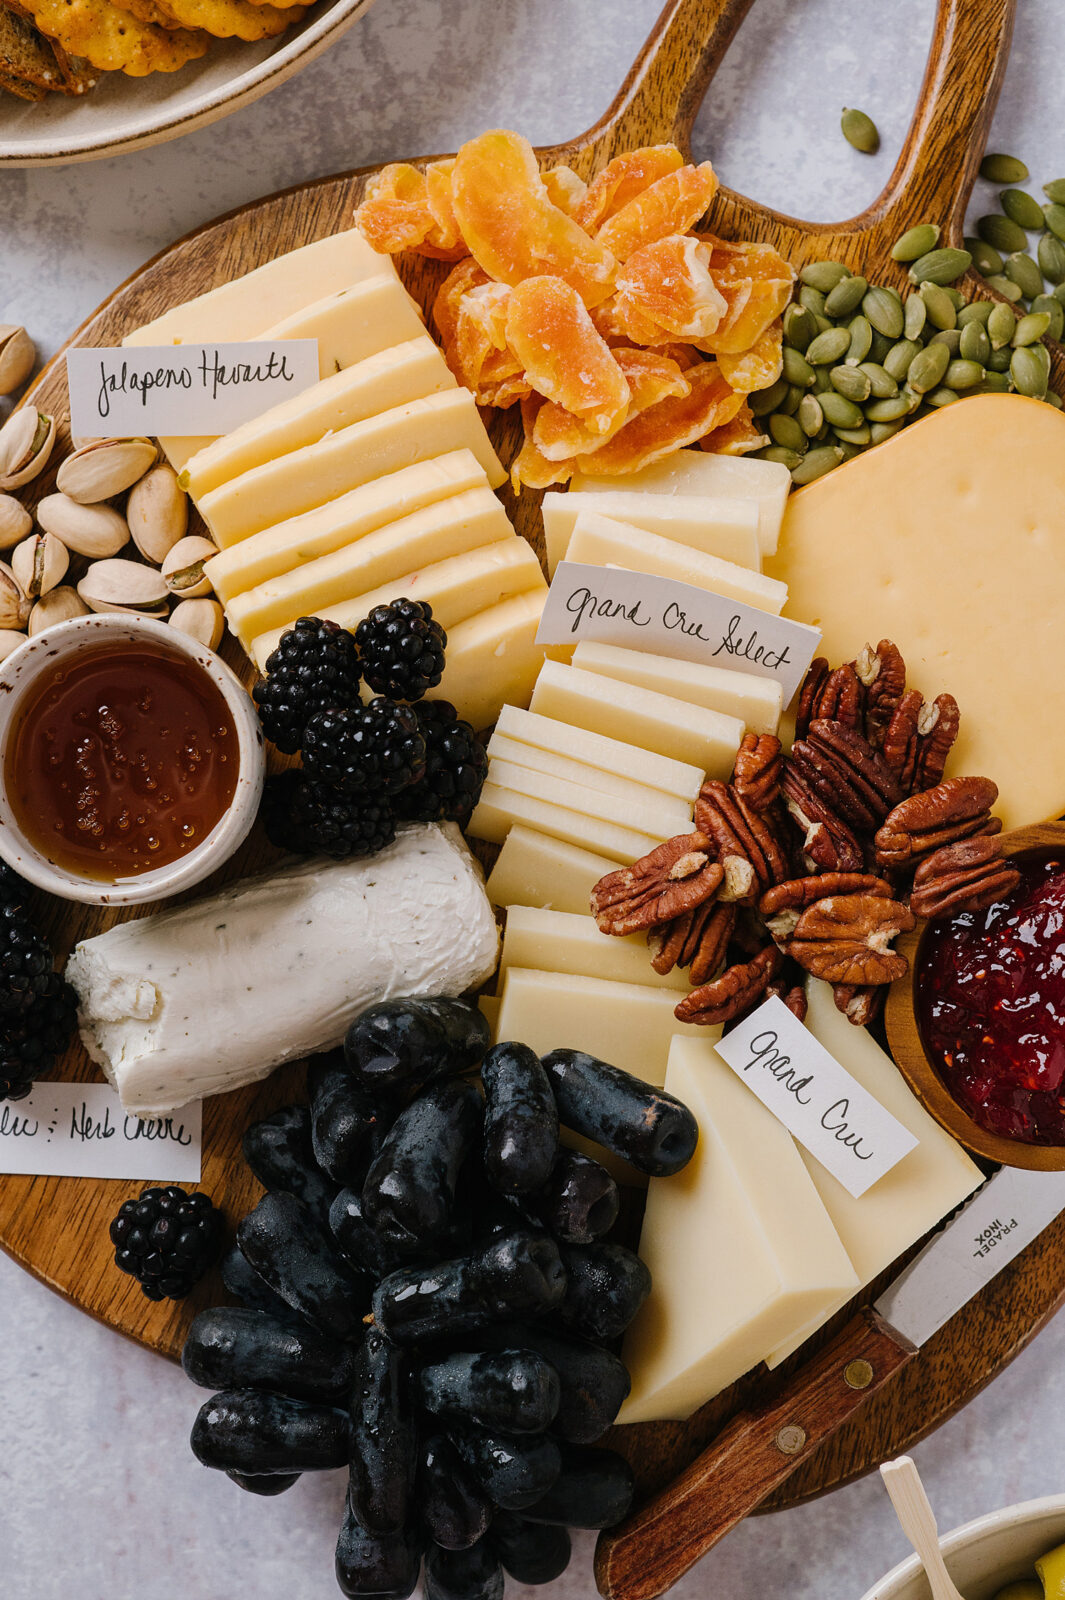
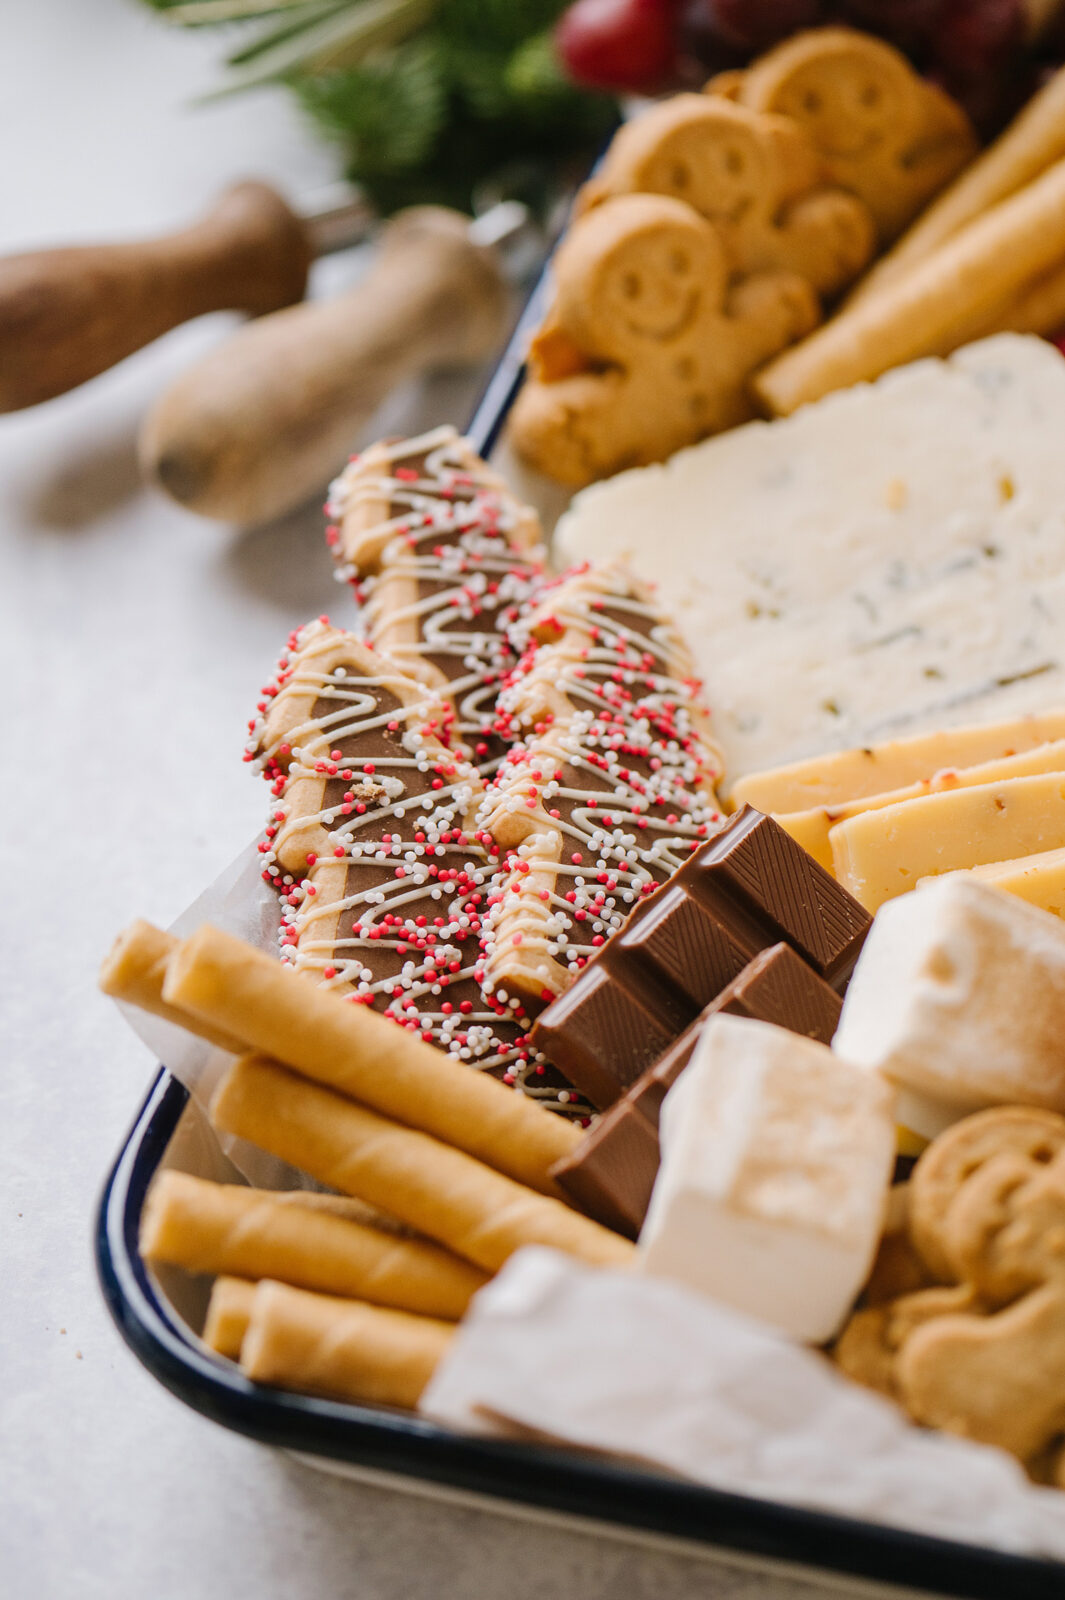
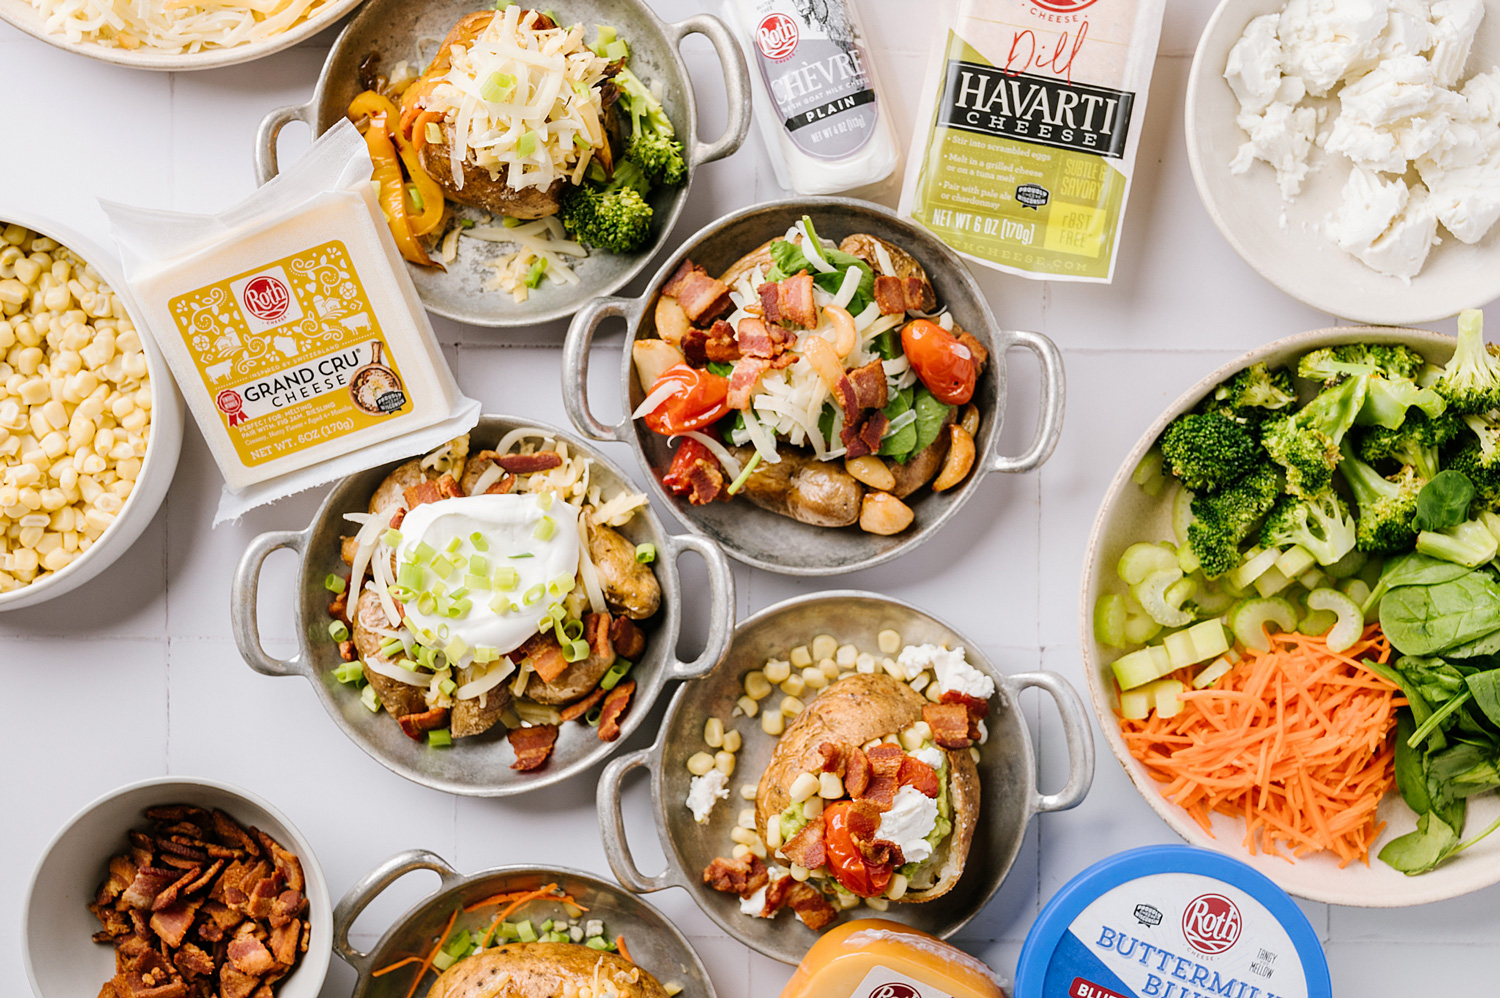
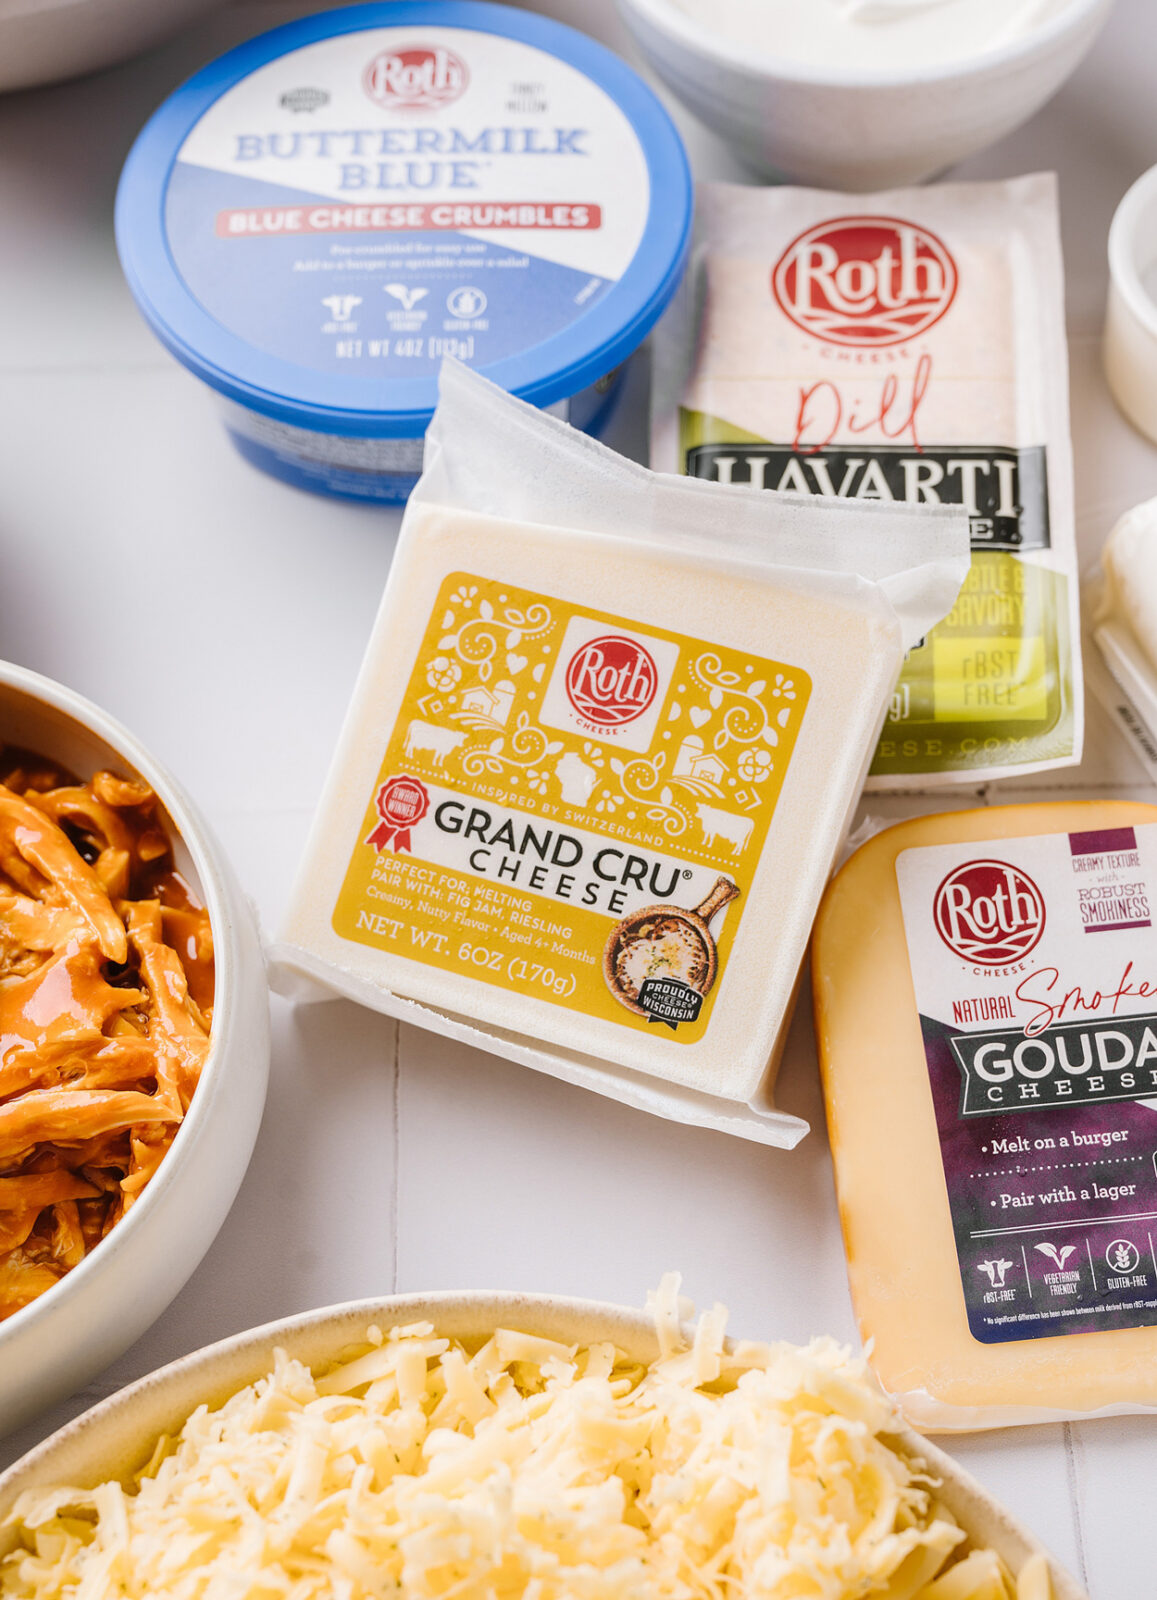
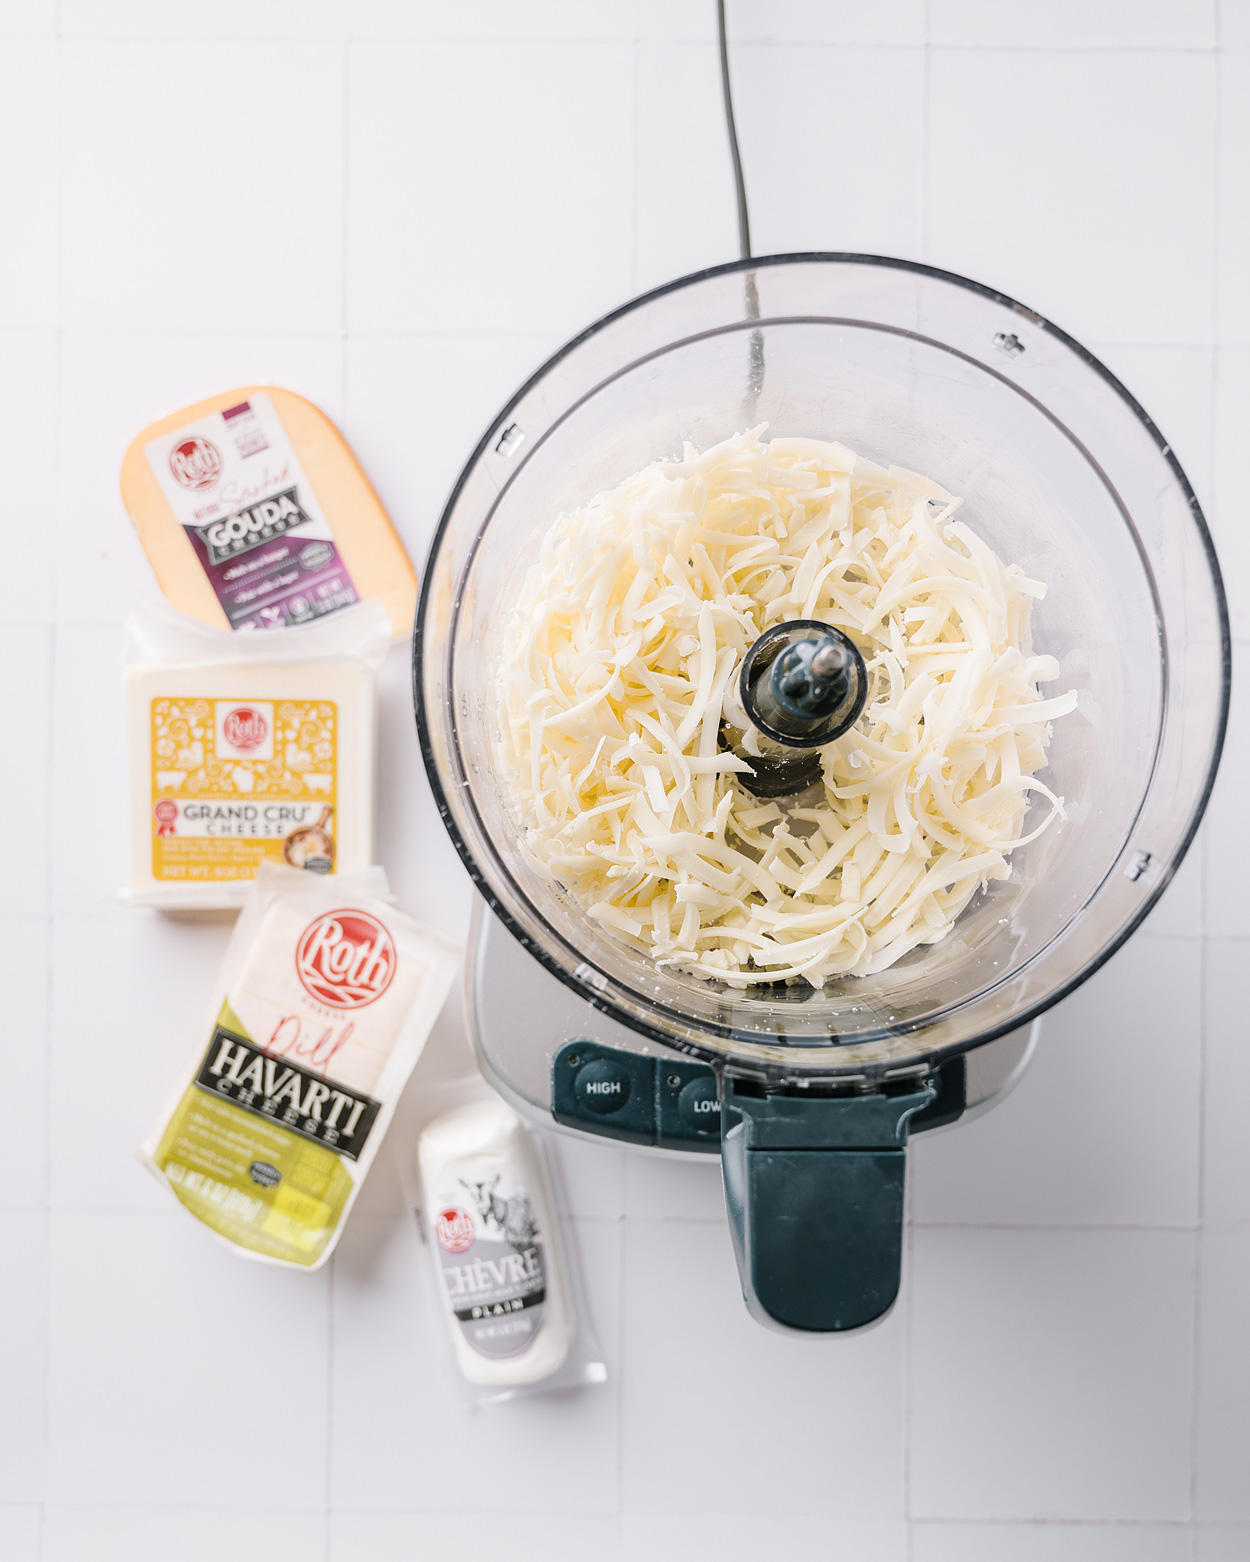
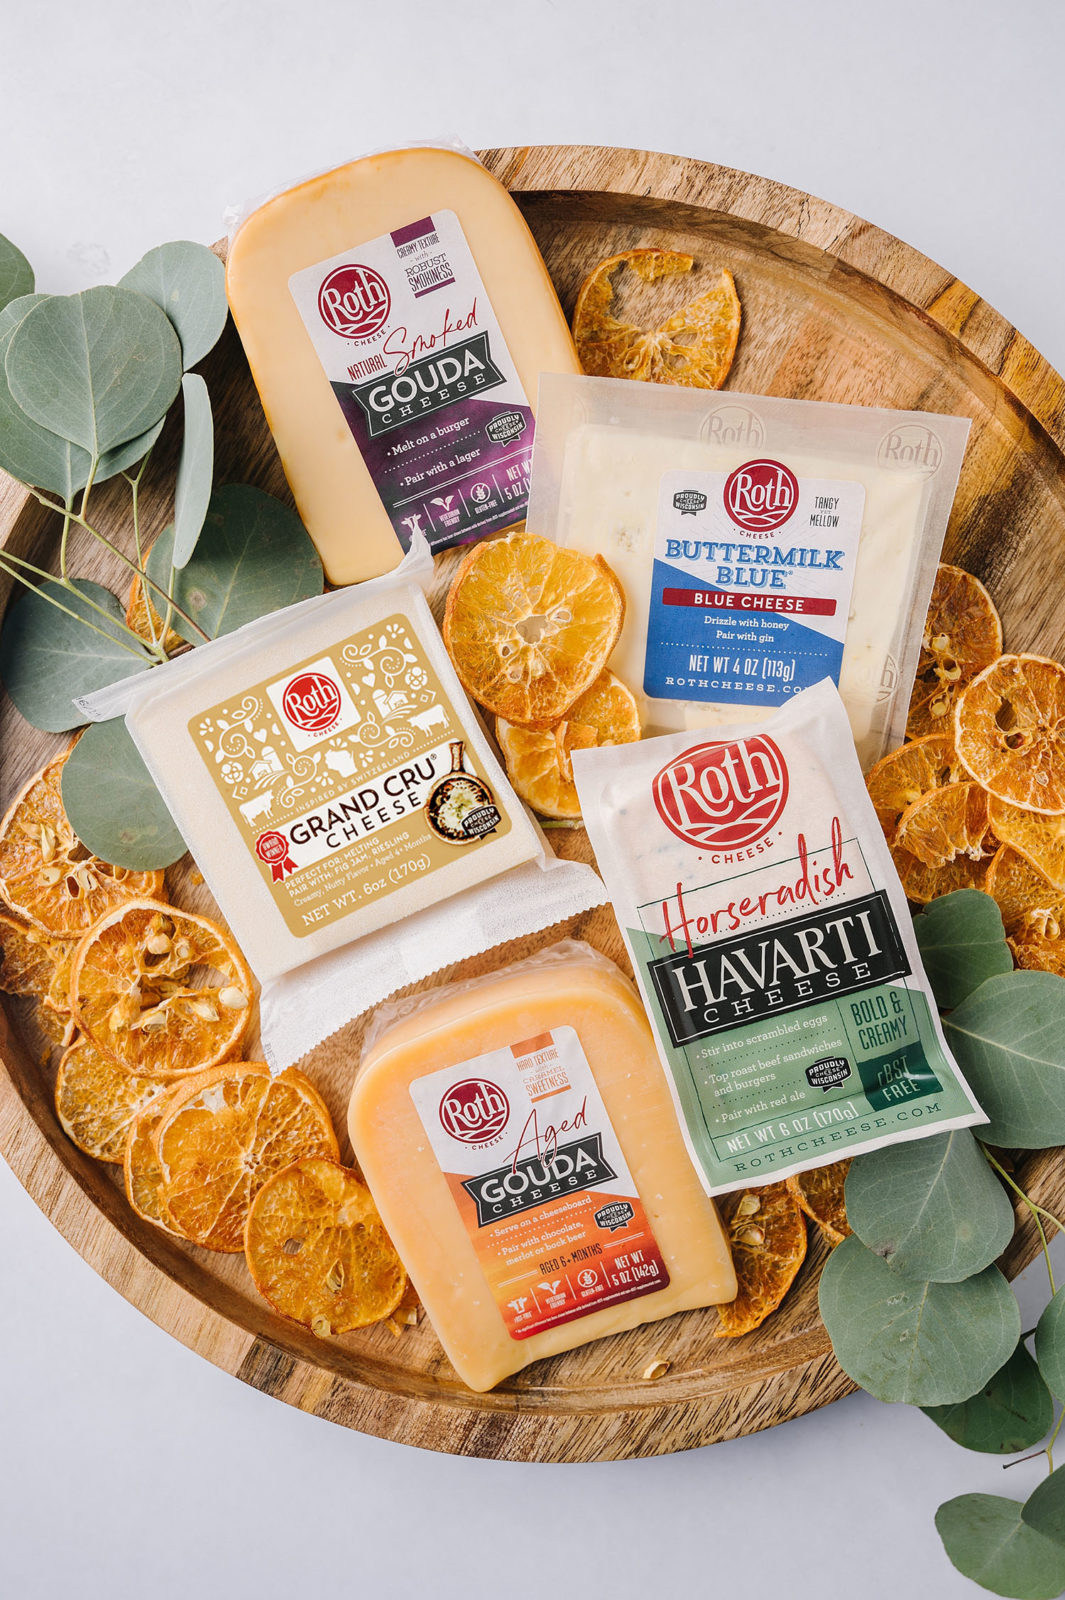
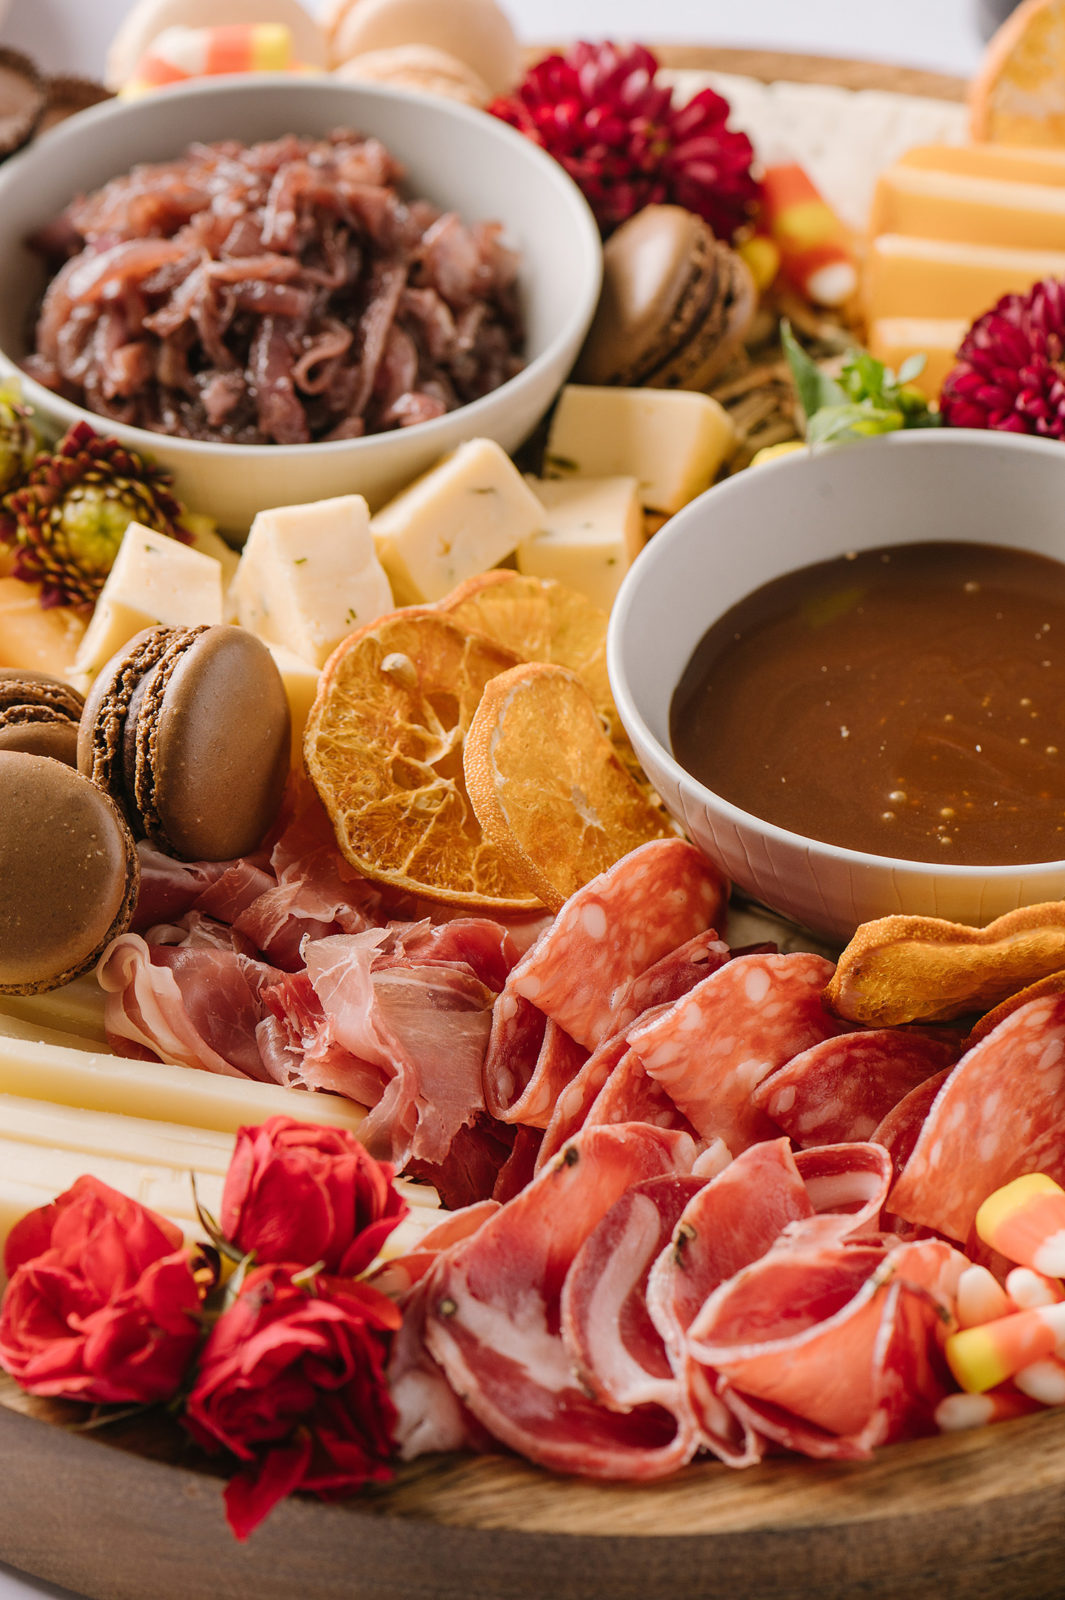
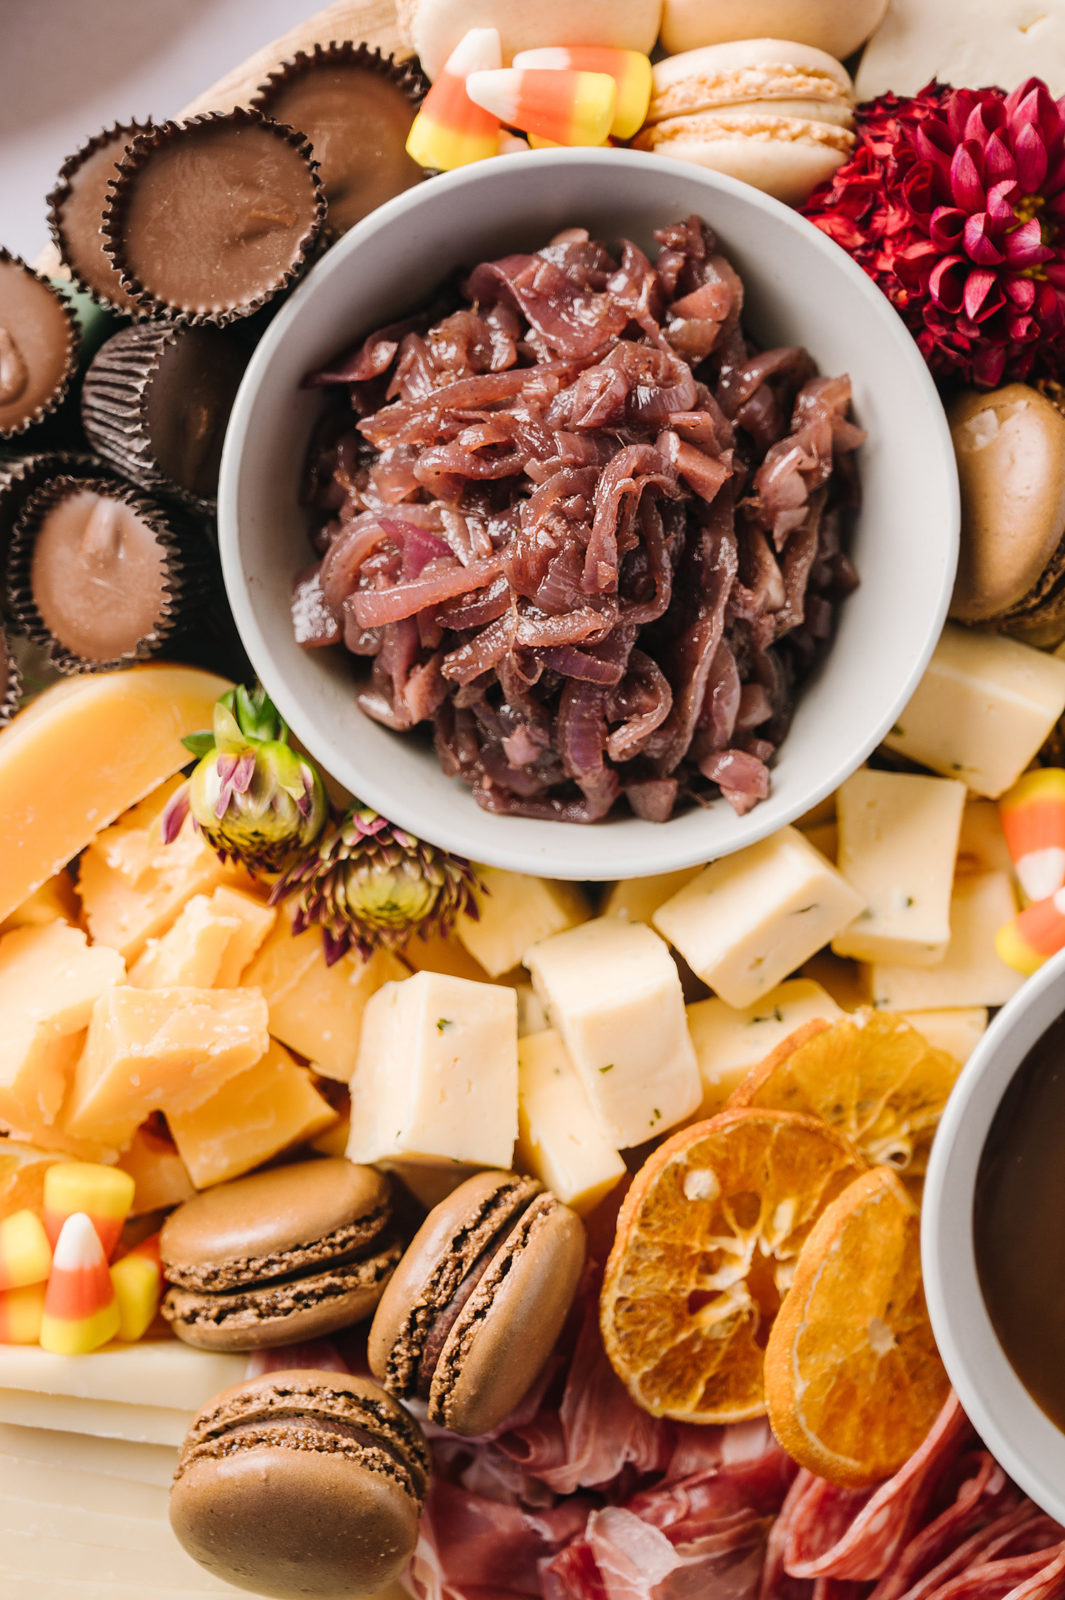
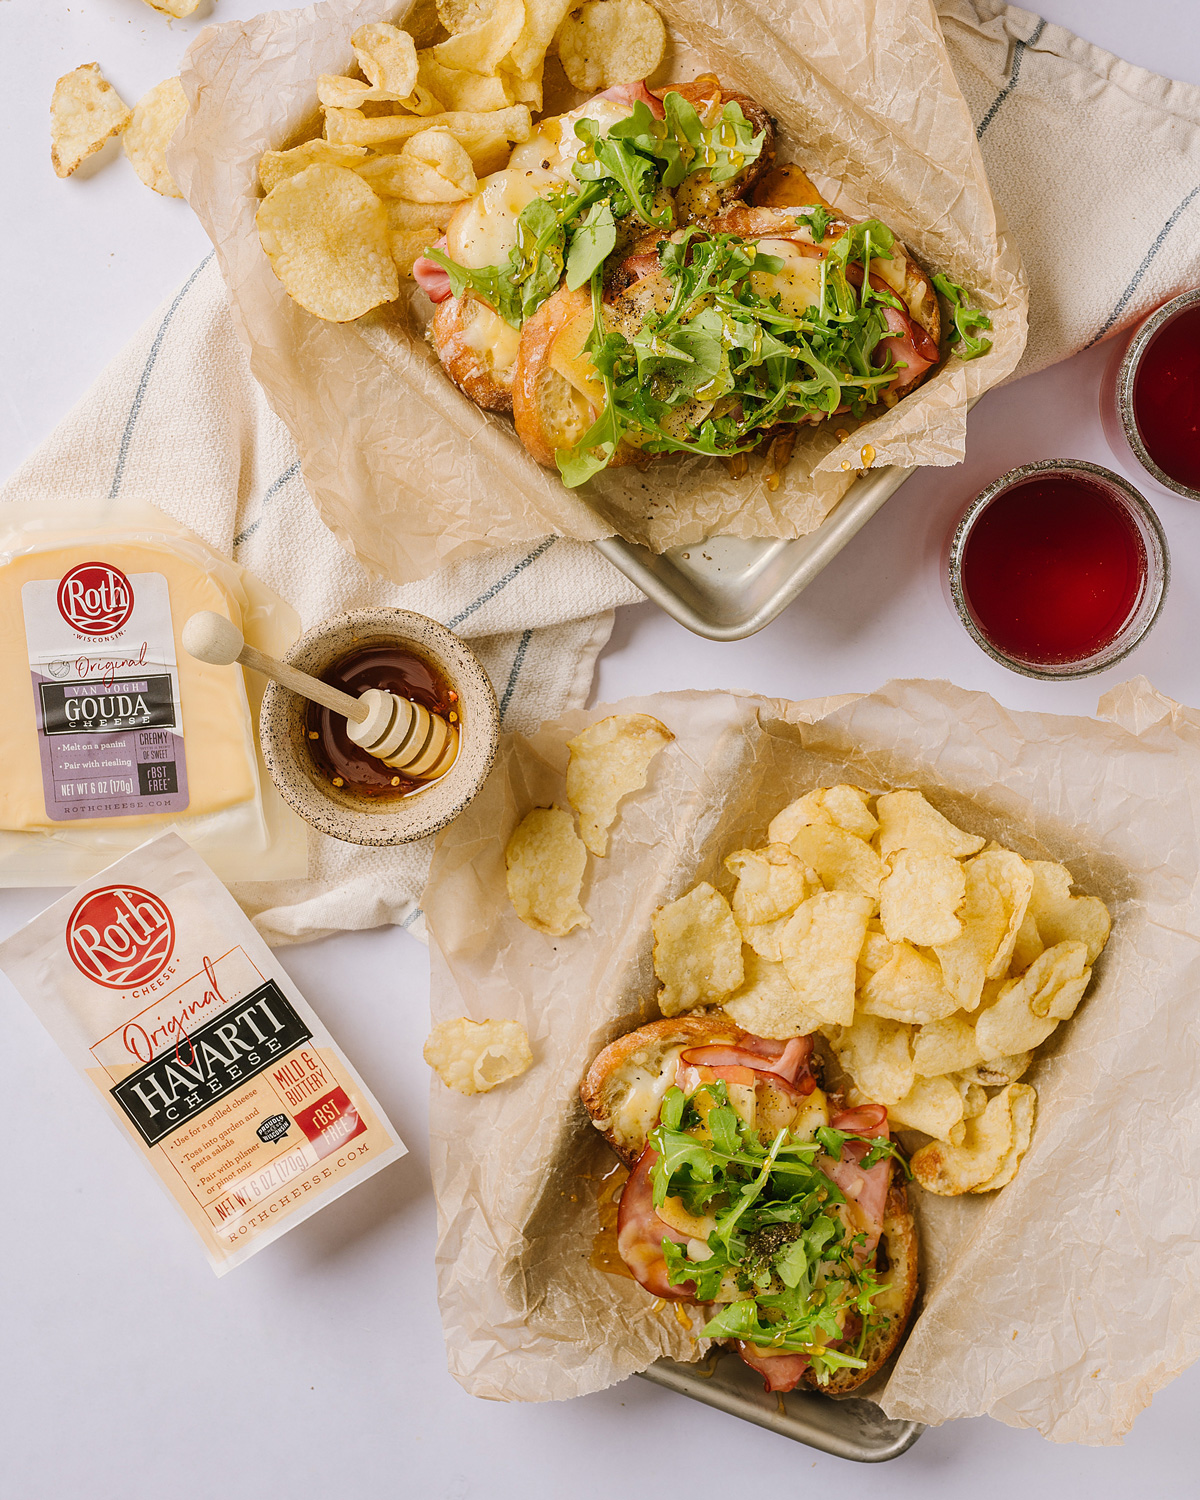
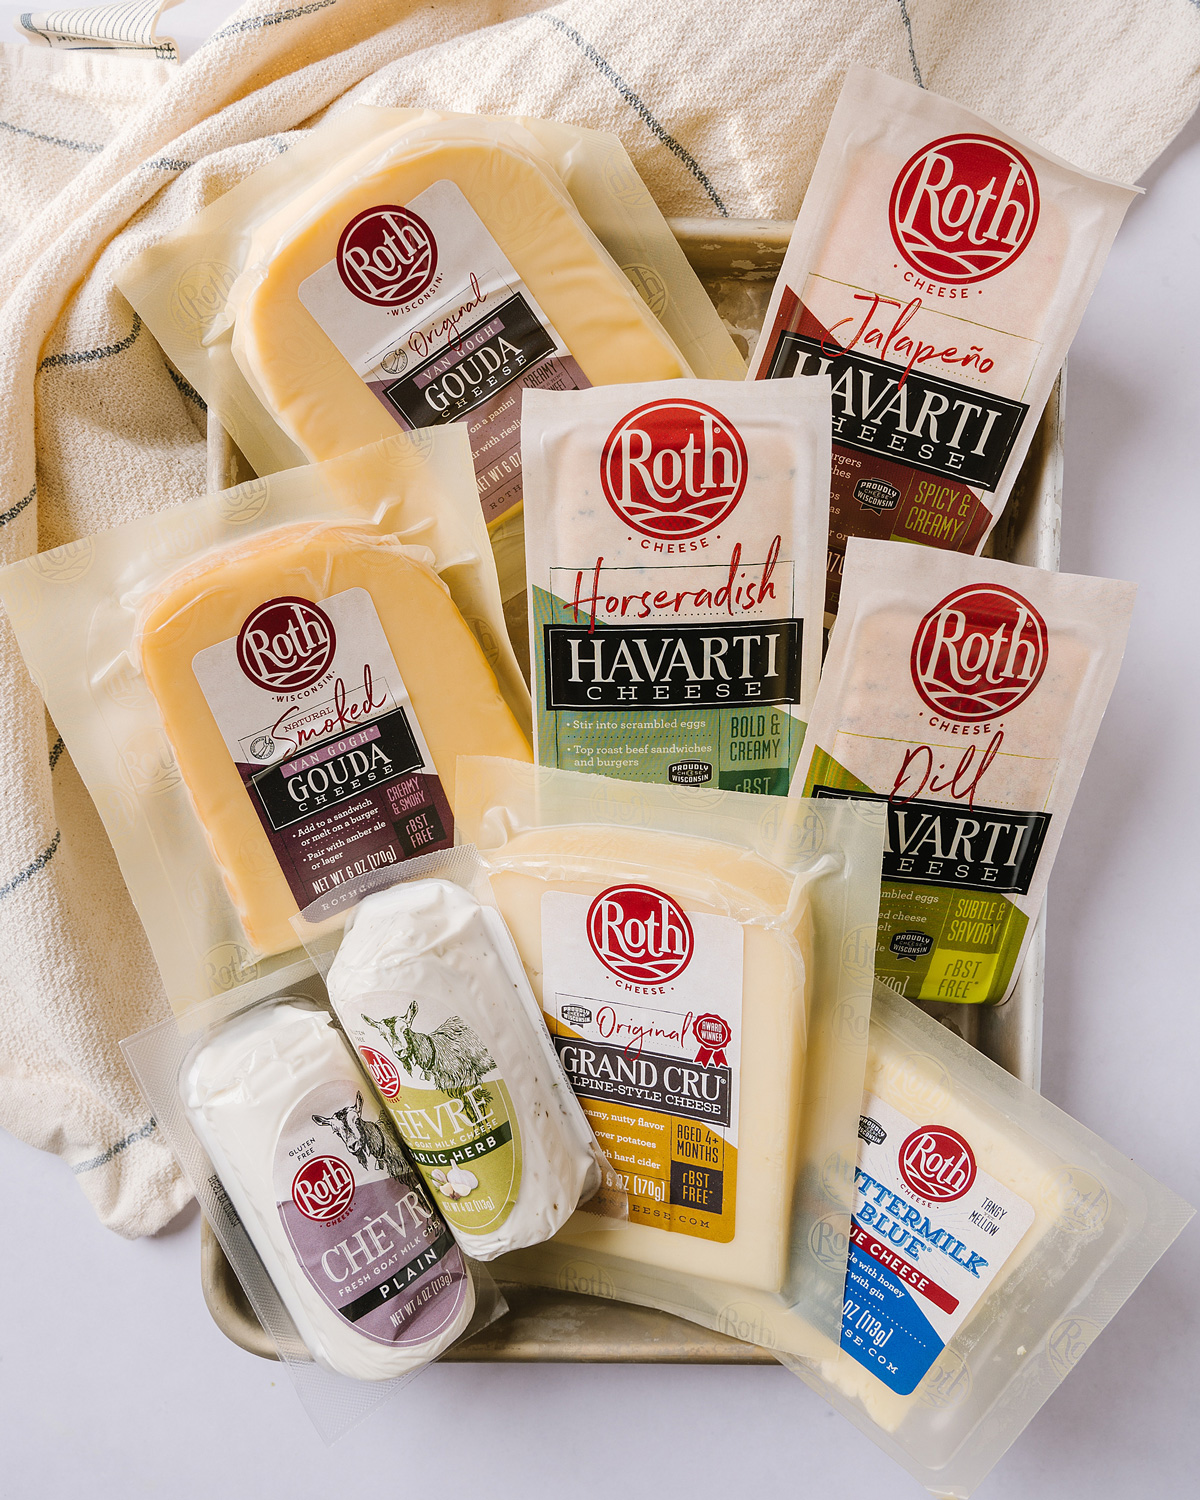
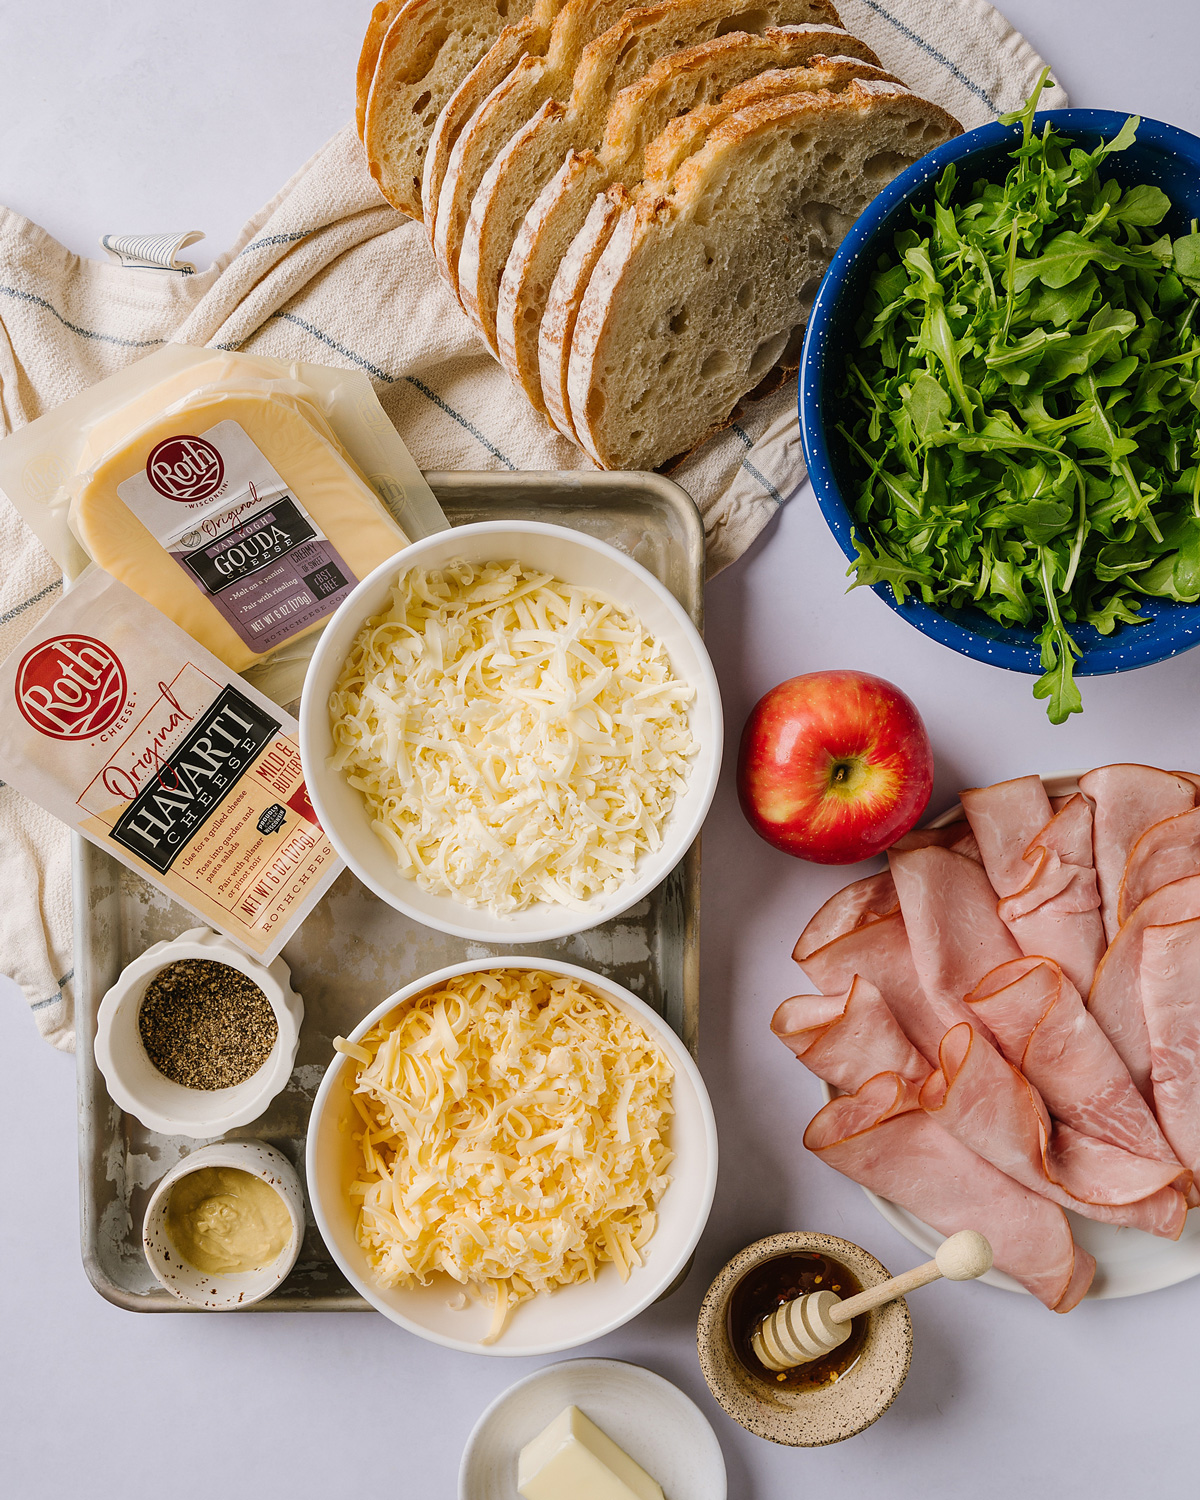
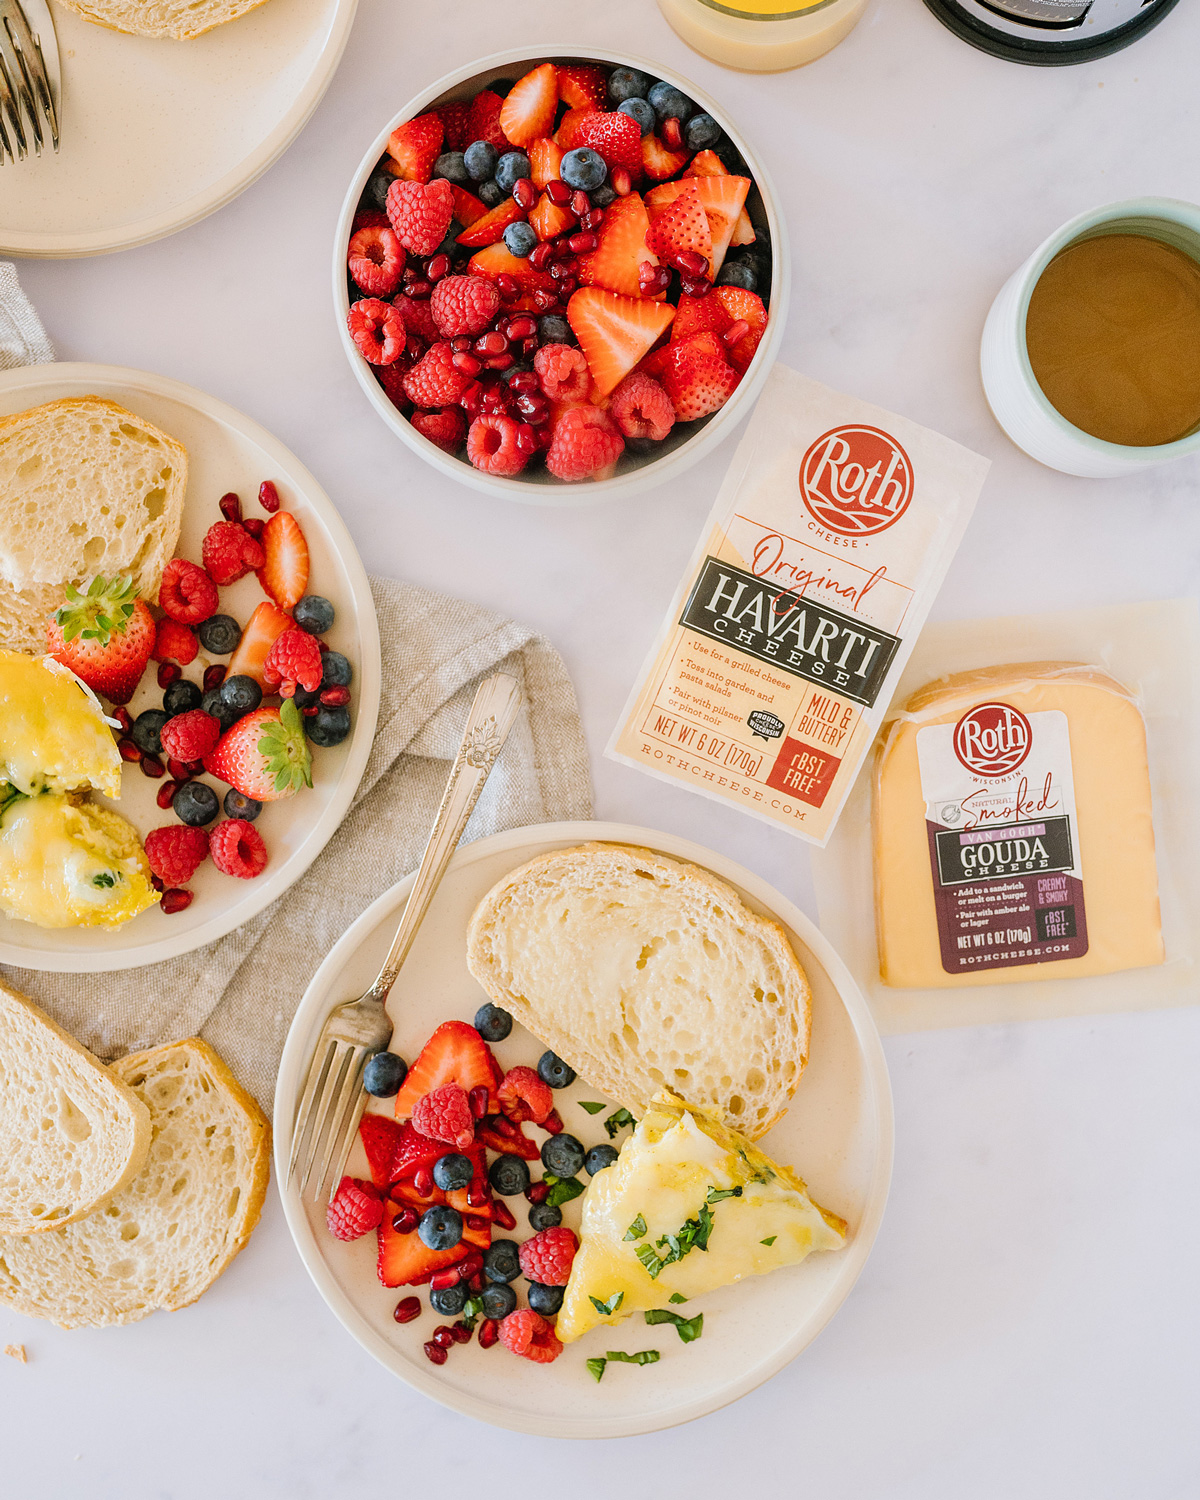
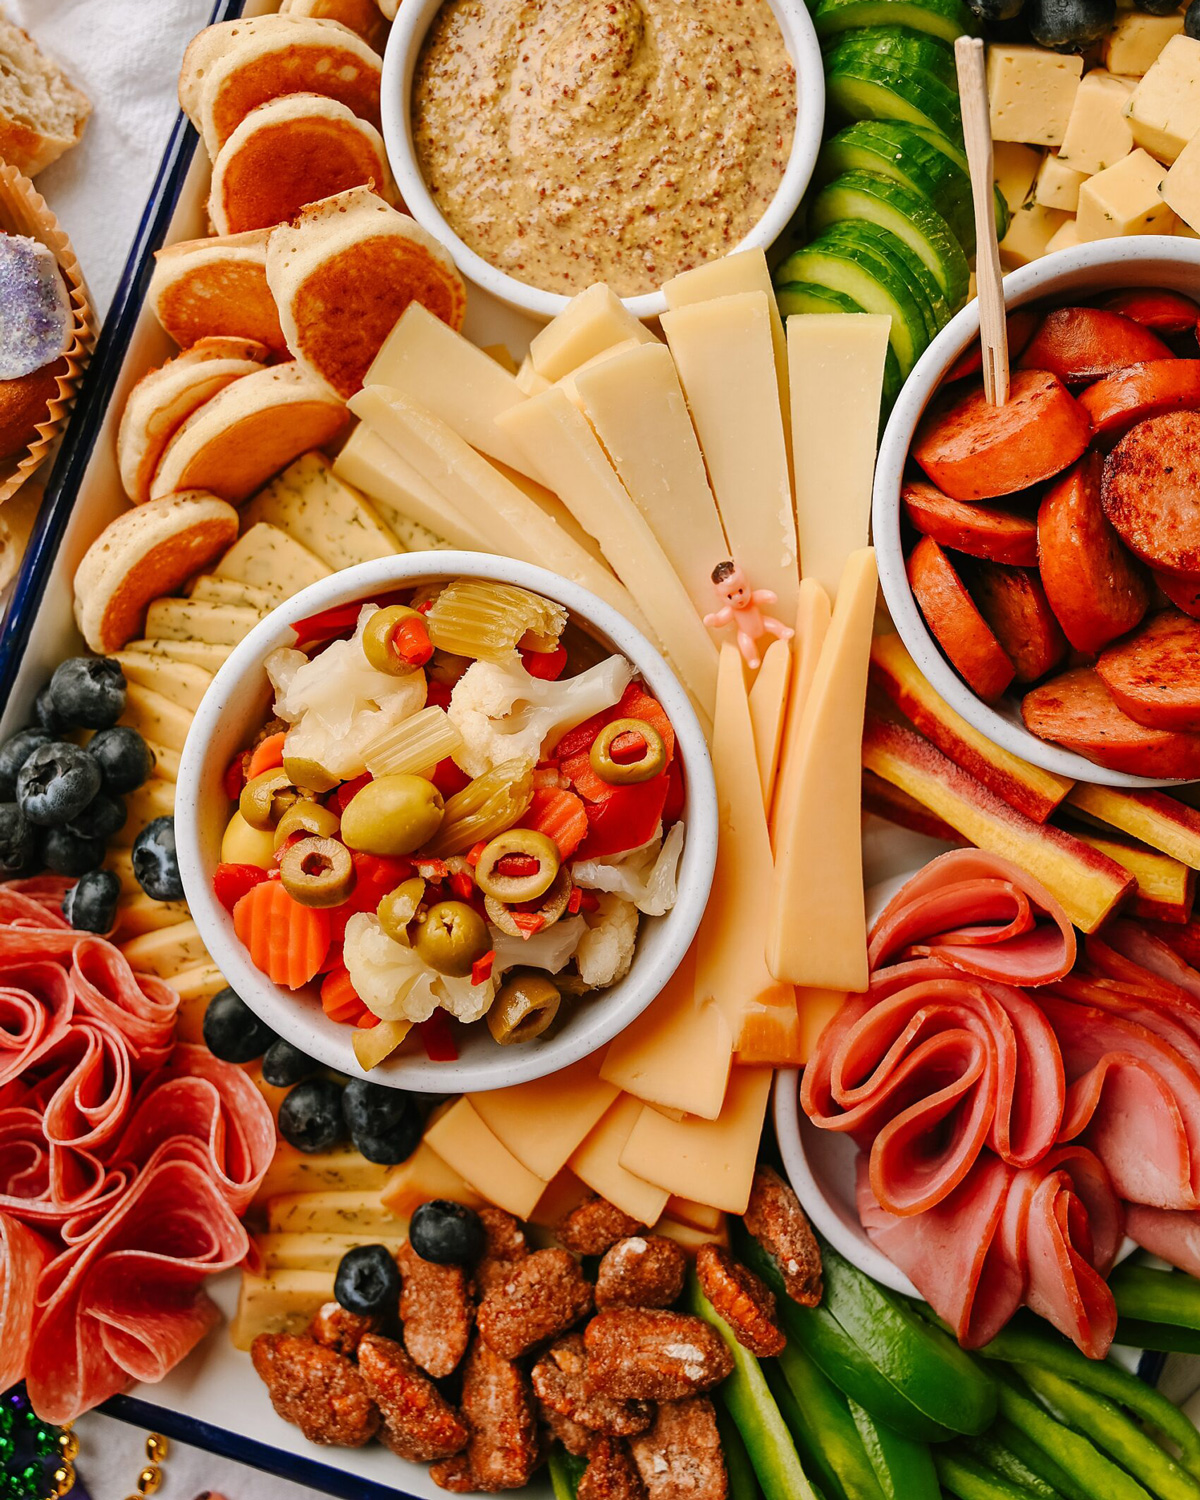
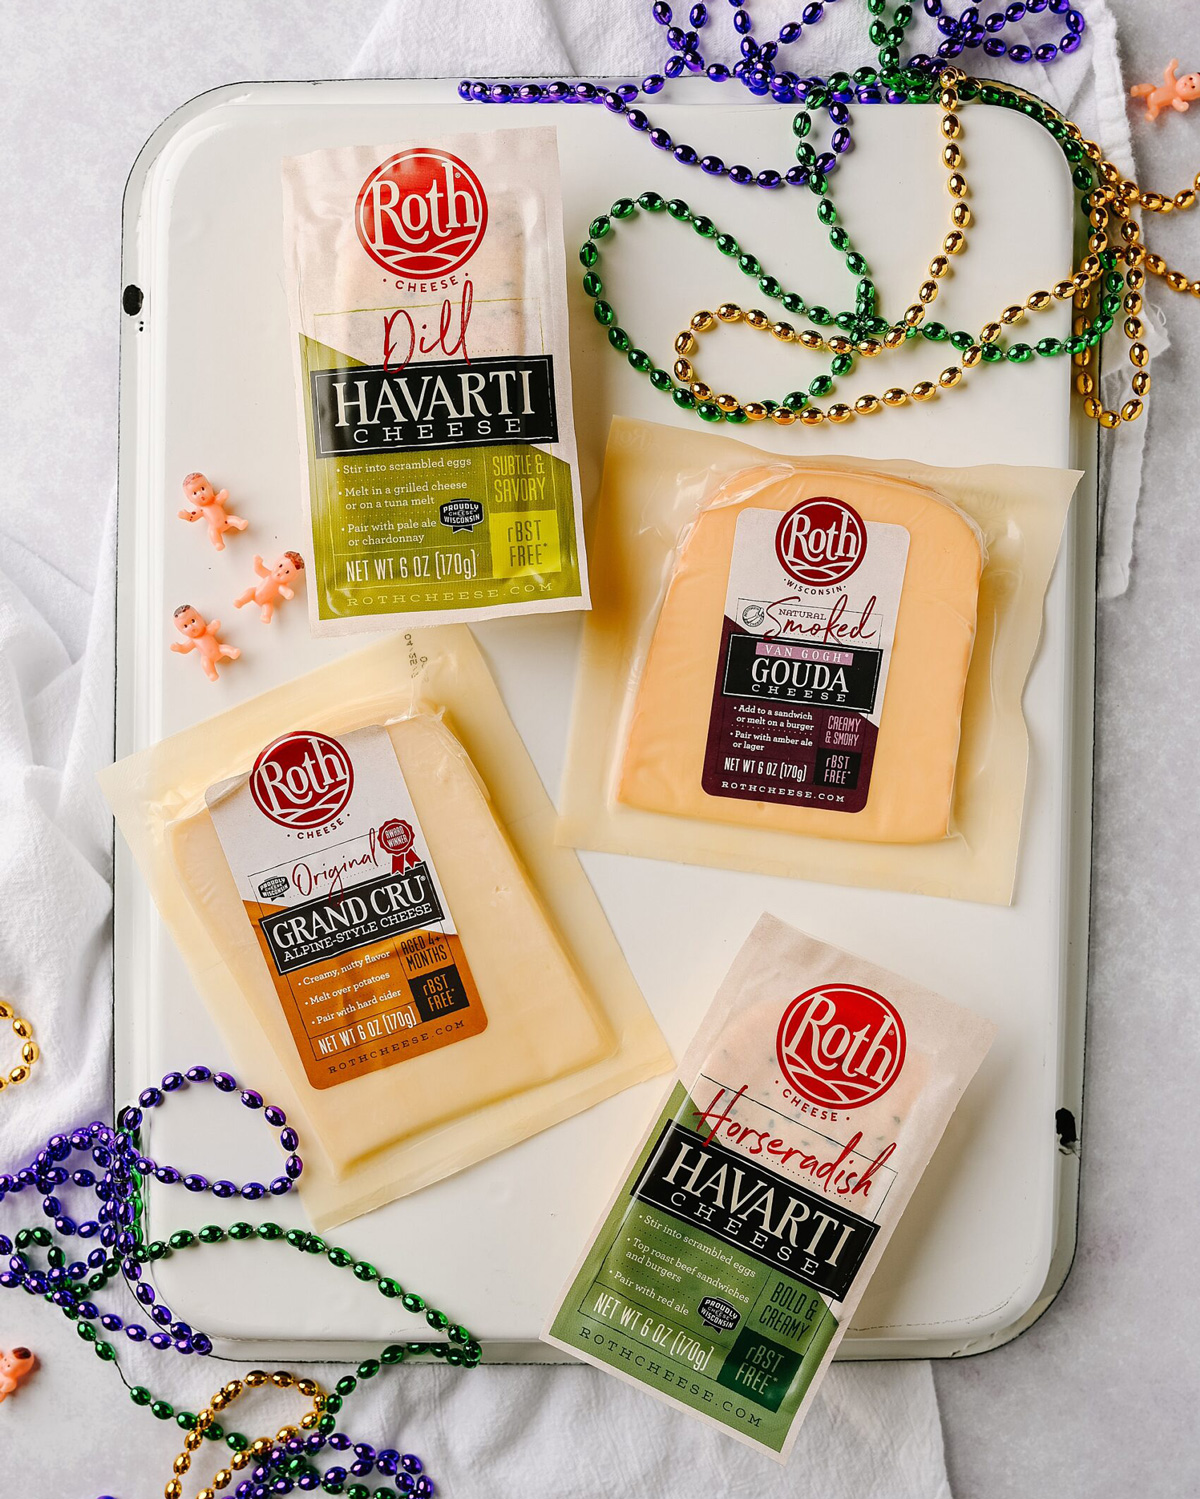
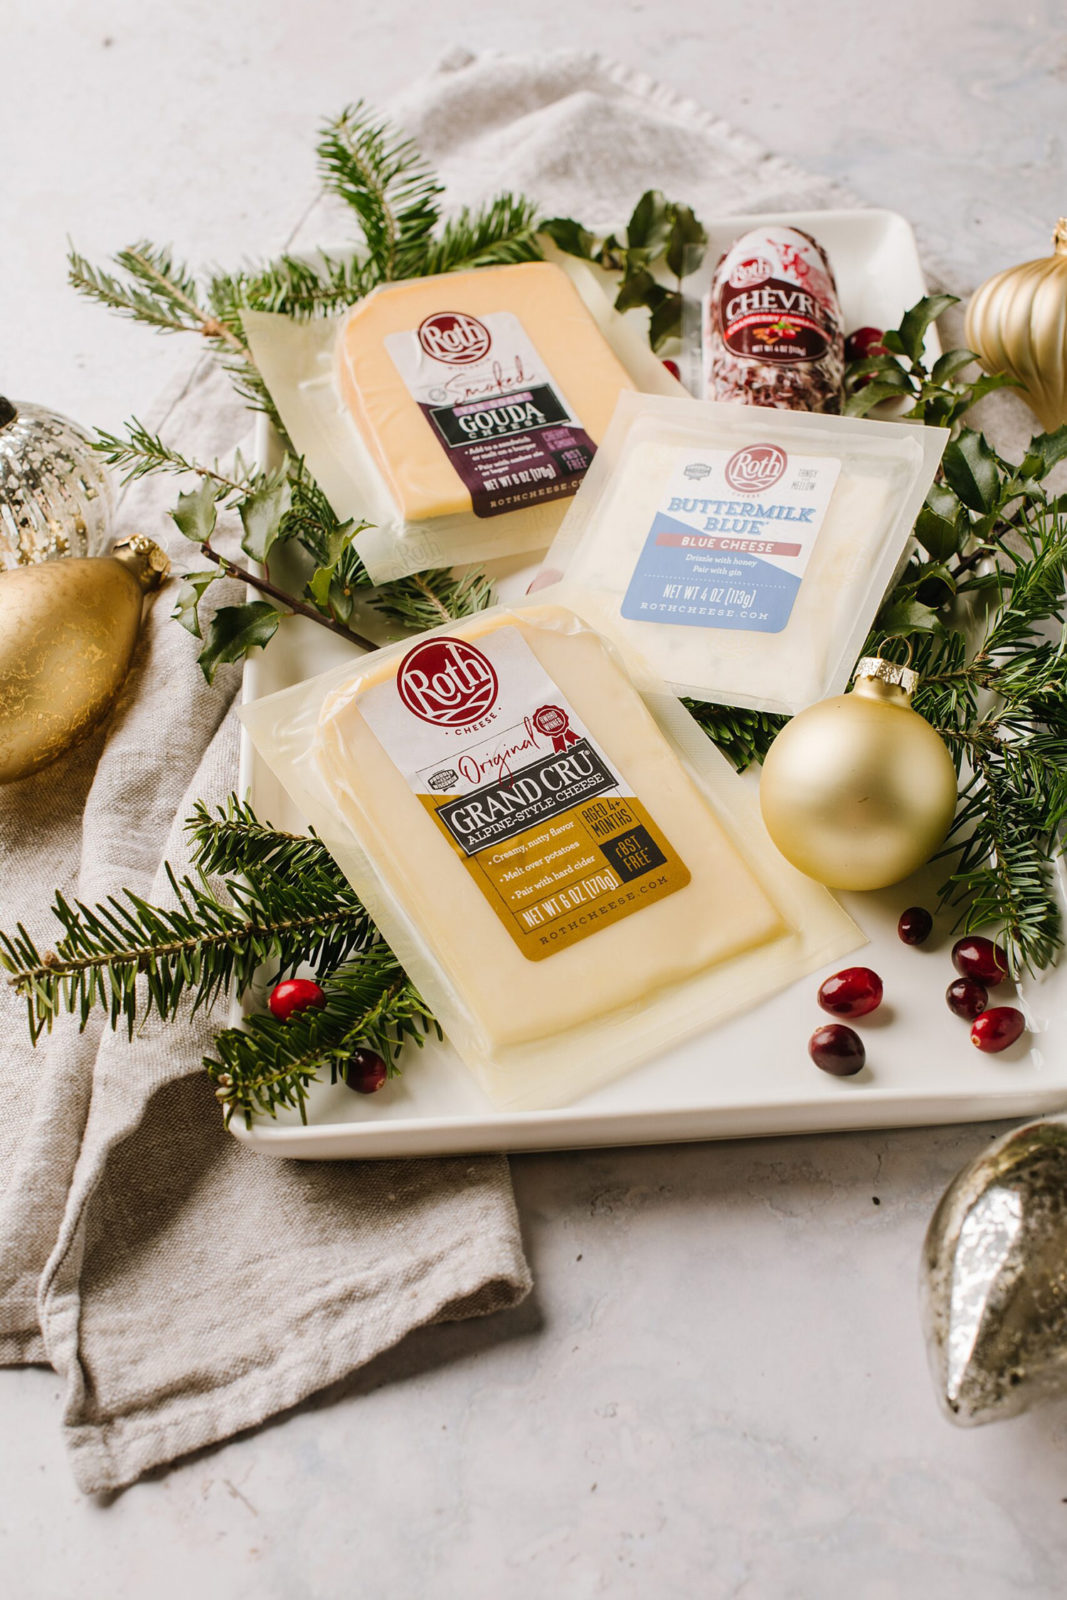
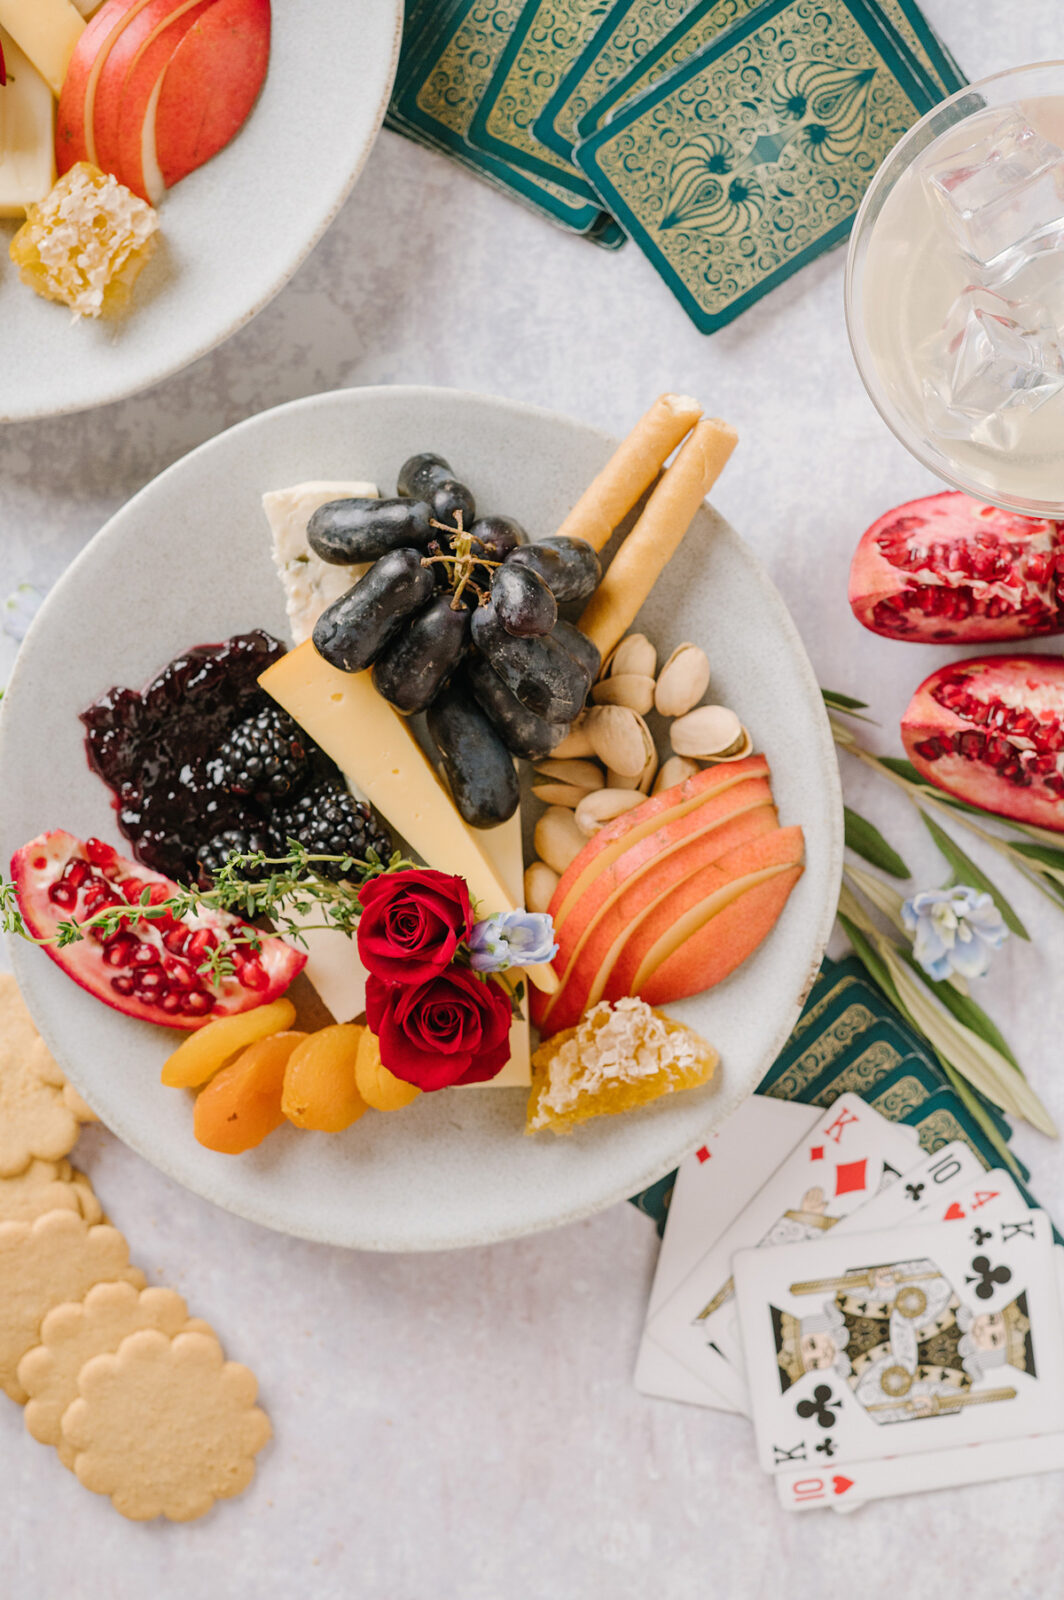
You know I love my Roth cheese and Grand Cru® is my husband’s favorite, so it’s no surprise that they are heavily featured on these plates. Like all of my cheese boards, I use three to five cheeses that are different in texture and flavor but arrange them differently to utilize the more petite plates

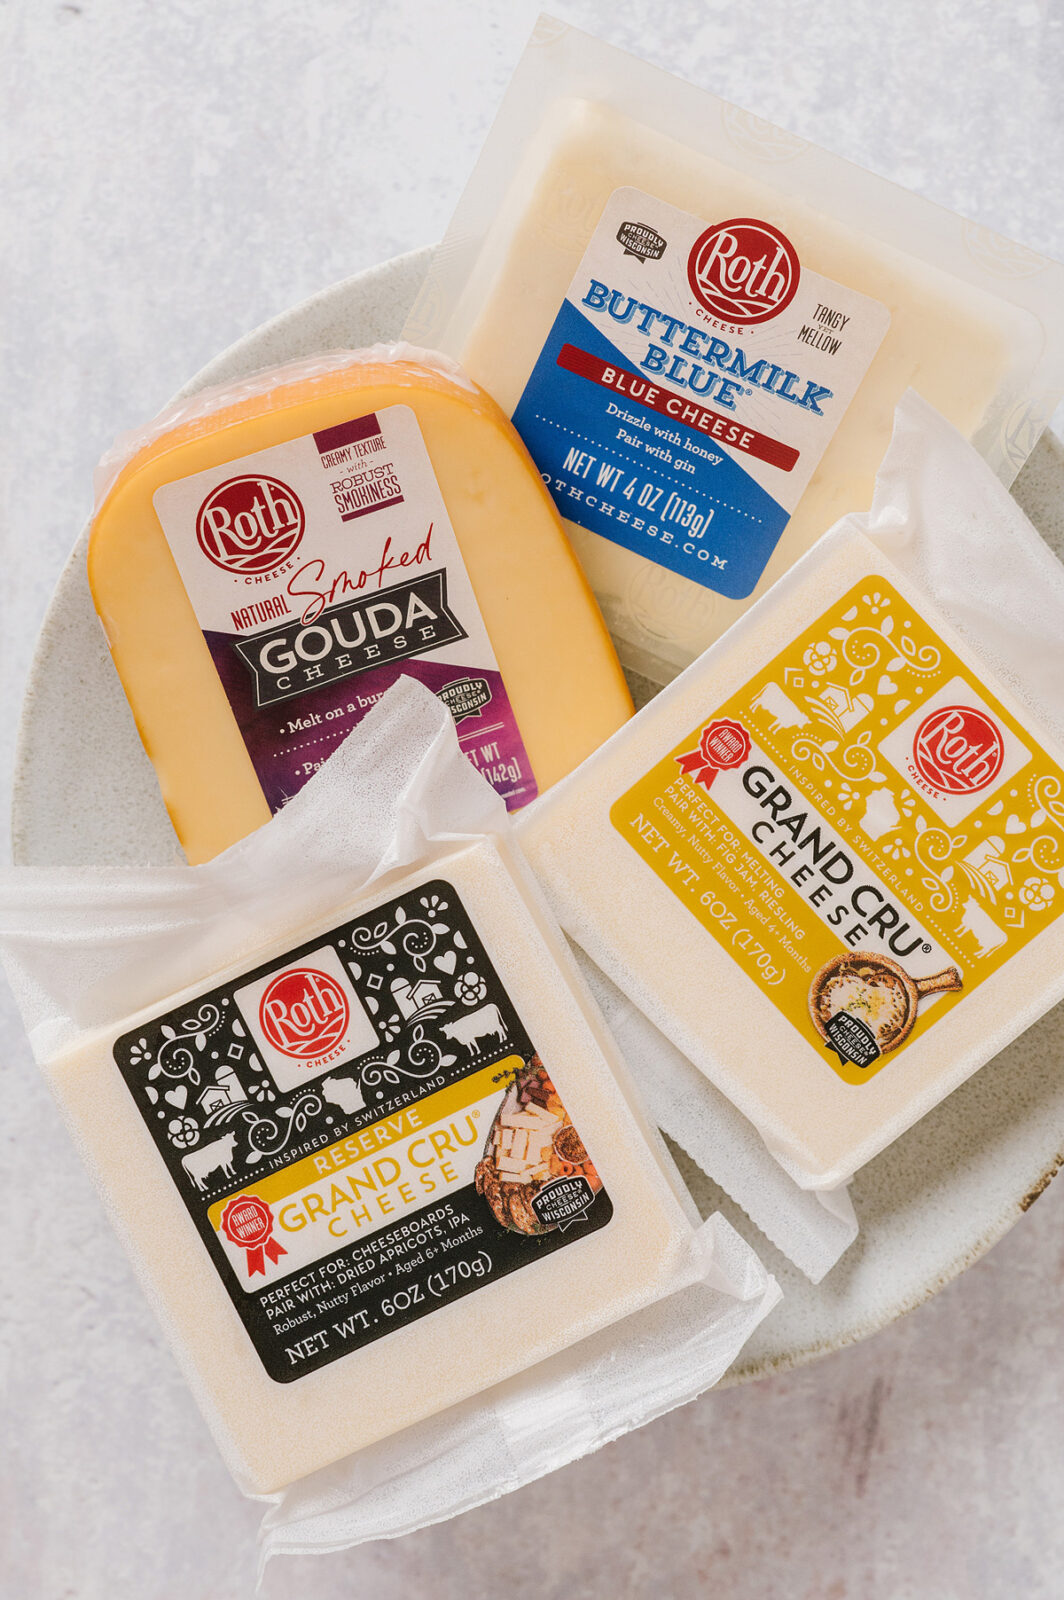
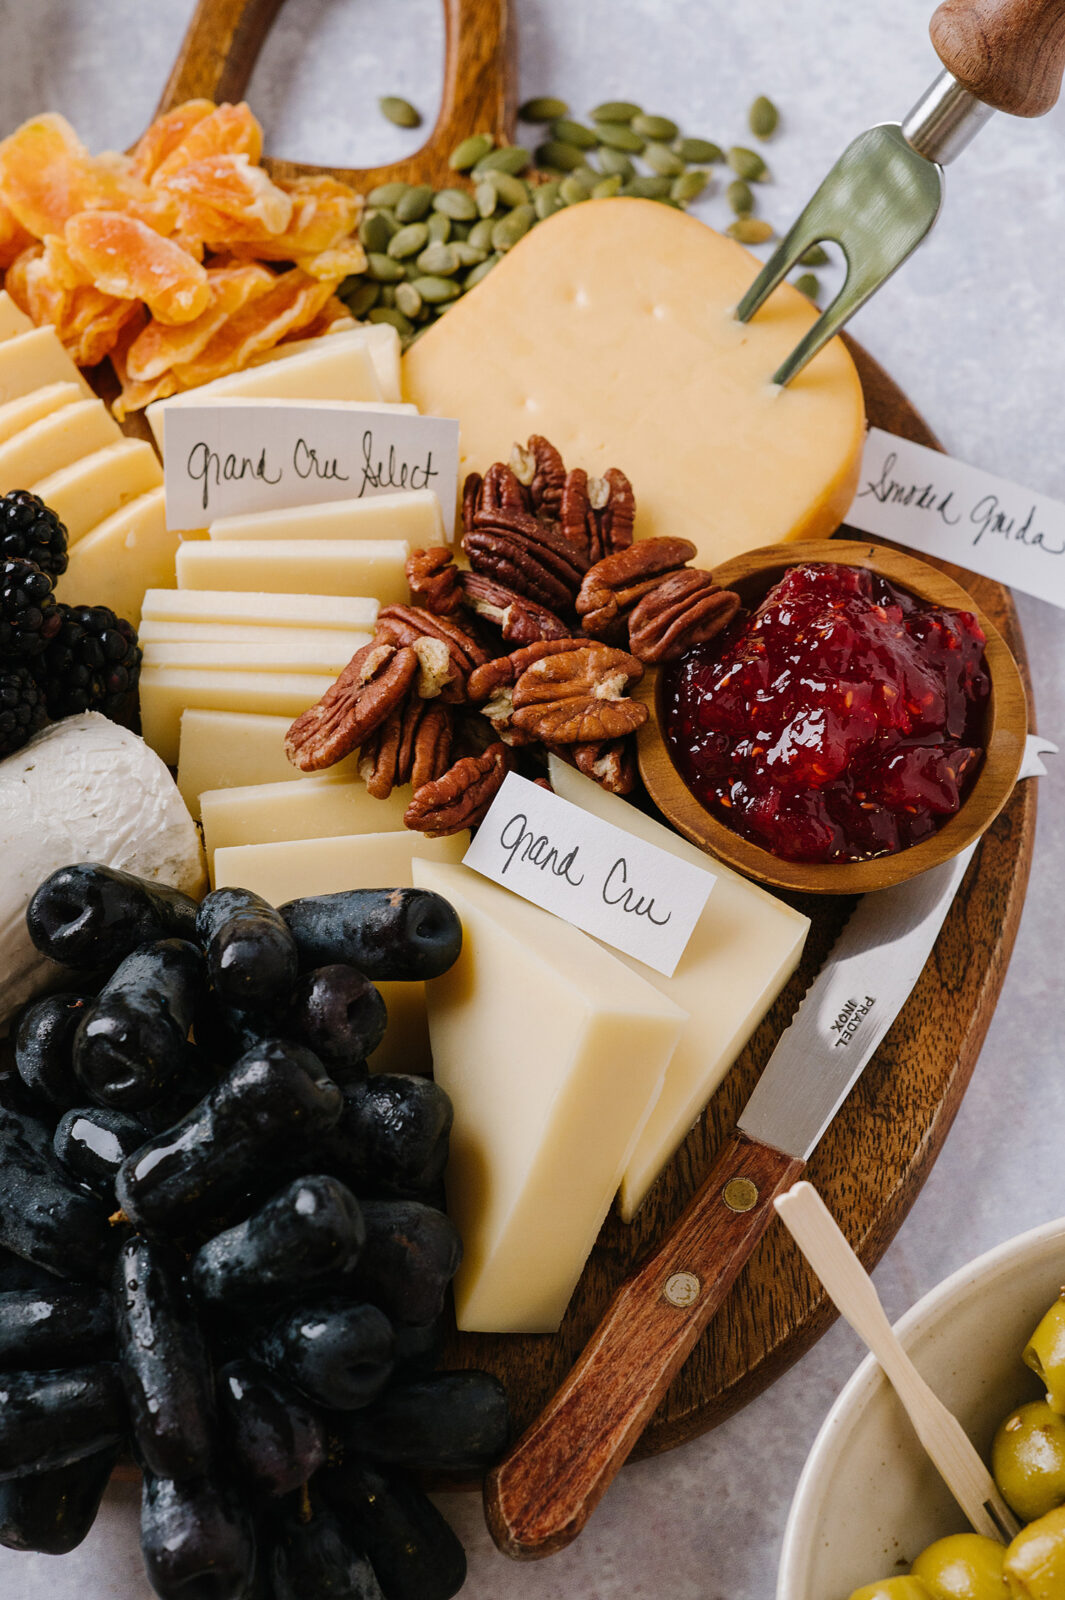
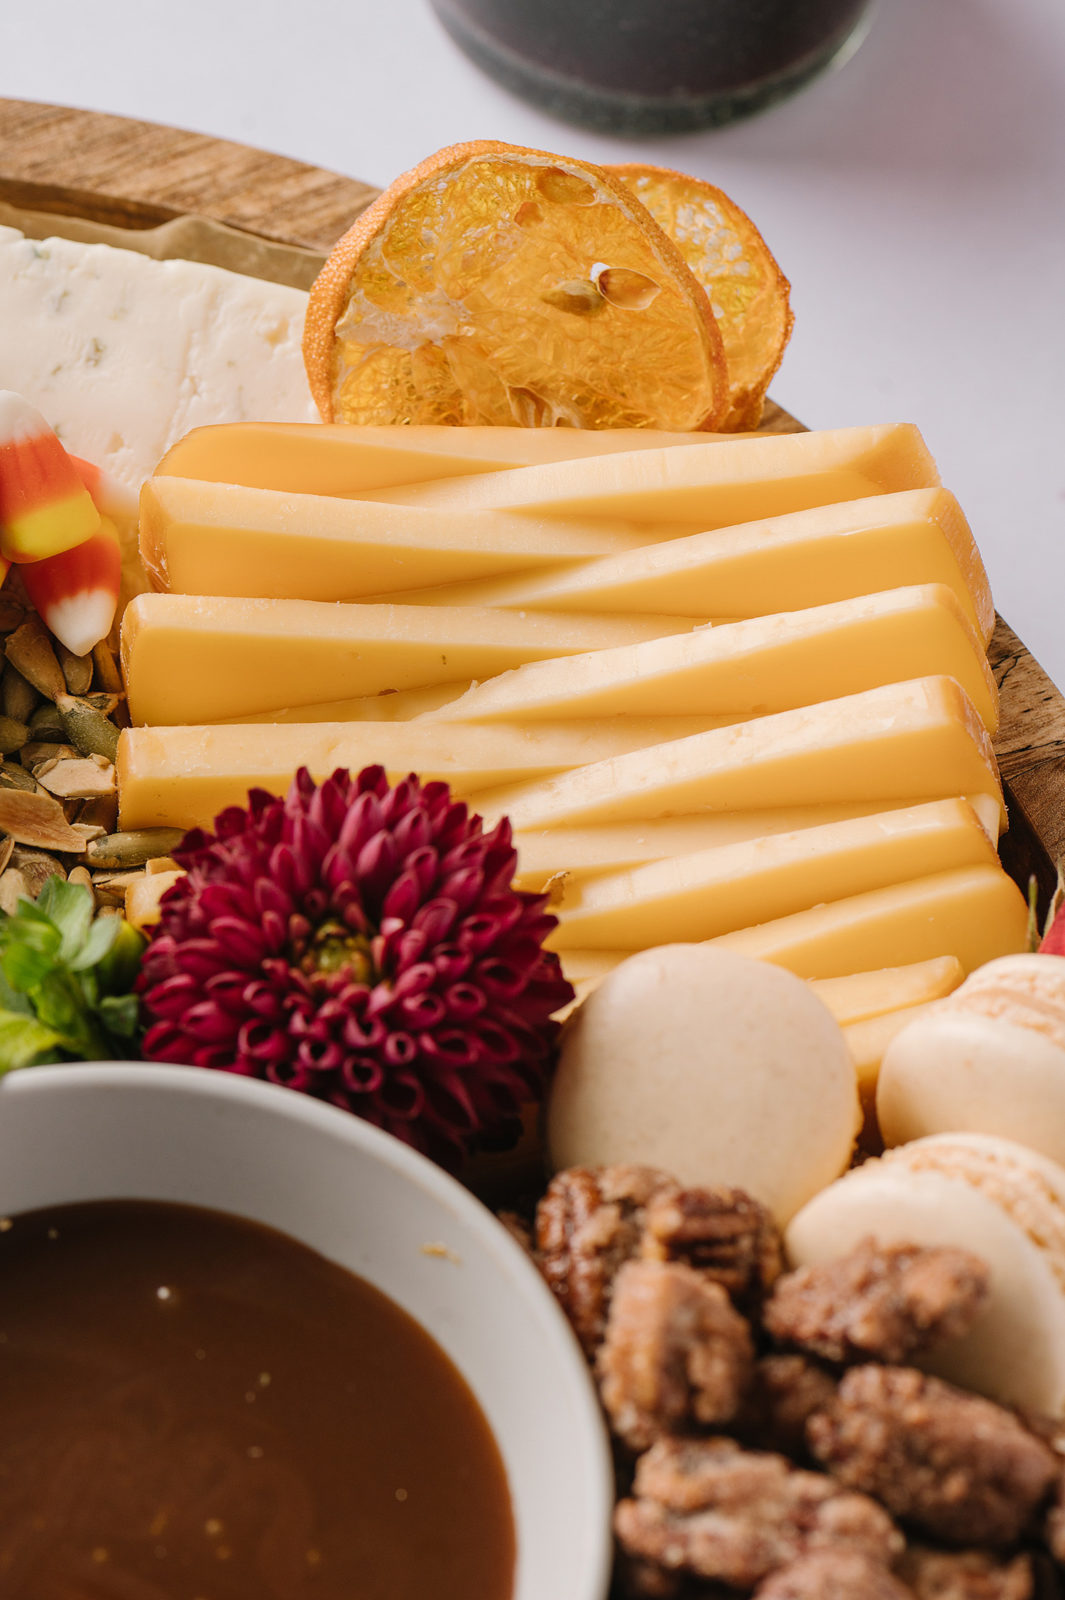
I used both Original Grand Cru® and aged Grand Cru® Reserve. Grand Cru® is an alpine-style cheese that is nutty and creamy. Grand Cru® Reserve is hand-selected wheels of Grand Cru® that are aged for more than six months. It results in a bolder and more savory-flavored cheese. It’s delicious. Buttermilk Blue® is creamy, which is a nice contrast to the Grand Cru® and is tangy, but mellow. To round it out, I added Smoked Gouda. I love the creaminess paired with the smoky notes in this cheese.

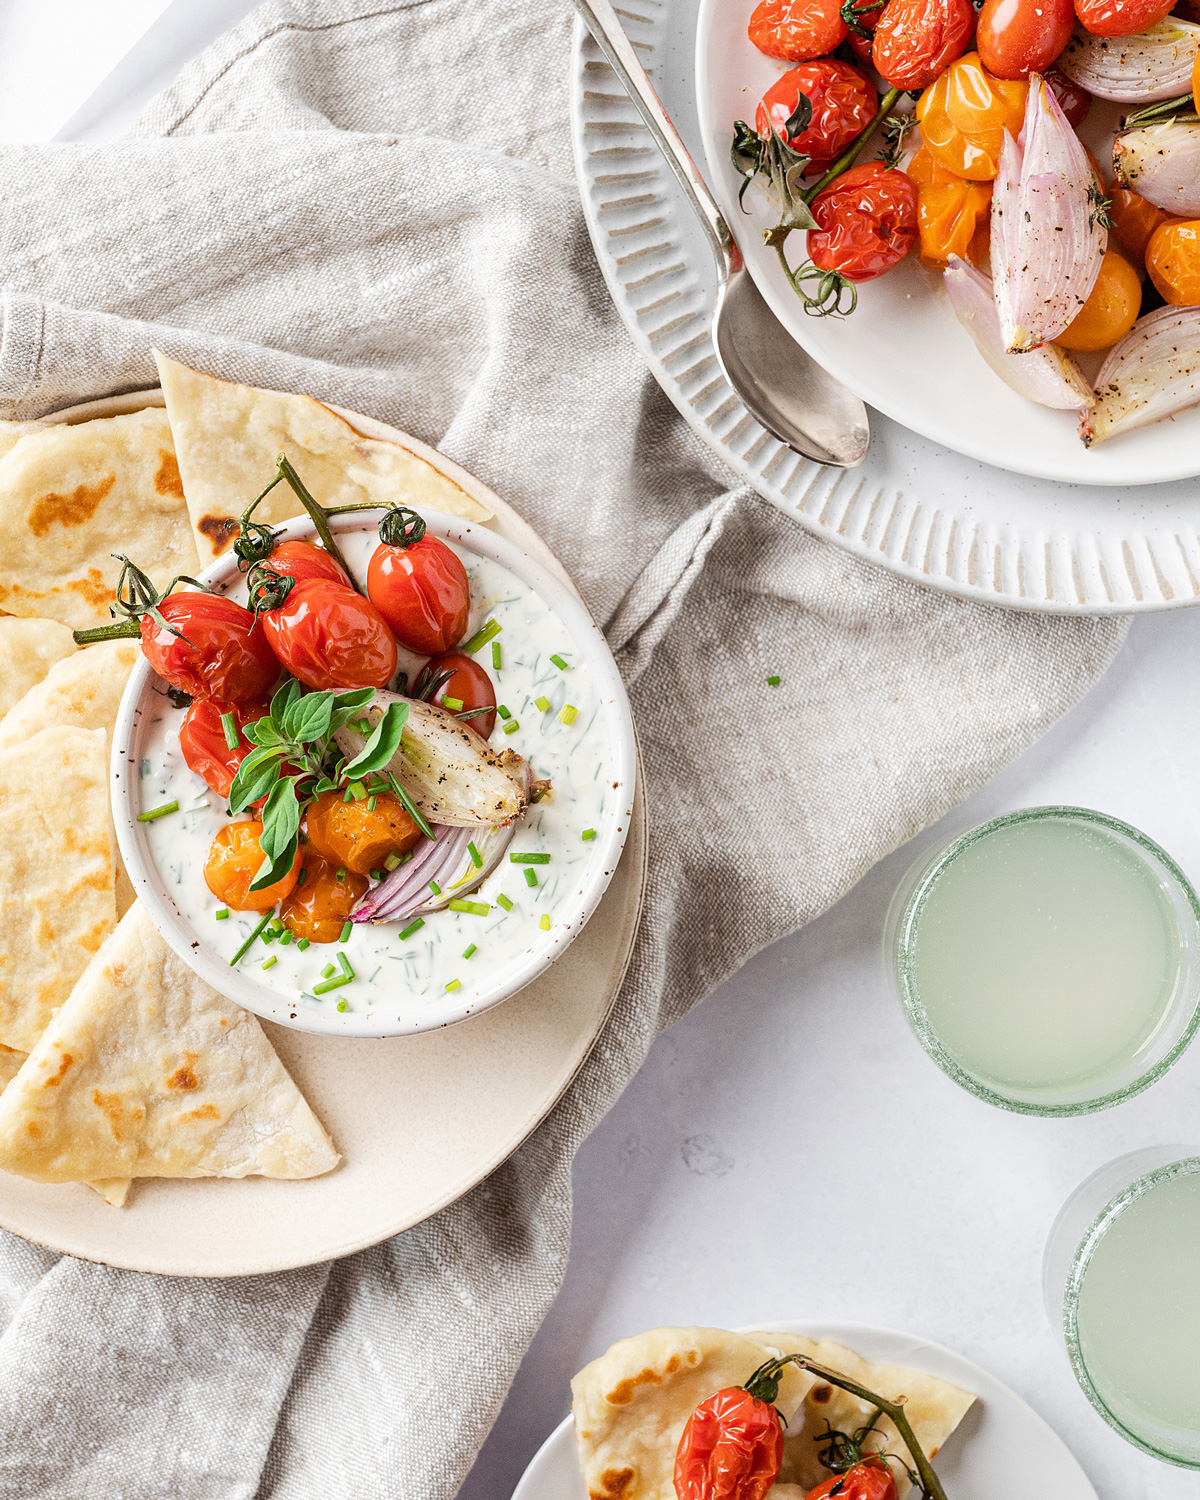
Both kinds of cheese pair so well with apples and pears, so that was my inspiration for the pear martini. I didn’t want to make a really heavy cocktail that would overpower the cheese, but I did want it to compliment the flavors. I am really happy with how they tasted together. 

If you want to pair your Grand Cru® but do not want a pear martini, try an amber beer or hard cider. They will work beautifully together.

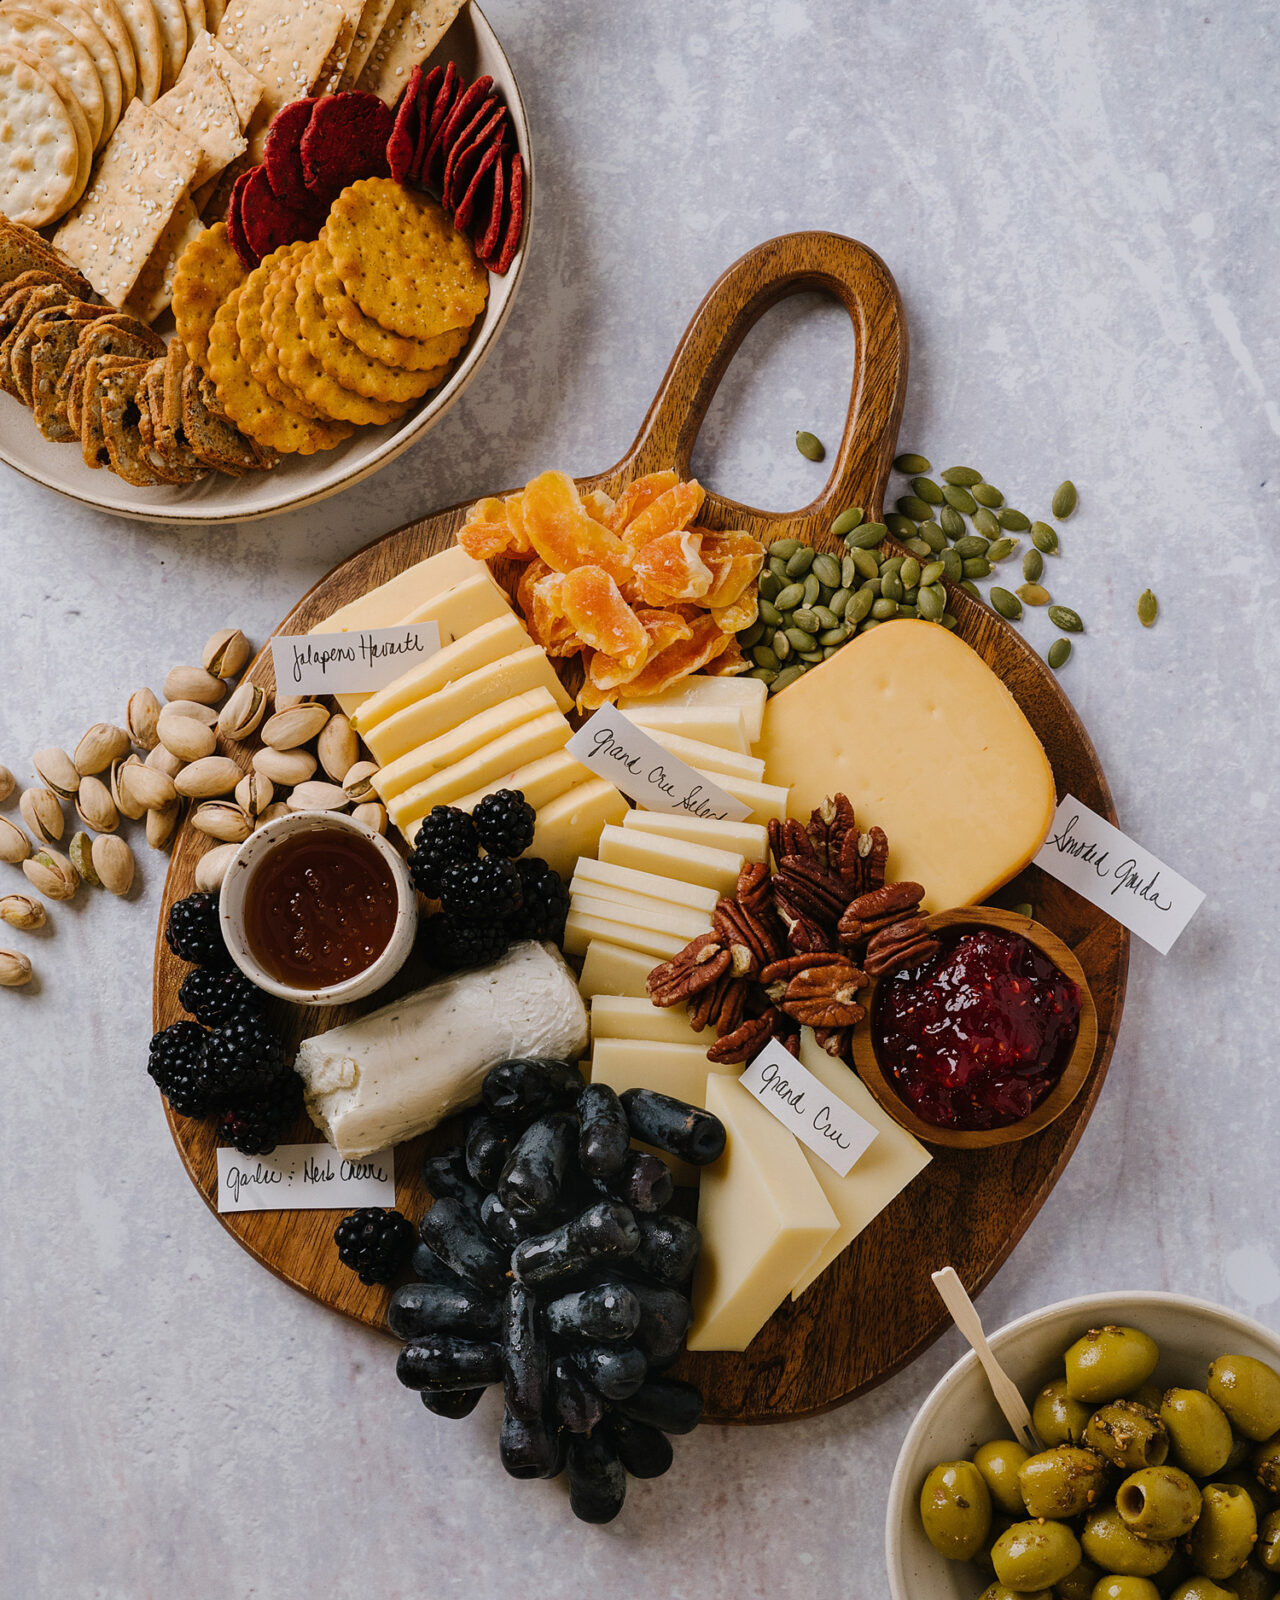
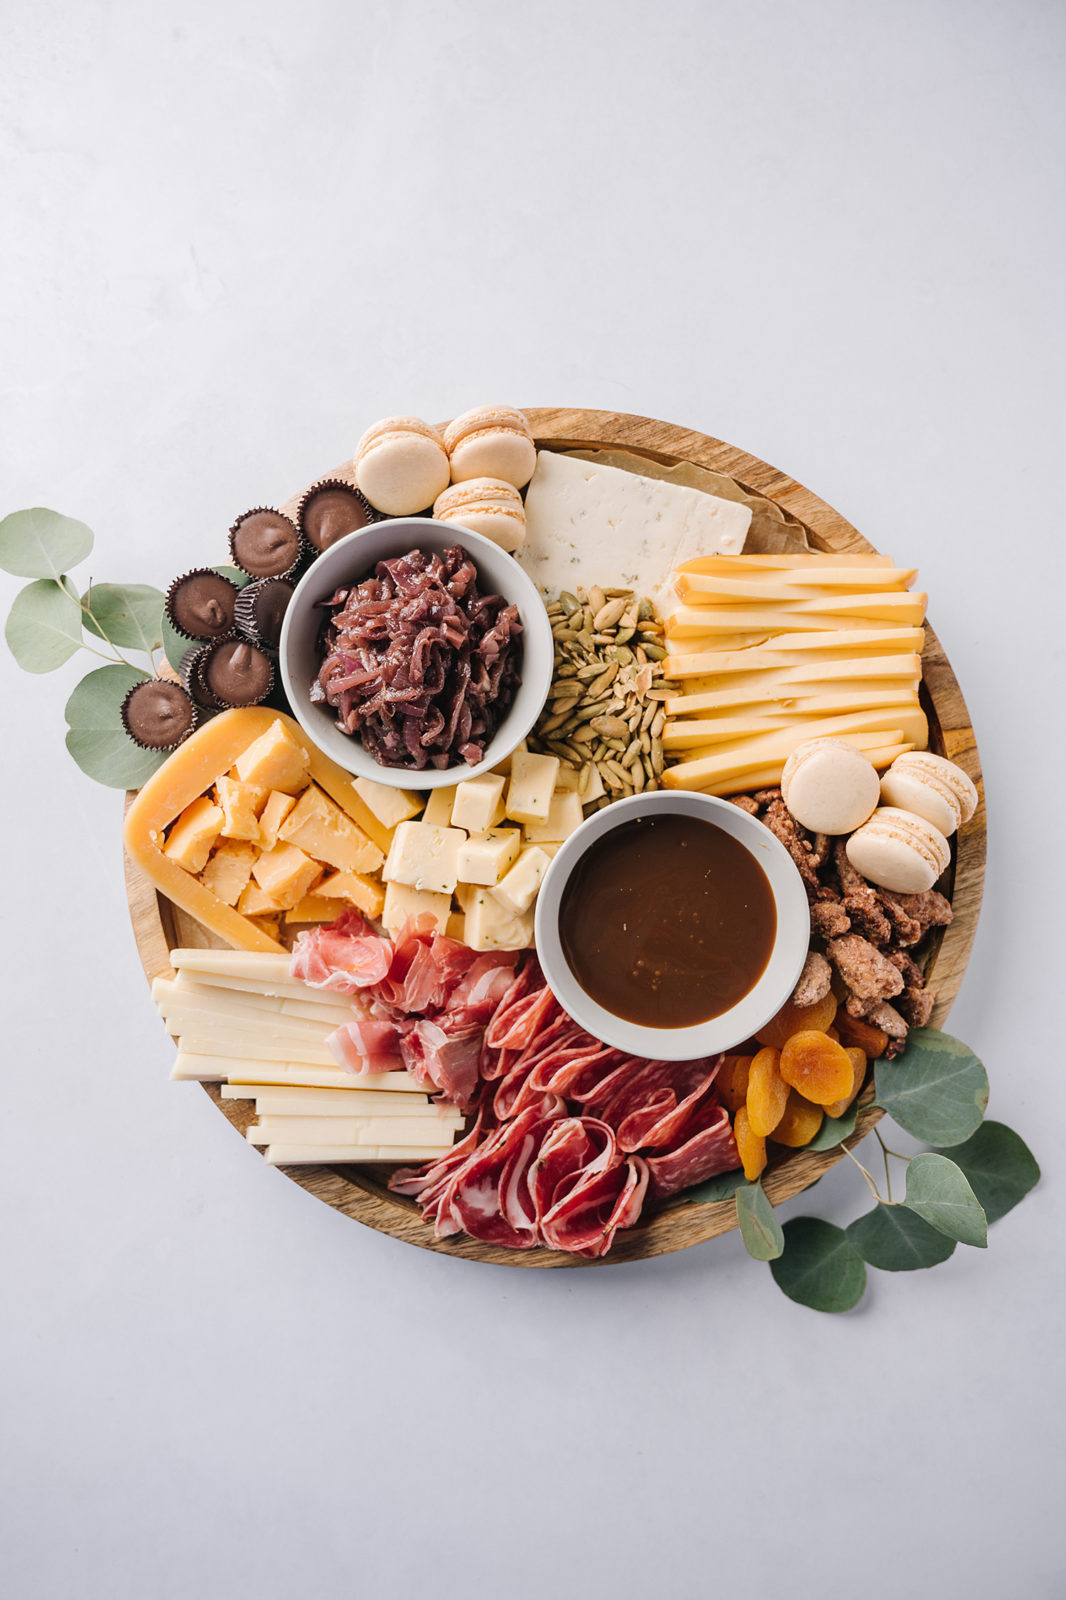
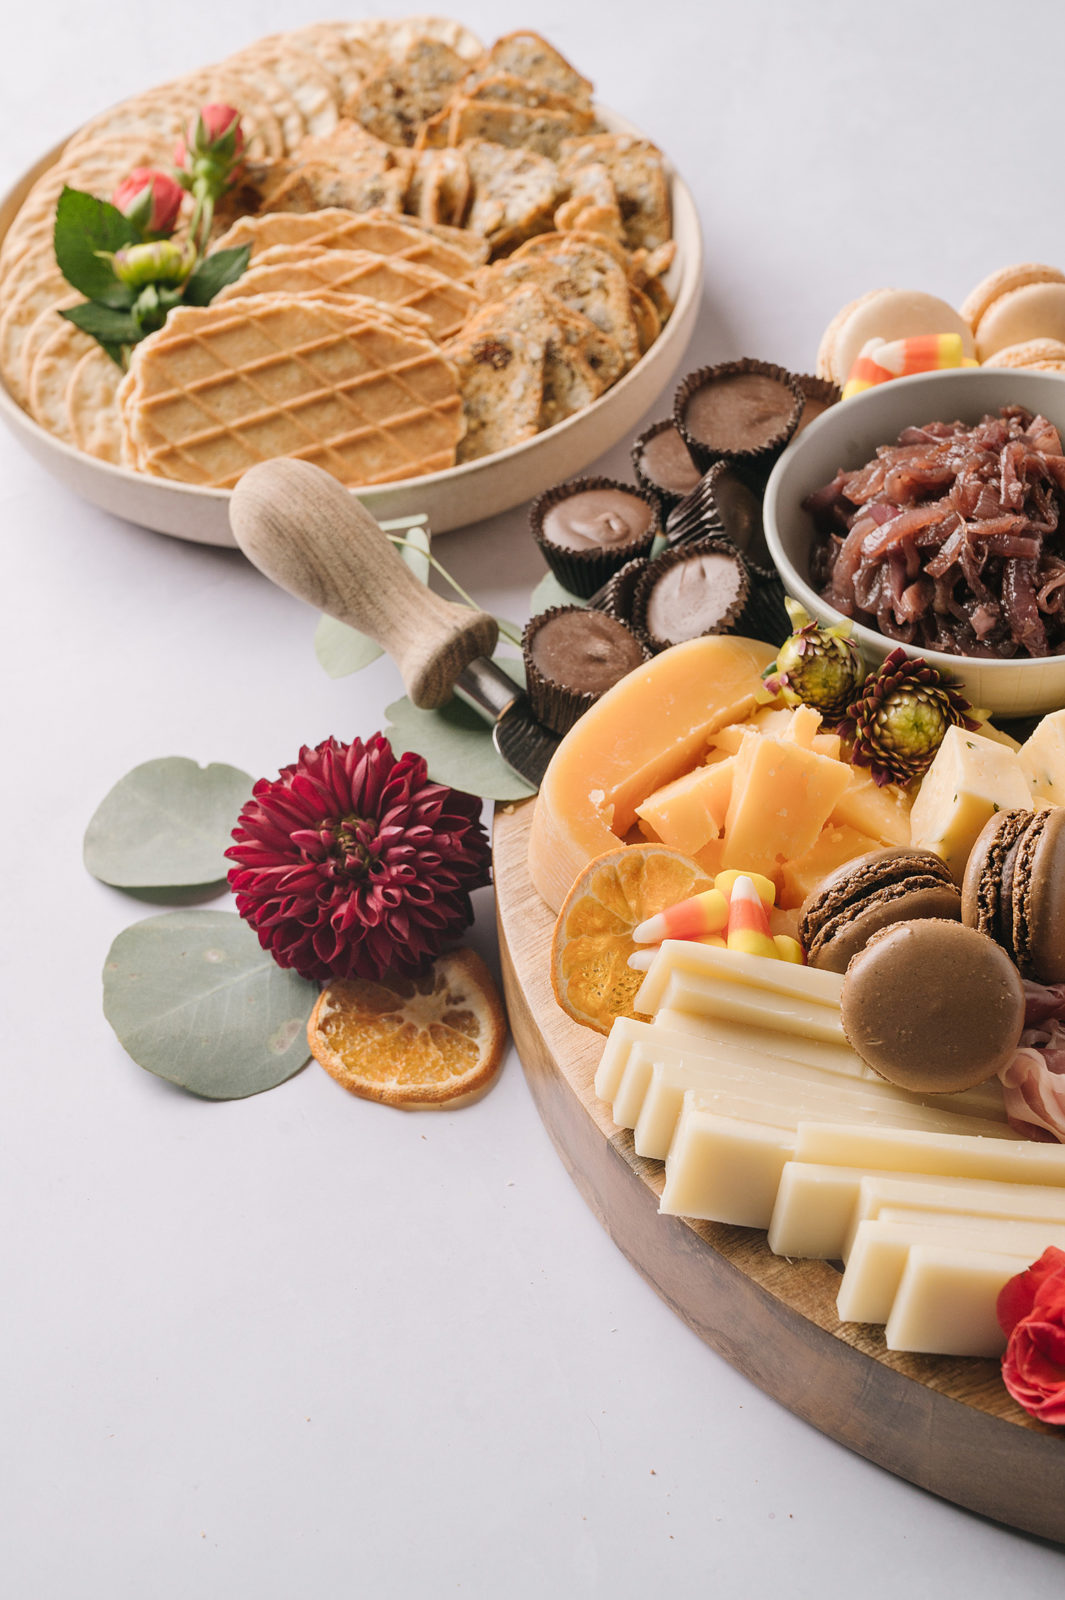
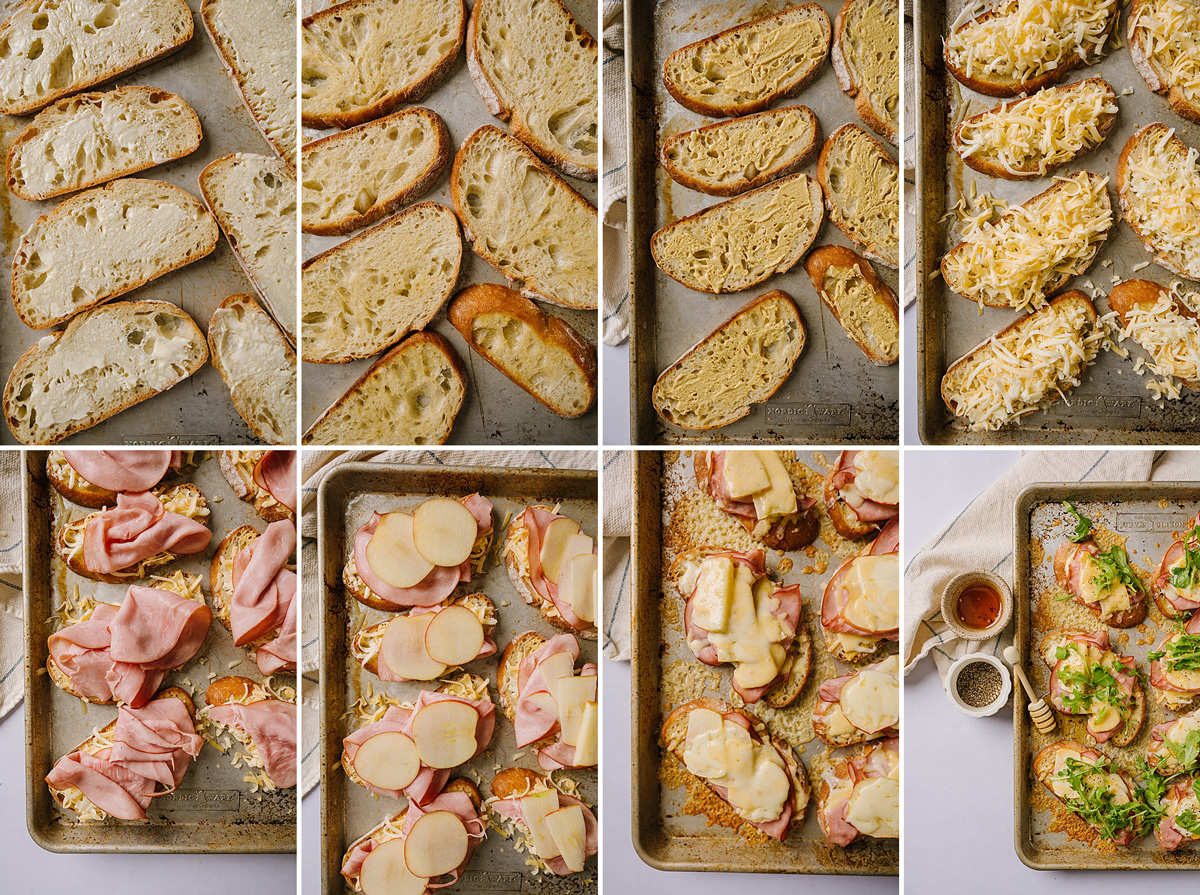
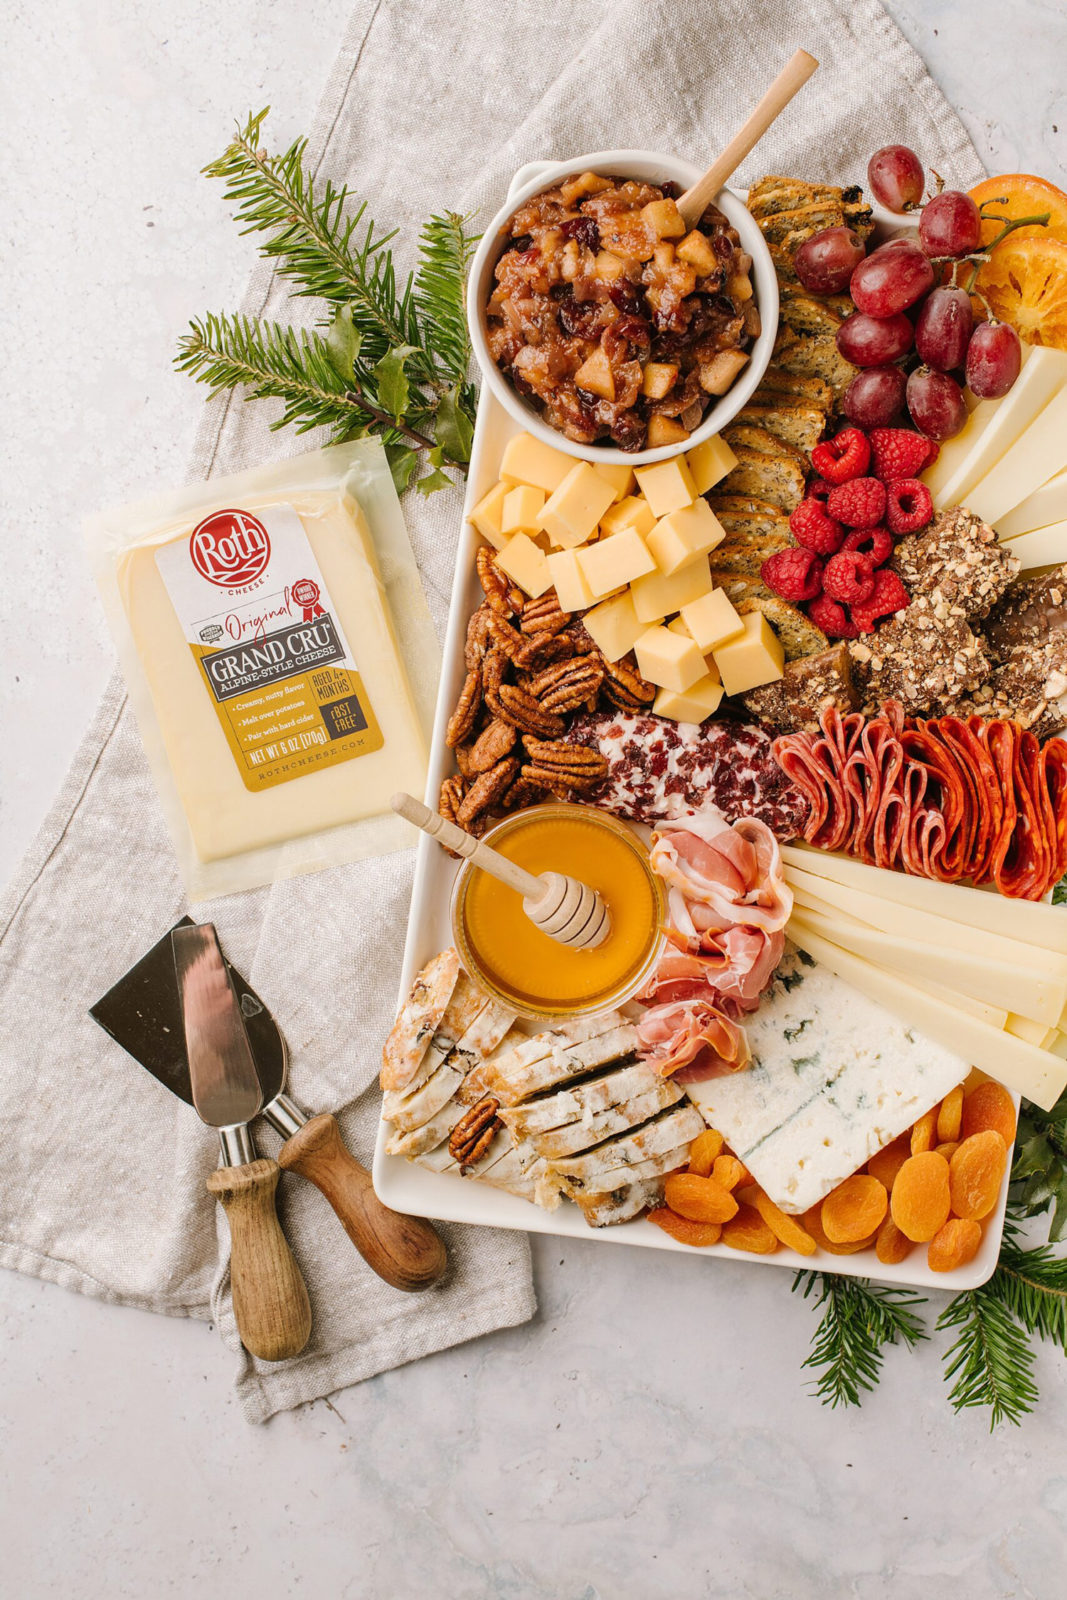
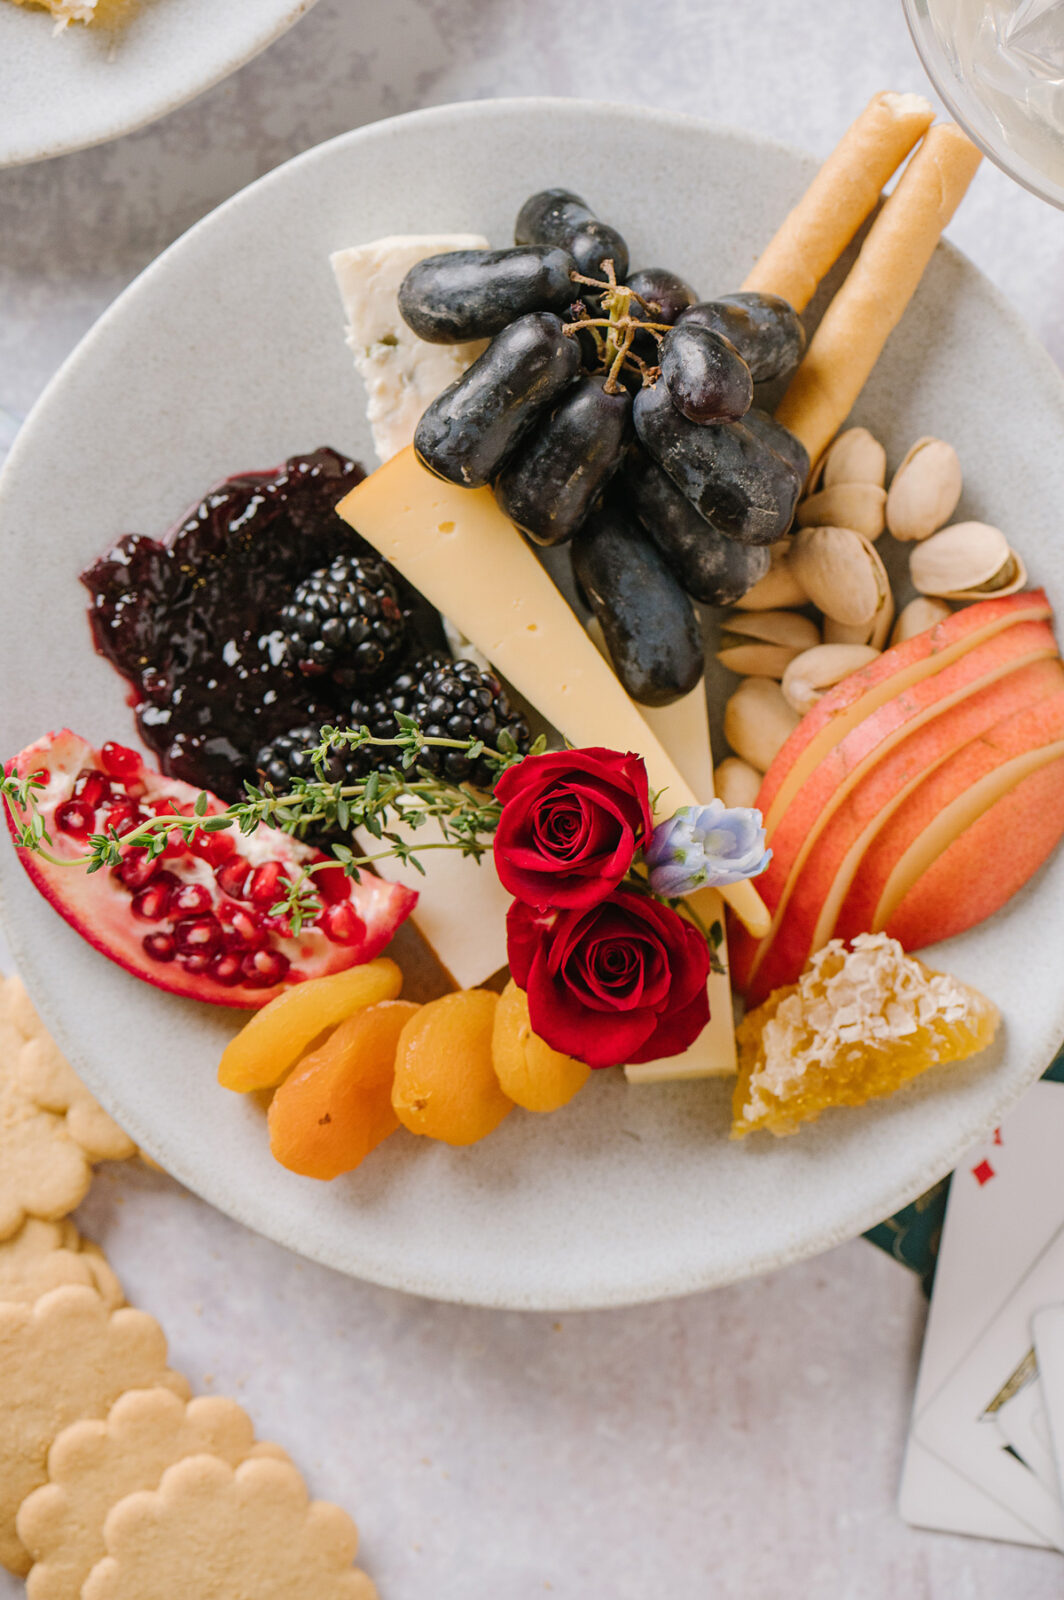
How to Make a New Year’s Eve Cheese Plate for Two //

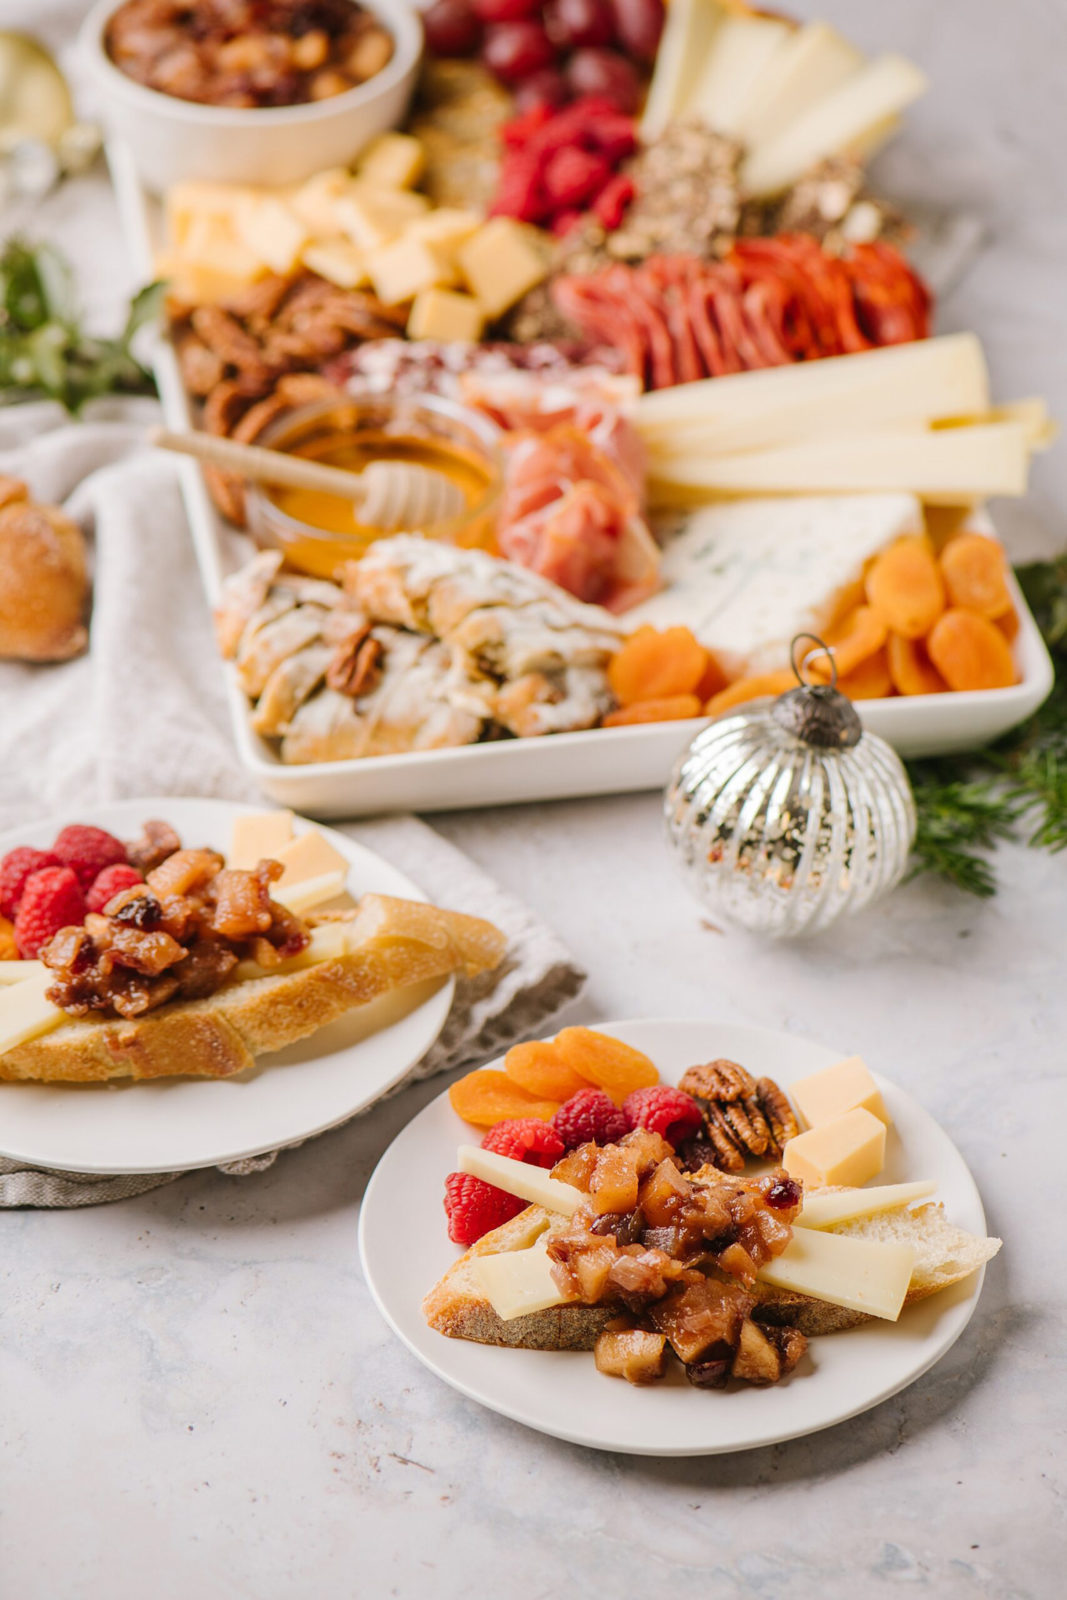
You can make one larger cheese plate, but I liked the idea of individual cheese plates. It made it feel special, but feel free to make one if you like. 

1. Grab two pretty plates. It’s a fancy celebration, so grab the china or special occasion dishes.
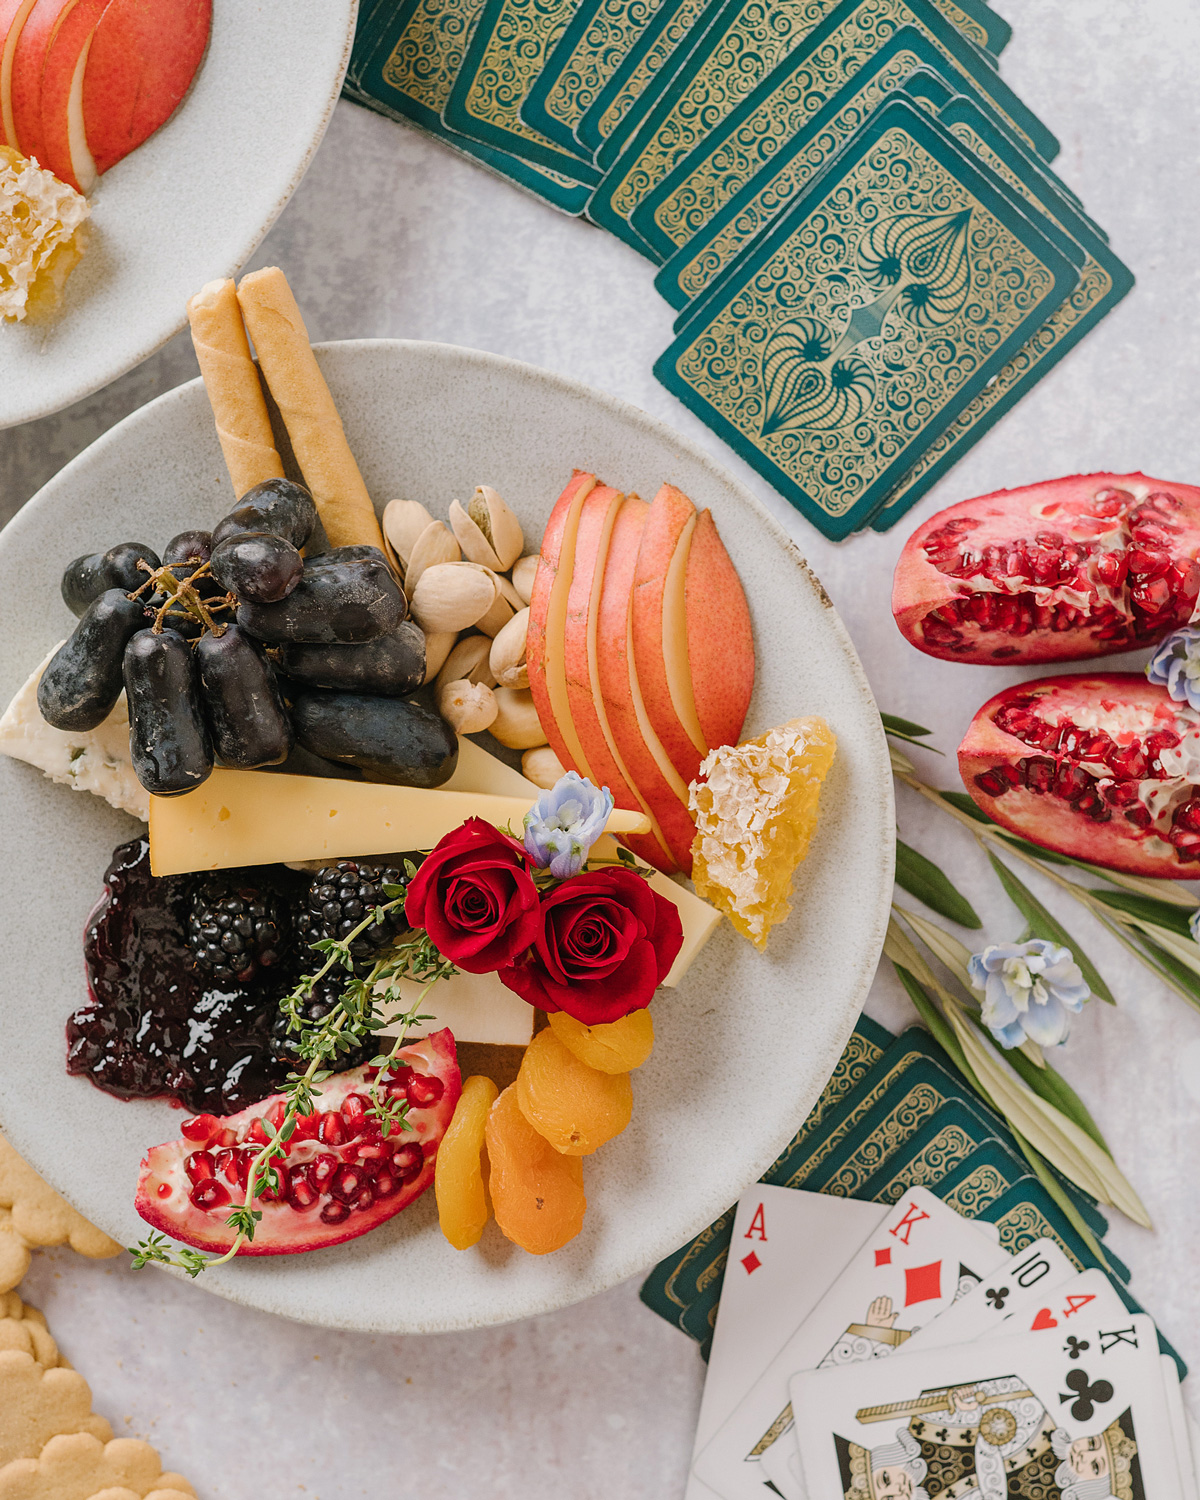
2. Arrange cheese. I really wanted this to be a beautiful presentation so I wanted this to look like a plated dish from a restaurant. 
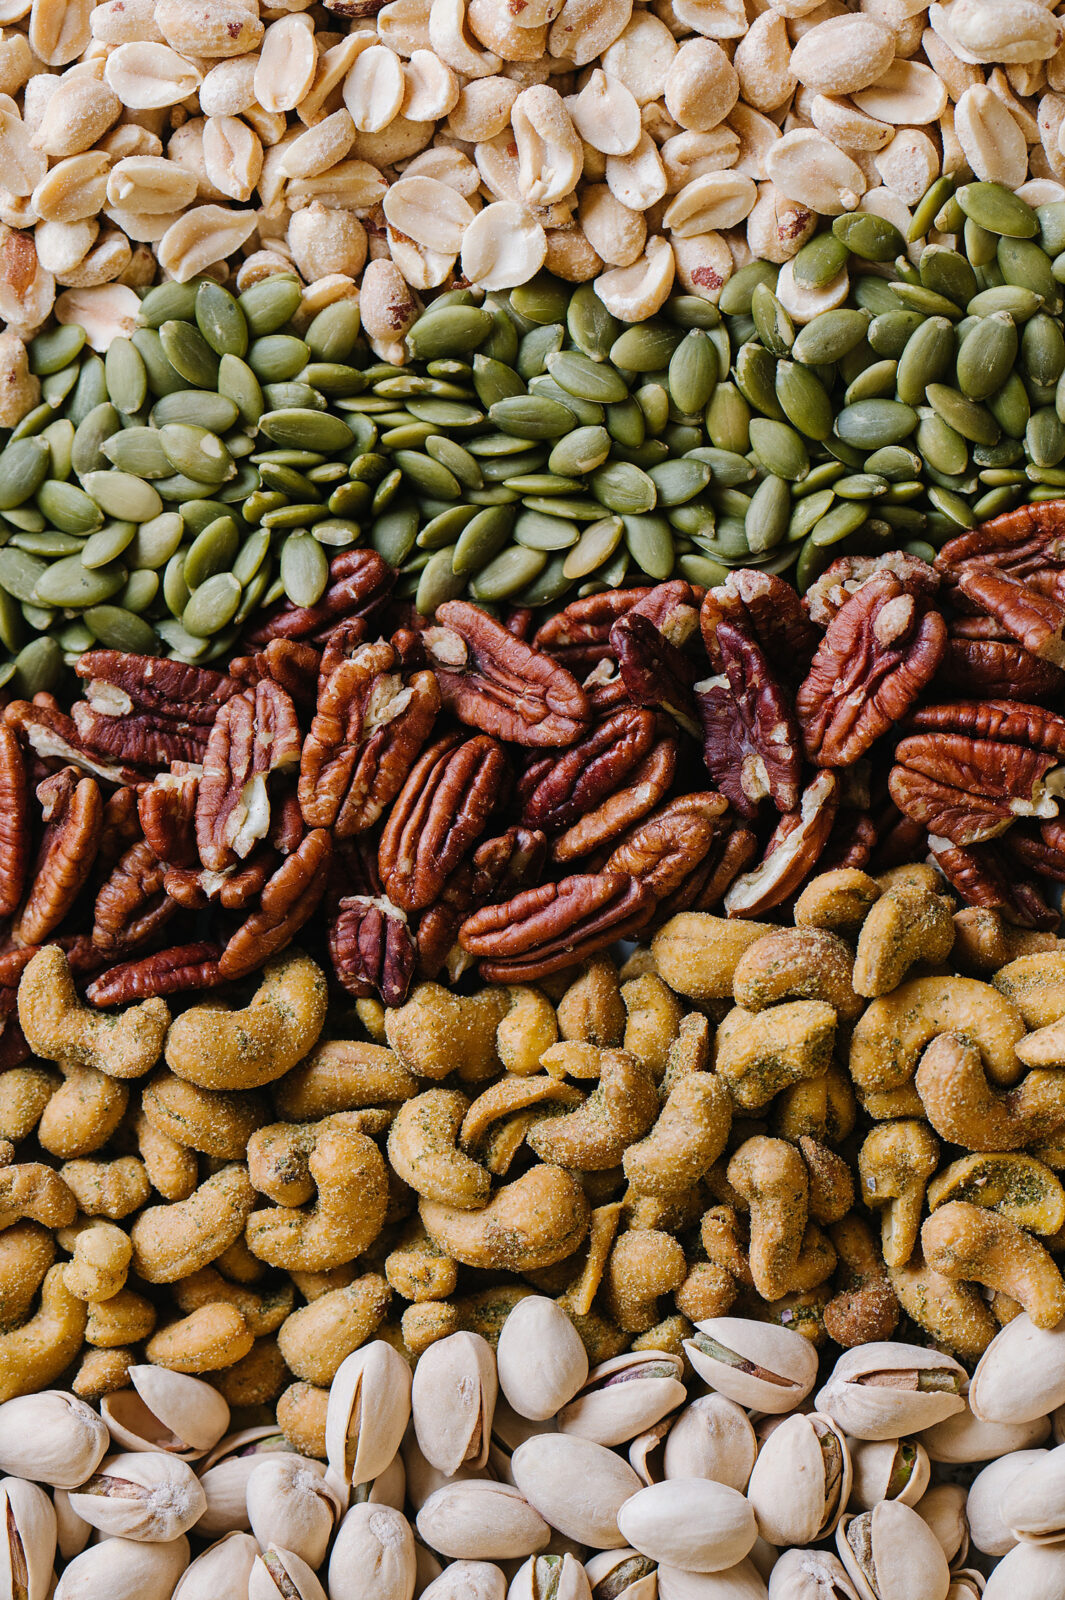
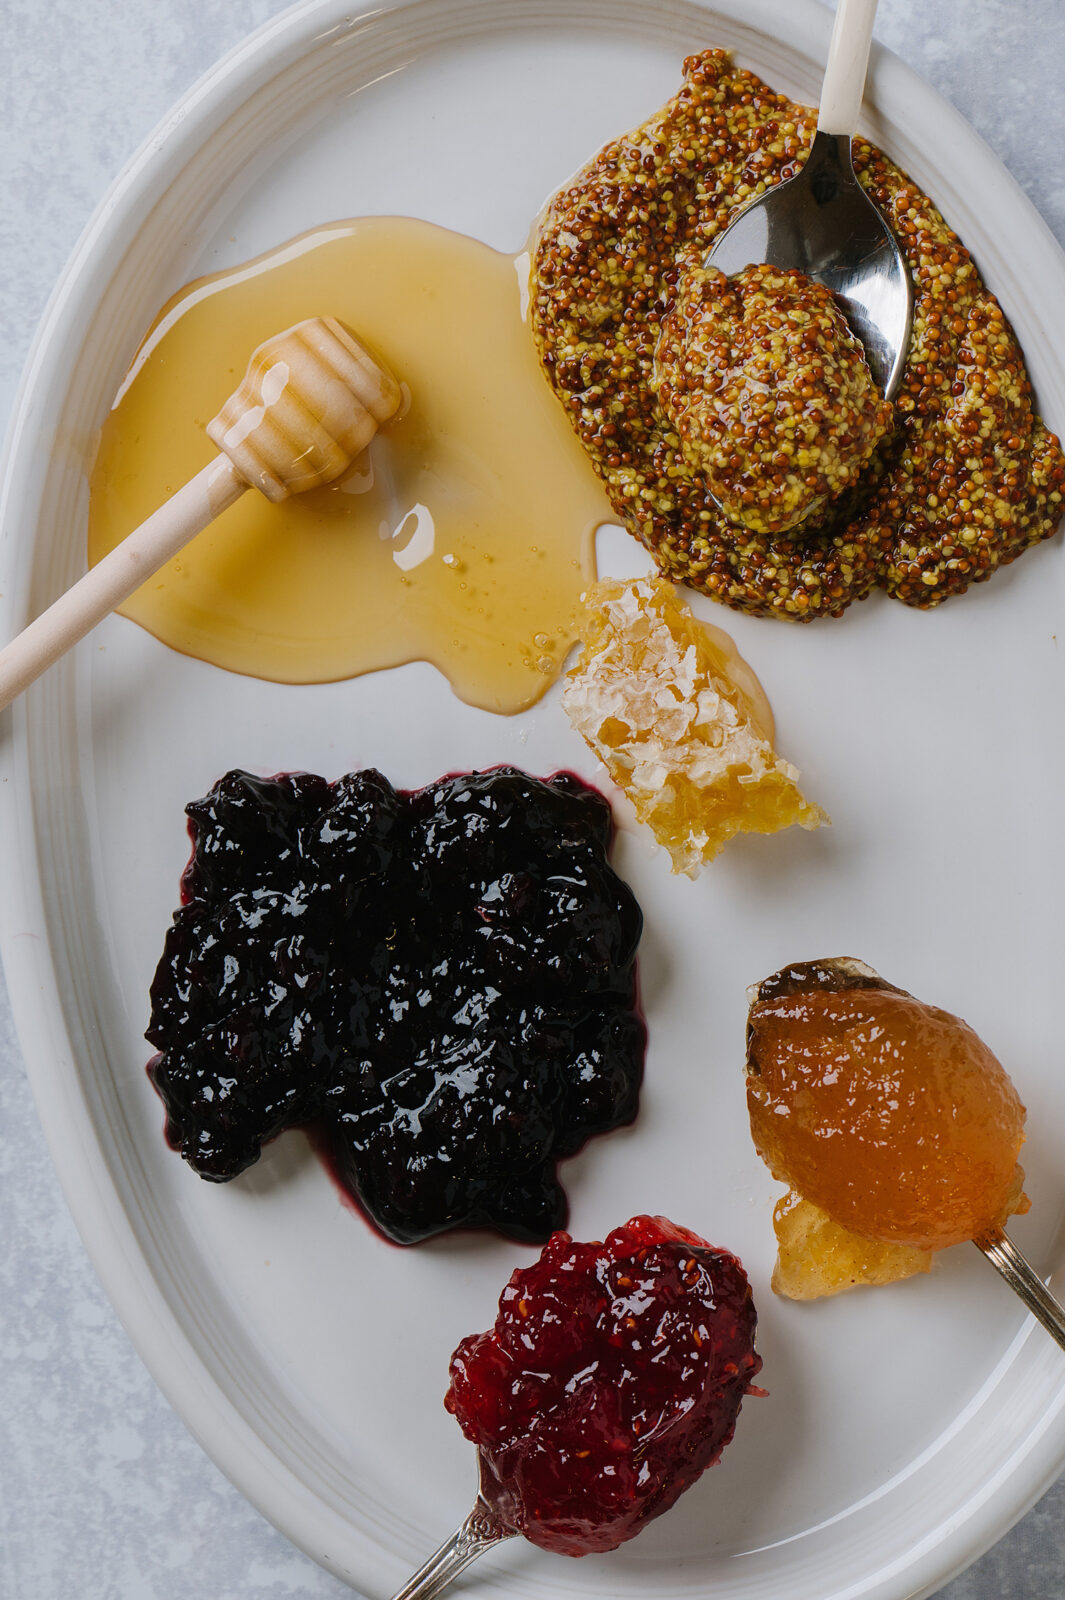
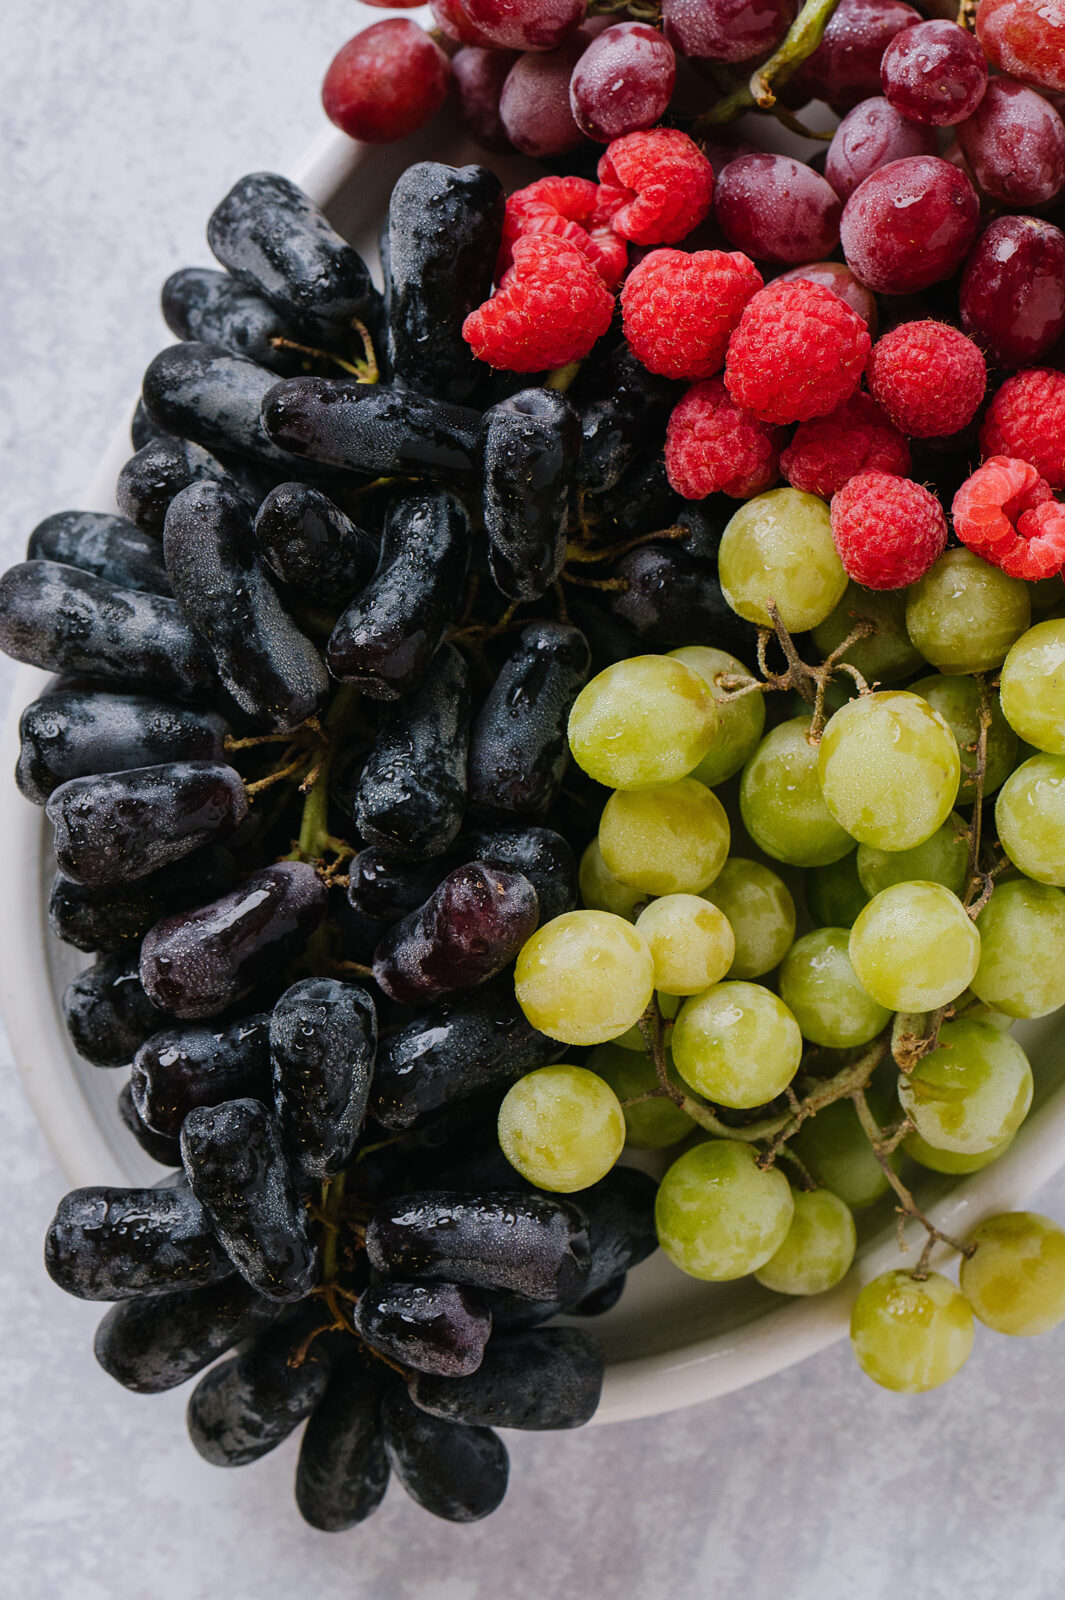
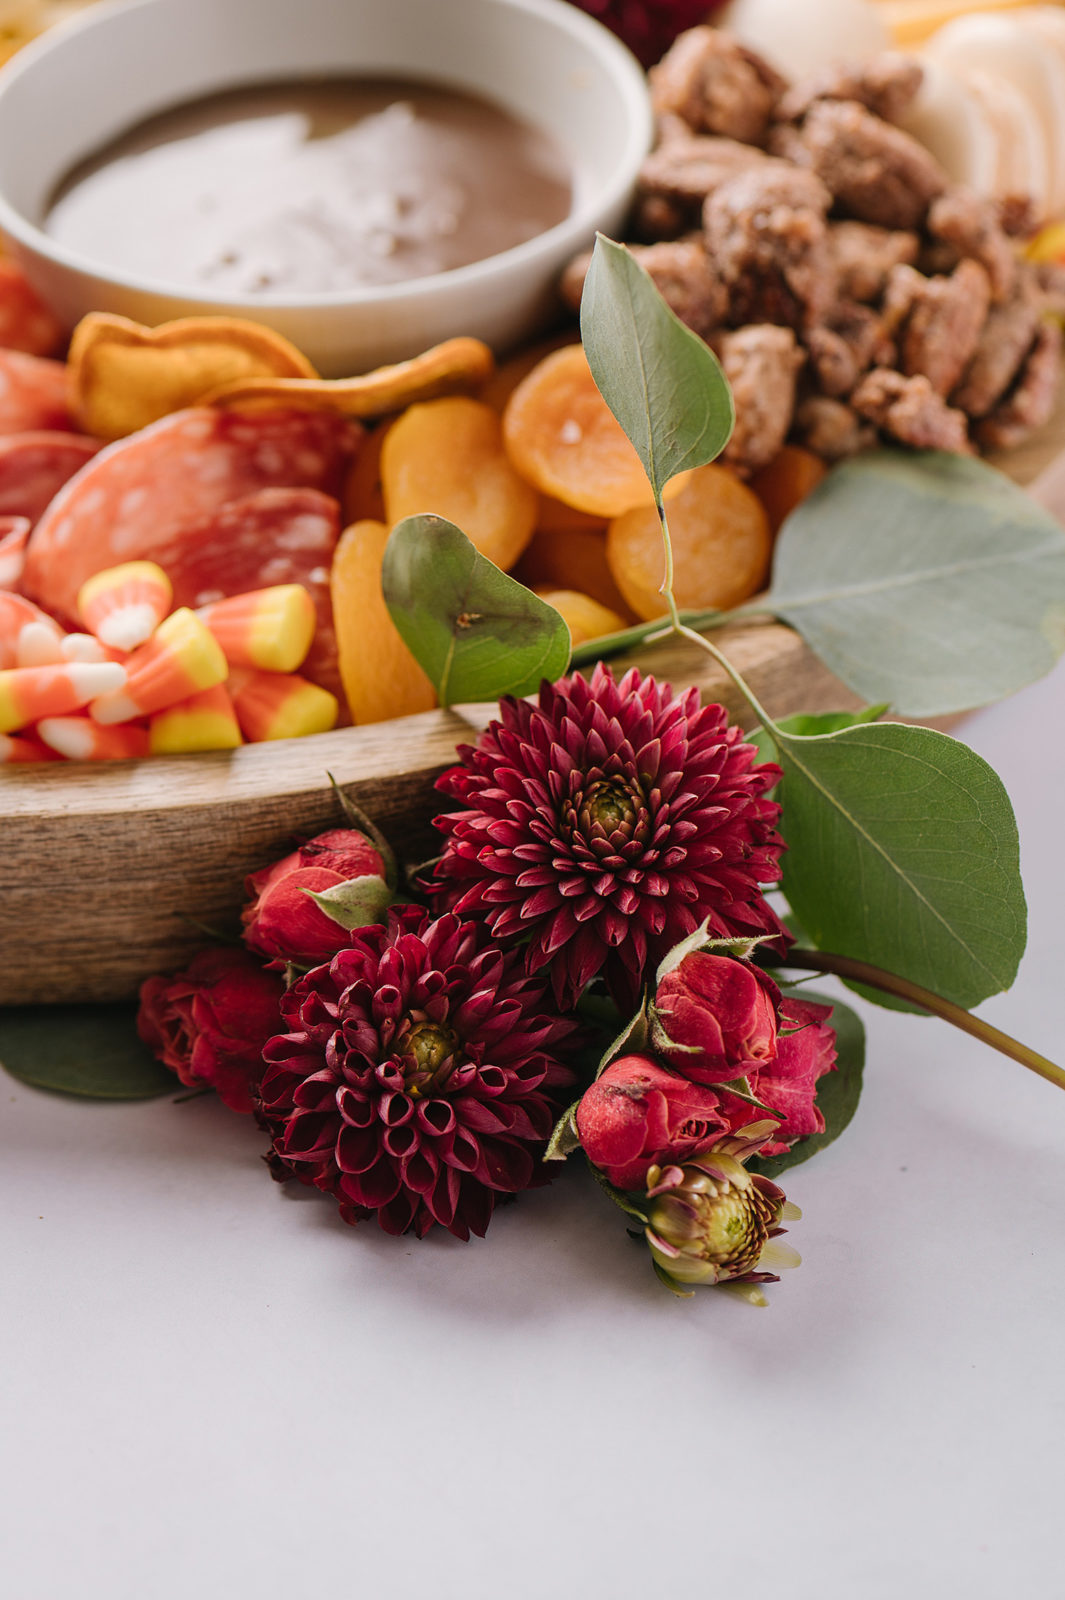
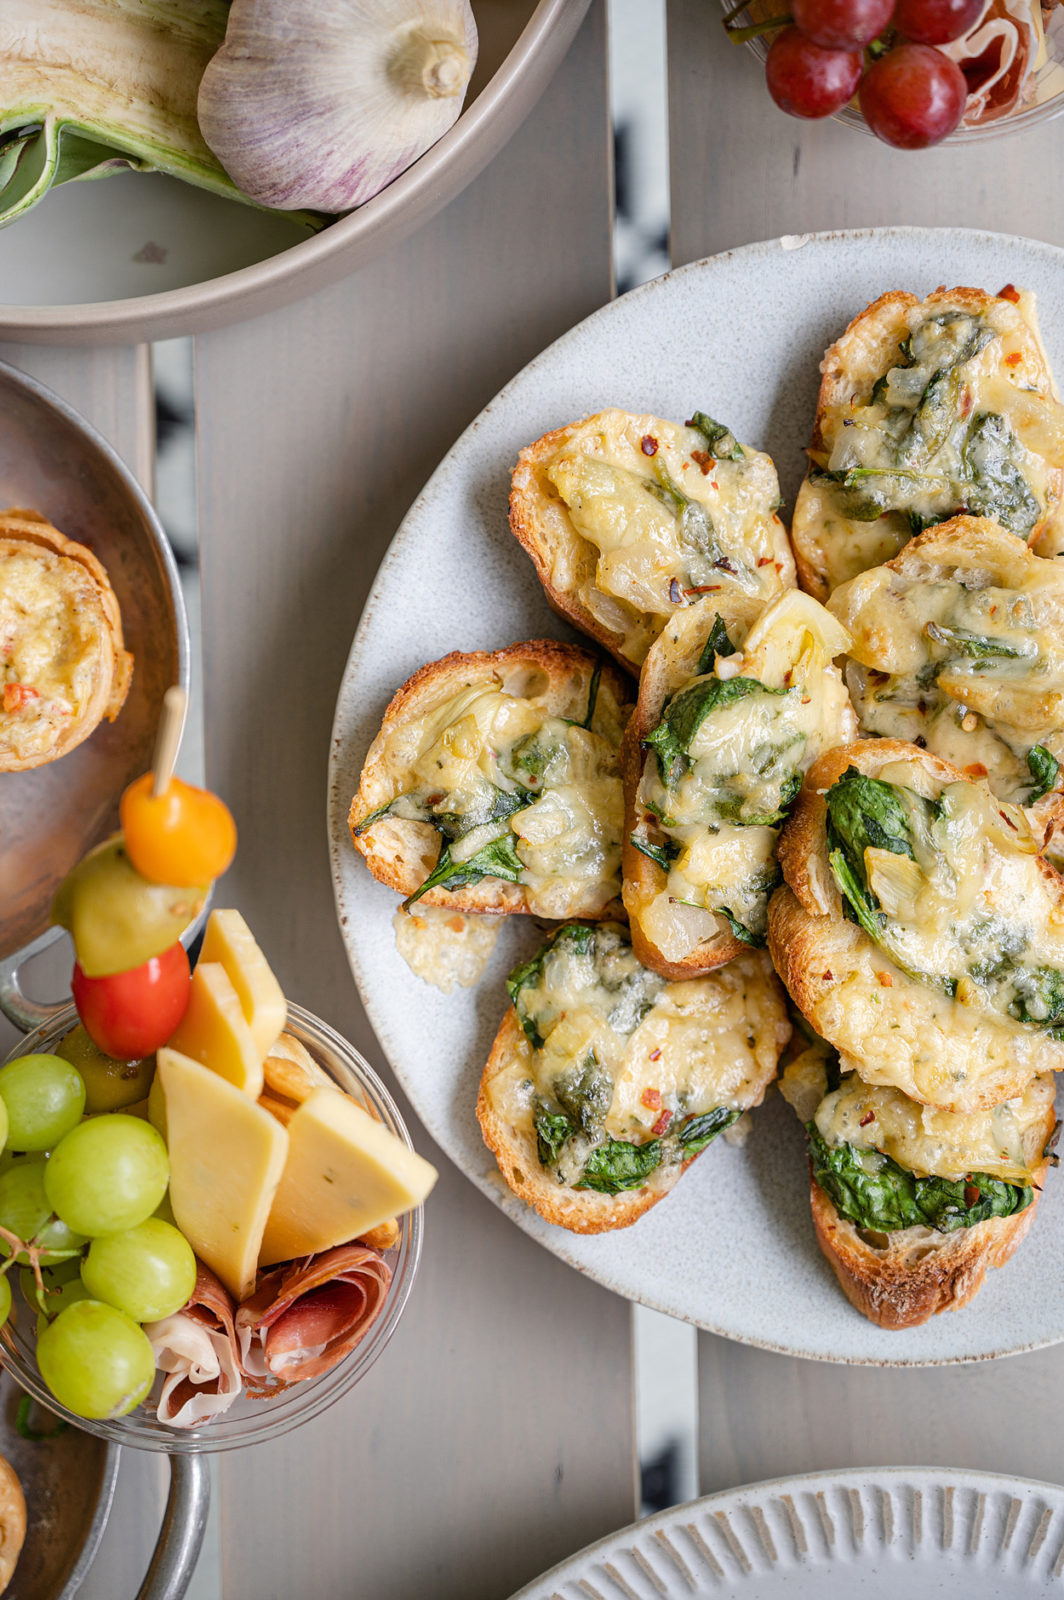
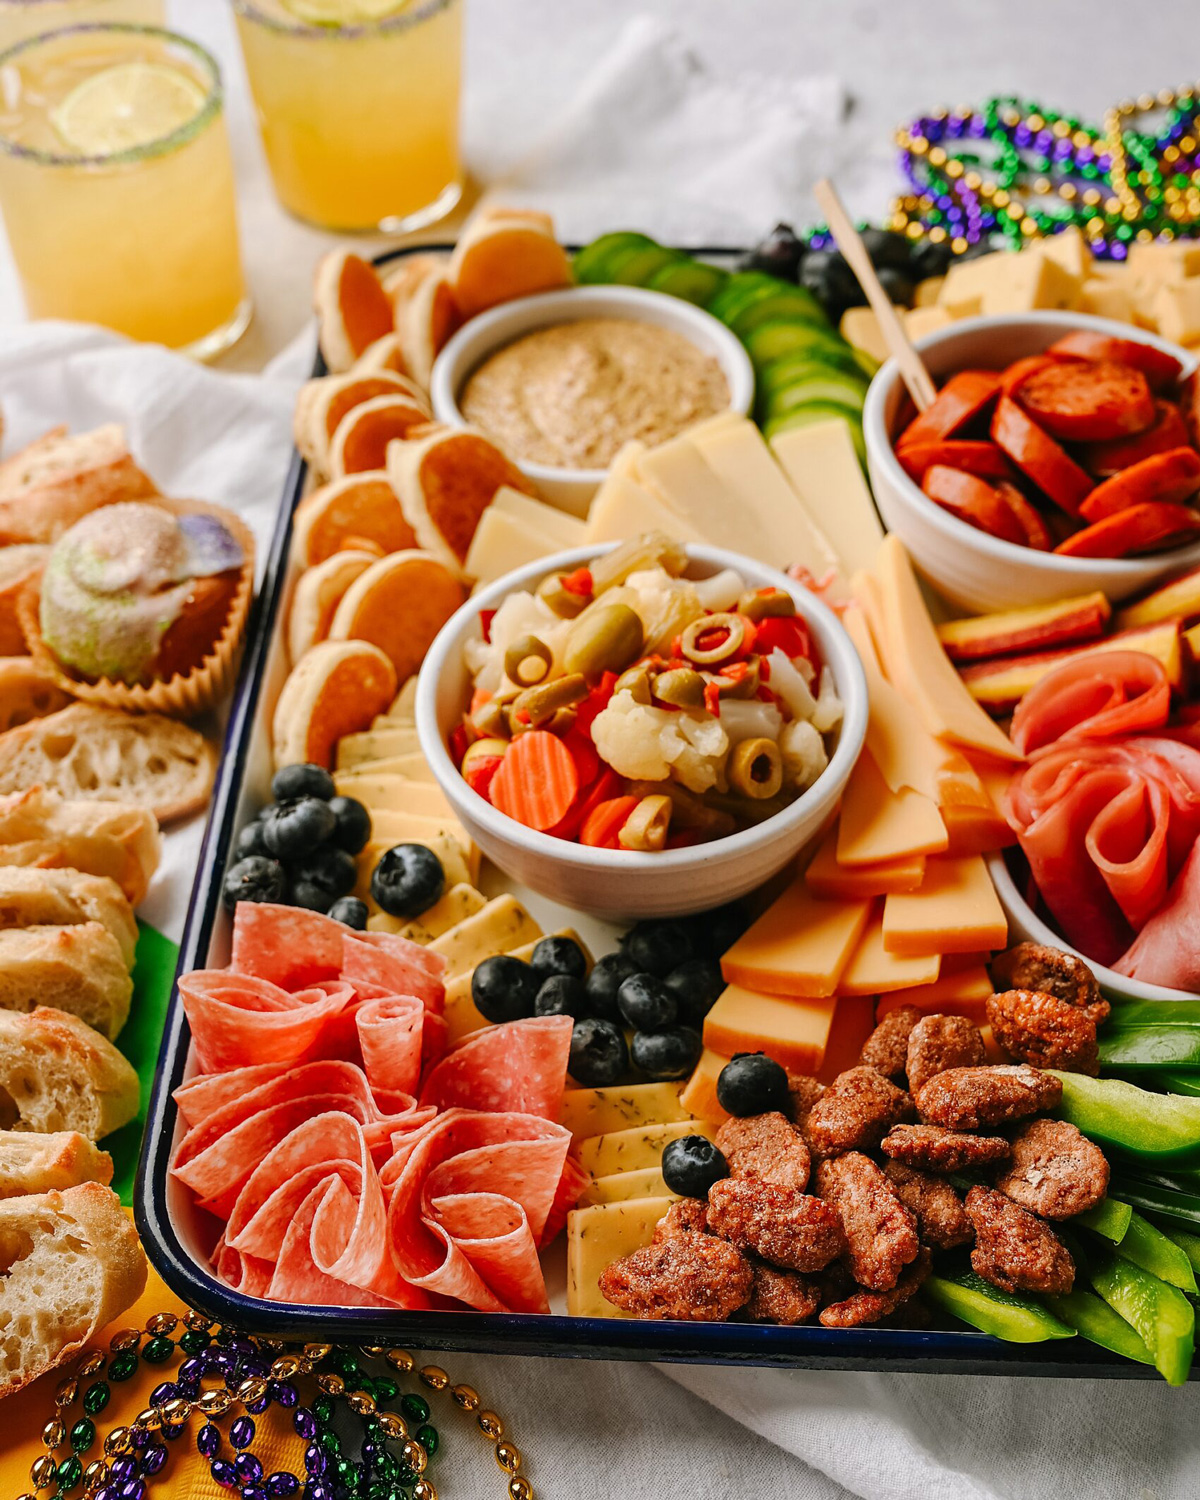
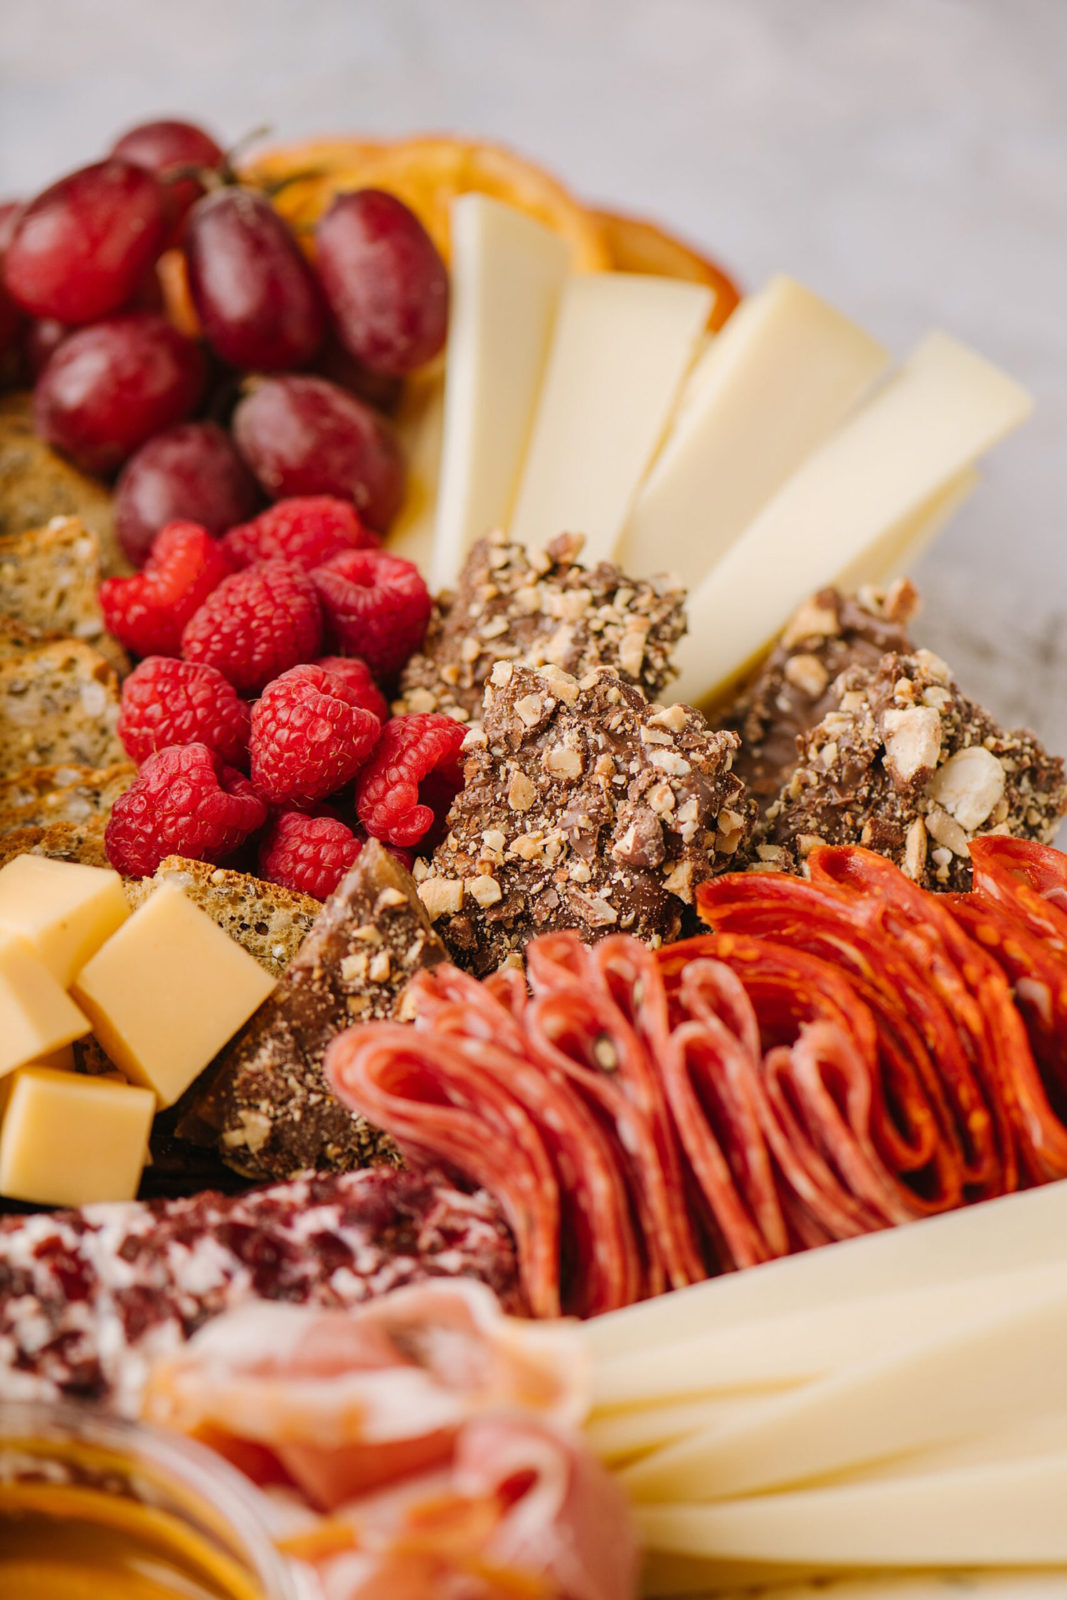
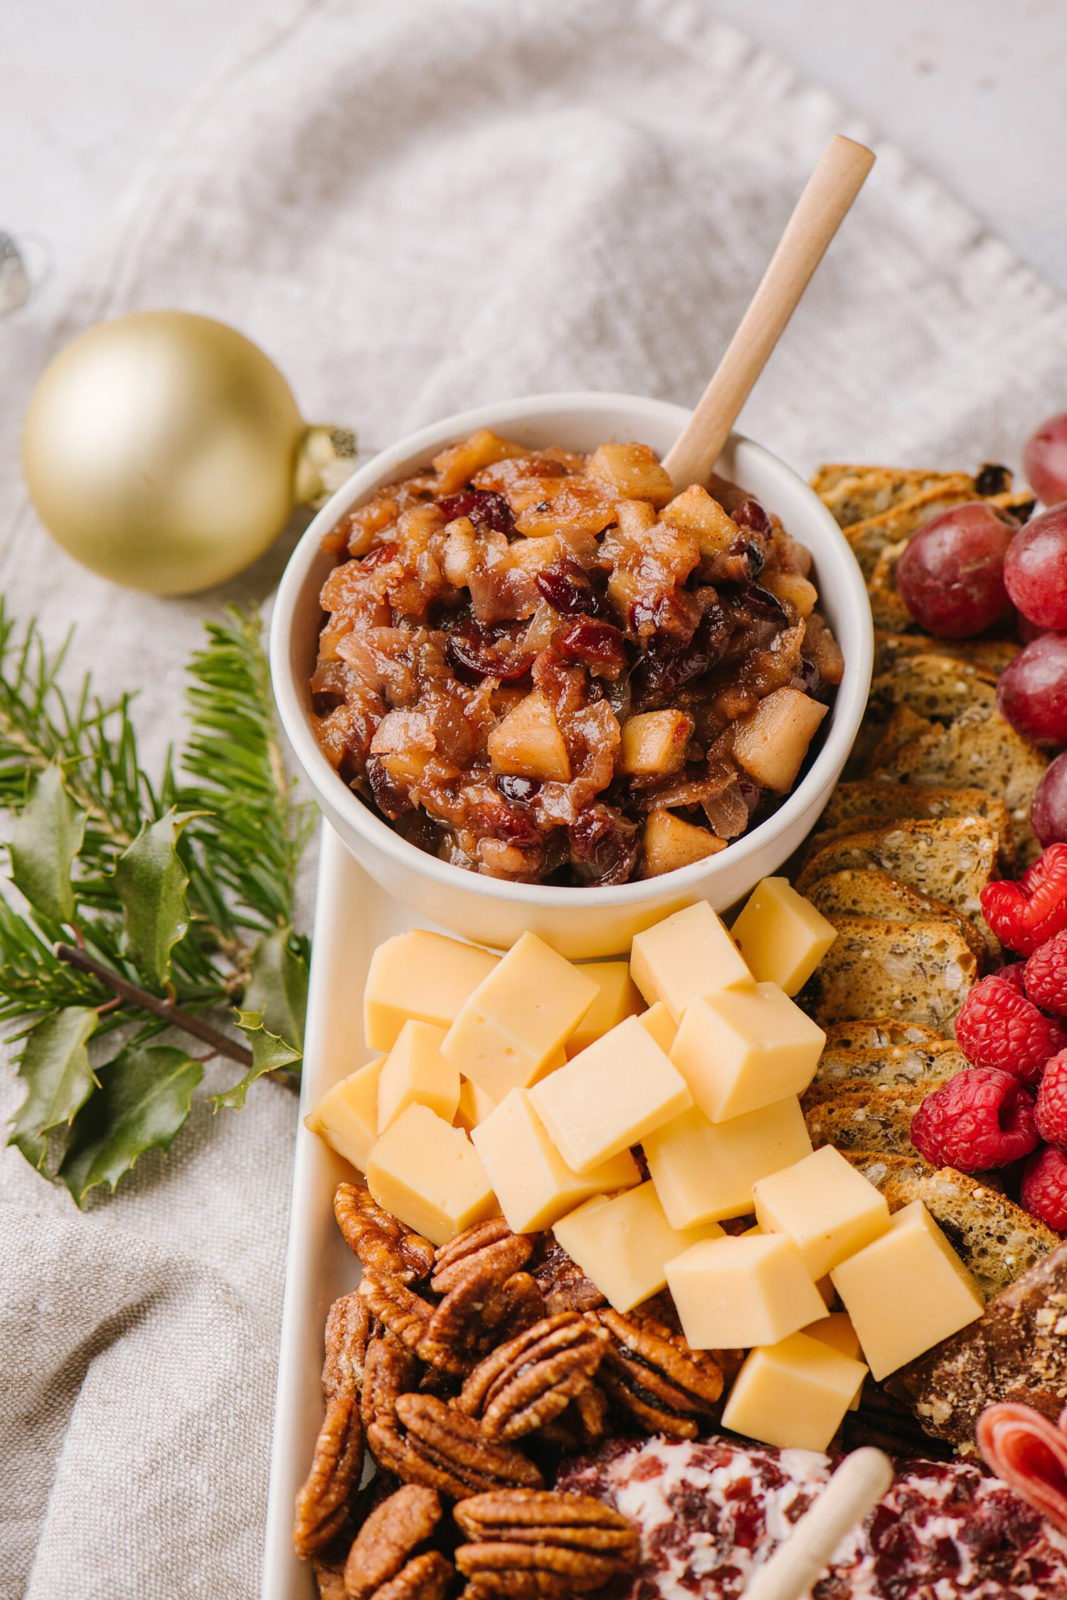
3. Fill in gaps with fruit, jam, and nuts. Apples and Grand Cru® are a natural pairing or Smoked Gouda and nuts. 
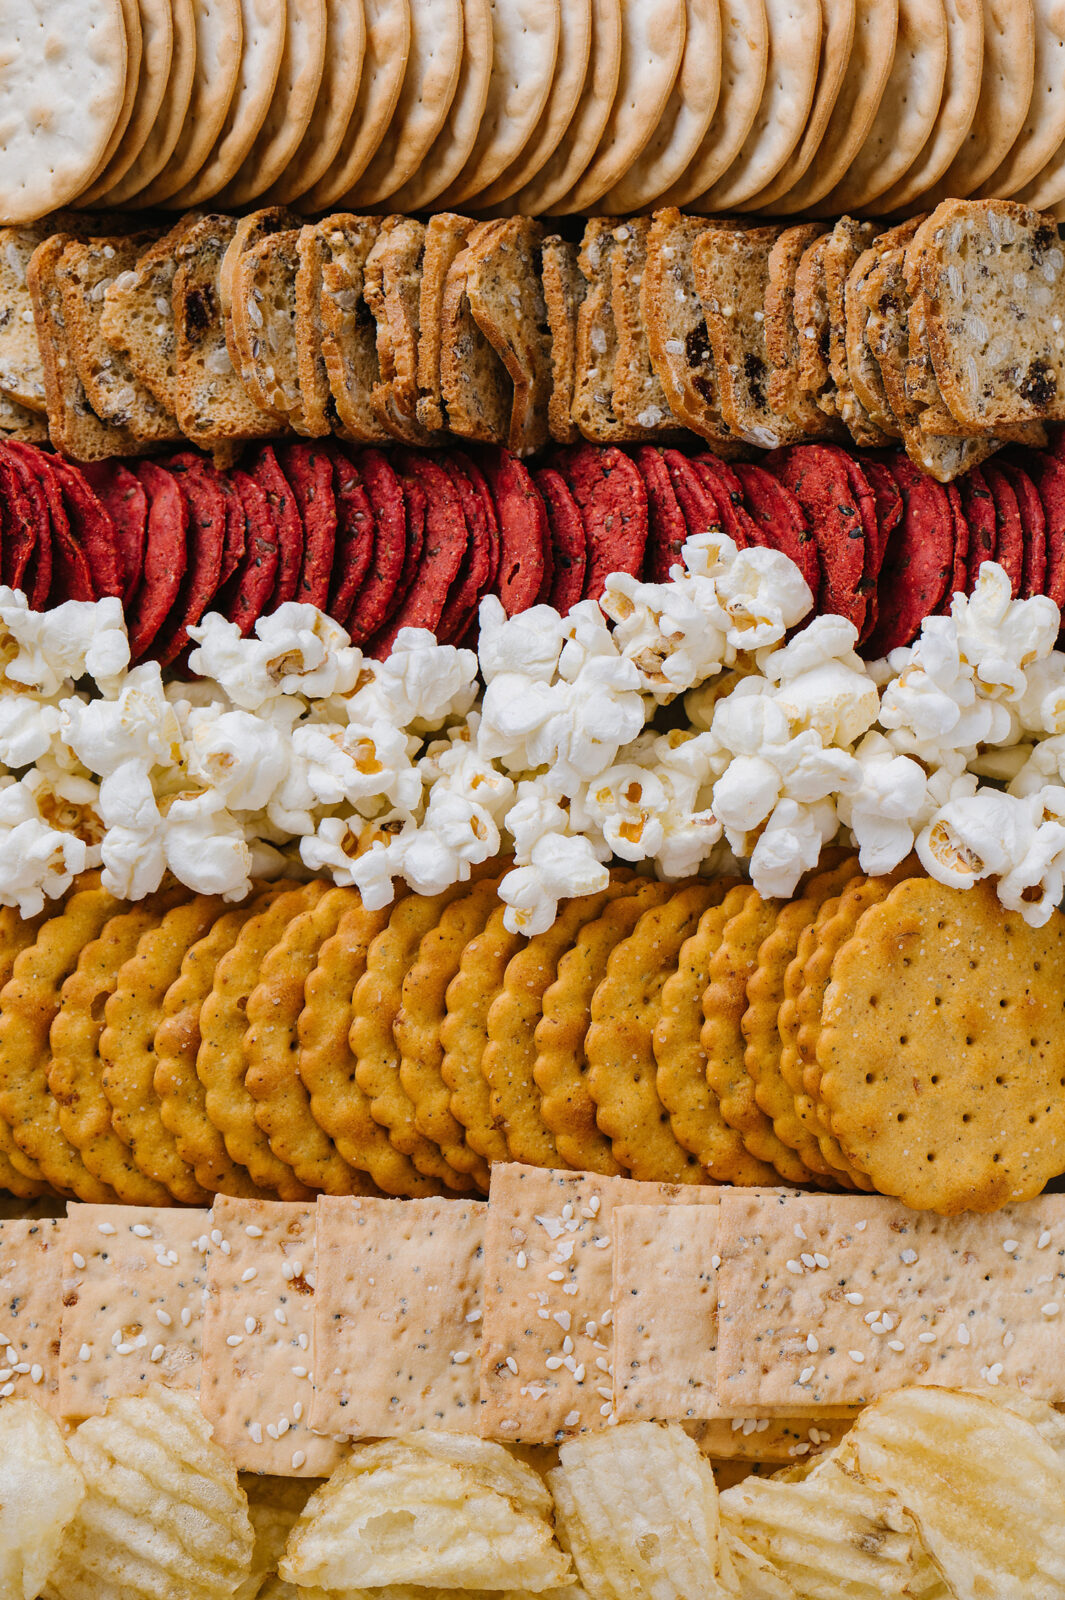
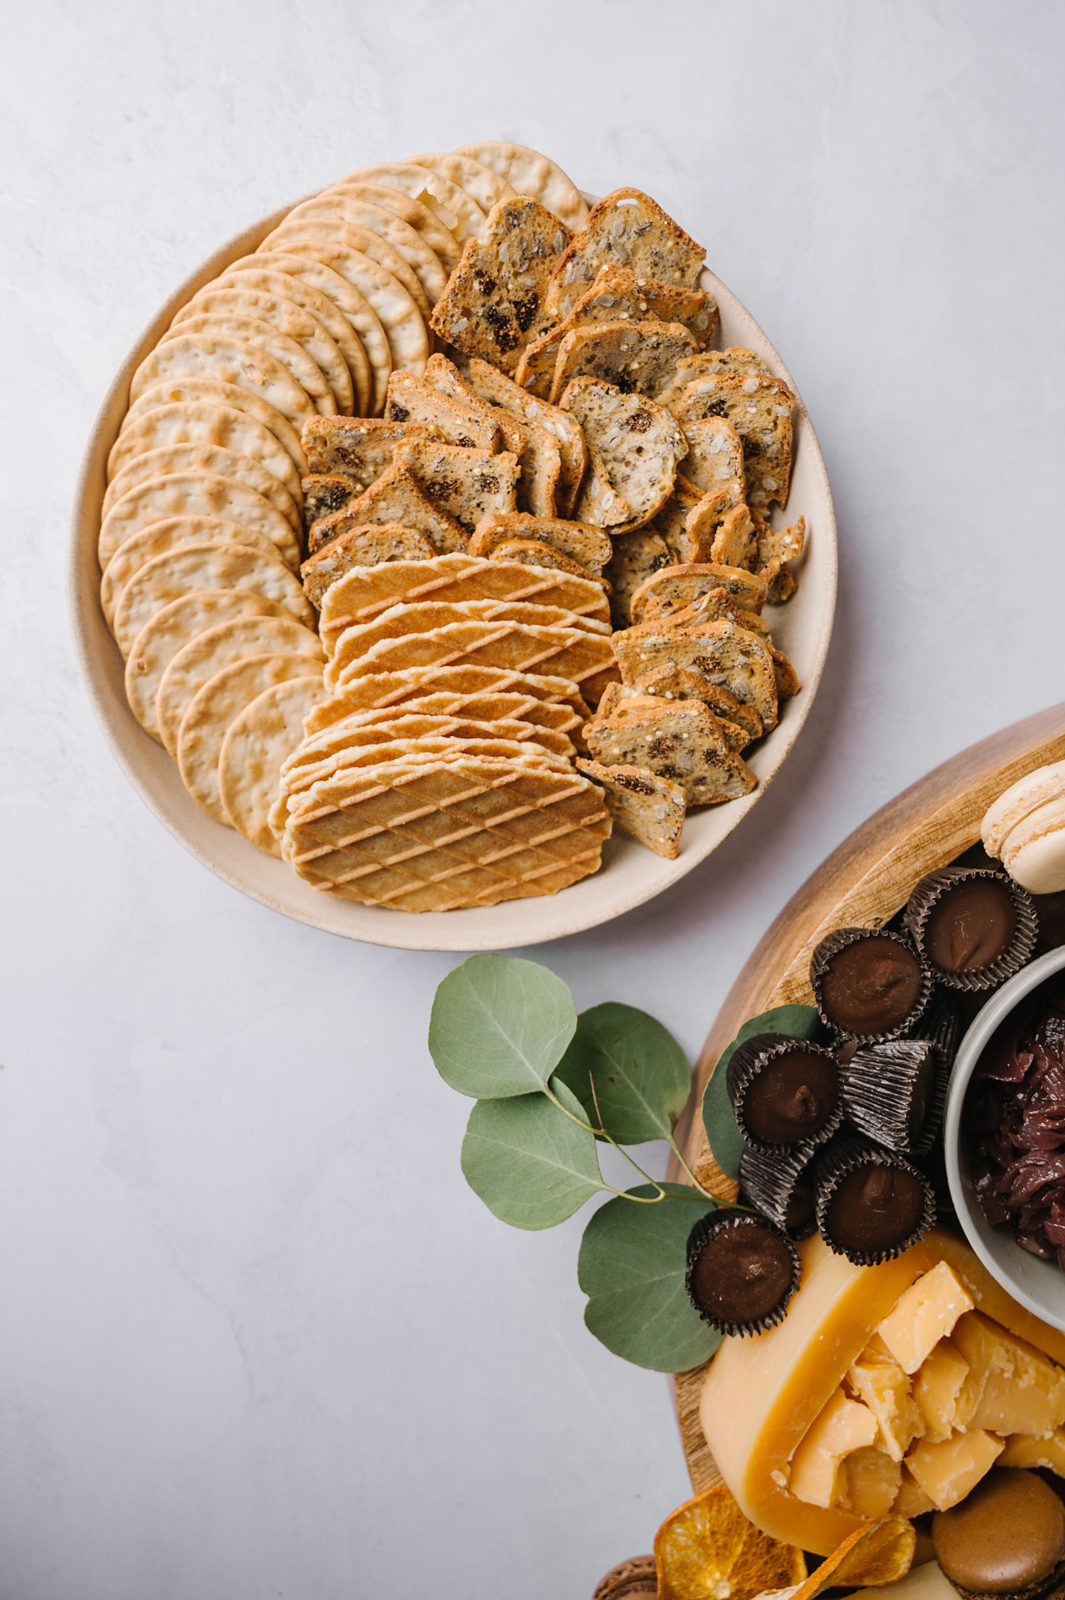
4. Slice a baguette and add crackers.
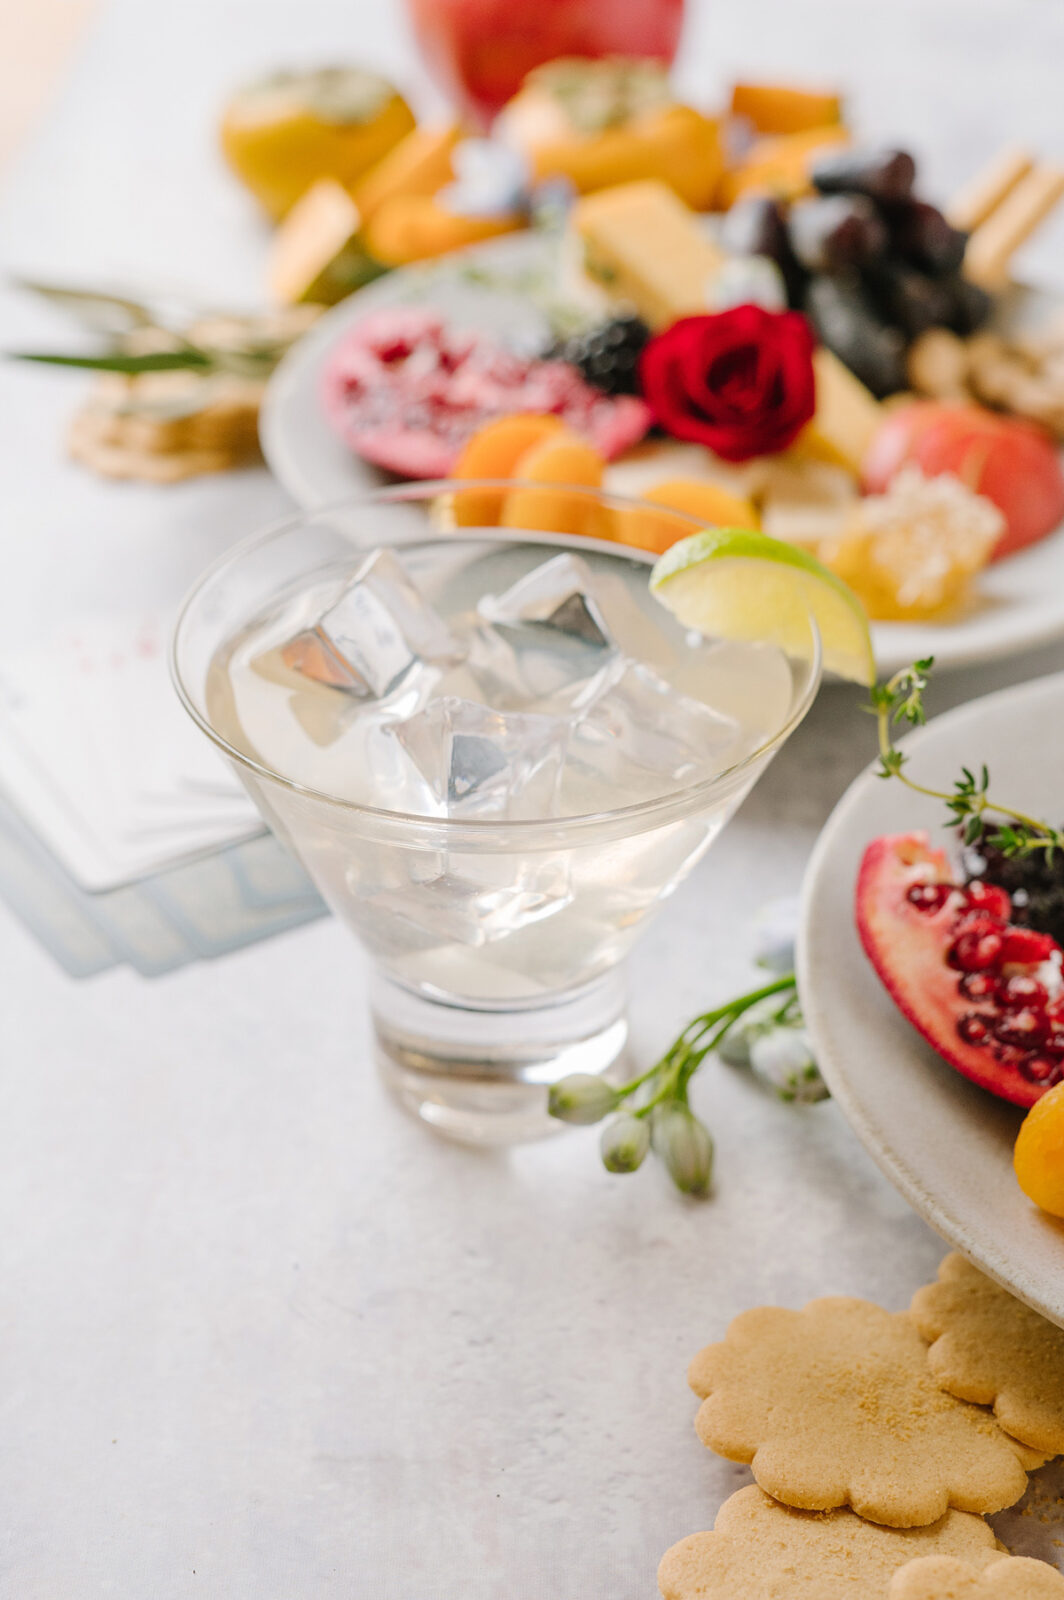
5. Serve with a pear martini.

How to Make a Pear Martini //

I feel so elegant when I am drinking a cocktail. It feels special and festive and indulgent, but it really is simple to make. You can purchase pear vodka from your favorite liquor store (or if you are in New England, your local packie) or make your own. 

DIRECTIONS:

1 ½ ounces pear flavored vodka
¼ cup pear juice*
Squeeze lime juice
Garnish with pear slices

*Can substitute apple if desired

Add pear-flavored vodka, pear juice, and lime juice to a shaker filled with ice. Shake well and strain into a glass. Pour into a martini glass or serve in a cocktail glass over ice. Garnish with pear slices.

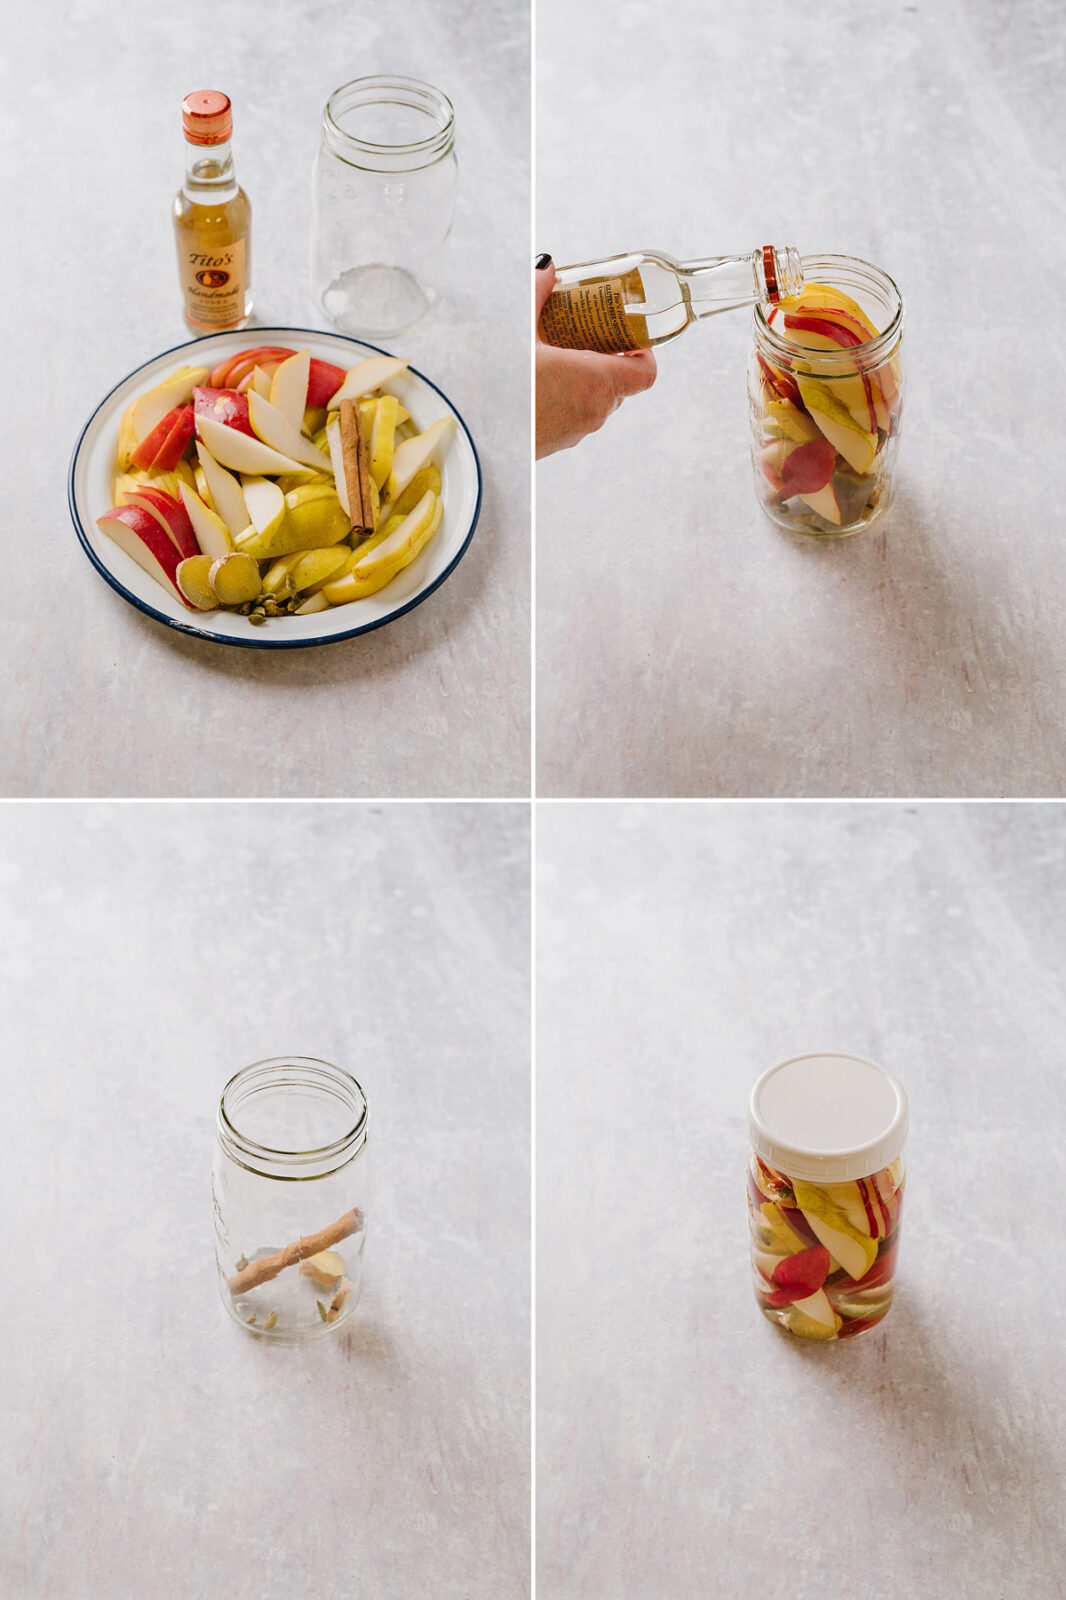
To make your own pear-flavored vodka, add a 750mL bottle of vodka to a large container with a tight-fitting lid. Add 5 sliced pears. Store in a dark place for 4 to 5 days. Remove the pears and enjoy.

Variations on a Pear Martini //

Use spiced pear vodka. To make a spiced pear vodka, add a few cinnamon sticks, crushed cardamom pods, and a slice of ginger. It will alter the color of your vodka, turning it brown, but it will still be delicious. 

In place of pear, feel free to use apple. Use plain vodka, make an apple vodka, or any vodka flavor you like, and replace pear juice with apple cider. 

New Year’s Eve Traditions and Ideas //

If you are spending the evening at home, it doesn’t mean that you can’t be fun and festive. You can plan some activities or start a new tradition. You don’t even need to stay until midnight unless you want to. 

Set an intention for the year. Take a few minutes and write down what you want the year to look like, feel like, and how to want to go through the new year.

Light a sparkler at midnight. Is there anything more festive than a sparkler? They don’t smell great, and you need to do this outside, but I really love lighting them on New Year’s. 

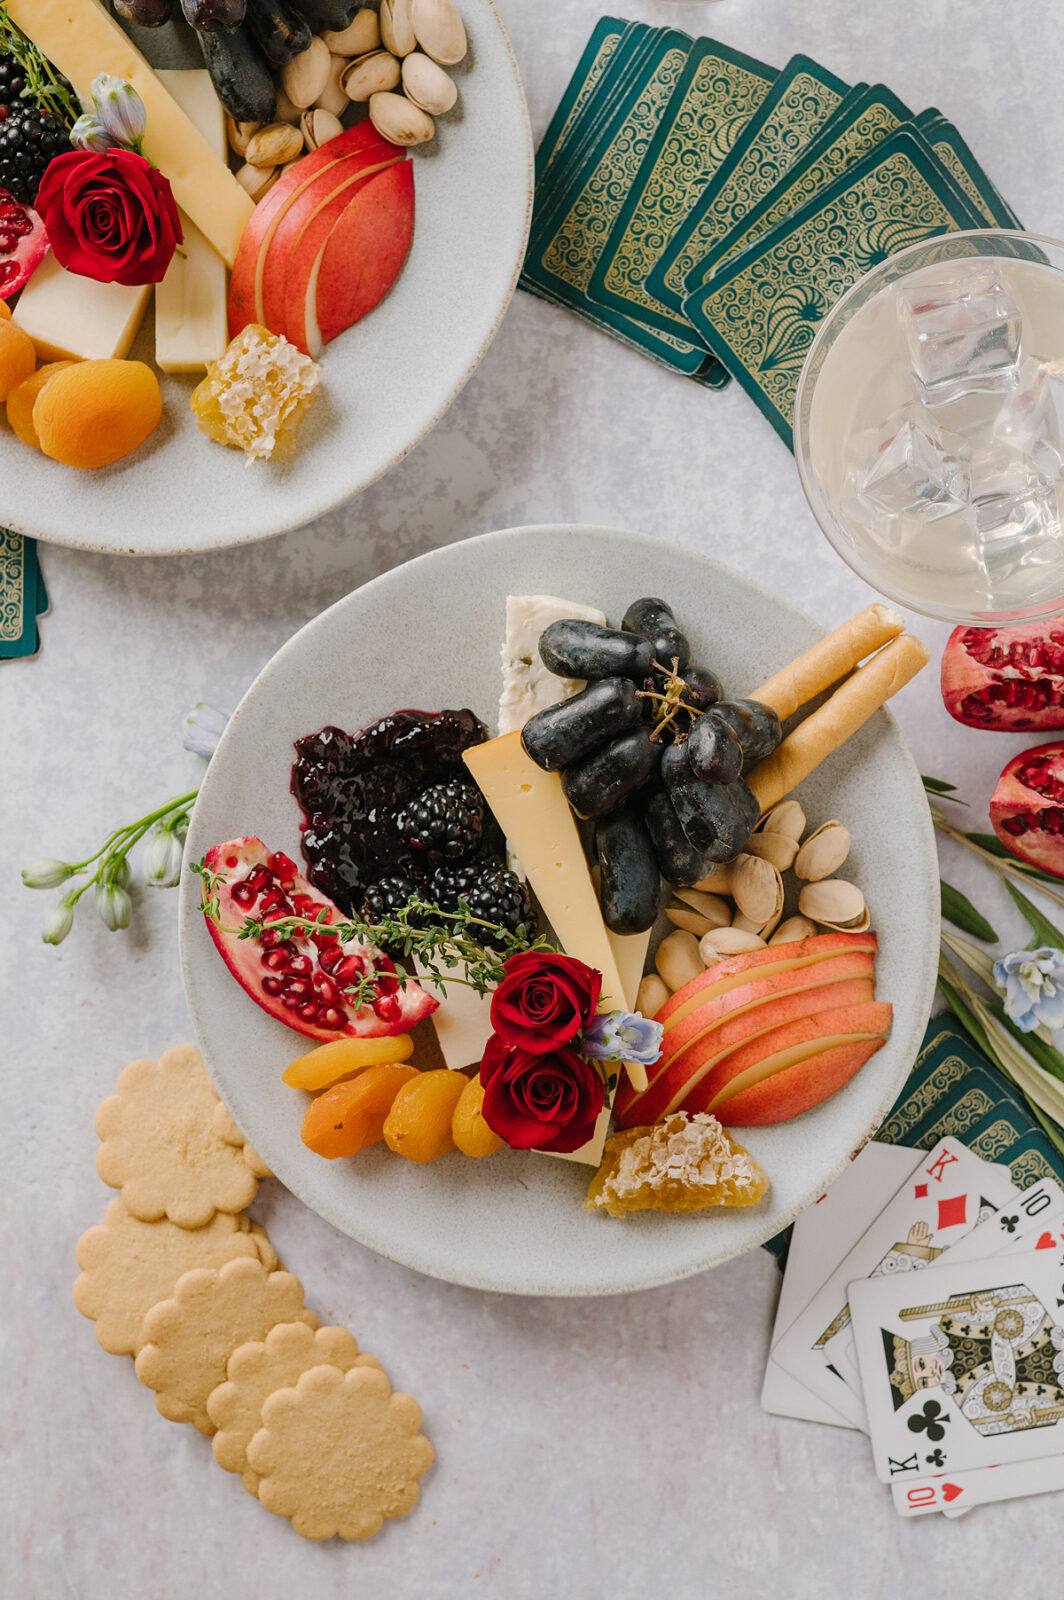
Play a board game or cards. My husband and I play Rummy 500 almost every night. We are very competitive and love connecting and talking about our day over a deck of cards. Yahtzee, Scrabble, Battleship, or Chess.

Buy a deck of conversation starters. Table Topics is a great one with so many different topics to choose from. I’ve learned so much this year about my husband of almost 20 years doing this. And I thought I knew everything about him already! 

Make something. Paint, draw, do a craft. It sounds cheesy, but buy a kit for both of you. Tap into your creativity and use your hands. 

Start a bucket list. Each person lists a few things they want to do in their lifetime. 

Look through your photo album and reminisce over the past year. Even better, print them out or make a photo album. There are lots of great apps and services that make it easy to do right from your phone. 

In Spain, everyone eats 12 grapes at the stroke of midnight. It is said to protect you from evil spirits and happiness and prosperity in the new year. Make sure to put some grapes on your cheese plate.

Whatever you decide to do, I hope that you have a safe and happy New Year.


Follow Bree on her blogFacebookInstagram and Pinterest!

How to Build A Holiday Pantry Cheeseboard

By: Bree Hester

How to Build A Holiday Pantry Cheeseboard! Create a showstopping holiday cheeseboard with delicious Roth cheeses by shopping your pantry. We’ll show you what to buy to have a beautiful and balanced board in no time.

How to Build a Holiday Pantry Cheeseboard

I can make different appetizers with puff pastry and dips, and spend ages making unique things to nibble on, but everyone gravitates to the cheeseboard. (I’m not hating on things in puff pastry or a dip – there is a time and place for sure.) Maybe it’s because a cheeseboard just looks so welcoming and inviting?

These days, I often skip making traditional appetizers and only serve a cheeseboard or grazing table. Especially during the busy holiday season, who has time for anything else?

A secret about a holiday cheeseboard is that it takes very little effort on your part. Having a well-stocked holiday pantry makes it easy to create a gorgeous board like this one in no time. It doesn’t take a lot to make a board seem abundant, overflowing, interesting, and seasonal. Just some strategic shopping and you are good to go!

How to Build a Holiday Pantry Cheeseboard

What Kind of Cheese Do I Put on a Holiday Cheeseboard? //

If you have been to a cheese shop or grocery store lately, then you know there are many incredible cheeses to choose from. I think it can be overwhelming, especially if you are new to cooking and entertaining. There are often HUNDREDS of varieties in the cheese case. 

There are no hard and fast rules for choosing cheese for a board. Anything goes really, but what I think works best is a variety of flavors and textures. I tend to make sure I have something for everyone on each board I create.

How to Build a Holiday Pantry Cheeseboard

My biggest piece of advice is to put cheeses that you like to eat on the board. If you don’t know what you like, try a new cheese each time you go to the grocery store. Bring home a small portion and see what you like about it. Is it creamy? Is it hard or soft? Do you love Chèvre? Do you love Aged Gouda?

When in doubt, ask the person at the cheese counter what they like or what they recommend. I do this almost every time I buy cheese from a specialty shop or specialty cheese section. Cheese people are passionate about their products.

Often, they will let you sample before purchasing. I often say, “I have alpine-style Grand Cru® and Gouda, what else should I include?” and they will have great suggestions and advice for you.

My biggest piece of advice is to put cheeses that you like to eat on the board. If you don’t know what you like, try a new cheese each time you go to the grocery store. Bring home a small portion and see what you like about it. Is it creamy? Is it hard or soft? Do you love chèvre? Do you love Aged Gouda?  When in doubt, ask the person at the cheese counter what they like or what they recommend. I do this almost every time I buy cheese from a specialty shop or specialty cheese section. Cheese people are passionate about their product.   Often, they will let you sample before purchasing. I often say, “I have alpine-style Grand Cru® and Gouda, what else should I include?” and they will have great suggestions and advice for you.

Hard cheeses: This can be Aged Gouda, Sharp Cheddar, Canela. These cheeses are typically very savory and bold. They often crumble and have a unique texture. They usually have a rind you cannot eat, but save it and add the rind to soups or stews to add another layer of flavor. 

Semi-hard cheeses: These cheeses are often aged, but softer than hard cheeses. Grand Cru® is my go-to (and my husband’s favorite cheese) and on every cheeseboard I make. It’s alpine-style, mellow, and just looks beautiful sliced into triangles. 

Crumbly or soft cheeses: These are cheeses you can typically spread on a cracker, like Chèvre goat cheese. These cheeses are creamy, typically mild, and moist. (Don’t hate me for using that word, but they are kind of wet.) They’re very distinct in flavor, fresh and milky. I like to add Plain Chèvre to my cheeseboards because I often will roll it in dried fruits or herbs for color to bring my palette together. 

Blue cheeses: I put these in a category of their own. Blue cheeses are soft, but I find they are either something you like or don’t like. I happen to love blue cheese and Buttermilk Blue® is mild enough for even people that swear they don’t like blue cheese. This is a bold, distinctly-flavored cheese. I like to spread it on a piece of bread with a drizzle of honey.

Wild card: This is where you can really go crazy. A stinky cheese, holiday-flavored cheese, a new variety — something completely unique and different. Let your guests experience something FUN. This is also where I rely on the help of the person selling cheese. Ask them for a recommendation for a wild card and they will deliver.

How to Build a Holiday Pantry Cheeseboard

How Much Cheese to Buy For A Holiday Cheeseboard? //

When you buy the bags of cheese, they add starch to the bag to keep the shreds from sticking together and they just don’t melt the same sexy way that cheese you shred yourself does. It makes a huge difference in the end result. 

How to Build a Holiday Pantry Cheeseboard

What I Keep Stocked In My Holiday Pantry //

I’m going to confess to something that I am both embarrassed and proud of: I have a cabinet in my laundry room that is strictly my cheeseboard-making pantry.

I keep my cheese board pantry stocked with nuts, pickles, olives, dried fruits, crackers, mustards, seasonal things, jams, jellies, honey, anything that I see when I am shopping that I think will look or taste great with cheese. 

When we lived in Europe, I did not buy typical souvenirs. I would go to a local grocery store and buy fun and unique things that I couldn’t get anywhere else or that the region was known for. I have holiday jellies from France and preserved lemons from Morocco and Marcona almonds from Spain and honey from Slovenia. It makes me so happy to pull them off the shelf and use them and think about where they came from.

I loved coming home from our travels and continuing the adventure on my plate. I don’t live in Europe anymore, but I still get delighted to find fun things while shopping.

Being able to shop my well-stocked (ok, fine, OVERFLOWING) pantry allows me to create a cheeseboard whenever I am feeling inspired — whether that is to have a movie-watching couch date on a Wednesday or a full-blown holiday gathering. I can go to that cabinet and pick and choose things to make my board festive, inviting, and interesting. 

Along with the idea that cheeses should be different textures and flavors, I think everything else on the board should be as well. Sweet with salty, crunchy with soft, you get the idea.

Savory Pantry items:

Pickles
Olives
Cured meats
Nuts
Tapenade
Pickled vegetables

Condiments:

Mustard
Honey
Jams/jellies
Chutney

How to Build a Holiday Pantry Cheeseboard

Delivery Vehicles & Crunchy Things:

Crackers
Breadsticks
Pretzels
Rice crackers
Potato chips
Popcorn

Sweet Pantry Items:

Candied nuts
Dried fruit
Candies
Chocolate 
Caramels
Kettle corn

Fresh things to add:

Prosciutto
Herbs
Fruit
Vegetables
Baguette

Festive & Seasonal:

Decorated cookies
Seasonal chutney/jams
Spiced items
Seasonal garnishes (think seasonal serving pieces like mini ornaments or glittery mini trees)
Mini cupcakes
Seasonal breads, like pumpkin or cranberry orange

How to Build a Holiday Pantry Cheeseboard

Serving Pieces:

Parchment paper 
Rimmed platters
Large plates
Cheese knives
Small bowls
Spoons, picks, and forks

How to Build a Holiday Pantry Cheeseboard

TIP: Line your boards or platters with parchment — this makes clean up so much easier.

You do not need to have everything on this list, but having one or two things from each category will allow you to make a beautiful, well-balanced, festive cheeseboard whenever the mood strikes.

Creating a holiday cheeseboard doesn’t have to be difficult. By having a well-stocked pantry and delicious Roth cheese, you will be able to serve your guests at a moment’s notice. 

If you need some help styling your board, check out this post. I share all of my best tips for making a board that tastes AND looks amazing.


Follow Bree on her blogFacebookInstagram and Pinterest!

How to Build A Baked Potato Bar

By: Bree Hester

How to make a baked potato bar for an easy weeknight meal featuring Roth Grand Cru® — what to serve and how to keep your baked potatoes warm for a baked potato buffet.

How to Build a Baked Potato Bar

Busy nights call for easy meals. You know the busy nights I am talking about, when your whole family is coming and going and everyone walks into the house borderline HANGRY. This time of year is BUSY. Between school, sports, appointments, long days at work — there is a lot going on. 

One thing that I have been doing more and more is a bar-style meal. Where you make a main item and leave out lots of things to customize your individual dish. This is great for my family because we have some vegetarians and some meat-eaters and everyone leaves the table satisfied. 

Think taco bar, DIY burrito bowls, make your own pizza, and a personal family favorite — the baked potato bar.

How to Build a Baked Potato Bar

My kids all love baked potatoes and this is an excellent way to turn a side dish into a meal. We add pulled pork or shredded buffalo chicken, bacon, veggies, LOTS of shredded Roth cheese, sour cream, sautéed peppers and onions, chili, pretty much anything you can think of — it can go into a potato

It’s also quick to get on the table. If my afternoon is busy, I can prep this in the morning or while I am cooking another meal. I do this a lot if I am already cooking something and doing a lot of chopping, etc. I do it for two meals – a couple of extra minutes saves me so much clean up and prep time later. Future me is always grateful. 

A baked potato bar is great for a weeknight meal, but it’s also an inexpensive way to entertain. This is great for a kid’s party, a team dinner before race day, or for watching a football game.

How to Make Baked Potatoes //

How to Build a Baked Potato Bar

I know that you are probably thinking that baked potatoes are not a quick thing to make. And you are correct, they do take a long time to bake, but you don’t have to do it in the oven, and once they are in the oven, it’s hands-off.

How to Build a Baked Potato Bar

More often than not, I bake potatoes in the oven. I wash them really well, dry them, prick them with a fork, coat them in oil and salt, and then bake them in a 375° F oven for 70 to 90 minutes. The skins are crisp and are perfectly seasoned. 

If you would like to cut the cooking time in half, you can slice the potatoes and place them slice side down on an oiled sheet pan. 

(Alternatively, you can use small potatoes like fingerlings and do a roasted potato bar. I really like this option when I want a few different toppings and don’t want to eat one big potato, I can make two or three mini options.) 

Another way to cook them is in your slow cooker. Do the same as above, then wash, prick, oil, and salt the potatoes, but also wrap them in foil. Slow cook on HIGH for 4.5 to 5 hours or on LOW for 7.5 to 8 hours, or until the potatoes are tender and cooked through.

Which Toppings to Include //

The sky is literally the limit as to what to include as a topping for your baked potato bar. Take inventory of what is in your fridge and freezer, and it’s fair game for a baked potato. A potato is a blank canvas that is begging to be topped with delicious things. 

Sure, a baked potato with a generous pat of butter and salt is delicious, but we can do better than that!

How to Build a Baked Potato Bar

Cheese // Is there anything better and melty, gooey, cheese on a piping hot potato? I honestly don’t think there is. I used to buy the bags of pre-shredded cheese, but I am a convert to shredding my cheeses myself. 

When you buy the bags of cheese, they add starch to the bag to keep the shreds from sticking together and they just don’t melt the same sexy way that cheese you shred yourself does. It makes a huge difference in the end result. 

You also have total control over the kind and quality of cheese you use. (You know I love my Roth cheese, especially their alpine-style Grand Cru®.) When you shred the cheese yourself, you can use all of your favorites and choose varieties you might not always think of. 

TIP: This cheese shredder attachment has been a game-changer when it comes to shredding cheese. I use it ALL the time. I also use the shredding disc on my food processor. Freeze your cheese for 15 minutes before shredding. It keeps the cheese from clumping and easier to get through the machine. 

How to Build a Baked Potato Bar

Cheese // I always have a ton of different kinds of cheese in my fridge. Creamy, sharp, soft, bold, I like to keep a good variety in my fridge. I love cheese and want to try as many kinds as I can. For a baked potato bar, I like to have a few different kinds to add different flavor profiles and textures to our potatoes.

How to Build a Baked Potato Bar

Grand Cru® goes well with so many things. It’s an amazingly delicious cheese that is good in so many things. It’s slightly sweet, melts like a dream, and is a great all-around option for just about anything you want to melt cheese on. I love it melted in a potato with sautéed onions and peppers. This is my #1 choice for a loaded baked potato.

The inspiration for this potato bar was our New Year’s Eve raclette, and Grand Cru® is the star of that show over roasted potatoes and slices of baguette. Add a few slices of apples… **chef’s kiss**

Buttermilk Blue® adds a bold pop of flavor. Buttermilk Blue® crumbles are great for a baked potato bar because you simply open the container and add a huge amount of flavor to your baked potato. A buffalo chicken baked potato with carrots, celery, green onion, and a generous amount of blue cheese and shredded Grand Cru® is my little guy’s potato of choice.

How to Build a Baked Potato Bar

Chèvre goat cheese is perhaps not the first cheese you would think of for a baked potato, but trust me when I say it works perfectly. It adds fresh, sharp, flavor and I like to make a very loose version of street corn with it. Corn, guacamole, roasted tomatoes, bacon, and Chèvre. Delicious!

How to Build a Baked Potato Bar

Gouda is one of my all-time favorite cheeses. It’s mellow and creamy and melts so beautifully. Lots of shredded Gouda, bacon, green onions, sour cream, and a generous amount of black pepper.

How to Build a Baked Potato Bar

Dill Havarti rounds out my delicious cheese selection. Another amazing melting cheese, it’s super creamy and I love the hit of dill. (I think that dill is underused and under-appreciated.) This one is my go-to for a vegetable potato. Roasted broccoli, spinach, onions and peppers, TONS of Dill Havarti, and a generous dollop of sour cream.

How to Build a Baked Potato Bar

Sour Cream // A big bowl of cool sour cream is always a good idea, but it is a MUST for a baked potato. I also will add a bowl of garlic herb sour cream too.

Meats // Can you have a loaded potato without bacon?  I didn’t think so either. I always have some pulled pork in my freezer and it is INCREDIBLE in a baked potato. For this potato bar, I bought a rotisserie chicken and tossed it with some buffalo sauce. Chili, taco beef, sloppy joe, pepperoni, ham, sausage. Any protein works.

How to Build a Baked Potato Bar

Vegetables // I like to air fry some broccoli, as it crisps up and stays bright green. Sautéed onion and peppers, diced tomatoes, avocado, corn, sautéed mushrooms, spinach, green onion, roasted garlic, chives, sliced jalapeños. This adds color and crunch.

TIP: Check out the salad or mezze bar at your local grocery store. This is a great way to save time and get to try some new things. I bought the roasted tomatoes and garlic when I grabbed the rotisserie chicken.

Extras // Butter, salsa, pizza sauce, ranch, barbecue sauce, sea salt flakes, herbs, red pepper flakes, anything that adds flavor and interest to your potato.

Essentially anything you can think of belongs in a potato, so get creative and make your own delicious combinations.

How to Build a Baked Potato Bar

How to Set Up Your Baked Potato Bar //

01. Bake your potatoes using your desired method. Whether you make oven-baked potatoes or slow cooker potatoes, make a few extra for leftovers. 

02. Prepare your toppings. Shred your cheese, warm your cheese sauce, set out your toppings in bowls or on a rimmed baking sheet lined with parchment for easy cleanup. I set mine out on my kitchen counter in an assembly line so that everyone can grab a plate and utensils and get busy customizing their potatoes. 

03. Assemble! Add toppings and get creative! I like to add cheese to the bottom and the top for maximum gooey meltiness. 

TIP: Cut your potato in half and make two different kinds to maximize textures and flavors. Discover a new favorite combination!

How to Build a Baked Potato Bar

How to Keep The Potatoes Warm //

If I need to hold my potatoes and keep them warm, I will keep them in a 200° F oven on a sheet pan until I need them. You can also keep already baked potatoes warm on the LOW setting in a slow cooker.

What to Serve With A Baked Potato Bar //

You don’t really need to serve anything else, a loaded baked potato is a meal in its own right, but I do like to serve some other things if I am serving this for a crowd. And obviously serve dessert. 🙂 

Arugula Caprese Salad

Kansas Chopped Salad with Peppercorn Ranch

Kale Caesar with Parmesan Crisps

The BEST Blueberry Crisp

Cookies and Cream Snack Cake

William’s Chocolate Chip Cookies


Follow Bree on her blogFacebookInstagram and Pinterest!

Sweet & Savory Fall Cheeseboard

By: BREE HESTER

How to assemble the perfect fall cheese board! My Sweet and Savory Fall Cheeseboard has fall flavors, colors, and is perfect for any autumn event.

Is that the crisp smell of fall in the air? Are you seeing back to school photos all over social media? Is the cozy hoodie/sweater in the back of your closet beckoning to you? Are you craving a PSL and fighting the urge to buy a pumpkin? 

Me. Too.

I’m ready to have some normalcy and routine in my life right now. This summer was a literal wash out. We had an entire month of rain and it did not put me in a festive summer mood. Here in New England, we’ve already had some fall-like days and I am HERE FOR IT. 

With all things fall on my mind, I created a Sweet and Savory Fall Cheeseboard featuring my favorite Roth Cheeses. I created this with fall colors, fall flavors, and cozy fall vibes in mind. I loved creating it and I especially loved eating it. 

While gatherings might be smaller this fall, we can still make them special. Adding a few extra touches here and there make all the difference and your family and guests will appreciate the beauty and effort you put into it. I would serve this beautiful fall cheeseboard with Spiced Apple Cider Cocktails and be in fall heaven.

How to Create a Fall Cheeseboard //

Select your favorite Roth cheeses. I love a variety of cheeses and profiles – especially when I am doing a sweet and savory cheeseboard. I like to have a creamy cheese, flavored cheese, blue cheese, hard cheese, and smoked cheese. There is something for everyone on the board and they all work together with the other items on the platter.

Creamy Cheese – Grand Cru® is my husband’s favorite cheese and it is on every cheeseboard I make. It is an alpine-style cheese that is delicious for eating, but also melts like a dream. It is mild and a great all-around cheese that everyone loves. 

Flavored Cheese – Horseradish Havarti is one of my favorite flavored Havarti cheeses in the Roth line up. It has chive, mustard seed, and the kick of horseradish. (It’s amazing on a baked potato.)

Blue Cheese – I love the punch of blue cheese. Buttermilk Blue® is creamy and tangy, but not too much. You know what I mean? Sometimes blue cheese is like hey, BLUE cheese, this is like bluuuuuueeeee cheese, it’s the perfect amount of mellow.

Hard Cheese – I chose Aged Gouda. I love the Gouda flavor and the way this cheese crumbles. I love the way it looks on the board and adds a different texture to the whole platter.

Smoked Cheese – Smoked Gouda is my ride-or-die cheese. I love it on a cracker, I love it melted on a sandwich, I love it in any shape or form. It’s so creamy and has just enough smokiness. 

Add Fall Accompaniments to Your Sweet and Savory Fall Cheeseboard //

Add fall details and flavors to enhance your cheeseboard. I chose a fall color palette as well to make this cheeseboard really drive home that this is a spread to eat by the fireplace while watching the Pats on a Sunday. Lots of yellow, orange, brown, and deep burgundy. This is a sweet and savory board so we have lots of salty and sweet notes. Which is my personal flavor jam. Always here for a sweet savory salty moment. I loved creating this board because the color palette is gorgeous and I love that you can have so many different unique bites from all of the things on this board. 

Savory //

Cheeses. I already shared which cheeses I chose, but I also added them in slices, cubes, and crumbles. I like the variety and that people can just grab their cheese and not have to slice it themselves. 

Meats. I bought a package of Spanish sliced meats. They came together in the package, I like that the store did the curating for me. Jamón Serrano (similar to prosciutto), salami, and a chorizo.  

Caramelized Onion and Garlic Jam. I made a batch of this jam and it not only fit into my color scheme, it is amazing on a cracker with Gouda. 

Pumpkin seeds. Pumpkin seeds or pepitas (sometimes the package says pepitas) add crunch and salt that balances all the sweet and creaminess from the cheese. Crackers. I used water crackers and fig and rosemary crisps. I like a plain cracker and one with more flavor. 

Sweet //

Dried Oranges. These are so beautiful on a platter and also taste really good. A friend gifted a package to me and now I buy a few at a time. You could also easily make your own in the oven.

Dried Apricots. Chewy and sweet, these are a must have for me. I’m not a huge dried fruit fan, but I adore an apricot. These are always the first thing I go for on a cheeseboard.

Praline Pecans. I buy a few of these at a time, they are amazing on their own, on a board, and tossed into a salad. 

Caramel Sauce. Add some sliced apples and dip away. Caramel is also delicious paired with Gouda and Grand Cru. 

Macarons. Macarons feel super fancy and are unexpected on a cheeseboard. You can buy pumpkin, cinnamon, or any fall flavor to add to the theme of this board. These are frozen macarons from the grocery store and were really good. I also love the shape and dimension they add. 

Candy. Candy corn and peanut butter cups are my family’s favorite fall candy. My son was STOKED to see candy corn on this board and it screams Halloween and fall. You know it’s almost back to school when you see the candy corn hit the shelves. 

Cookies. On the cracker plate, I had butter crisps. These are thin like a cracker, but are a cookie. A piece of Grand Cru on one of these with a drizzle of caramel… chef’s KISS. I also had a bowl of gingersnaps to add some fall spice. 

Decorations //

Cheeseboards are usually the focal point of the table. People ooh and ahh over cheeseboards because they are so visually appealing. They work double duty as both a decor piece and as a way to serve my guests food.

I bought some flowers that matched the colors I was using with my food and placed some blooms of burgundy dahlias and deep orange-y red spray roses around the board and the table it is sitting on. I also built the cheeseboard on top of sprigs of eucalyptus. Sprigs of green add so much visual interest and life to this board. 

You can also coordinate napkins, utensils, and dishes to match the theme. It’s very easy to make a simple cheeseboard into an extraordinary themed showpiece. 

Tips for Assembling a Fall Cheeseboard //

I have a few rimmed platters that I prefer to build boards on. I think the lip makes it easier to transport and keeps everything from spilling over. 

I line all of my cheeseboards with parchment paper. This makes clean up super easy and protects the wood on my cheeseboard. When I am cleaning up, I throw the paper away and give the sides a good wipe down with some soapy water. 

Pick things up as you see them in stores. I like to stock up on seasonal items and keep them for occasions like these. When I am making a cheeseboard, I am able to pull fun things that are unexpected from my pantry. 

You don’t need to make one large cheeseboard, you can make individual ones or a few small ones to put around the room.  

Follow Bree on her blogFacebookInstagram and Pinterest!

How to Make Hot Honey and Gouda Grilled Chicken Sandwiches

By: Bree Hester

Hot Honey and Gouda Grilled Chicken Sandwiches topped with melty Gouda and Smoked Gouda cheeses, then drizzled with homemade hot honey. Add lettuce, tomato, and onion and you have an INCREDIBLE sandwich.

My family loves to give me a hard time about how often I make chicken for dinner. “Ugh, seriously. Chicken again? Ew. Mom, that’s sooooo boring.” It’s “gross” but not in the good way. 

(Guess what? Keeping up with teen slang is almost a full-time job. One minute gross is well, gross, and the next it means really good.)

But put a piece of chicken between bread and it’s a totally different situation, and very welcome at dinner time. Melt two kinds of Roth Gouda cheese on it and all of the sudden, I’m a hero. (I’ll take what I can get.)

This is the perfect summer dinner when you don’t really feel like cooking, but also don’t want to go anywhere or get takeout. A grilled chicken burger at home is always a good idea, even when you don’t feel like cooking a single thing.  

This recipe is so simple and takes very little time. Serve with some chips and fruit, and you have a pretty well-rounded meal that is gross, but in the good way.

This has been the summer of hot honey for me. I can’t find enough things to put it on. I put it on pizza (sounds weird but trust me), mix it into salad dressings, and drizzle on just about any sandwich to give it a sweet/hot kick. It’s so simple to make, you just mix together two ingredients, but it changes. the. game. in terms of flavor. 

Put it on a grilled chicken sandwich and be prepared to be blown away. 

Also, my beloved Roth Gouda got a new look. Same delicious cheese inside, but updated packaging on the outside

Ingredients to Make Hot Honey and Gouda Chicken Sandwiches //

Hot Honey and Gouda Grilled Chicken Sandwich

Chicken. I use organic chicken cutlets if I am short on time. They are thinner and I think better on a sandwich. If I don’t have cutlets, I pound the breasts a little for even cooking. Taking the time to even out the breasts results in more even cooking and being easier to eat on a roll. 

Roth Gouda. Sweet and creamy Gouda is the perfect melting cheese for these sandwiches. The creaminess is an amazing foil to the hot honey and melts like a dream. I keep Gouda in my fridge 100% of the time — for eating — but it’s also become one of my favorites to cook with. I like to shred and melt it on everything. 

Roth Smoked Gouda. I love to combine Smoked Gouda with regular Gouda to add more smoky flavor to the sandwiches. I have to be honest though, I will put Smoked Gouda on just about anything and it’s my favorite cheese on a cheeseboard. 

Calabrian chili. Calabrian chilies are grown in the Calabrian region of Italy and are spicy, floral, smoky, and even a little sweet. This has replaced sriracha as my go-to heat source when I am looking to spice up a recipe. You can find this in the tomato aisle or in the Italian section of the grocery store. Or you can always order it online. I have also bought these chilies ground into a paste.  

Honey. You can’t make hot honey without honey. I like to use mild orange blossom honey, but use any honey you have on hand. 

Buns. I think that a good bun/bread situation is the key to an excellent sandwich. Everything inside the sandwich can be stellar, but if you are putting your delicious sandwich ingredients in an inferior carb situation, then you are just selling yourself (and your sandwich) short. I used a sesame seed bun from a local bakery. I like the added flavor and texture of the seeds.

How to Make Hot Honey and Gouda Chicken Sandwiches // The Steps

This is really a simple recipe, but it’s so, so, so good, and perfect for a busy summer night. I like to get ahead of the game and get my chicken soaking in the marinade in the morning, but I’ve also made it with just a few minutes of marinating time and they are still amazing.

Add olive oil, lemon juice, Dijon mustard, honey, garlic powder, onion powder, parsley, smoked paprika, salt, and pepper to a bowl.

Hot Honey and Gouda Grilled Cheese Sandwich

Mix until well combined.

Add the chicken to a plastic bag or glass container and pour the marinade over the chicken. Keep in the fridge until ready to grill.

Hot Honey and Gouda Grilled Chicken Sandwich

To make the hot honey, add honey and Calabrian chili to a jar. I use an immersion blender to purée, but you could also just finely dice the chili and stir it through or blend in the blender. Set aside until ready to use. 

When ready to cook, preheat the grill to 400 degrees F. Use a grill brush to clean off the grates and lightly oil the grill.

Add the chicken and cook for 4-5 minutes a side (if using cutlets, they don’t take as long) with the lid closed.

Add grated Roth Gouda and Smoked Gouda to the top of the chicken for the last minute of cooking. Close the lid to let the cheese melt.

Hot Honey and Gouda Grilled Chicken Sandwich

Place on a bun with lettuce, tomato, onion and a generous drizzle of hot honey.

FAQ’s //

Hot Honey and Gouda Grilled Chicken Sandwich

Can I make hot honey with another kind of chili or pepper? 

Of course! You can use jalapeño or habanero peppers, or really any hot chili pepper you like. You can cut the peppers in half, remove the seeds if you don’t like it really spicy, and steep the pepper in a saucepan with the honey over medium-low heat for five minutes. Let cool, and keep in a jar with an airtight lid.

How do I keep my chicken moist and not dried out?

Make sure to marinate your chicken in something with oil and acid. The oil adds moisture while the acid helps keep the chicken tender. Also, be careful to not overcook the chicken. Use an internal thermometer and take the chicken off the grill at 160 degrees F. It will continue to cook once it comes off. Put the chicken on a plate and cover with foil and let rest for 5 minutes before cutting. It will help keep the chicken juicy and tender.

How do you get cheese to melt evenly on burgers and sandwiches?
Shred it! Cheese melts faster and more evenly when it’s shredded. I like that you can mix different types of cheese to make an even more complex cheese flavor. Grand Cru® mixed with Gouda is *chefs kiss*. Ever since I discovered the cheese grater attachment for my Kitchen-Aid, I almost always grate my cheese no matter what I am using it for. (I love that attachment so much that I don’t even mind that it can’t go in the dishwasher — that’s LOVE.) It’s changed my pizza game!

Recipe Tips //

You can marinate your chicken for up to 24 hours. When there is acid in the marinade, I don’t like to do it any longer than 24 since it can start to break down. This a great get-ahead tip for serving a crowd. 

I like to put my toppings on a large tray and let everyone dress their sandwiches themselves. You can prep your toppings earlier in the day. Dampen a paper towel and lay it on top of the vegetables and keep crisp in the fridge until dinnertime.

Hot honey can be a little messy, so a squirt bottle is a good way to store it. Less sticky mess on your table. 

Variations //

Caramelized onion and garlic jam is especially delicious on this sandwich. I love it with melted Gouda, lettuce, onion jam and a thinly-sliced crispy apple. The drizzle of hot honey sends it over the edge.

Barbecue sauce as a marinade is really good too. The sweet and smoky sauce goes so well with all of the other flavors of the smoked cheese and the sweet/hot honey.  

If you want to skip the bun, this makes a great salad. Alternatively, serve in lettuce cups. Slice the chicken, top with shredded Gouda, and drizzle with hot honey. Serve on a bed of crispy lettuce.

Hot Honey and Gouda Grilled Chicken Sandwich

Get the full recipe here!

Follow Bree on her blogFacebookInstagram and Pinterest!

Three Spinach Artichoke Gouda Appetizer Recipes

By: Bree Hester

Three Spinach Artichoke Gouda Appetizers

Now that the world is starting to reopen, I am tip-toeing into entertaining again. I have so missed having people over and being able to cook for them. Feeding people is my love language.  

While I don’t think that I am ready for an inside gathering just yet, my backyard is ready to party. 

This spring, we turned our patio into an outdoor living space that is made for enjoying summer nights with friends and family. We added new outdoor games, upgraded our fire pit and garden, and made a living room set complete with hanging chairs that are perfect for cuddling up in.  

Now more than ever, I want to focus on my guests. And not on being in the kitchen cooking while they are catching up and enjoying themselves. I want to be out there having a good time too. I’ve missed my friends and can’t wait to spend time with them again. So that means I need some snacks that are easy to prepare and easy to eat. 

My friends at Roth Cheese have a new Spinach Artichoke Gouda cheese that is so good and was the inspiration for this spread. Its creation was inspired by the classic dip that we all know and love: lots of spinach, artichoke, red pepper flake, and garlic flavor in creamy Gouda. 

Three Spinach Artichoke Gouda Appetizers

I created three appetizer recipes featuring the new Spinach Artichoke Gouda: Spinach and Artichoke Crostini, Mini Spinach Artichoke Gouda Tarts, and Charcuterie Cups

I love that each thing is bite-sized or personal. You don’t need to worry about utensils or double-dipping. (Please tell me that we said goodbye to that in 2020.) This creamy flavored Gouda is so versatile. It melts like a dream in and on everything and is delicious all on its own. It works perfectly in each recipe.

Roth Spinach Artichoke Gouda cheese

Roth Spinach Artichoke Gouda cheese is available through Amazon Fresh, you can have it delivered right to your door. If you don’t receive Amazon Fresh, you can also find it online via the Alp & Dell Cheese Store.

Now that it is finally feeling like summer, I’m going to break out the corn hole, get the pollen off the furniture, and fire up the fire pit, because I am ready to have some fun. 


Spinach Artichoke Crostini

Spinach Artichoke Crostini //

Crispy toast topped with sautéed spinach and artichokes, and covered in melted Roth Spinach and Artichoke Gouda cheese. 

  • 24 pieces sliced baguette
  • ½ cup olive oil
  • ½ sweet onion, finely chopped
  • 1 can artichoke hearts, drained and finely chopped
  • 4 cloves garlic, minced
  • ¼ teaspoon red pepper flakes
  • 1 (8-oz) bag baby spinach
  • Salt and pepper, to taste
  • 1 (6-oz) package Roth Spinach Artichoke Gouda cheese, shredded

Preheat the oven to 350 degrees F. Arrange bread slices on a baking sheet. Brush bread with ¼ cup olive oil. Toast until golden brown, about 5 minutes. Set aside. 

Add oil to a medium sauté pan over medium heat. Add onions and artichokes, cook for about 5 minutes or until the onions soften. Add garlic, red pepper flakes, and cook for one minute. Add spinach to the pan, and cook until it wilts, about 2 minutes. Season with salt and pepper. 

Flip the bread over and top the untoasted side with the spinach mixture. Sprinkle generously with cheese. Put the pan back into the oven and cook until the cheese melts. If you like things a little extra spicy, sprinkle the tops with more red pepper flake.


Mini Spinach Artichoke Tarts

Mini Spinach Artichoke Gouda Tarts //

A one-bite cheese tart full of spinach and artichoke flavor. These are delicious served warm, but equally delicious at room temperature.

  • 1 box ready made pie crust (there should be 2 crusts in the box)
  • ⅔ cup sour cream
  • ⅓ cup green onions, finely chopped
  • ⅓ cup red pepper, finely chopped
  • ⅓ cup artichoke bruschetta topping
  • 2 cups Roth Spinach Artichoke Gouda cheese, shredded
  • Salt and pepper

Preheat oven to 375 degrees F. Cut pie crust into about 2 ¾-inch rounds. Gently press into a mini muffin tin. Bake for 10 minutes. If the crusts puff up, use a spoon or tart shaper to press them back into shape. 

Mix sour cream, green onions, red pepper, artichoke bruschetta topping in a medium bowl. Fold in shredded cheese and season with salt and pepper. 

Add a tablespoon of the mixture into each pie crust. Put back into the oven and bake for an additional 10 minutes. 


Spinach Artichoke Grazing Cups

Charcuterie Cups //

Personal cheese boards or grazing cups full of delicious meats, cheeses, nuts, fruit, and crackers. 

Add the smaller items to the bottom of a clear plastic cocktail glass, jar, or any container you like. Skewer olives and tomatoes on cocktail sticks.

Arrange crackers in the back, then add Roth Spinach Artichoke Gouda cheese and prosciutto.


Follow Bree on her blogFacebookInstagram and Pinterest!

Whipped Goat Cheese with Roasted Tomatoes and Homemade Flatbreads

Whipped Herbed Goat Cheese with Roasted Tomatoes and Shallots with Homemade Flatbreads is an easy and elegant appetizer for any occasion.

By: Bree Hester

Whipped Herbed Goat Cheese with Roasted Tomatoes and Homemade Flatbreads

I have a confession. I don’t like goat cheese. I don’t like yogurt either. It’s always been too tangy for me. Yet I sometimes need to use ingredients that I don’t necessarily love and I have to try them. (The perils of being a recipe developer, some days are much better than others.) 

So you can imagine my surprise when I dipped my flatbread into this herbed goat cheese dip and I actually loved it. No one was more shocked than me. Roth Chèvre might be my gateway into the world of goat cheese. It’s mild, fresh tasting, and not overly goat-y. 

So why would I make a recipe with an ingredient that I don’t like? Well, because my husband likes it, and he loves a dip. I also had a ton of fresh herbs to use before they wilted in my crisper drawer. 

Lastly, every month I get shipped a box of delicious cheeses from my friends at Roth Cheese and I wanted to expand my culinary horizons. I love their cheeses and can’t decide which one to eat first, but I always give the goat cheeses to my neighbors. (They also make a Wild Blueberry and Garlic Herb version.)  

So I made a really delicious whipped herbed goat cheese dip and now I won’t avoid things with goat cheese on restaurant menus. Here’s to more beet salads in my future!

Ingredients to Make Whipped Chèvre, Roasted Tomatoes, and Homemade Flatbread //

Whipped Herbed Goat Cheese with Roasted Tomatoes and Homemade Flatbreads

This is a great recipe to make if you have some herbs and tomatoes to use up before they start to go. The flatbreads will impress everyone when you tell them you made them yourself. No one has to know how easy they are to make.

Whipped Herbed Goat Cheese with Roasted Tomatoes and Homemade Flatbreads

Whipped Goat Cheese Ingredients //

Roth Chèvre: This is a creamy, mild goat’s milk cheese that is perfect to start with if you think that you don’t like goat cheese. It’s soft, mild, and takes on other flavors beautifully. It comes in 4- and 8-ounce packages that can be found at your local Walmart. (You can also use the Garlic Herb version and really punch up the flavor.)

Honey: This doesn’t make the dip sweet, but it does balance out the tartness of the cheese. 

Lemon: Lemon juice brightens the whole dip up. Feel free to fold in the zest when you are folding in the herbs.

Fresh herbs: I almost always have parsley, dill, and chives either in my fridge or growing in my garden. Fresh herbs add so much flavor and brightness to any dish you make.

Garlic: My favorite trick is to drop whole cloves into a running food processor and let the machine do all the work. I start a lot of recipes this way. 

Olive oil: This adds a little fattiness and also helps mellow out all of the other flavors.

Roasted Tomato Ingredients //

Cherry tomatoes: I love the way that tomatoes on the vine look. But you can use any kind of tomato you like. I like to use cherry tomatoes because they take less time and are sweeter than large tomatoes.

Shallots: You can leave shallots out if you don’t have any available, but I love the way shallots get sweet when they are roasted. Quarter them to reduce cooking time.

Fresh herbs: I use rosemary, thyme, and oregano, but any herb will add flavor.

Olive oil: Be generous and coat everything well.

Homemade Flatbread Ingredients //

Flour: All-purpose flour is the base of this simple flatbread recipe.

Sugar: Just a pinch adds enough sweetness to balance the tang from the yogurt.

Baking powder: This gives the flatbread lift and helps create the bubbles when cooking.

Yogurt: Helps make a tender flatbread and replaces water in this recipe. 

Salt: It might seem like a lot of salt, but you need it to flavor this flatbread. 

Olive oil: Coat your pan with olive oil to keep it from sticking., but also it It also helps turn the flatbreads golden brown and crisp up.

How to Make // The Steps

Whipped Herbed Goat Cheese with Roasted Tomatoes and Homemade Flatbreads

I like to start by making the whipped goat cheese. It needs some time to chill so the flavors can get to know each other. 

Add garlic cloves to a running food processor. Let the food processor do the hard work for you.

Add goat and cream cheeses. Let it run at high speed for 3-4 minutes, scraping the bowl every now and again. Make sure that it is really smooth and creamy. 

Add lemon juice, honey, olive oil, and a good pinch of salt and pepper, to taste. Run again for another minute.

Transfer to a bowl and mix through the fresh herbs. Cover and chill for at least an hour before you serve it.

Whipped Herbed Goat Cheese with Roasted Tomatoes and Homemade Flatbreads

While the dip is chilling, start the tomatoes. Line a baking sheet with parchment paper or foil. Spread the tomatoes and shallots out in a single layer.

Drizzle a generous amount of olive oil, salt and pepper over the top. Add sprigs of fresh herbs. 

Roast for 15 to 20 minutes. Set aside. 

Time for the flatbreads.

Whipped Herbed Goat Cheese with Roasted Tomatoes and Homemade Flatbreads

Add flour, sugar, baking powder, and salt to a large bowl. Give it a good mix. Stir in the yogurt and when it starts to come together, turn it out onto the counter. Knead for about a minute or until it is in a ball. 

Divide into 4 pieces and cover with a tea towel. Let rest for 15 minutes. Roll out to ⅛ inch.

Heat a cast-iron skillet over medium heat. Add 1 tablespoon of olive oil and add the dough to the pan. Cook for about 2 minutes, or until the surface begins to bubble and the bottom turns golden brown. Flip and cook for another two minutes.

Whipped Herbed Goat Cheese with Roasted Tomatoes and Homemade Flatbreads

FAQs //

What’s the difference between goat cheese and chèvre? They’re the same thing! Chèvre translated from French means both “goat” and “goat cheese”. There are lots of different kinds of cheese made with goat’s milk, but the soft, creamy, fresh, white cheese is commonly known simply as goat cheese. 

Can I make this dip ahead of time? YES! It will just get better and better as it chills out in the fridge. 

What are the best kinds of herbs to use in this recipe? Honestly, whatever fresh herbs you have. Basil, parsley, chive, dill, thyme, oregano… they all work together and will add tons of flavor to this dip.

Recipe Tips //

Whipped Herbed Goat Cheese with Roasted Tomatoes and Homemade Flatbreads

It will be hard to not eat all of this dip right out of the bowl, but let it chill for before serving. It will add to the texture, and the flavors will get a chance to get to know each other.

Don’t want to make the flatbread? No problem. Serve on crusty bread, with crackers, or with sliced vegetables. 

What else can I do with roasted tomatoes? I like to purée my roasted tomatoes and turn them into a pasta sauce or soup. The roasting brings out the natural sweetness of the tomatoes and elevates anything you put them in. They also make a great side dish all on their own.

Variations of Herbed Goat Cheese //

Roth Plain goat cheese is mild in flavor, so it can take on many different flavor profiles. Here are some other ideas for whipped goat cheese:

Blueberry and Orange: Skip the garlic and herbs, add more honey, orange juice, and orange zest. Maybe even a pinch of cinnamon? Top with blueberry sauce or fresh blueberries. You can also use the Wild Blueberry version to really add to the blueberry flavor. 

Strawberries and Balsamic Vinegar: Whip the Chèvre with salt and pepper, olive oil, and top with chopped strawberries and a drizzle of balsamic glaze.

Everything Bagel Goat Cheese: Replace the fresh herbs with a tablespoon or two of everything bagel seasoning. 

Goat Cheese Toast: Elevate your morning avo toast. Spread the herbed goat cheese on toast and top with fresh peach slices and a drizzle of olive oil and honey.

How to Store //

Whipped Herbed Goat Cheese with Roasted Tomatoes and Homemade Flatbreads

This dip will keep in an airtight container for 4 to 5 days in the refrigerator.

You can make and freeze the flatbreads ahead of time (Although, I think they taste best eaten when they are made). Let cool completely, put in a freezer bag, and freeze for up to one month. To reheat, bake at 350° F for 5-10 minutes.

Get the full recipe instructions HERE!

Follow Bree on her blogFacebookInstagram and Pinterest!

How to Make the Perfect Grilled Cheese

Sometimes called a toastie, my Open-Faced Hot Honey and Ham Grilled Cheese has Dijon, ham, arugula, apples, pepper, and a hot honey drizzle.

By: Bree Hester

Open-Faced Honey Ham and Cheese

April is National Grilled Cheese Month and I appreciate an entire month devoted to my love of crispy bread and melted cheese. Is there anything better than a grilled cheese sandwich? I really don’t think there is. 

The thing about grilled cheese is that it’s so simple and yet so divine, but to make an EPIC grilled cheese, you can’t just throw a cheese sandwich in a pan and call it good. There are thoughts and techniques that go into creating that angelic cheese icon. 

Follow these rules for making the most EPIC and delicious grilled cheese sandwich and you will have your mind blown by just how good the grilled cheese can be. 

(With such simple ingredients, make sure to use the best quality ingredients you can get your hands on. I splurge on bakery-fresh artisan bread, Irish or French butter, and lots of Roth Cheese.)

Open-Faced Hot Honey Ham and Cheese

01. Use really good bread. Go to the bakery and get a loaf of crusty, hearty bread. You can add some flavor here too. An olive bread, a sweet bread with fruit (I’m not a fan of raisins, but a fruit and nut bread is actually a really delicious base for grilled cheese), baguette, ciabatta, whole wheat – whatever looks good to you. Have the bakery slice it for you and save yourself the terror of cutting off a finger with a serrated knife. (Just me? This hasn’t happened to you?)

02. Use super soft butter. You want butter on every surface of your bread. (Both sides!!) There is nothing more frustrating than trying to spread too cold butter and tearing your beautiful bread. Make sure that it is softer than room temperature, you want spreadable butter. Some people swear by mayonnaise for grilled cheese. If you’ve been here for a while, you know I’m phobic about it, so it’s not something I keep allow in my house, but it’s really good for this job because it spreads well and has enough oil to crisp up your bread. 

03. Use a variety of cheeses. Is one kind of cheese good? Absolutely. Are two or three varieties mixed together even more incredible? You betcha. All cheese tastes good, there is no debate about that. But some cheeses have incredible melting qualities. Some have unique flavor profiles. Pair up cheeses that melt really well with ones that have unique flavors. Like Havarti and Gouda, for example, in my Open-Faced Hot Honey and Ham Grilled Cheese. Both are delicious on their own, but Havarti is an excellent melting cheese and Gouda is a flavor explosion. Together they are a dynamic duo. 

04. Shred your cheese. Slices are fine, but I really like to shred my cheese and mix them together in a bowl before putting them on my sandwich. I think that this is the best way to get a good mix. I also really love how the cheese melts when you put shredded on a sandwich instead of hand-cut cheese. I just don’t cut my slices as thinly or evenly as my sandwich deserves. 

05. Shapes and sizes. Sometimes a regular old sandwich cut in half is what you are after. But if I am eating one with soup, I want it cut into fingers. If I am feeling really fancy, I want an open-faced toastie and want to knife and fork it. My kids like it cut into quarters without crust. I like how when you think outside of the box a little, it changes the grilled cheese experience entirely. 

06. Flavor and texture. I think that the perfect bite has all or most of the flavor elements — sweet, salty, sour, bitter, umami. We also can’t forget about texture — creamy, crunchy, smooth, crispy. When you are looking in your fridge for grilled cheese ingredients, anything goes. But I like to think about the perfect bite. Is there a fresh element? Is there going to be some crunch? Am I feeling spicy? 

07. Resist the urge to turn up the heat on the pan. You’re hungry and want a sandwich NOW, I get it. It has taken me years to break this habit with my husband. He used to think that the only way to cook pancakes was on high heat. The outside would burn and the inside would be raw. Medium-low and slow is actually the ideal heat setting for pancakes AND grilled cheese. The bread will crisp and turn a luscious golden brown and the cheese and toppings inside will be hot and melty. 

08. Shop your pantry. I really like to put mustards, jams, fruit butter, honeys, chutneys, pickled jalapenos, pestos, tapenades, and relishes in my grilled cheese. It’s a great way to add sweetness or a huge pop of flavor or spice. My favorite combination is salty and sweet, so I love adding a thin layer of jam to my bread before adding the cheese. It’s incredible! 

09. Shop your fridge. I think that a fresh element is always good in something that is, well, super rich. I like to add fresh herbs (thyme, basil, even the humble parsley), arugula, a few tomato slices, anything that will cut some of the fattiness in the grilled cheese. Fresh ingredients add bite and an entirely different element to the sandwich.

10. Change the cooking vessel. You probably are cooking your grilled cheese in a nonstick skillet. That’s fine, but if you have a cast-iron skillet use that. If you don’t have a cast-iron skillet, get one. They are super cheap and will last forever. They conduct heat better than anything else and can go in the oven. I cook everything I can in one of those. My next favorite cooking vessel for grilled cheese is, wait for it… a waffle iron. There is a place that used to be on Cape that had the best grilled cheese and it was made with good bread, cheddar, and cooked in a waffle iron. It makes for the BEST crevices and crunchy bits. Don’t sleep on trying to cook your grilled cheese in a waffle iron.

Open-Faced Hot Honey Ham and Cheese

Best Melting Cheeses For Grilled Cheese //

Roth Grand CruⓇ is an alpine-style cheese similar in style to Gruyère. It melts like a dream and is slightly sweet and nutty. It is an American-made cheese that is a delicious all-around cheese for eating, melting, and flavor.

Roth Original Havarti is super creamy and mild. It’s perfect for grilled cheese and also a perfect one to pair with a stronger-flavored cheese. You can also make killer combinations when you use flavored Havartis like Dill Havarti, Chipotle Havarti, or my personal favorite — Horseradish Havarti.

Best Cheeses for Adding a Punch of Flavor to Grilled Cheese //

Roth Gouda is a great melting cheese as well, but also has a distinct flavor that can only be found in a Gouda cheese. Punch it up even more and use a Smoked Gouda. I love this with thin slices of apple and Dijon mustard. 

Buttermilk BlueⓇ is creamy, tangy, and mellow. I love the unexpected punch of blue cheese in a grilled cheese sandwich. It is too much for me on its own in a sandwich but paired with Havarti, there is plenty of blue cheese kick that is mellowed out by the creamy cheese. For this sandwich, I like a thin layer of fig jam and some prosciutto slices on a fruited bread with some finely chopped rosemary inside.

Chèvre might not be the first cheese you think of in a grilled cheese, but believe me when I tell you, it works. This goat’s milk cheese is tangy, but also mild. (Truth be told I don’t love goat cheese, but I really do like this one.) This is particularly delicious on an open-faced grilled cheese. I like to melt Gouda on the bottom, spread Chèvre on top of that, sun-dried tomatoes, basil, and a handful of arugula. It’s a knife and fork-er, but a perfect brunch sammie.

Open-Faced Hot Honey Ham and Cheese

Delicious Accompaniments to Add To Your Grilled Cheese Repertoire //

Otherwise known as: shop your pantry and fridge for things to put inside your grilled cheese. Just about anything is fair game, but get creative with your ingredients. 

Sweet //

Jams and jellies
Honey
Maple walnuts
Hot honey
Fruit butters: apple, pumpkin, pear
Fruit curds 
Dried fruit
Berries
Cranberry sauce
Fruit compote
Fresh fruit slices

Savory //

Flavored butter: garlic herb butter, truffle butter, chipotle butter
Pesto
Relish
Pickled vegetables
Tapenade
Caramelized onions 
Caramelized mushrooms
Jalapeño peppers
Salsa
Meats: bacon, prosciutto, sopressata, 
Mustards
Balsamic glaze
Marinara sauce
Fresh herbs
Horseradish

These are just a few ideas to get you started. Once you start to play with ingredients, the possibilities are endless.

Open-Faced Hot Honey Ham and Cheese

Ingredients for Open-Faced Hot Ham and Cheese //

This Open-Faced Hot Honey and Ham Grilled Cheese is my current go-to combination. 

Hot Honey: I cannot get enough hot honey. Nothing is safe, I put it on and in everything. It is very easy to make at home, but I usually buy it. If you’d like to make your own, simply mix together 1 cup honey and 2 tablespoons hot sauce. Heat on the stove for a few minutes and then transfer to an airtight container. 

Gouda and Havarti cheeses: I love this combination of cheeses. Roth Gouda is my favorite cheese  and I love mixing it with Roth Havarti for its melting qualities.

Baby arugula: I love the bite and freshness it adds to a hot ham and cheese sandwich. 

Dijon mustard: Because you can’t have a ham and cheese without mustard. 

Apples: The thinly-sliced apples add the perfect amount of sweetness and a little crunch.

Open-Faced Hot Honey Ham and Cheese

How to Make Grilled Cheese in the Oven // 

I used a crusty white bread that I got at a local bakery. I buttered one side and toasted it, then took it out and spread a light layer of Dijon mustard on the opposite side of bread. Then I topped it with shredded Gouda and Havarti, a few thin slices of ham and apple. Add a little more cheese to help it all stick together. Put it back in the oven and toast until the cheese is melted and gooey. Take it out and add a grind of pepper, a handful of baby arugula, and a generous drizzle of hot honey.  

This sandwich hits all the notes that make me happy. Crispy, crunchy, salty, sweet, creamy, spicy. It’s absolute perfection. I hope you love it as much as I do.

Open-Faced Hot Honey Ham and Cheese

Get the full recipe instructions HERE!

Follow Bree on her blogFacebookInstagram and Pinterest!

How to Make a Cheesy Frittata

Baked Frittata with Smoked Gouda, Havarti, Spinach, Potato, and Pepper is a baked frittata recipe that is perfect for breakfast, lunch, or dinner.

By: Bree Hester

Cheesy Baked Frittata

I don’t love eggs. But I do love eggs when they are covered in melted cheese and lots of veggies and other things to bulk them up. Like a frittata.

Just about anything goes in a frittata. You can clean out the fridge and throw some eggs in there and you have an incredible meal — for breakfast, lunch, or dinner. You can serve it piping hot, room temperature, or even cold. Frittata is essentially the perfect meal.

For this particular frittata, I used thinly-sliced Yukon Gold potatoes, red pepper, and spinach with shredded Roth Smoked Gouda and Roth Original Havarti cheeses. But what I really want you to do is to consider this a base recipe. You can customize this recipe into any kind of frittata you like. 

I do start with sautéed onions as the base for every frittata I make. I like to cook them for a few minutes to soften them before I add the egg. But after that, it’s up to you and your taste. Go crazy.

Ingredients //

Cheesy Baked Frittata

My base frittata recipe only has a few ingredients that you most likely have right this minute. Olive oil, onion, eggs, milk, salt, and pepper. For this recipe, I also used Yukon Gold potatoes, red peppers, garlic, spinach, and two kinds of Roth cheese.

Eggs // I always buy organic large eggs. I think they are best and when they are the main protein source in a recipe, like in this one, I think it’s important to use the best eggs you can get your hands on.

Milk // I add a little milk to my egg mixture to make the eggs creamier. You can use half-and-half or if you have some heavy cream, use that. (I like to use up whatever dairy I have and I seem to always have a half carton of cream in my fridge.)

Yukon Gold potatoes // These are my favorite potato variety. They are golden in color, super creamy, and just a delicious potato. I used baby ones, but any size will work. Leftover roasted potatoes are perfect for this.

Roth Original Havarti cheese // I chose this cheese for its melting capabilities. It’s super creamy, milk in flavor, and melts like an absolute dream. I use my favorite Kitchen-Aid attachment to shred my cheese. It works like a dream.

Roth Smoked Gouda cheese // Smoked Gouda has a just-right smoky flavor, is slightly sweet, and very creamy. This Gouda melts like a dream. Gouda is one of my favorite cheeses and I use it in as many recipes as I can. Smoked Gouda adds such a depth of flavor, it makes this recipe. Don’t sleep on smoked cheese, it is delicious on its own but really adds something amazing to any recipe that calls for cheese. 

Sautéed onions // I think that sautéed onions are the basis of any delicious recipe. They add so much flavor and depth and you don’t need a lot to do the job.

How to Make // The Steps for Making Frittata //

This is such an easy baked frittata recipe. You sauté some vegetables, whisk some eggs and milk together, and then put it all together in an ovenproof pan. Top with cheese and bake until set and the cheese is gooey and melty.

Cheesy Baked Frittata

Add olive oil to an ovenproof sauté pan over medium-high heat. (Mine is 8 inches, but I normally make it in a little larger pan. I made two individual ones for lunch tomorrow.)

Add potatoes and cook for about 8 minutes, or until they start to soften and turn golden brown. Season with salt and pepper. Remove from the pan and set aside. 

Cheesy Baked Frittata

Add onions and red pepper and cook for 5 to 7 minutes or until they are soft and the onions are translucent.

Add spinach and minced garlic. Cook for about a minute, or until the spinach is wilted and the garlic is fragrant.

Cheesy Baked Frittata

Remove the pan from the heat and add the potatoes back to the pan. Season well with salt and pepper.

Cheesy Baked Frittata

Whisk eggs and milk together until combined. Season with salt and pepper. 

Cheesy Baked Frittata

Pour the egg mixture into the pan and top with most of the cheese. I hold some back to add when it comes out of the oven.

Cheesy Baked Frittata

Add the pan to a preheated 350° F oven and bake until set, about 15 minutes. Let sit for 5 minutes, then remove from the pan and garnish with chopped basil.

Cheesy Baked Frittata

What Makes This Frittata with Smoked Gouda, Havarti, Spinach, Potato, and Pepper So Good? //

This frittata recipe is so good. It’s so easy to make and such a good vehicle to carry flavor. Everyone in my house will eat it and it’s also great left over. So many things to love!

Frittata with Smoked Gouda and Havarti. How can that not be amazing? This is a marriage made in heaven, a stronger-flavored cheese that is balanced with a rich and creamy one, and both melt so well. You can also add the extra shredded cheese after it comes out of the oven and put it under the broiler for a minute to get those crispy, brown, cheesy bits.

The more cheese, the better if you ask me. This is a great way to use up any cheeses that you have in your cheese drawer. Shred up what you have and try all kinds of cheese combinations. It’s also great for a leftover cheese board after a party. (Remember those?)

Frittata can be served for breakfast, lunch, or dinner. It’s so versatile. I probably make it more for dinner than any other time of the day.

It’s great leftover and perfect in a lunchbox. I actually made a few individual ones in two silicone baking cups, but you could bake them in a well-greased muffin pan. Make sure to use a LOT of cooking spray, egg sticks like nothing else.

Cheesy Baked Frittata

Serving Suggestions //

Frittata can be served all on its own and it’s great, but I like to round it out. For breakfast, I like to serve it with some toast and berries or a fruit salad. 

For lunch or dinner, I like to serve it with a side salad or arugula dressed with some lemon juice and olive oil. Super simple.

Cheesy Baked Frittata

How to Store & Reheat Leftovers //

This recipe serves 8, so I often have a piece or two for the next day. 

Store the leftover pieces in an airtight container for up to 4 days in the refrigerator. It also freezes really well.

To reheat in the oven, cover the frittata with foil and reheat at 350° for 15 to 20 minutes. To reheat in the microwave, put on a plate and cover with a paper towel. Microwave for 15 to 30 seconds or until it is warm all the way through.

Cheesy Baked Frittata

Tips for Making the BEST Frittata Ever //

Frittata is so easy to make, but there are a few things that will make it incredible. 

Use a non-stick pan and plenty of oil. Eggs stick like nothing else. If you’ve ever made the mistake of not greasing a muffin tin enough and then baking eggs in them, you know what a pain it is to get that clean. So be generous with the olive oil. 

Season at every stage. Add salt and pepper throughout the recipe. You want to layer and build seasoning. It makes a HUGE difference. Don’t wait until the last step to season, you want everything to taste great on it’s own. 

Shred your own cheese. I used to buy a lot of bags of shredded cheese, but these days, I buy more bricks of cheese and use my grater attachment on my mixer to shred it myself. I get to use different kinds of cheese that I normally wouldn’t. Tip: put the cheese in the freezer for 10-20 minutes before you shred it.

Use a combination of cheeses. I always find that using more than one kind of cheese increases the overall cheesiness in recipes. Cheeses have different properties and flavor profiles. Using more than one cheese is a great way to get the best flavor and the next melt possible. Mix a spicy Jalapeño Havarti with Grand Cru® or the gorgeous melting Fontina with Buttermilk Blue®.

Soften the vegetables before you add the eggs. Sautéing your onions and vegetables before you add the egg mixture makes a huge difference in the end result. I know that the vegetables will cook in the oven, but the frittata will not taste anywhere near as good.

Get the full recipe instructions HERE!


Follow Bree on her blogFacebookInstagram and Pinterest!

How to Make a Mardi Gras Cheeseboard

How to make a Mardi Gras cheeseboard or Fat Tuesday-inspired cheeseboard with all things yellow, green, purple, and New Orleans!

By: Bree Hester

I have never lived in New Orleans or anywhere that truly embraces Mardi Gras, but I do love to celebrate it. You don’t really need to give me an excuse to decorate and make food around a theme.

I make a King Cake for my family every year, sometimes multiple times during Mardi Gras season, but for sure on Fat Tuesday. Some people eat pancakes (it’s called Shrove Tuesday or Pancake Day in the United Kingdom) or paczki (Polish jelly doughnuts — they are incredible!) to get ready for the Lenten season. Some people go buck wild with the cocktails and the beads. 

This year, we are going all out and will eat so much cheese and meats and King Cake and we will have zero regrets. I feel like we need a reason to celebrate and this is the answer! Have a family Mardi Gras night at home. 

How to Create a Mardi Gras-Inspired Cheeseboard //

I love a clear theme and this board has one: the colors of Mardi Gras and New Orleans. According to my research, purple represents justice, green represents faith, and yellow or gold represents power. 

New Orleans is what I think of when I think of Fat Tuesday, so I chose things that are from New Orleans and things that you eat while you are there. 

I had the BEST time creating this cheeseboard and I can’t wait to tell you how I made it. So grab a King’s Cup and let’s get started! 

Researching the Foods of New Orleans and Mardi Gras //

I started by doing a little research into foods that can be found and eaten in New Orleans. I wanted things that are easy to eat, go well on a cheeseboard, and loosely all tie into my Creole and Cajun theme.

King Cake // King Cake had to be on there. It’s the first thing I think of when I’m thinking about Mardi Gras. I made this one, but you can order them and have one shipped from Louisiana straight to your door. I’ve done this before and love how many different fillings you can choose from. I did an easy cheese filling for this one.

Andouille Sausage // Is found in so many Creole and Cajun recipes. It is a smoky pork sausage that is the base of so many famous Louisiana recipes. I cut mine on the bias and seared it until the sides were golden and crisp, like you do with kielbasa. 

Creole Mustard // Creole mustard is grainy, spicy, and an essential ingredient in remoulade sauce that is also a New Orleans staple. It’s delicious to dip your Andouille into. 

Praline Pecans // I’m of the humble opinion that there needs to be a sweet element on every cheeseboard. You can’t visit a touristy Southern city without being hit in the nostrils with the delicious aroma of burnt sugar and roasted pecans. I worked next to a candy shop that made them while I was in college and think that for a few years I was ⅕ praline pecan. They are the perfect sweet element for this cheeseboard. 

Pancakes // When I was thinking about what to put on this board, the idea to add baby pancakes came to me in the middle of the night (ALWAYS THINKING ABOUT FOOD) and I’m so glad I remembered it when morning came around. I made silver dollar-sized pancakes as a nod to Shrove Tuesday. I used my favorite store-bought pancake mix, but you can always make homemade pancakes.

French Bread // Crusty French baguette because there is so much French influence in the food and culture of New Orleans, this had to be a vehicle for getting cheese to mouth. 

Cornbread Crisps // Also a nod to the South where cornbread and biscuits are found on almost every table. And the yellow color was a plus too. 

Muffaletta Ingredients // If you’ve ever gone to New Orleans, you have seen and heard of the famous muffaletta sandwich. There is an olive salad, lots of meats and cheeses, and is often served as an entire loaf bread. It’s pressed, so when it’s cut, it has really beautiful layers. I have a bowl of olive salad ingredients, ham, salami, and lots of cheese to choose from. With the French bread, you could make yourself a muffaletta-like sandwich.

The Rest // To round out my Mardi Gras cheeseboard, I picked fruits and vegetables that fell into my color palette. Purple and yellow carrots, yellow and green peppers, blueberries, and cucumbers. 

The Roth Cheeses I Used for This Board //

For full disclosure, I chose my cheeses based solely off of color. Thankfully, Roth Cheese never lets me down and I had cheese that is yellow AND yellow with flecks of green! (When you are committed to a theme, you really need to COMMIT!)

Natural Smoked Van Gogh®️ Gouda // This is one of my favorite cheeses in the entire Roth Cheese lineup. This cheese is creamy, smoky, and incredible. It is also made for a perfect bite – A piece of French bread, a teeny bit of mustard, a slice of smoked Gouda, and topped with pecan praline. Trust me, it’s perfect!

Grand Cru®️ // Grand Cru® makes an appearance on every board I make now because it is my husband’s favorite cheese. It also pairs perfectly with an icy cold beer, which goes great with a muffaletta. 

Dill Havarti // I think that Dill is often overlooked as one of the best herbs. It’s so fresh and light and I use it in salads all the time. Add it to some Havarti and it makes a really delicious cheese even more delicious. (This cheese is really good on a fried egg sandwich.) 

Horseradish Havarti // I LOVE horseradish. I worked in a restaurant that had jars of really spicy horseradish and oyster crackers on each table. I would eat it and cry because it was so hot, and I loved every second of it. The creaminess of the Havarti cuts the spiciness of the horseradish and has just the right amount of kick. This Havarti also has chive and mustard seed in it. I need to experiment with this cheese more because I think that it would be amazing melted on so many things. 

Some Extra Festive Things //

To make the table I served this on even festive, I bought some yellow, green, and purple napkins from a party store. I put a few of each color under the cheeseboard and it adds so much color and makes everything pop. 

Mardi Gras beads and King Cake babies! I bought a big bag of 100 beads on Amazon and am set for life. I put strands all around the table and the cheeseboard to get us in the Mardi Gras mood. I also bought little plastic babies that are found in King Cakes and used them in cocktails and around the table to set the tone.

Lastly, I made a batch of King’s Cup Cocktails. A really delicious coconut, lime, and pineapple drink with a green and purple sugar rim that is so good and really fits with my whole theme. 

I hope you loved this post as much as I loved creating it. I had the best time thinking of ideas and decorating and making something special for my family when we need a weeknight celebration.


Follow Bree on her blogFacebookInstagram and Pinterest!

How to Make A Valentine’s Day Cheeseboard

How to create a romantic Valentine’s Day cheeseboard with chocolate-covered peanut butter balls and Roth Grand Cru®️ alpine-style cheese!

By: Bree Hester

Valentine's Day Cheeseboard with Roth Cheese

There is a better than good chance that your Valentine’s Day is going to be celebrated at home this year. Might I suggest a chocolate and cheeseboard to set the mood? Is there anything sexier than cheese and chocolate? Maybe cheese, chocolate, and PEANUT BUTTER.

Just because we might be skipping the fancy restaurant this year, does not mean that we can’t make it special at home. When my husband and I had young children, we often put them to bed and had a nice evening on the couch with a bottle of wine and a cheeseboard

Honestly, some of our best dates took place in the comfort of our living room when we didn’t have babysitters or much disposable income to speak of. Now we have teenagers and they go to bed later than us and we miss our cozy couch dates. 

I love a theme and a holiday, so I really went with it for this board. Red and pink and roses and hearts – and there is nothing not to love on this cheeseboard.

Roth Grand Cru®️ alpine-style cheese is naturally nutty and pairs perfectly with peanut butter and chocolate. I made peanut butter balls to complement the complex flavors of the cheese. They are incredibly simple to make and one of my absolute favorite Valentine’s treats. 

Ingredients for Homemade Peanut Butter Balls

Ingredients for Peanut Butter Balls //


Peanut Butter: You can use smooth or chunky, but this isn’t the time to use the healthy kind. The kind that comes from the health food store or separates is great on bread, but you need to add so much sugar to get it to hold its shape.

Melted Butter: You don’t need a lot of butter, but it adds to the richness and helps the balls keep their shape. 

Vanilla: A little vanilla adds depth of flavor and makes everything taste better. 

Salt: Everything sweet needs a little salt to bring out and enhance the flavors of everything in the bowl. It makes the peanut butter more peanut buttery and the chocolate more chocolate-y. 

Powdered Sugar: Adds sweetness but also literally holds everything together. 

Chocolate: I used semisweet chocolate chips, but if you prefer, you can use milk or dark too. 

Coconut Oil: I add a little coconut oil to my chocolate to add shine and help it set up. (This is also how to make homemade Magic Shell for ice cream.)

How to Make // The Steps

How to Make Peanut Butter Balls / Step 01
  • In a medium bowl, mix together 1 cup peanut butter, 1/4 cup melted butter, 1 teaspoon vanilla, 1 teaspoon kosher salt, and 2 1/2 cups powdered sugar. Mix until smooth and well combined. 
How to Make Peanut Butter Balls / Step 02
  • Chill the mixture for 10 to 15 minutes. 
  • Portion the mixture into tablespoon-sized balls. Roll them into balls and place on a parchment-lined baking sheet.
How to Make Peanut Butter Balls / Step 03
  • Freeze until firm, about 30 minutes. 
  • When ready to dip, melt 1 (12-oz) package semisweet chocolate chips over a double boiler or in the microwave. Add 1 tablespoon coconut oil and mix until combined. 
How to Make Peanut Butter Balls / Step 04
  • Use a fork or skewer to dip the peanut butter balls into the chocolate. Let the excess chocolate drip and place them on the parchment paper.
How to Make Peanut Butter Balls / Step 05
  • Add sprinkles if you like. 
  • Let sit until the chocolate is firm. 
Valentine's Day Cheeseboard with Roth Cheese

Tips for Making Peanut Butter Balls //

  • When you are making something with so few ingredients, make sure to use the best ingredients you can. It makes a big difference in the end result. Use high-quality peanut butter and chocolate. 
  • While you are working with the balls, if they’re too soft to dip, put them back in the freezer to set back up. 
  • If your chocolate cools and becomes too thick, put it in the microwave for 10-20 seconds until it is back to a dipping consistency. 
  • I sometimes like to add rice cereal or crushed cornflakes to the mixture for a little extra crunch. Or even mini chocolate chips or toffee bits would be amazing!
  • You can use white, milk, or dark chocolate if you prefer. There is no wrong chocolate/peanut butter combination!
Valentine's Day Cheeseboard with Roth Cheese

How to Make a Valentine’s Day Cheeseboard with Peanut Butter Balls //

I love a theme and I also love a holiday, so creating this board was just a lot of fun for me. I found as many things in the grocery store that are red, pink, heart-shaped, and fun for Valentine’s Day. 

Valentine's Day Cheeseboard with Roth Cheese

The Roth Cheeses //

The first step, pick your Roth cheeses and place them on your cutting board. I like to keep some wedges whole, and slice others. I like the way that it looks, and I like that it makes it easy to eat. 

Grand Cru®️ has quickly become my husband’s favorite cheese, so that was the inspiration behind this Valentine’s date night cheeseboard. It is mellow and has just a bit of natural sweetness, so it’s perfect on a board that features so many sweets. 

Prairie Sunset®️ and chocolate are also a match made in heaven, which is why I chose those two kinds of cheese to pair with all of the chocolate you find on this board. 

Chèvre is mild and fresh. In my humble opinion, an excellent base on a cracker with some prosciutto and dried fruit. I took it a step further and rolled it dried cranberries for color and extra flavor.  

Havarti rounds out the cheese selection. It’s super creamy and I wanted something more salty and savory to round out all of the sweetness on this cheeseboard.

Valentine's Day Cheeseboard with Roth Cheese

The Rest for Your Valentine’s Day Cheeseboard //

Once you have your cheeses laid down on your cutting board, I like to fill in some of the holes with my bigger items. I made roses out of salami and bay leaves, so they took up a nice spot at the top of the board. 

I placed my peanut butter balls in the middle because next to the cheese, they are the star of the show. 

There is a cute bakery in my town that specializes in gingerbread cookies, so I bought a few large hearts and made sure that they were also a focal point. 

Once I had my main items placed, I filled in any holes with smaller items. I had raspberries, chocolate-covered strawberries, chocolate caramels, white chocolate raspberry chunks (they have Pop Rocks in there and it’s my new favorite candy), little pink cakes, and heart candies.

This board is FULL of delicious treats. To finish it off and really make it look romantic, I added spray roses and more fresh bay leaves. 

I love this cheeseboard turned out and I can’t wait to share it with my love this Valentine’s Day.

Valentine's Day Cheeseboard with Roth Cheese

Follow Bree on her blogFacebookInstagram and Pinterest!

Helpful Holiday Cheeseboard Tips

By guest contributor: Bree Hester, Baked Bree

Our holidays this year might be smaller, but that doesn’t mean they won’t be full of traditions or as festive. Growing up, we had a cheeseboard as part of our Christmas morning breakfast. This was before cheese boards were part of our everyday vernacular. We had cheese and crackers, but not like the full spread.

We felt very fancy eating cheeses we picked out at the gourmet cheese shop, with little jars of mustards and jams, teeny tiny pickles, olives, and crusty bread while wearing our pajamas after opening our presents. 

Now, we don’t save the good cheese for just Christmas morning, we eat cheese boards with the good cheese on them all the time at home. We keep a well-stocked pantry so we can throw together a good cheese pairing at a moment’s notice. And we do. Often.

One upside of 2020 is that we can buy excellent quality cheeses at our local grocery store any time we want. 

A few years ago, I went to Wisconsin and met a few cheesemakers, and toured their facilities. I sampled their cheeses and saw firsthand the pride and love they put into their product. People just don’t make cheese, they live and breathe cheese. 

It stayed with me and now I actively seek out Wisconsin cheeses, like Roth Grand Cru®, because I know that they will be made with milk that comes from family farms. More often than not, you can see the silo from the parking lot, they are that close. 

Roth Cheese is a brand that I look for in the cheese case because I know that I’m going to get a well-crafted and delicious cheese, made with all-natural ingredients and rBST-free milk, no matter which variety I choose. I also really like that all of the packages have pairing and cooking ideas on them. 

I’ve made so many cheese boards that I think that I have cracked the code for making stellar ones every time that are just as pretty as they are tasty. 

Grand Cru Cheeseboard by Bree Hester

How to Choose Cheese For Your Board //

When I’m making a cheese board, I want a few different kinds of cheese. Different textures, different flavor profiles, different ages, different colors. I want there to be lots of different bite possibilities.

For this board, I have Grand Cru®, Buttermilk Blue®, Van Gogh Gouda, and Cranberry Cinnamon Chèvre.

Age // Grand Cru® is Roth’s signature alpine-style cheese. It is similar to Gruyère, cultured in cooper vats and then aged for 4+ months. It is delicious for snacking, but also melts beautifully. We also use this for our New Year’s Eve raclette because it’s heaven melted over roasted potatoes.

Texture // Buttermilk Blue® is a creamy and mellow blue that is aged for two months. A lot of blue cheeses can be too strong for me, but this one is just right. 

Flavor // Van Gogh Gouda is slightly sweet and mellow. It also melts well and is delicious in mac and cheese. 

Color // Cranberry Cinnamon Chèvre is a creamy goat’s milk cheese rolled in dried cranberries and dusted with cinnamon.

You can find Grand Cru® and other Roth Cheeses at your local grocer. Use their store locator for the closest location to you.

What to Put on Your Cheese Board //

Like with the cheeses you choose, you also need a variety with the other things on the board. Crunchy, sweet, salty, spicy. The way I like to think about it, combinations of things to make amazing bites. I also like to put on things that are seasonal or unexpected and fun, like the stollen on this board. 

Meats // Salami, prosciutto, ham, any cured meat you like

Fresh Fruits // Apples, pears, grapes, peaches, berries, cherries, figs

Dried Fruits // Dried cranberries, apricots, figs, mango

Nuts // Almonds, candied pecans, walnuts, pistachios, cashews

Condiments // Jams and jellies, honey, mustard, chutney, tapenade, pepper spread

Delivery// Crackers, flatbreads, breadsticks, pretzels, crusty bread

The Unexpected // Chocolates, potato chips, caramel corn, pickled vegetables, seasonal things, cookies

I made a homemade Apple Cranberry Chutney and it will go perfectly with the Grand Cru® and the other cheeses on this board. 

How to Put Together A Visually Appealing Cheese Board //

The beauty of a cheese board is, well, cheese. But also they are really beautiful on your table. There are some tricks for making them look Instagram-worthy.

Lay your cheeses out first // Your eyes are trained to see things in triangles and patterns. Cheese is often round and sliced into a triangle. I place the cheeses in a general triangle shape on the platter and point the edges towards each other. I also will pre-slice or cube some for ease of eating, but also visual interest. 

Color // I pick a color palette and try to pick things that will compliment each other. This board has lots of warm colors – reds, oranges, and yellows. All the colors work together and don’t compete with each other. You can also do the opposite – pick colors that are opposite on the color wheel. Purple and green, blue and orange, or red and green. 

Make it look abundant // I like my boards to look overflowing. Use a smaller platter or container and pile things higher on it. 

Fill all the space // I really like how a full platter looks. Where you can’t see the surface that the food is sitting on. It looks like a rectangle of meats and cheeses sitting on a table and I’m here for that. Nuts, dried fruits, and berries are really good filler for this. 

How can you arrange it in a different way // Instead of just taking a handful of crackers on putting them on a platter, maybe stack them or line them up or wave them around a bowl? Maybe fold meats into ribbons or pile them into little purses (this is really good for prosciutto)?

Think in odd numbers // Your brain tells your eyes to see things in patterns, and it also really likes odd numbers. So groupings of 3’s and 5’s draw your eye around your platter. 

Don’t overthink it and have fun // Even though I was styling this board to be shot for a post, it took me less than 10 minutes to put it together. I think that when you are working with foods that are naturally colorful and beautiful like cheese and fruit and chutneys, it is difficult to make it look anything less than gorgeous. Just have fun with it. 

How to Make Apple Cranberry Chutney //

I made this holiday-spiced Apple Cranberry Chutney to go on my cheese board because I love how in an English pub when you order a cheese plate, it always has a chutney on it. And also because I was a little overzealous with my apple purchasing and found myself with an abundance of apples that needed to be used up.  

During the holidays, I do like to take the extra time to make special condiments to have on hand, whether for gift giving or for when I am going to make a cheese board or serve a pork roast or a roast chicken. It makes me feel very Nigella Lawson-esque. 

I created this apple and dried cranberry chutney recipe using things I already had on hand. Apples, cider, onions, fresh ginger, spices, brown sugar, apple cider vinegar, salt, lemon juice, and dried cranberries. 

If you have never had a chutney before, it is a savory condiment, like a jam. It’s Indian in origin, and why you see it in English pubs. Did you know that the national food of England is chicken tikka masala? 

It’s simple to make, pairs perfectly with cheese and meats, and when you are making it, you can’t help but get into the holiday spirit. 

How to Make // The Steps

  1. Heat oil in a Dutch oven or large saucepan over medium heat. Saute onions for one to two minutes, or until translucent. 
  2. Add fresh ginger and spices, and cook for an additional minute. 
  3. Add brown sugar, apples, cider, apple cider vinegar, salt, and lemon juice. 
  4. Reduce heat to low, and let the apples cook down and begin to soften about 10 minutes. 
  5. Use a masher and mash about half of the apples. Add the dried cranberries and continue to simmer for an additional 15 to 20 minutes, or until the mixture is thick and the liquid has evaporated.  
  6. Let cool and put into a jar with a tight-fitting lid. Store in the refrigerator for up to 2 weeks or frozen for up to 2 months. 

Get the full recipe: Apple Cranberry Chutney