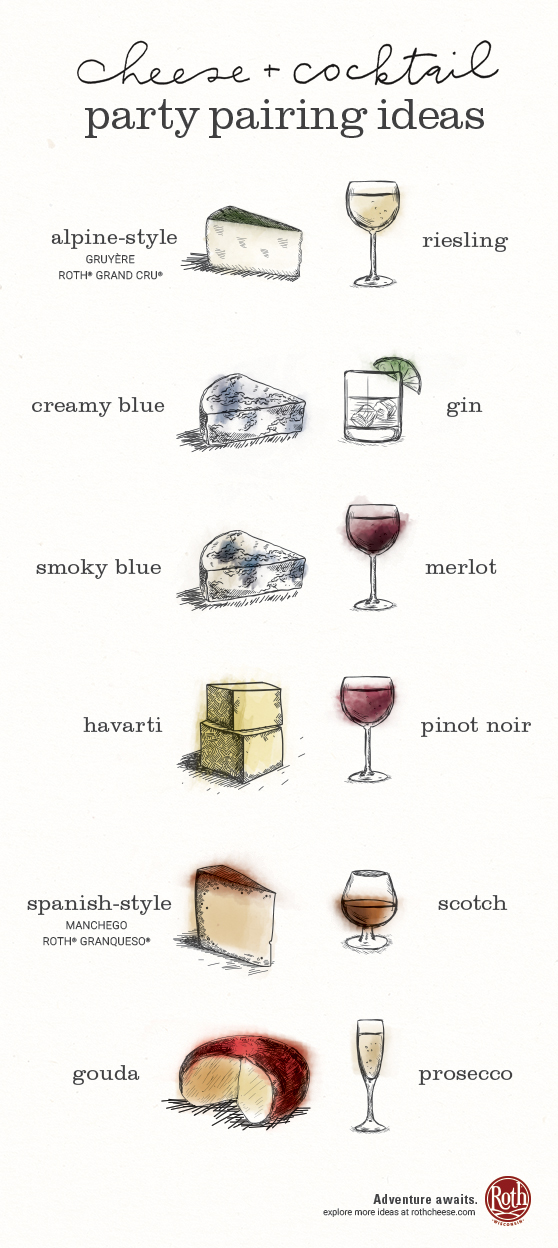
To go out or not to go out… that is the question! And we’ve made the answer much easier with four of our best wine and Roth cheese pairings for a romantic date night in.
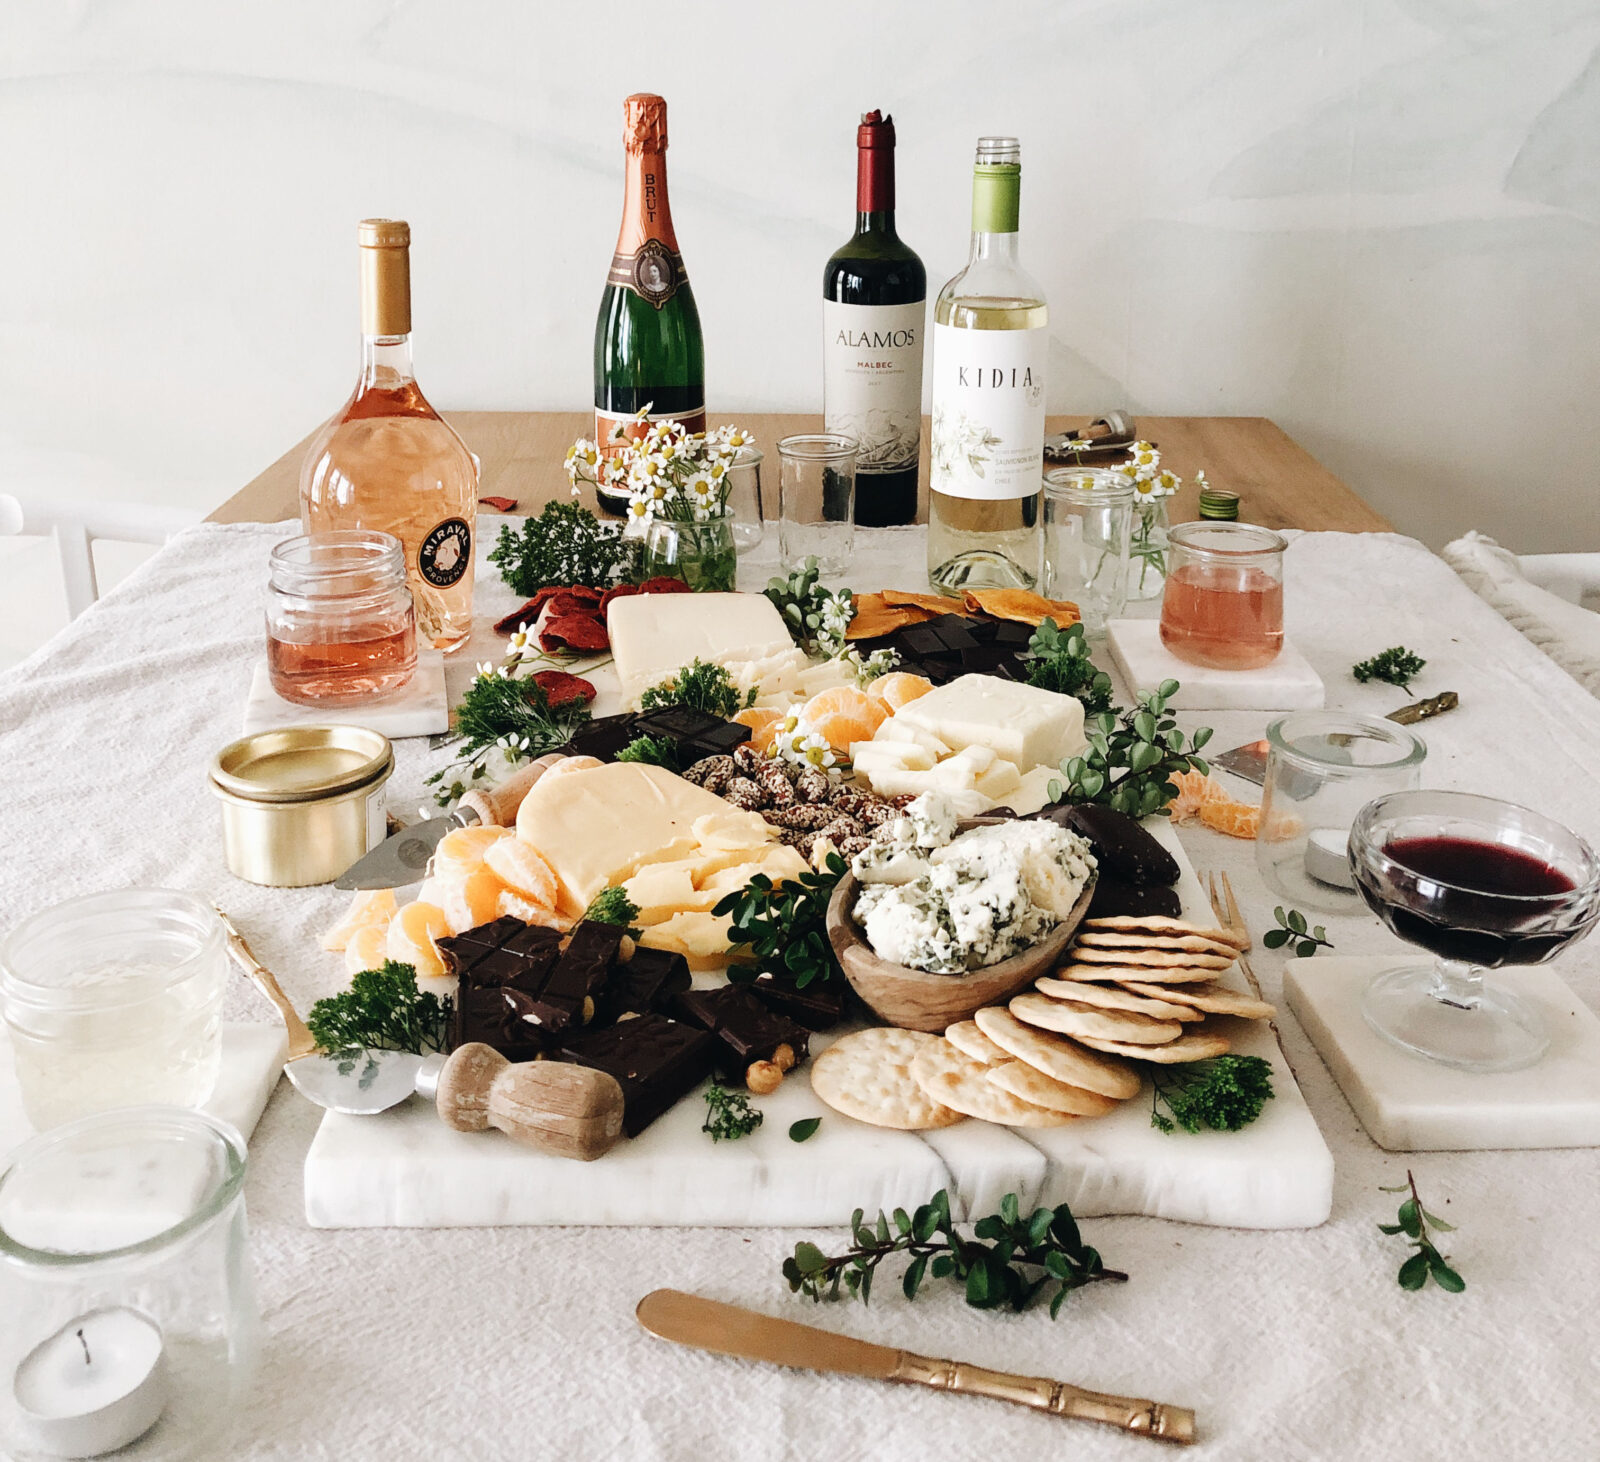
Even better, create a cheeseboard for a taste-as-you-go activity you can enjoy right from the comfort of your couch. Just add our suggested pairings (below), crackers, fresh fruit, nuts, and anything else you love. Featuring our Gouda, Grand Cru®, Havarti, and Buttermilk Blue® cheeses.
Gouda & Champagne
Mellow and mild Gouda has a creamy texture that pairs well with Champagne bubbles. Add a touch of sweetness by including dark chocolate and orange slices or dried mango. Not a fan of Champagne? Other bubbly wines, like a dry Prosecco or Cava, are great too!
Grand Cru® & Sauvignon Blanc
Our signature alpine-style Grand Cru® is nutty and full-bodied, making it the perfect match for a grassy yet zingy Sauvignon Blanc. Candied nuts, milk chocolate, and orange slices are well-balanced complements to the cheese and white wine.
Havarti & Malbec
A dry red wine like Malbec pairs wonderfully with our super creamy and buttery Havarti cheese. Add dark coffee chocolate to the plate for a surprisingly harmonious flavor trio. A few red-hued crackers add a visually romantic and festive touch.
Buttermilk Blue® & Rosé
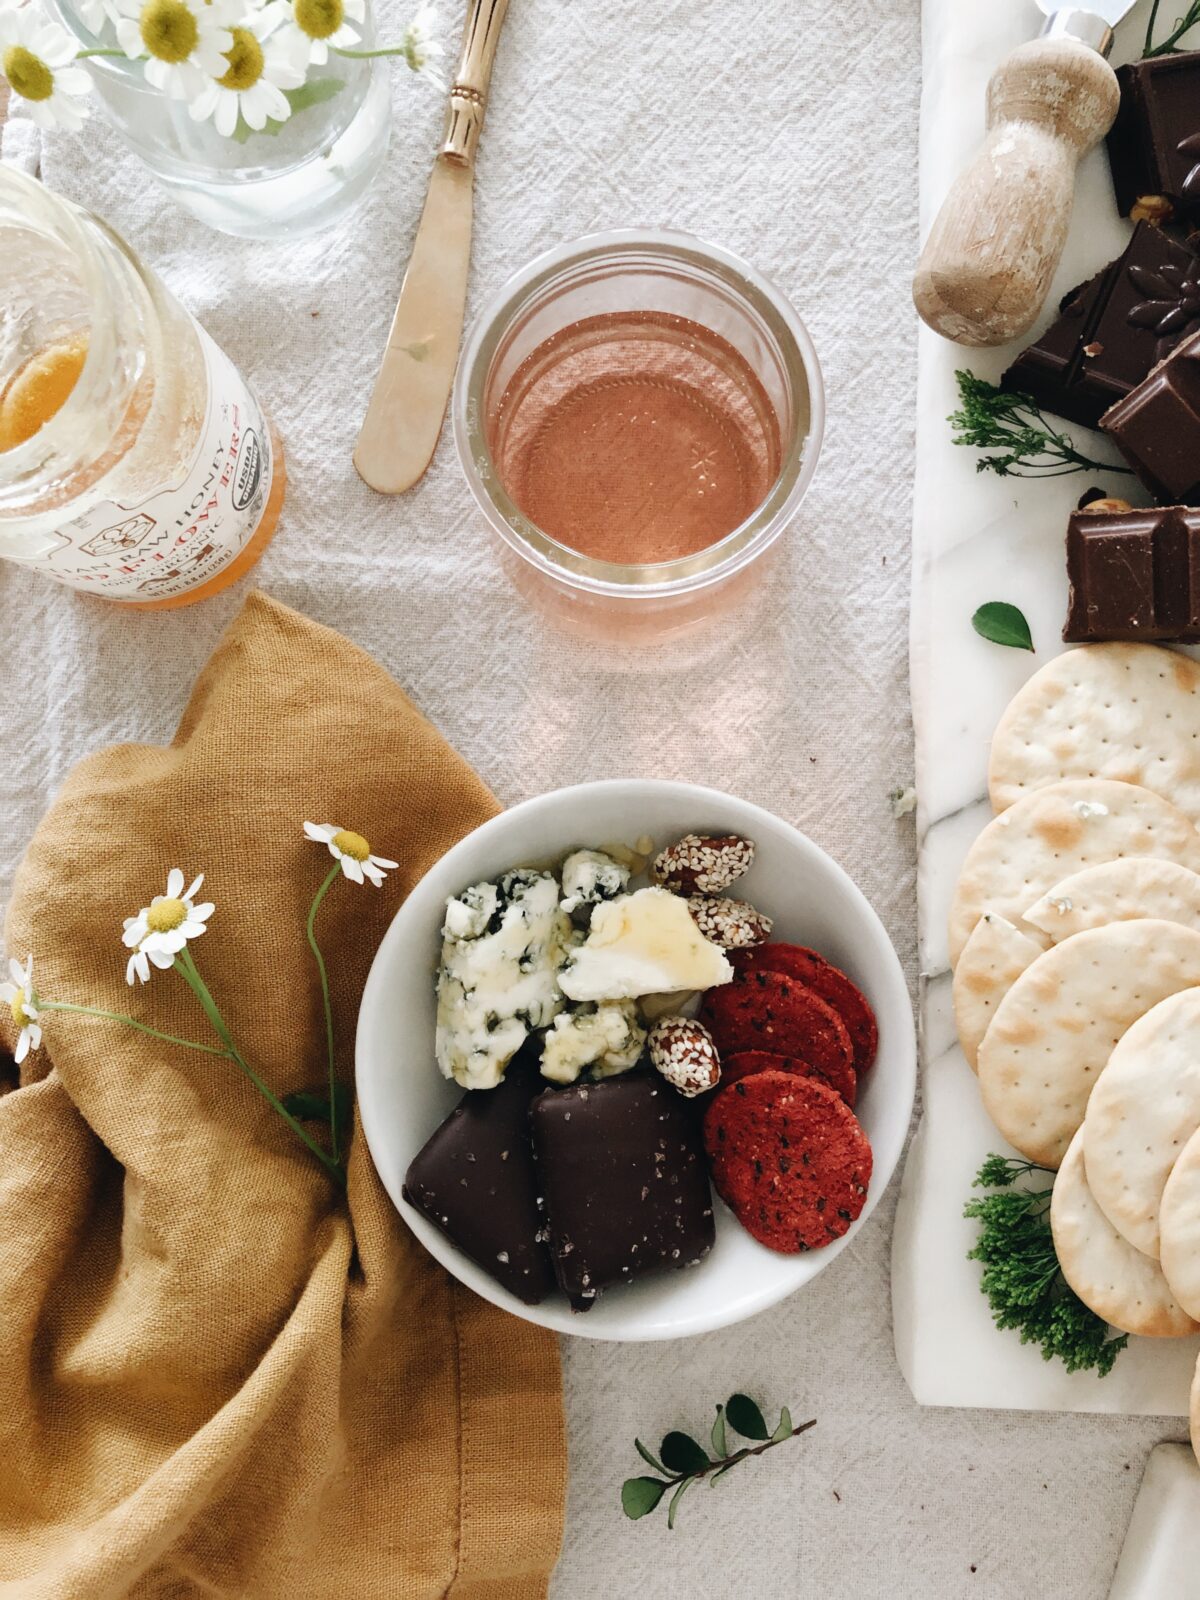
Our creamy and tangy Buttermilk Blue® complements a dry Rosé like no other! Add in a few sea salt dark chocolates, and your partner will be seriously wowed. For those a bit hesitant on blue cheese, add a drizzle of honey to help cut the sharp flavor.
Pairings & photography brought to you by our pal Bev Cooks.
Now that temps are really starting to drop, cozy winter meals are essential for warming up weeknight dinners. We’ve rounded up five of our favorite recipes that are simple, comforting, delicious, and of course — CHEESY! Each recipe features a different Roth cheese because with so many varieties, it’s easy to find the perfect one for whatever mood you’re in.
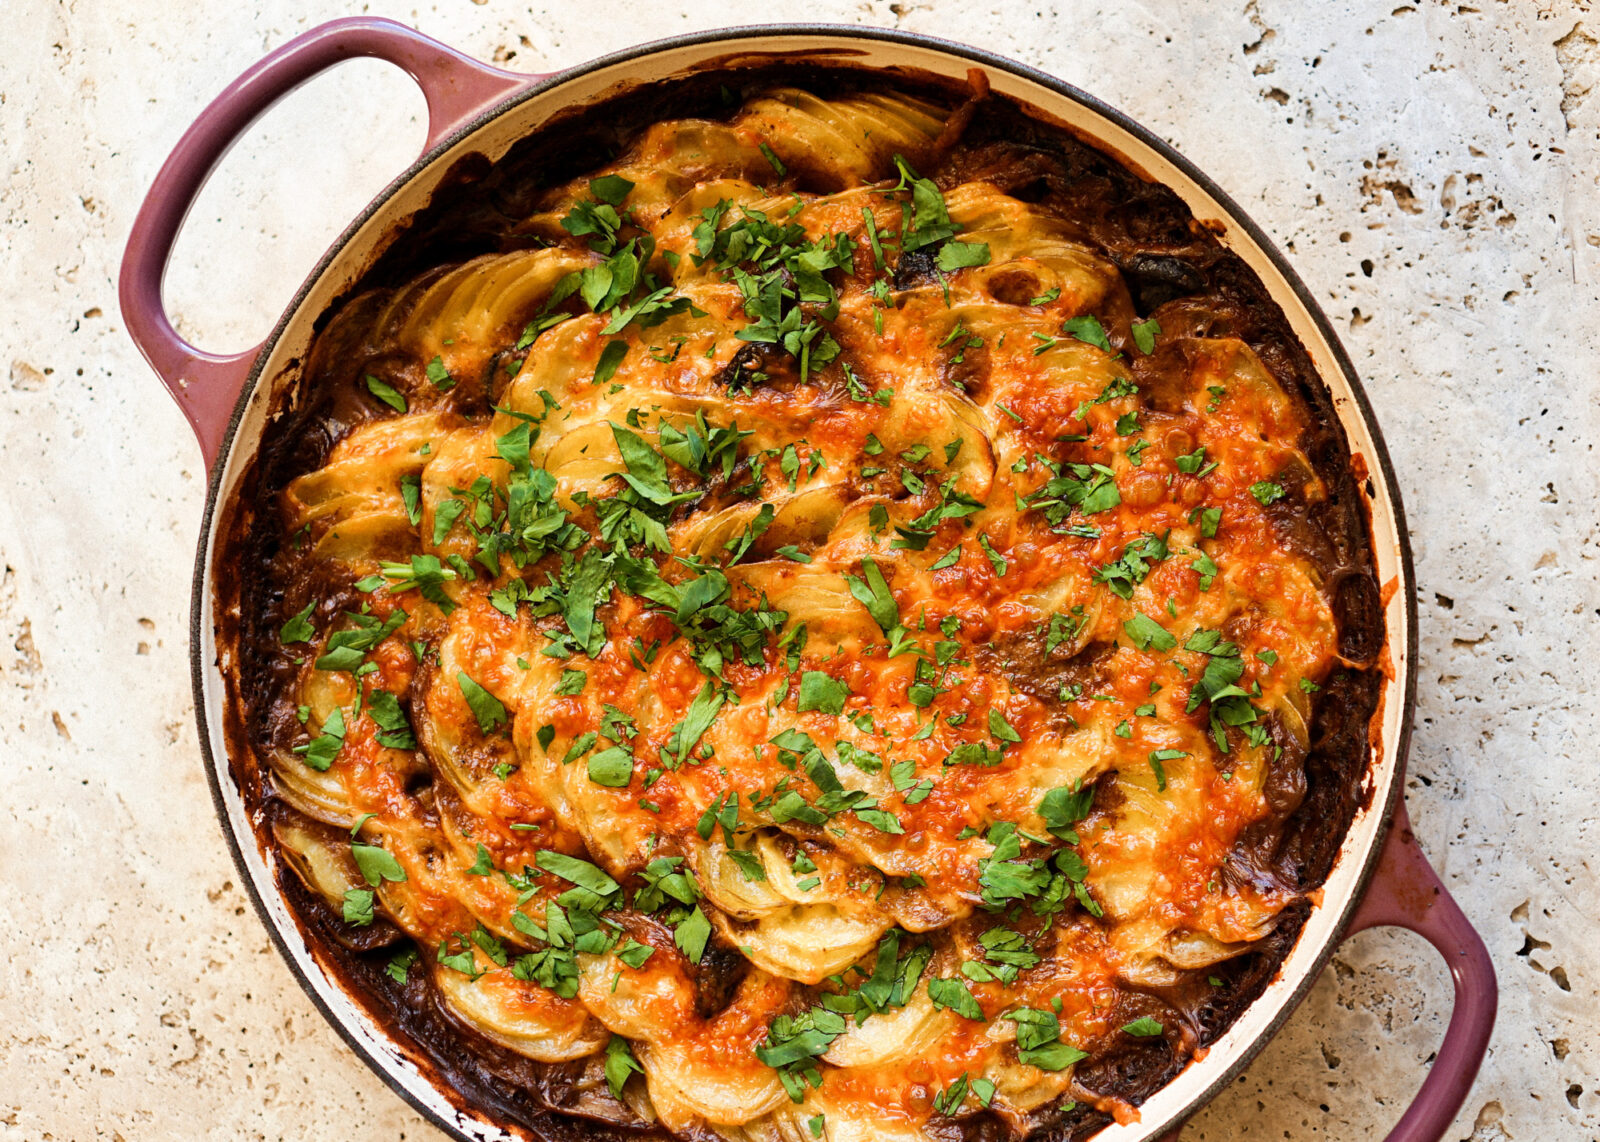
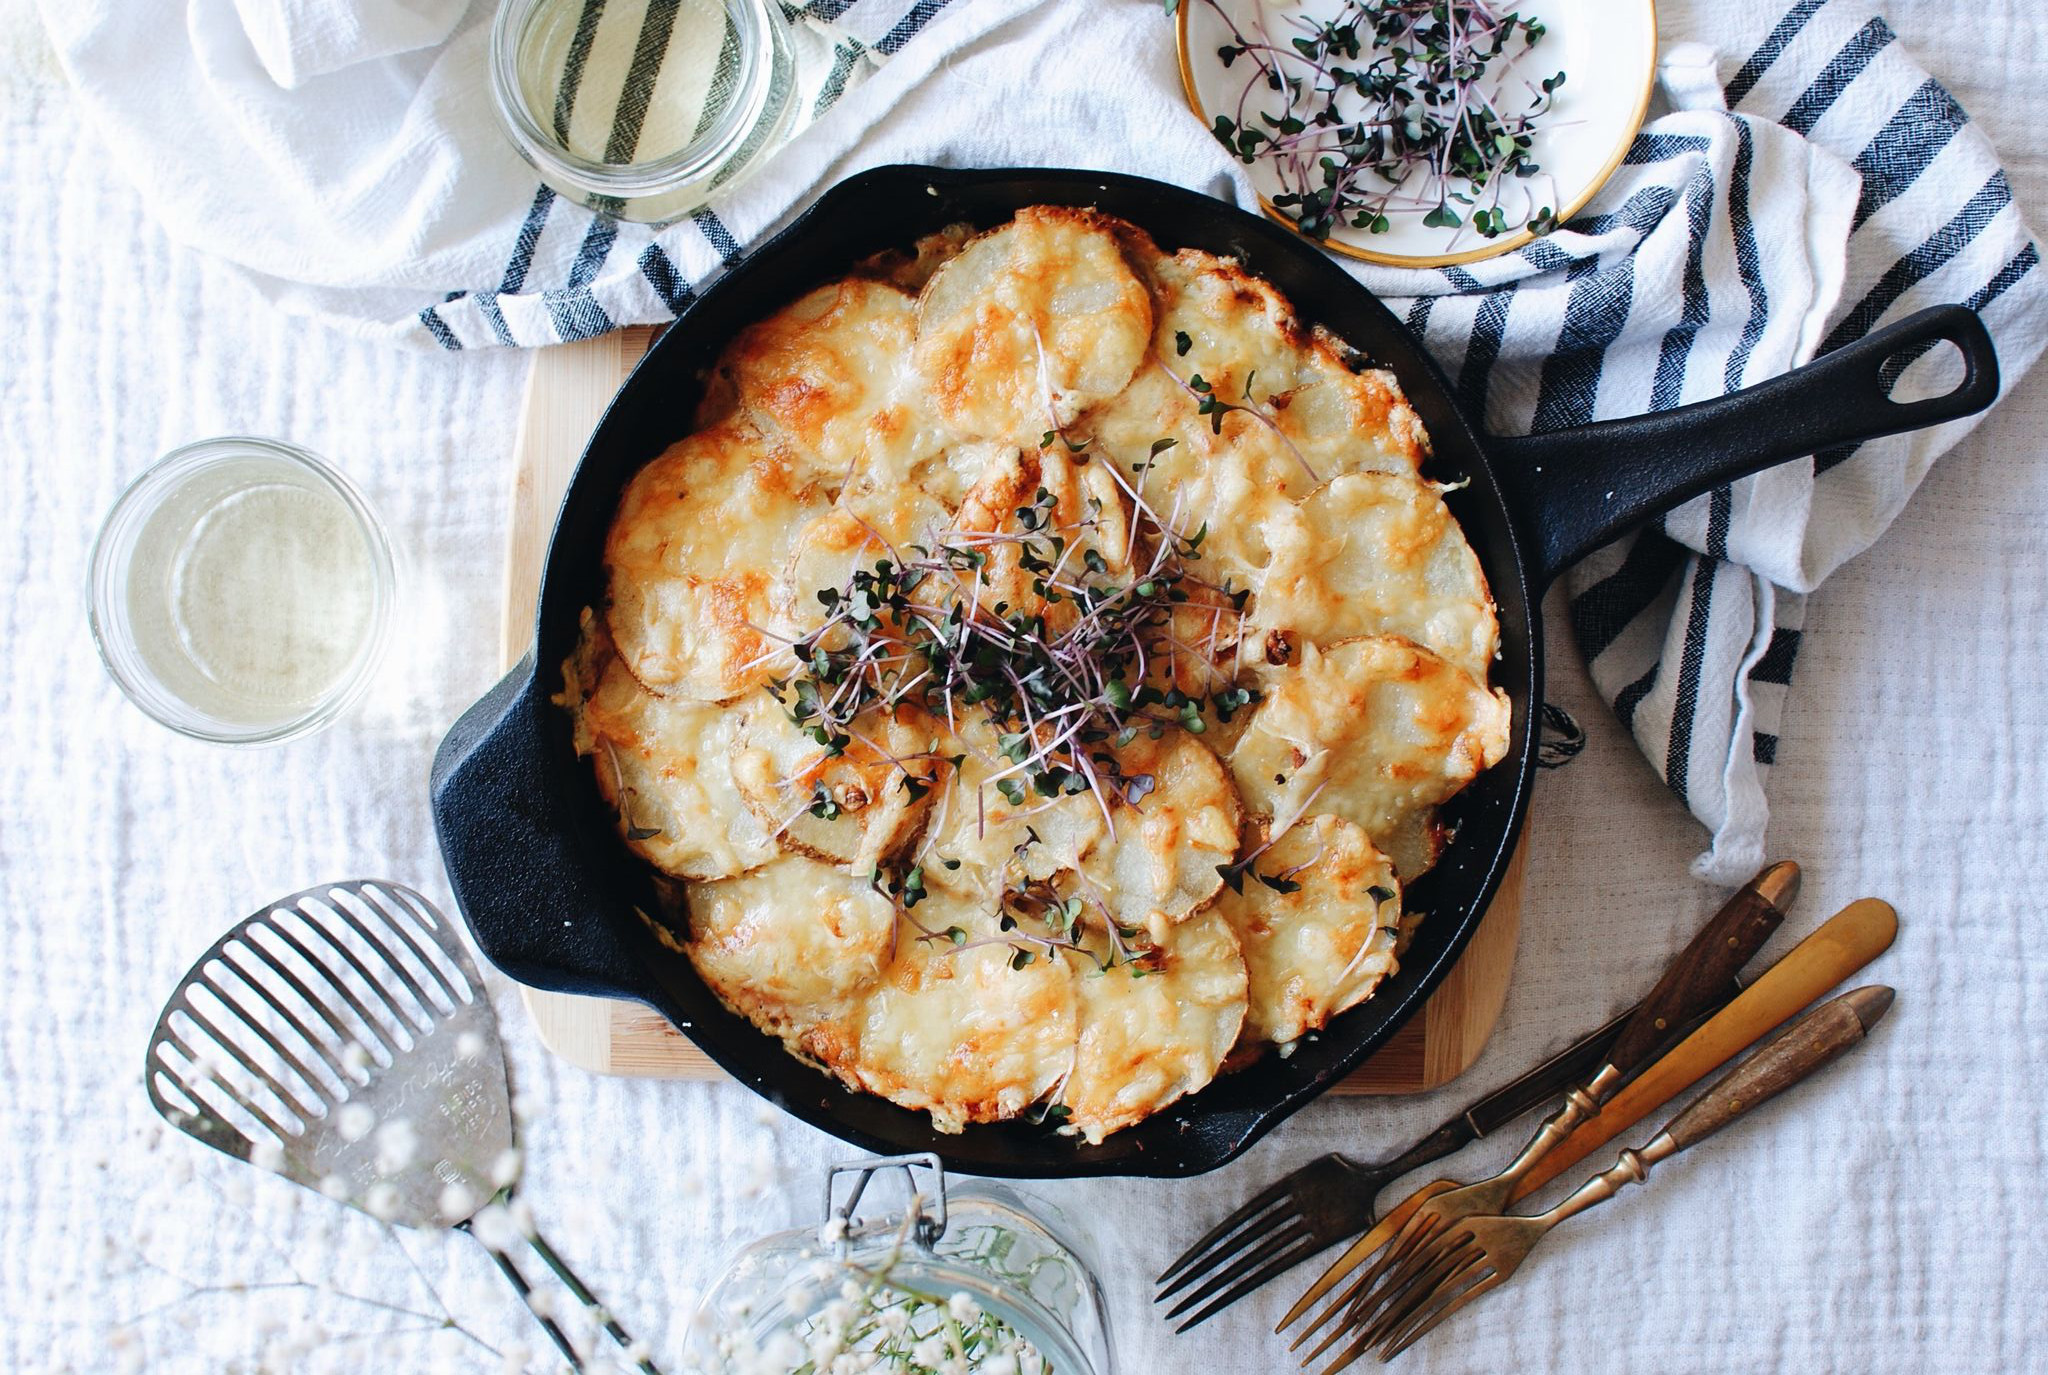
Miso Mushroom Scalloped Potatoes
These Miso Mushroom Scalloped Potatoes are like two amazing sides in one! They’re topped with a generous amount of our creamy Havarti for an extra crispy, cheesy bite.
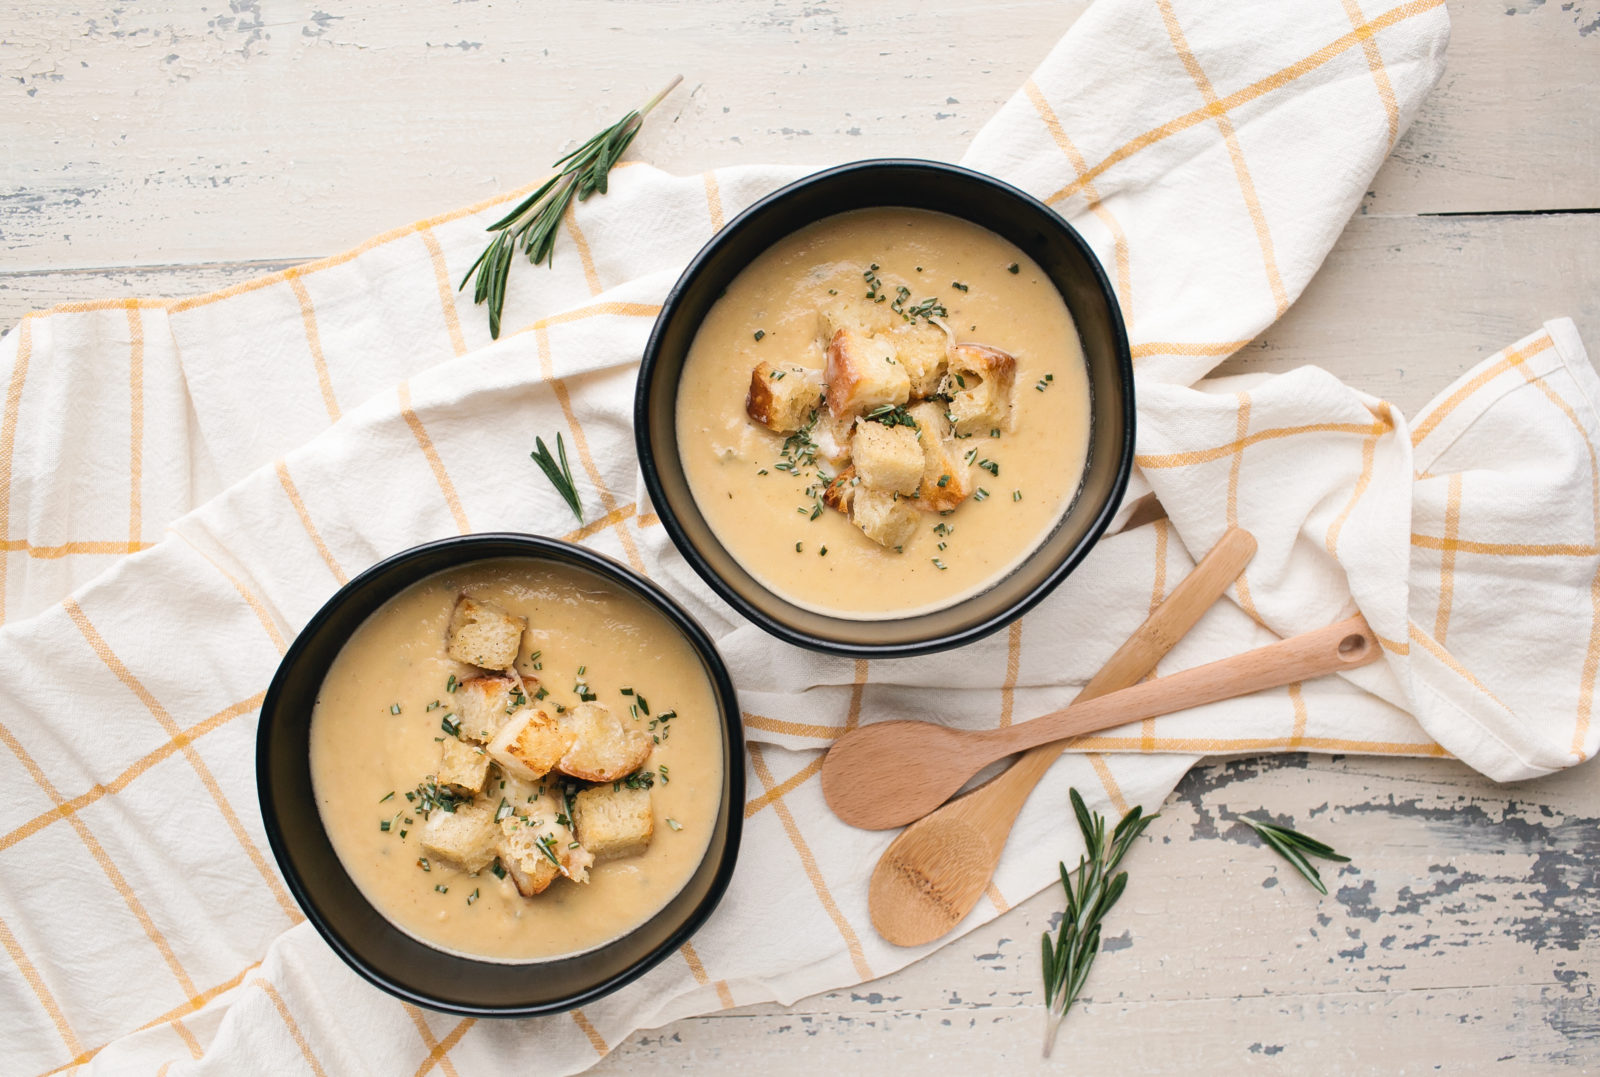
A warming, veggie-packed soup that’s on the table in less than an hour. It’s so simple and easy! Everything roasts on one pan, then is puréed until silky smooth. Featuring Organic Cheddar (or sub Grand Cru®).
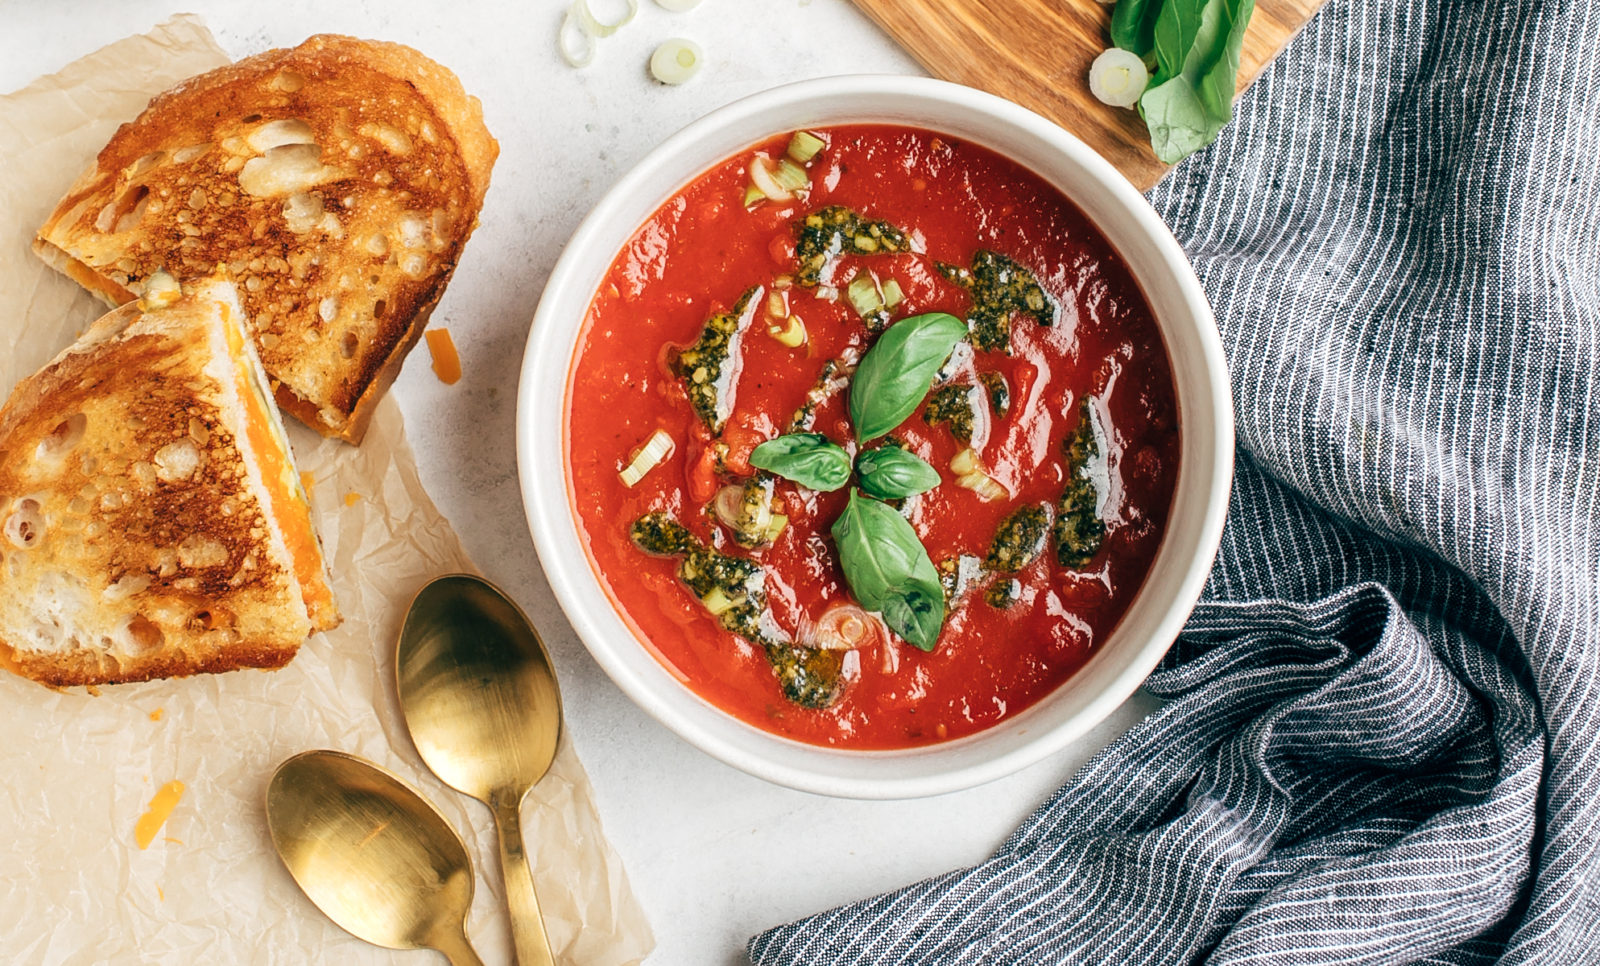
Tasty and super easy, the combo of grilled cheese and tomato soup never fails to comfort. This recipe is a classic, family-friendly take using our sweet and addictive Prairie Sunset® cheese (or sub Gouda).
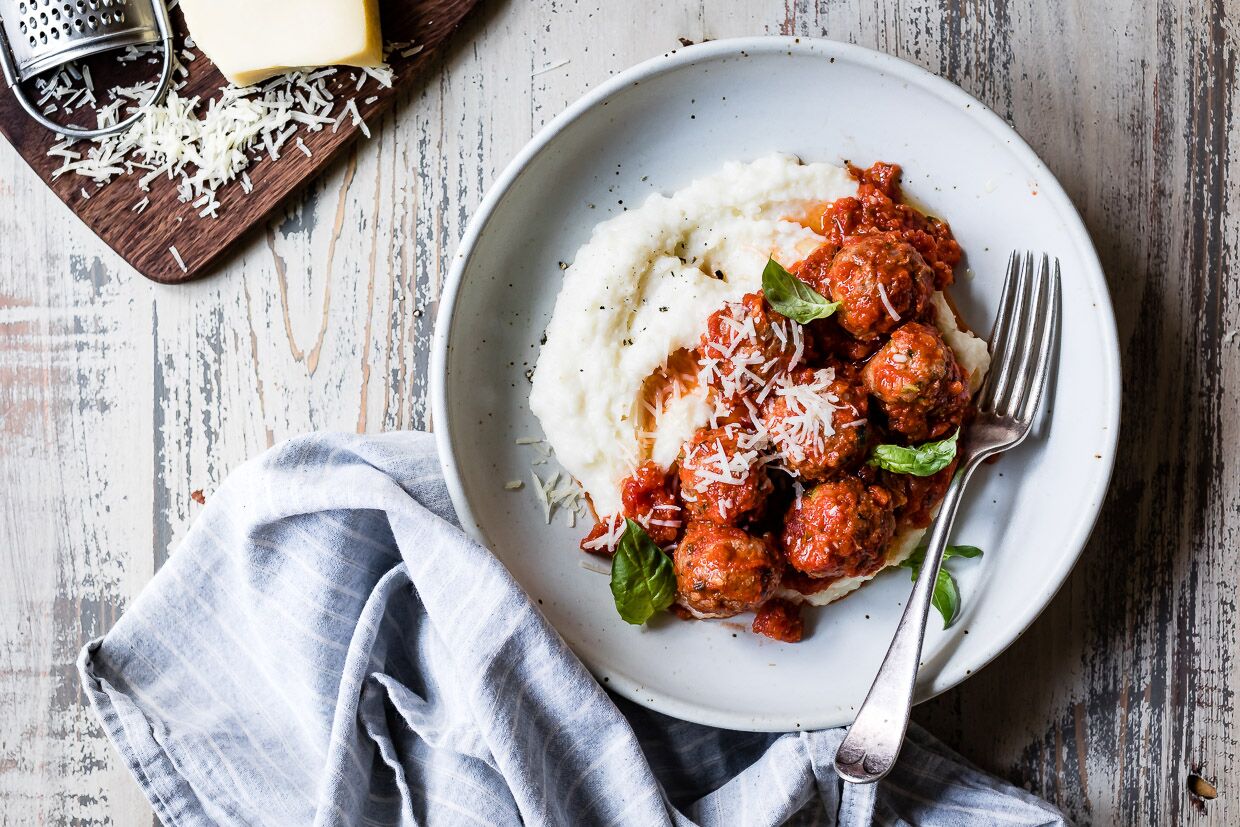
Zucchini shreds keep these turkey meatballs moist while buttery, rich Gouda intensifies the flavor. For a doubly cheesy dish, our alpine-style Grand Cru® is added to the polenta. When you’re feeling something on the fancier side, this one’s a family crowdpleaser.
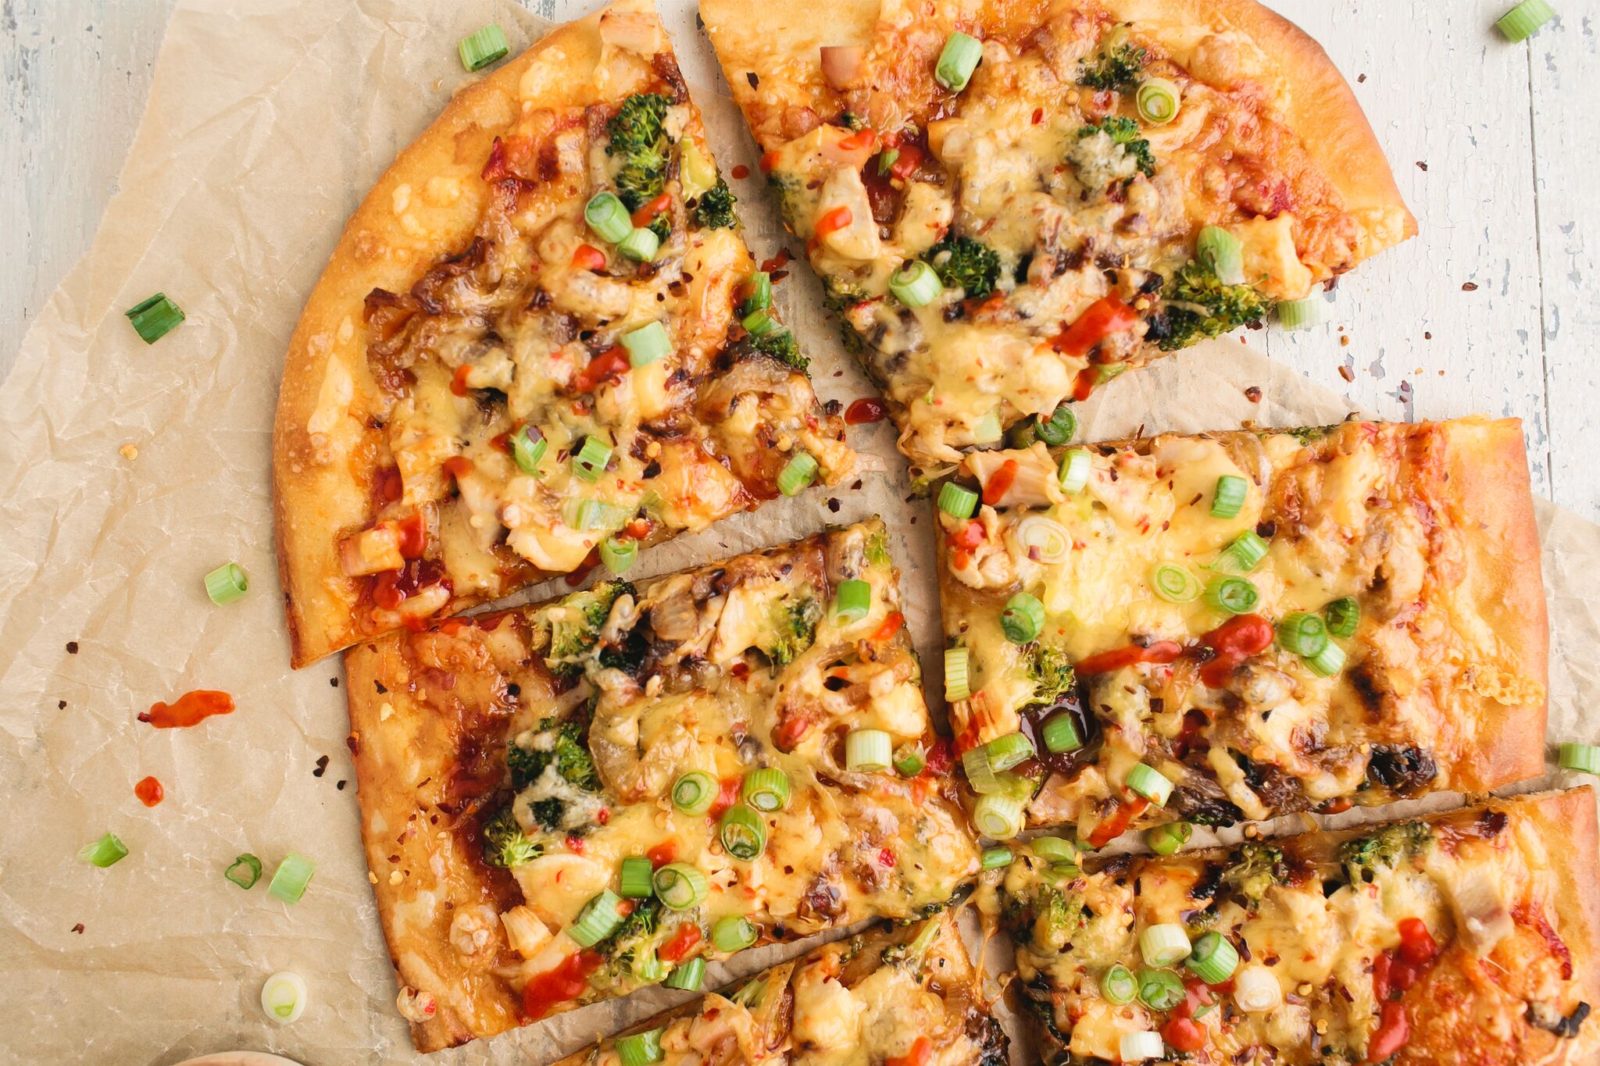
Spice up your pizza night! The sriracha obsession is real with this sweet, spicy, and SUPER cheesy pizza—made with BBQ sauce, broccoli, chicken, and green onions. Use our original Gouda or Three Chile Pepper Gouda for an extra kick of heat.
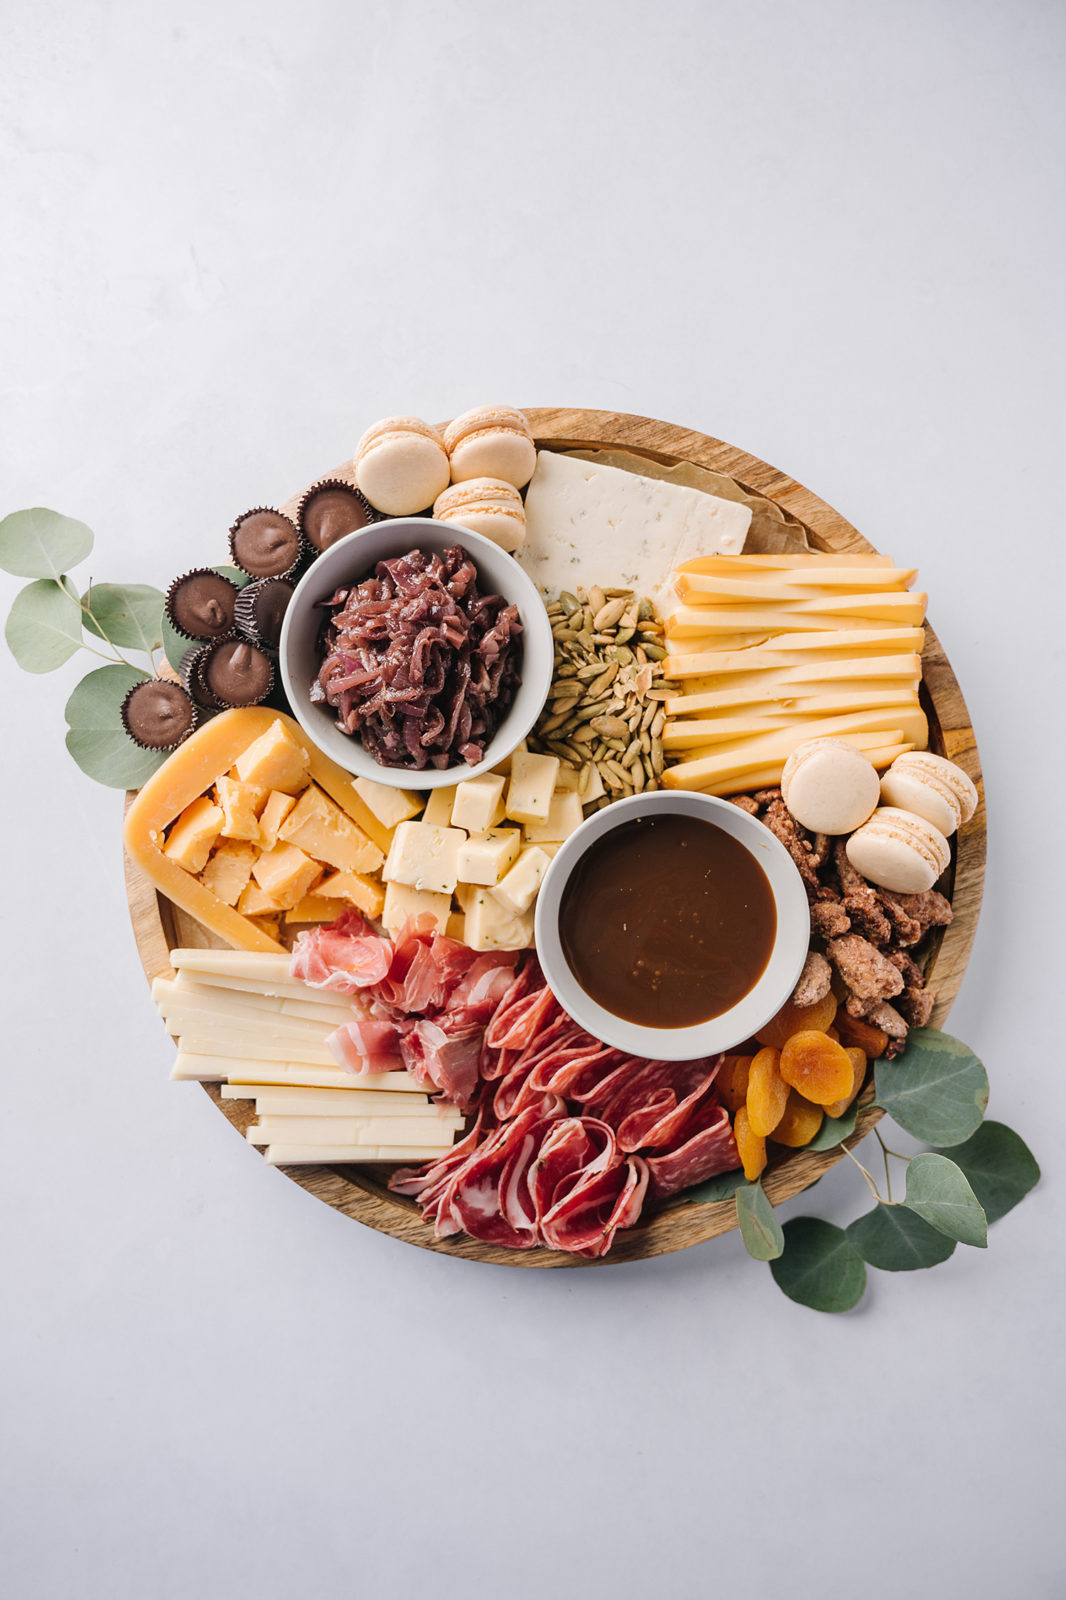
How to assemble the perfect fall cheese board! My Sweet and Savory Fall Cheeseboard has fall flavors, colors, and is perfect for any autumn event.
Is that the crisp smell of fall in the air? Are you seeing back to school photos all over social media? Is the cozy hoodie/sweater in the back of your closet beckoning to you? Are you craving a PSL and fighting the urge to buy a pumpkin?
Me. Too.
I’m ready to have some normalcy and routine in my life right now. This summer was a literal wash out. We had an entire month of rain and it did not put me in a festive summer mood. Here in New England, we’ve already had some fall-like days and I am HERE FOR IT.
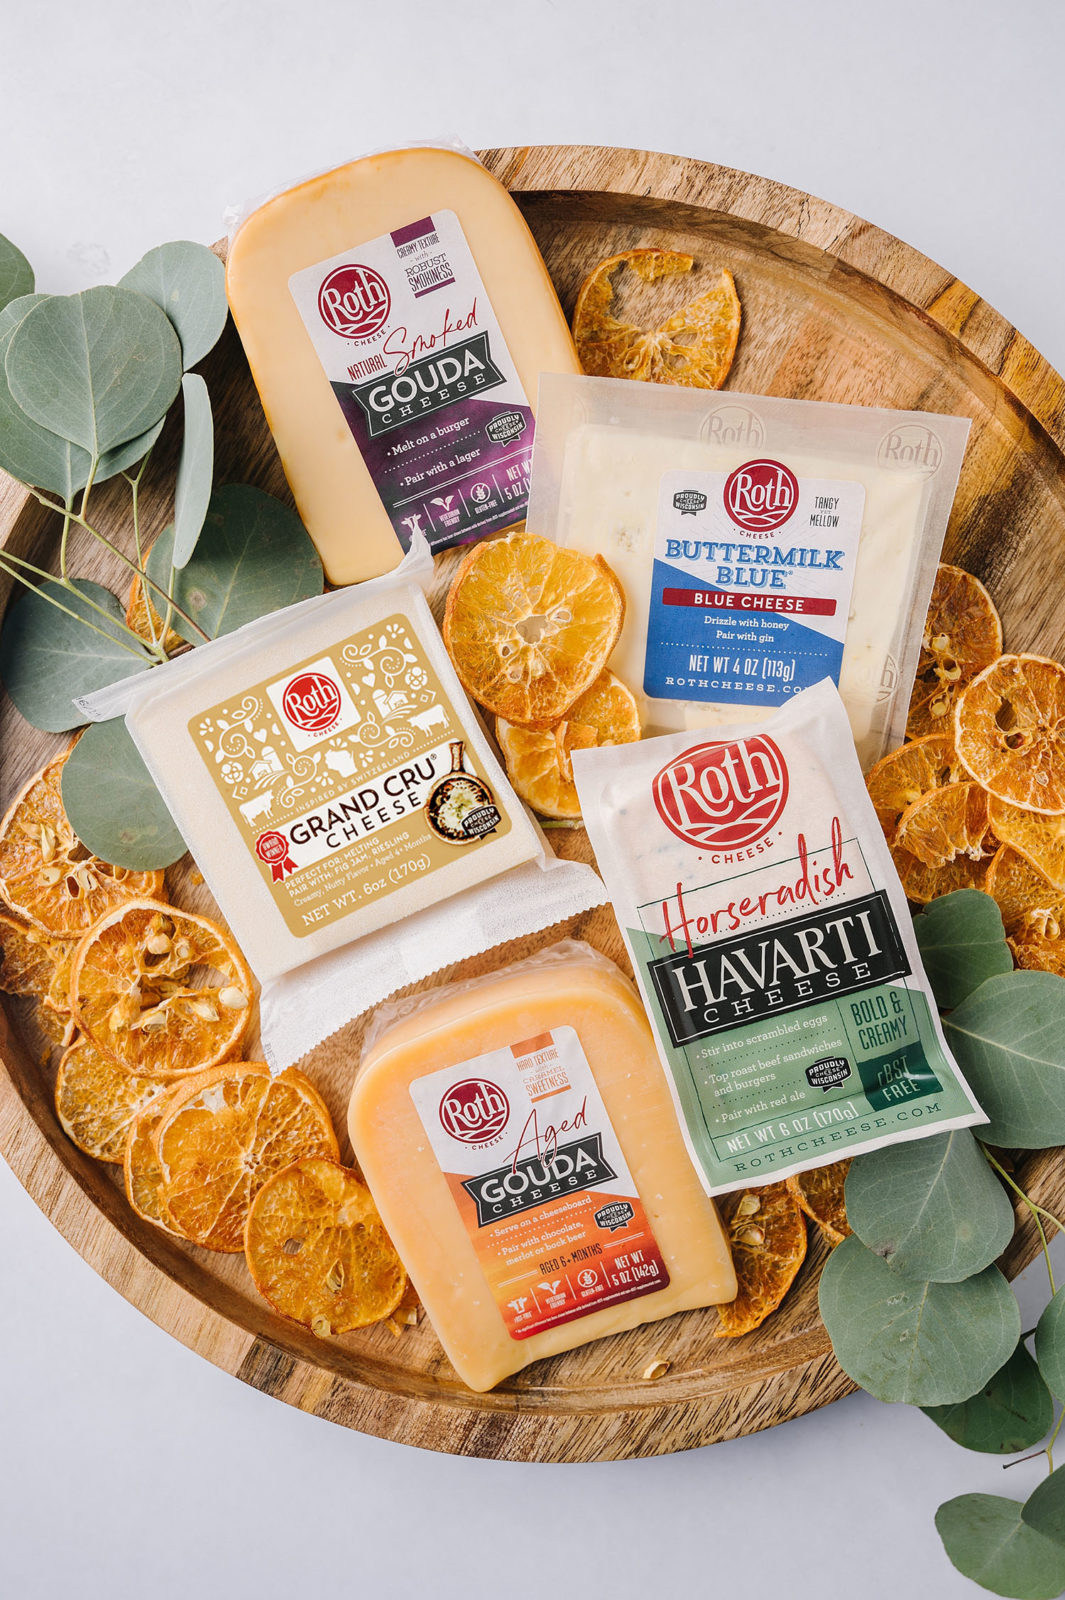
With all things fall on my mind, I created a Sweet and Savory Fall Cheeseboard featuring my favorite Roth Cheeses. I created this with fall colors, fall flavors, and cozy fall vibes in mind. I loved creating it and I especially loved eating it.
While gatherings might be smaller this fall, we can still make them special. Adding a few extra touches here and there make all the difference and your family and guests will appreciate the beauty and effort you put into it. I would serve this beautiful fall cheeseboard with Spiced Apple Cider Cocktails and be in fall heaven.
How to Create a Fall Cheeseboard //
Select your favorite Roth cheeses. I love a variety of cheeses and profiles – especially when I am doing a sweet and savory cheeseboard. I like to have a creamy cheese, flavored cheese, blue cheese, hard cheese, and smoked cheese. There is something for everyone on the board and they all work together with the other items on the platter.
Creamy Cheese – Grand Cru® is my husband’s favorite cheese and it is on every cheeseboard I make. It is an alpine-style cheese that is delicious for eating, but also melts like a dream. It is mild and a great all-around cheese that everyone loves.
Flavored Cheese – Horseradish Havarti is one of my favorite flavored Havarti cheeses in the Roth line up. It has chive, mustard seed, and the kick of horseradish. (It’s amazing on a baked potato.)
Blue Cheese – I love the punch of blue cheese. Buttermilk Blue® is creamy and tangy, but not too much. You know what I mean? Sometimes blue cheese is like hey, BLUE cheese, this is like bluuuuuueeeee cheese, it’s the perfect amount of mellow.
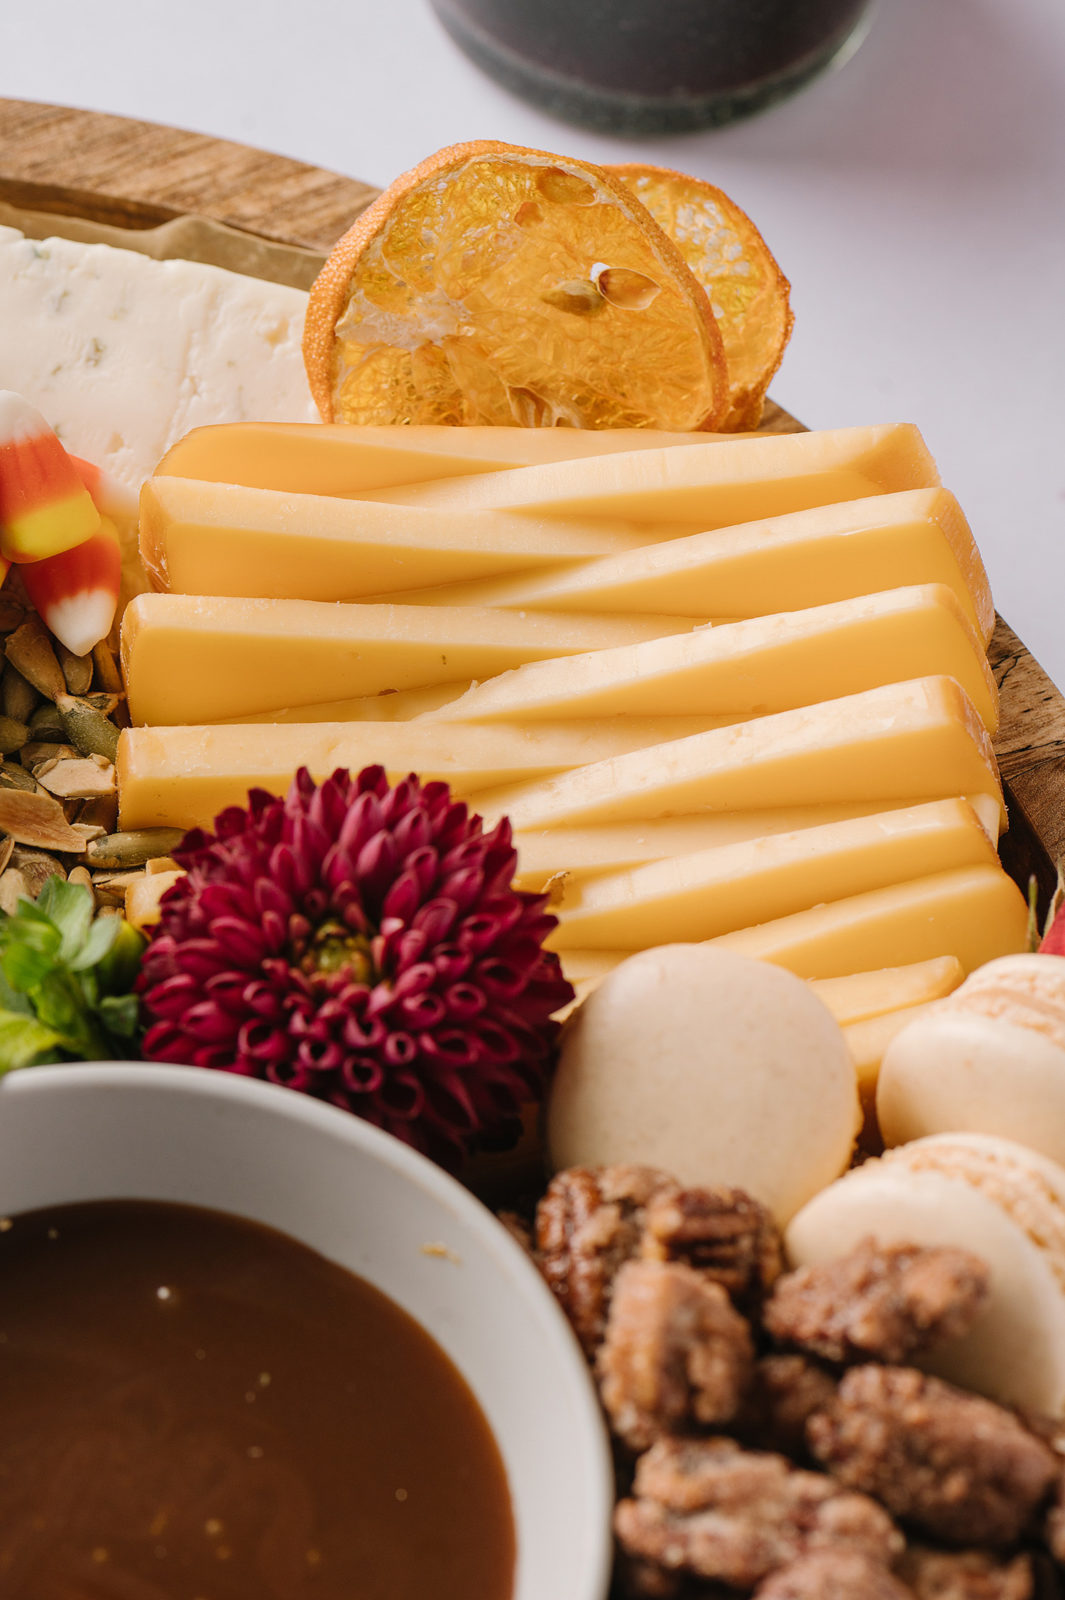
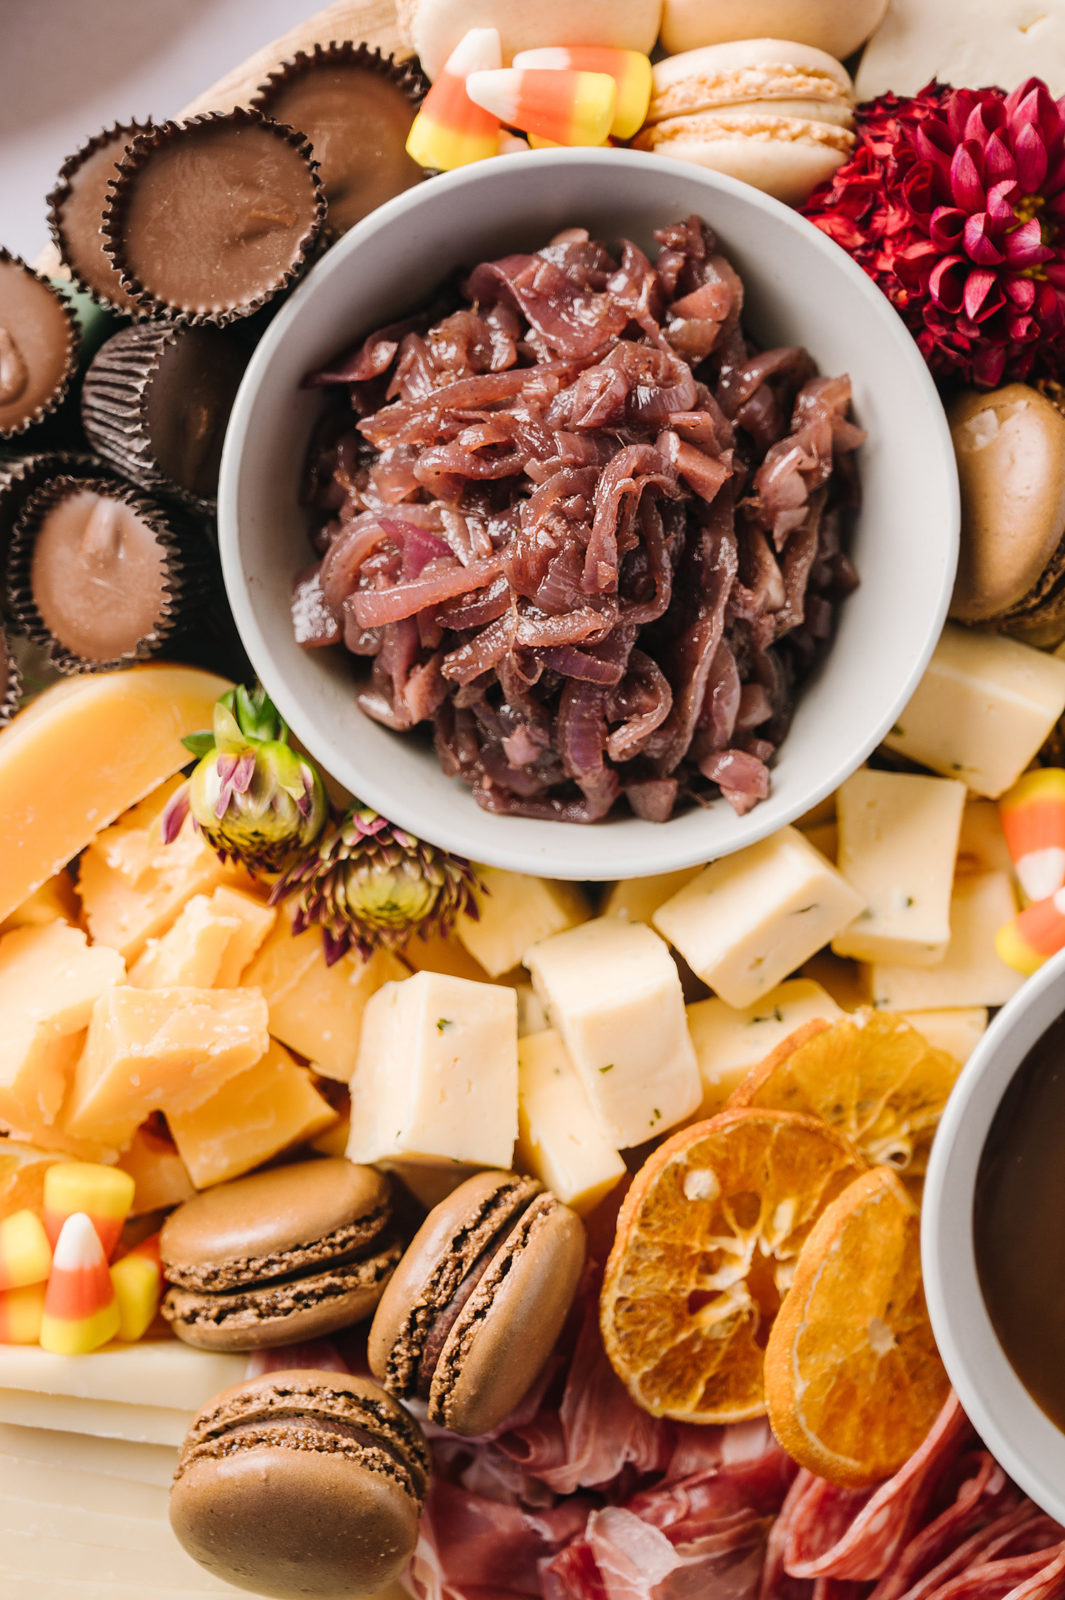
Hard Cheese – I chose Aged Gouda. I love the Gouda flavor and the way this cheese crumbles. I love the way it looks on the board and adds a different texture to the whole platter.
Smoked Cheese – Smoked Gouda is my ride-or-die cheese. I love it on a cracker, I love it melted on a sandwich, I love it in any shape or form. It’s so creamy and has just enough smokiness.
Add Fall Accompaniments to Your Sweet and Savory Fall Cheeseboard //
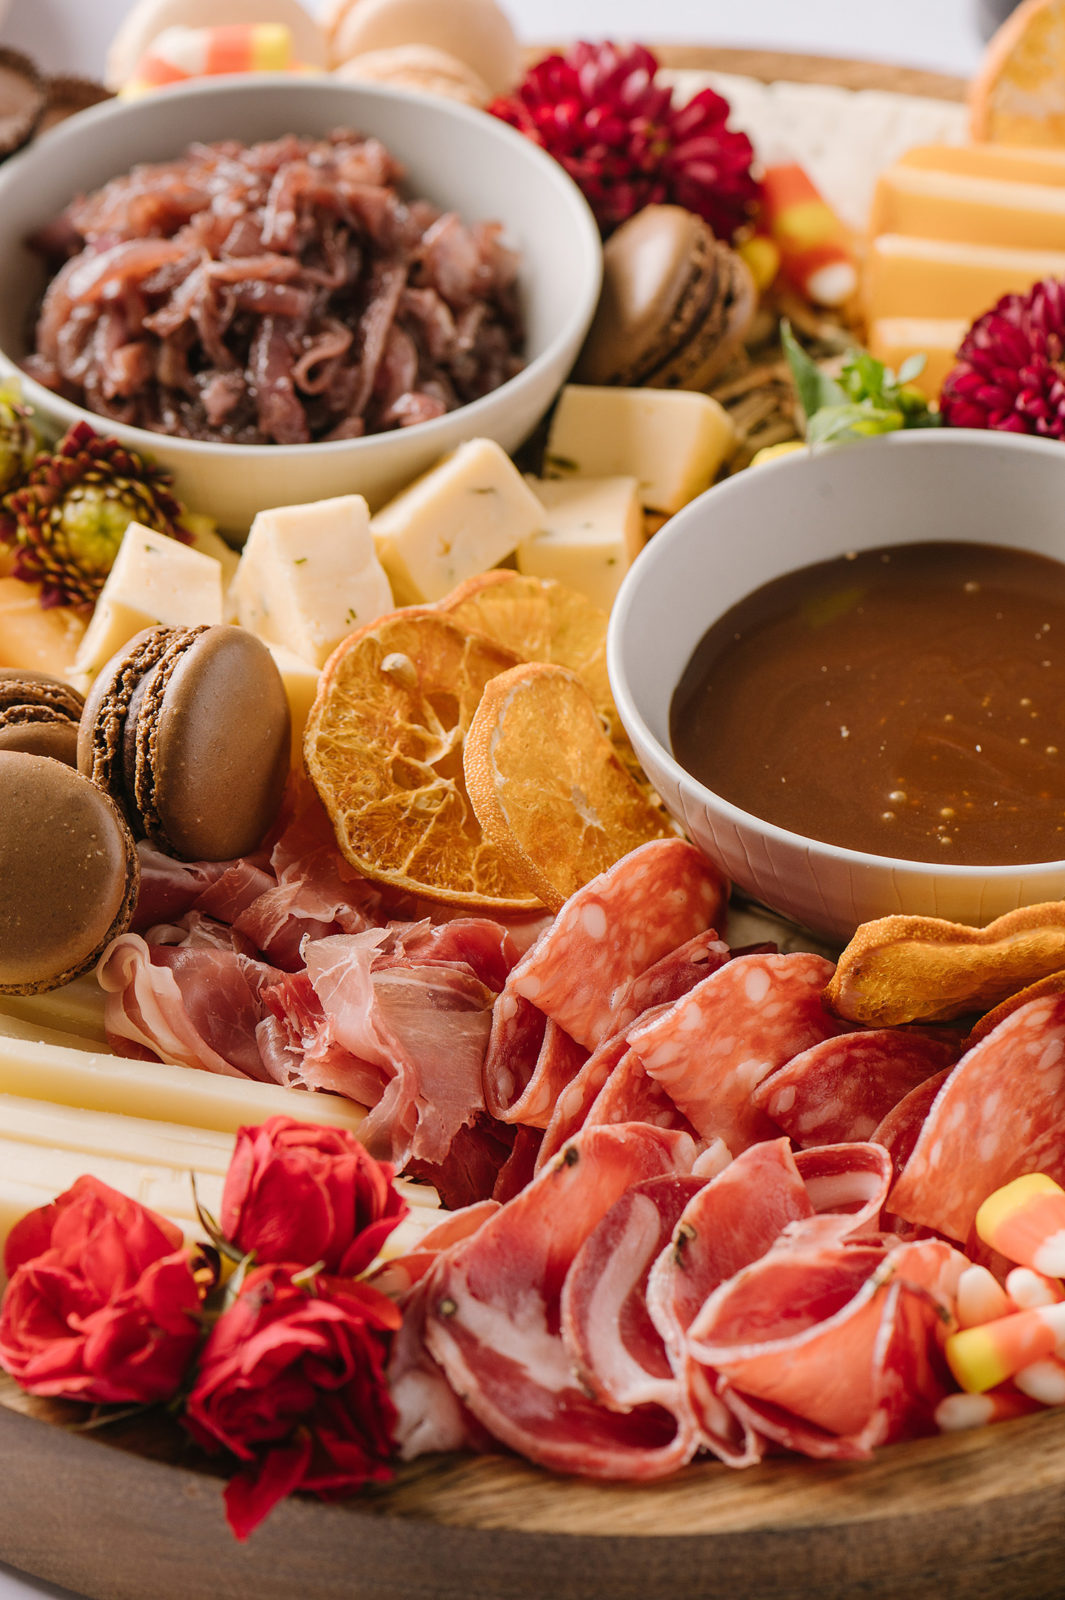
Add fall details and flavors to enhance your cheeseboard. I chose a fall color palette as well to make this cheeseboard really drive home that this is a spread to eat by the fireplace while watching the Pats on a Sunday. Lots of yellow, orange, brown, and deep burgundy. This is a sweet and savory board so we have lots of salty and sweet notes. Which is my personal flavor jam. Always here for a sweet savory salty moment. I loved creating this board because the color palette is gorgeous and I love that you can have so many different unique bites from all of the things on this board.
Savory //
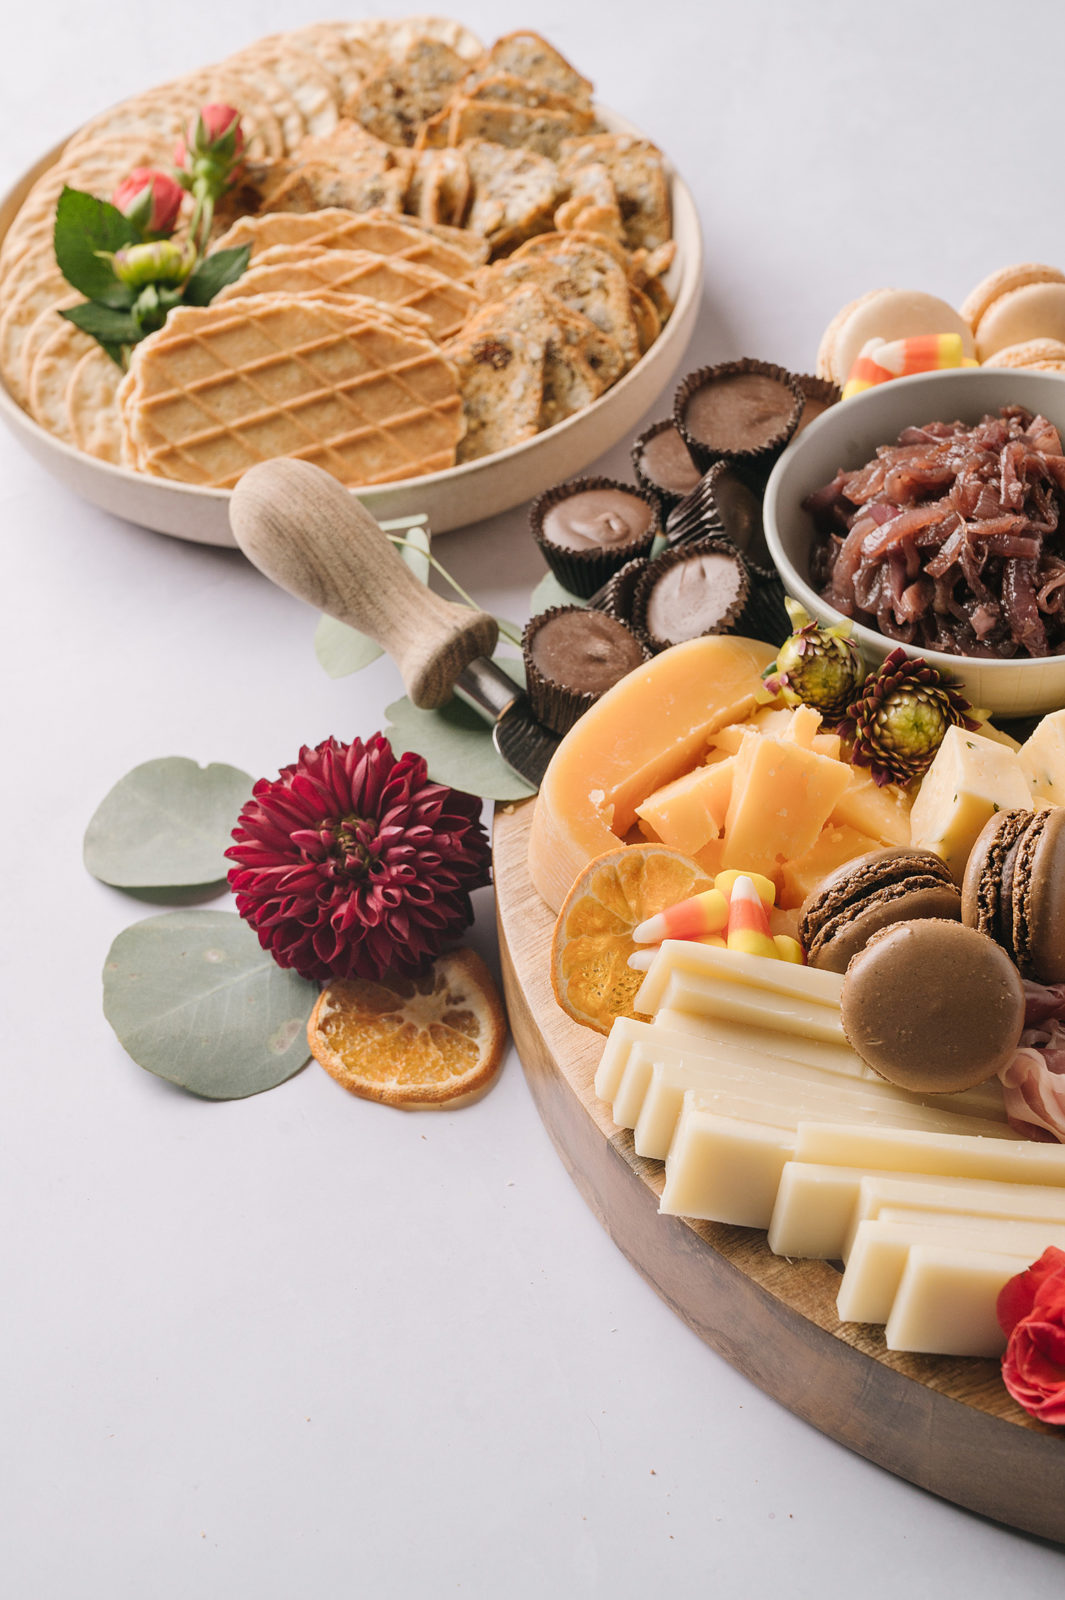
Cheeses. I already shared which cheeses I chose, but I also added them in slices, cubes, and crumbles. I like the variety and that people can just grab their cheese and not have to slice it themselves.
Meats. I bought a package of Spanish sliced meats. They came together in the package, I like that the store did the curating for me. Jamón Serrano (similar to prosciutto), salami, and a chorizo.
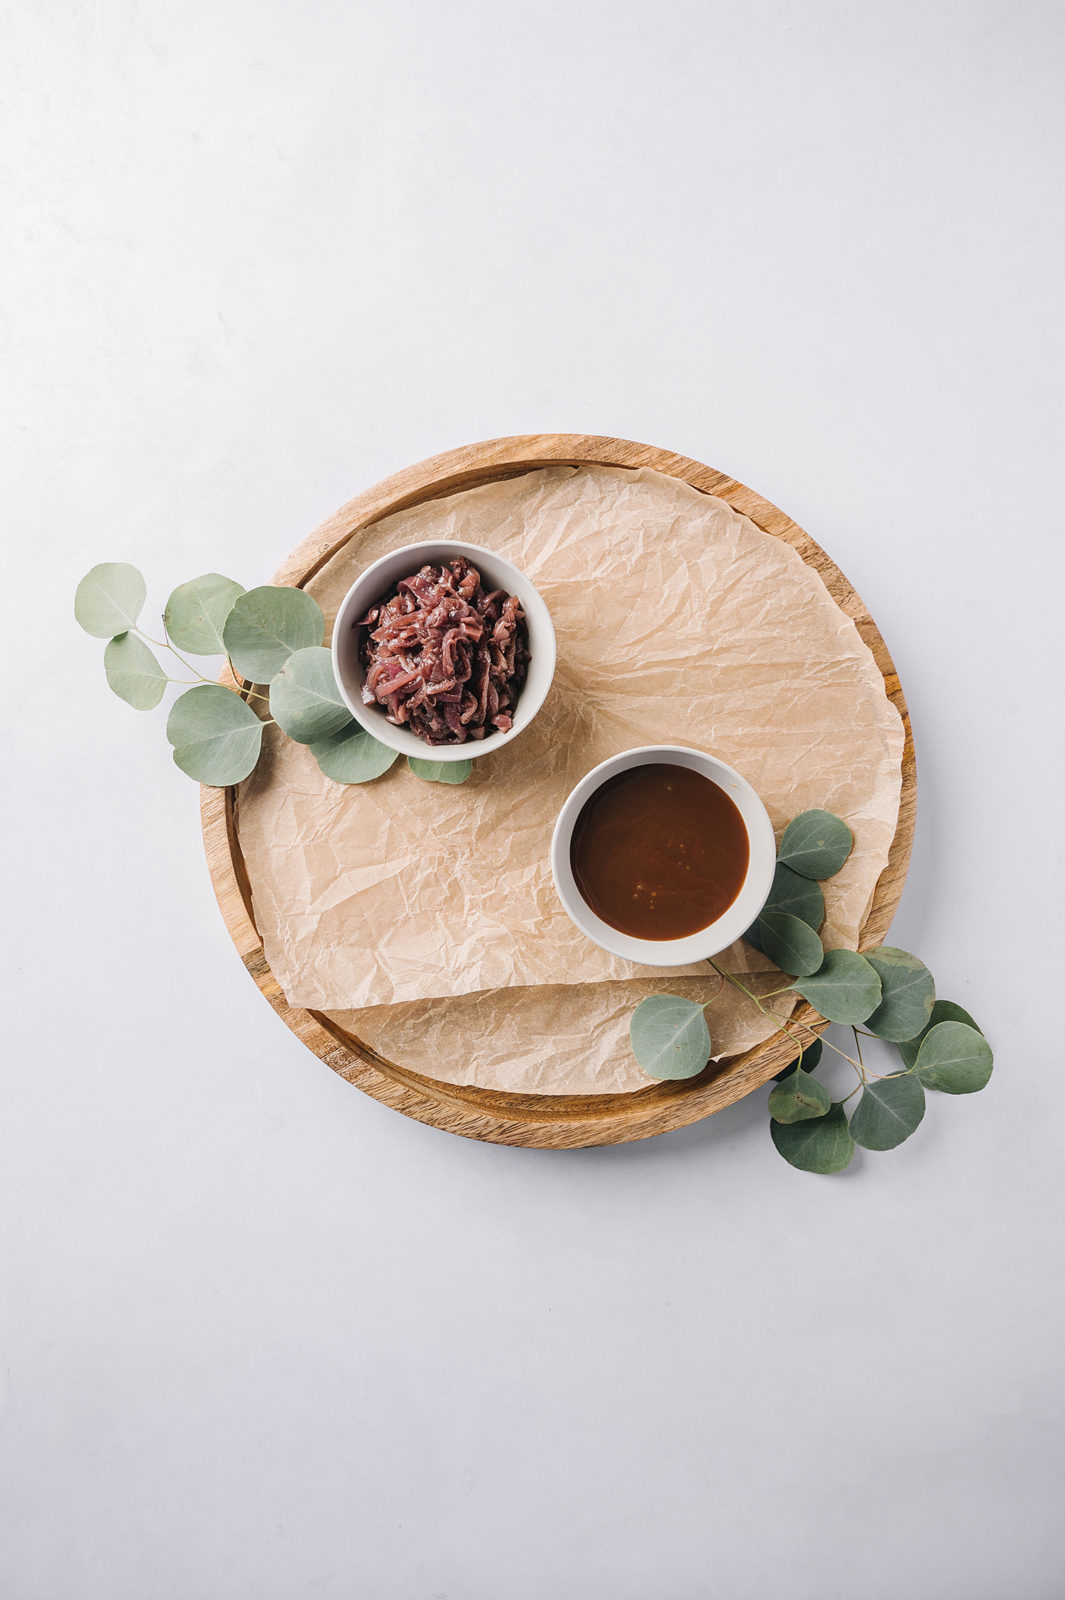
Caramelized Onion and Garlic Jam. I made a batch of this jam and it not only fit into my color scheme, it is amazing on a cracker with Gouda.
Pumpkin seeds. Pumpkin seeds or pepitas (sometimes the package says pepitas) add crunch and salt that balances all the sweet and creaminess from the cheese. Crackers. I used water crackers and fig and rosemary crisps. I like a plain cracker and one with more flavor.
Sweet //
Dried Oranges. These are so beautiful on a platter and also taste really good. A friend gifted a package to me and now I buy a few at a time. You could also easily make your own in the oven.
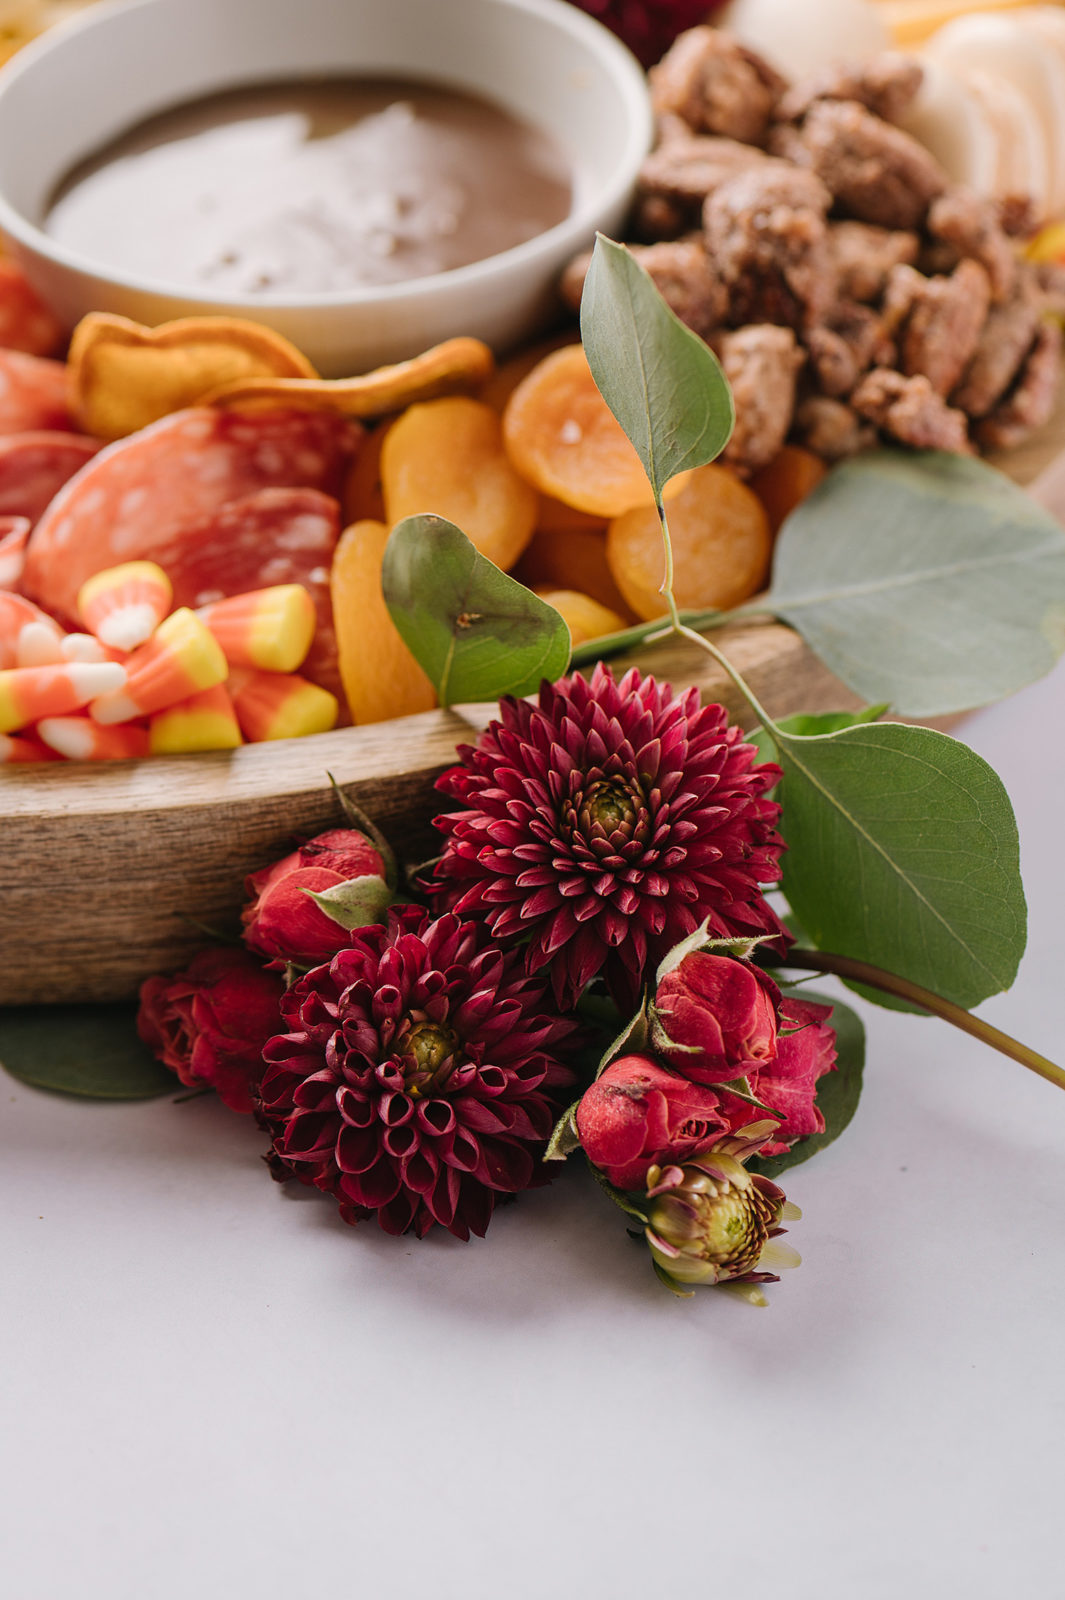
Dried Apricots. Chewy and sweet, these are a must have for me. I’m not a huge dried fruit fan, but I adore an apricot. These are always the first thing I go for on a cheeseboard.
Praline Pecans. I buy a few of these at a time, they are amazing on their own, on a board, and tossed into a salad.
Caramel Sauce. Add some sliced apples and dip away. Caramel is also delicious paired with Gouda and Grand Cru.
Macarons. Macarons feel super fancy and are unexpected on a cheeseboard. You can buy pumpkin, cinnamon, or any fall flavor to add to the theme of this board. These are frozen macarons from the grocery store and were really good. I also love the shape and dimension they add.
Candy. Candy corn and peanut butter cups are my family’s favorite fall candy. My son was STOKED to see candy corn on this board and it screams Halloween and fall. You know it’s almost back to school when you see the candy corn hit the shelves.
Cookies. On the cracker plate, I had butter crisps. These are thin like a cracker, but are a cookie. A piece of Grand Cru on one of these with a drizzle of caramel… chef’s KISS. I also had a bowl of gingersnaps to add some fall spice.
Decorations //
Cheeseboards are usually the focal point of the table. People ooh and ahh over cheeseboards because they are so visually appealing. They work double duty as both a decor piece and as a way to serve my guests food.
I bought some flowers that matched the colors I was using with my food and placed some blooms of burgundy dahlias and deep orange-y red spray roses around the board and the table it is sitting on. I also built the cheeseboard on top of sprigs of eucalyptus. Sprigs of green add so much visual interest and life to this board.
You can also coordinate napkins, utensils, and dishes to match the theme. It’s very easy to make a simple cheeseboard into an extraordinary themed showpiece.
Tips for Assembling a Fall Cheeseboard //
I have a few rimmed platters that I prefer to build boards on. I think the lip makes it easier to transport and keeps everything from spilling over.
I line all of my cheeseboards with parchment paper. This makes clean up super easy and protects the wood on my cheeseboard. When I am cleaning up, I throw the paper away and give the sides a good wipe down with some soapy water.
Pick things up as you see them in stores. I like to stock up on seasonal items and keep them for occasions like these. When I am making a cheeseboard, I am able to pull fun things that are unexpected from my pantry.
You don’t need to make one large cheeseboard, you can make individual ones or a few small ones to put around the room.
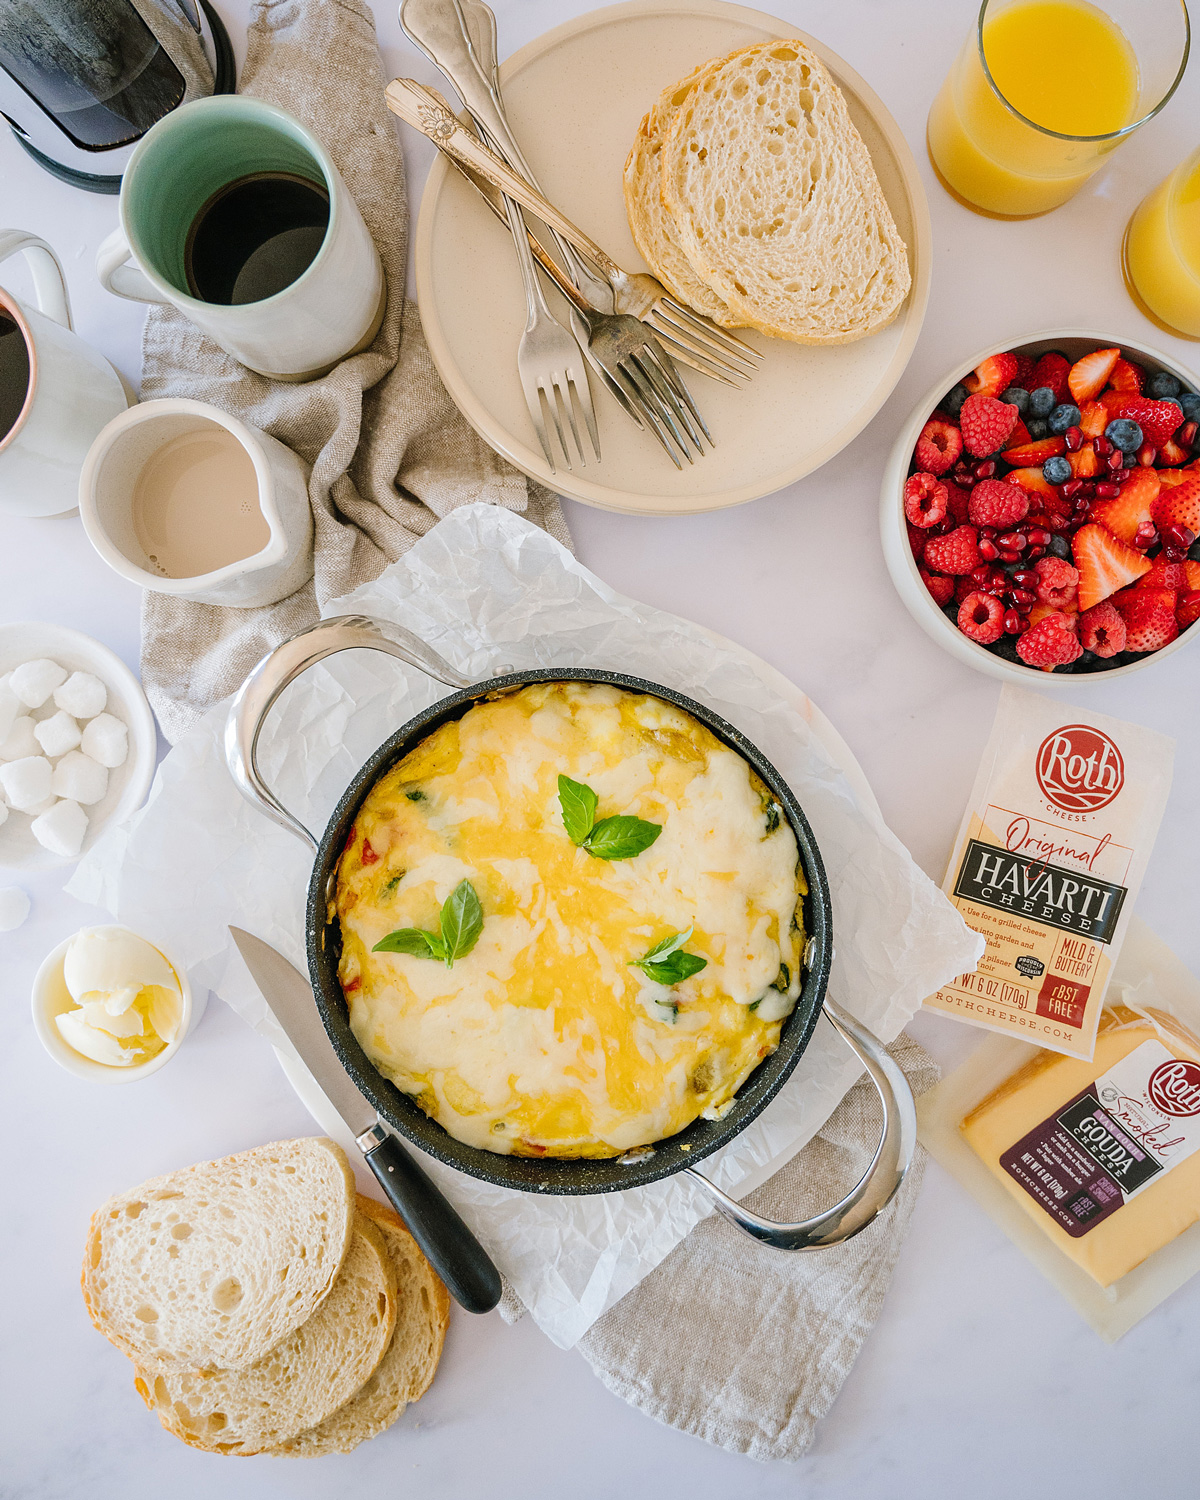
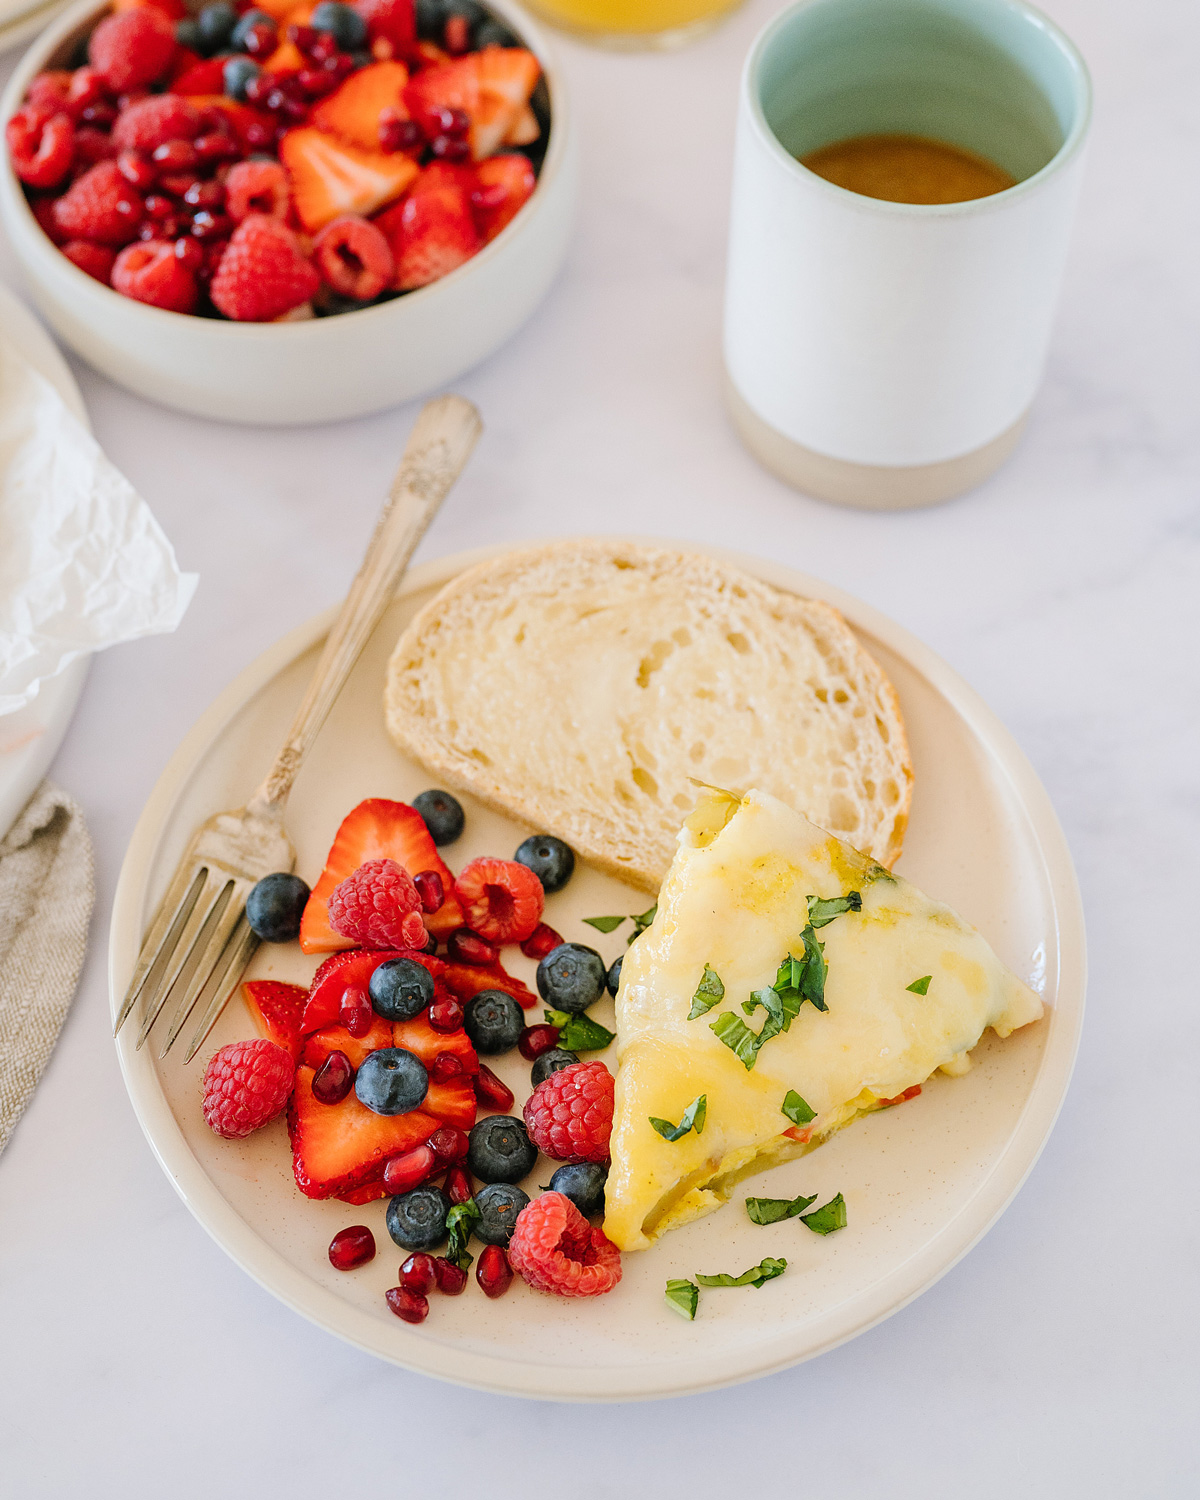
I don’t love eggs. But I do love eggs when they are covered in melted cheese and lots of veggies and other things to bulk them up. Like a frittata.
Just about anything goes in a frittata. You can clean out the fridge and throw some eggs in there and you have an incredible meal — for breakfast, lunch, or dinner. You can serve it piping hot, room temperature, or even cold. Frittata is essentially the perfect meal.
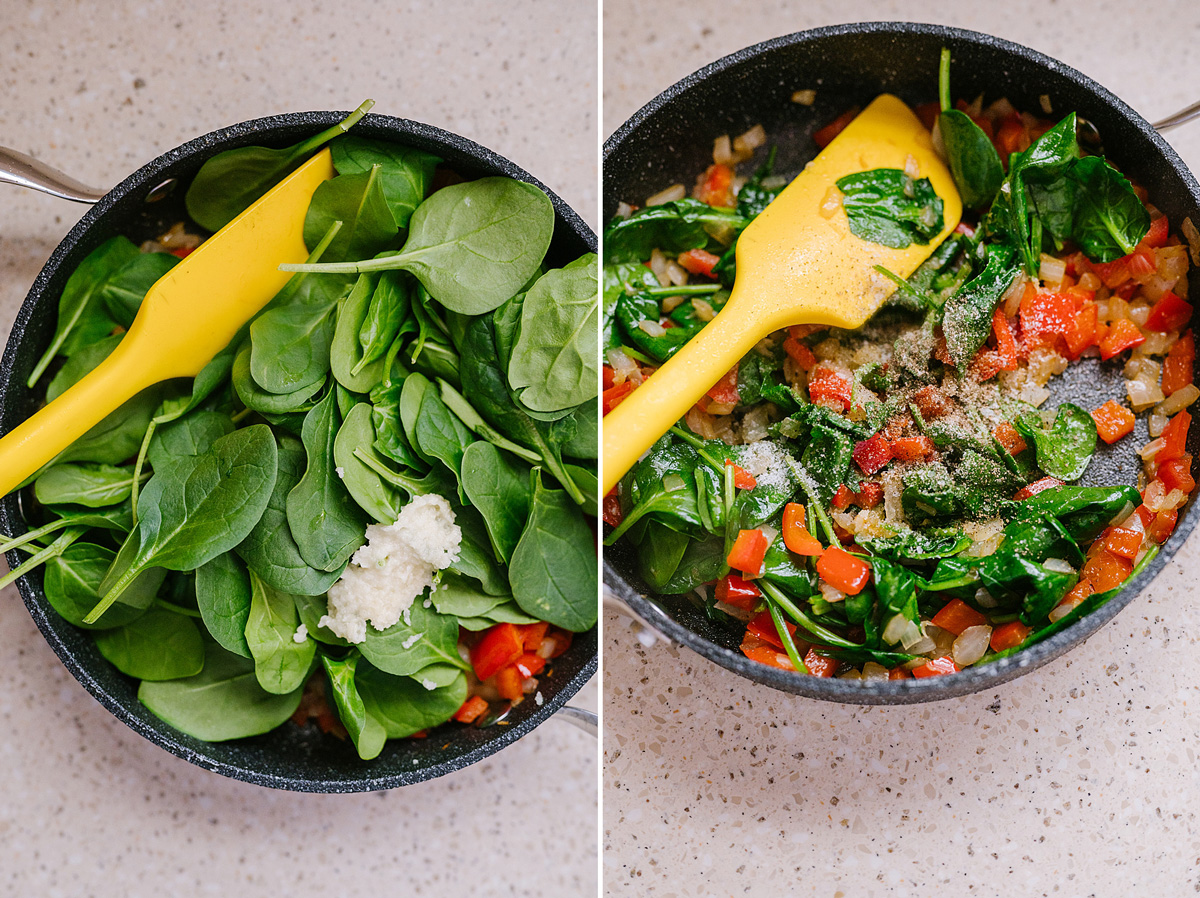
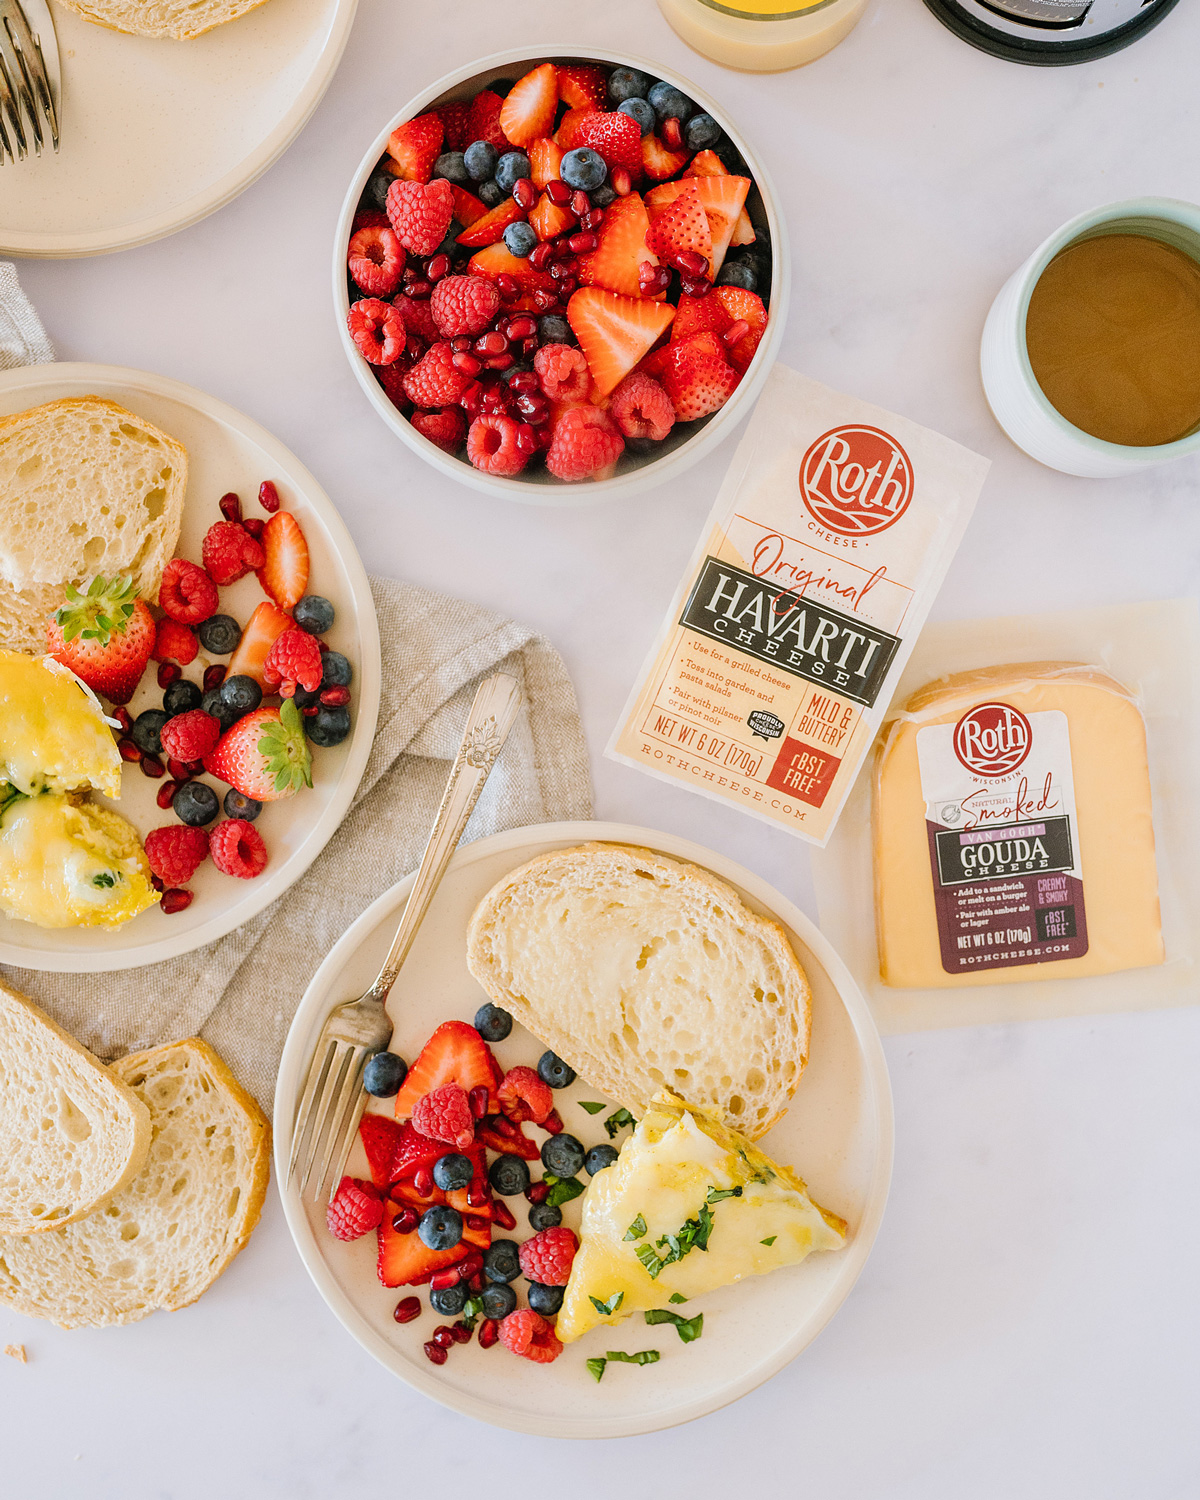
For this particular frittata, I used thinly-sliced Yukon Gold potatoes, red pepper, and spinach with shredded Roth Smoked Gouda and Roth Original Havarti cheeses. But what I really want you to do is to consider this a base recipe. You can customize this recipe into any kind of frittata you like.
I do start with sautéed onions as the base for every frittata I make. I like to cook them for a few minutes to soften them before I add the egg. But after that, it’s up to you and your taste. Go crazy.
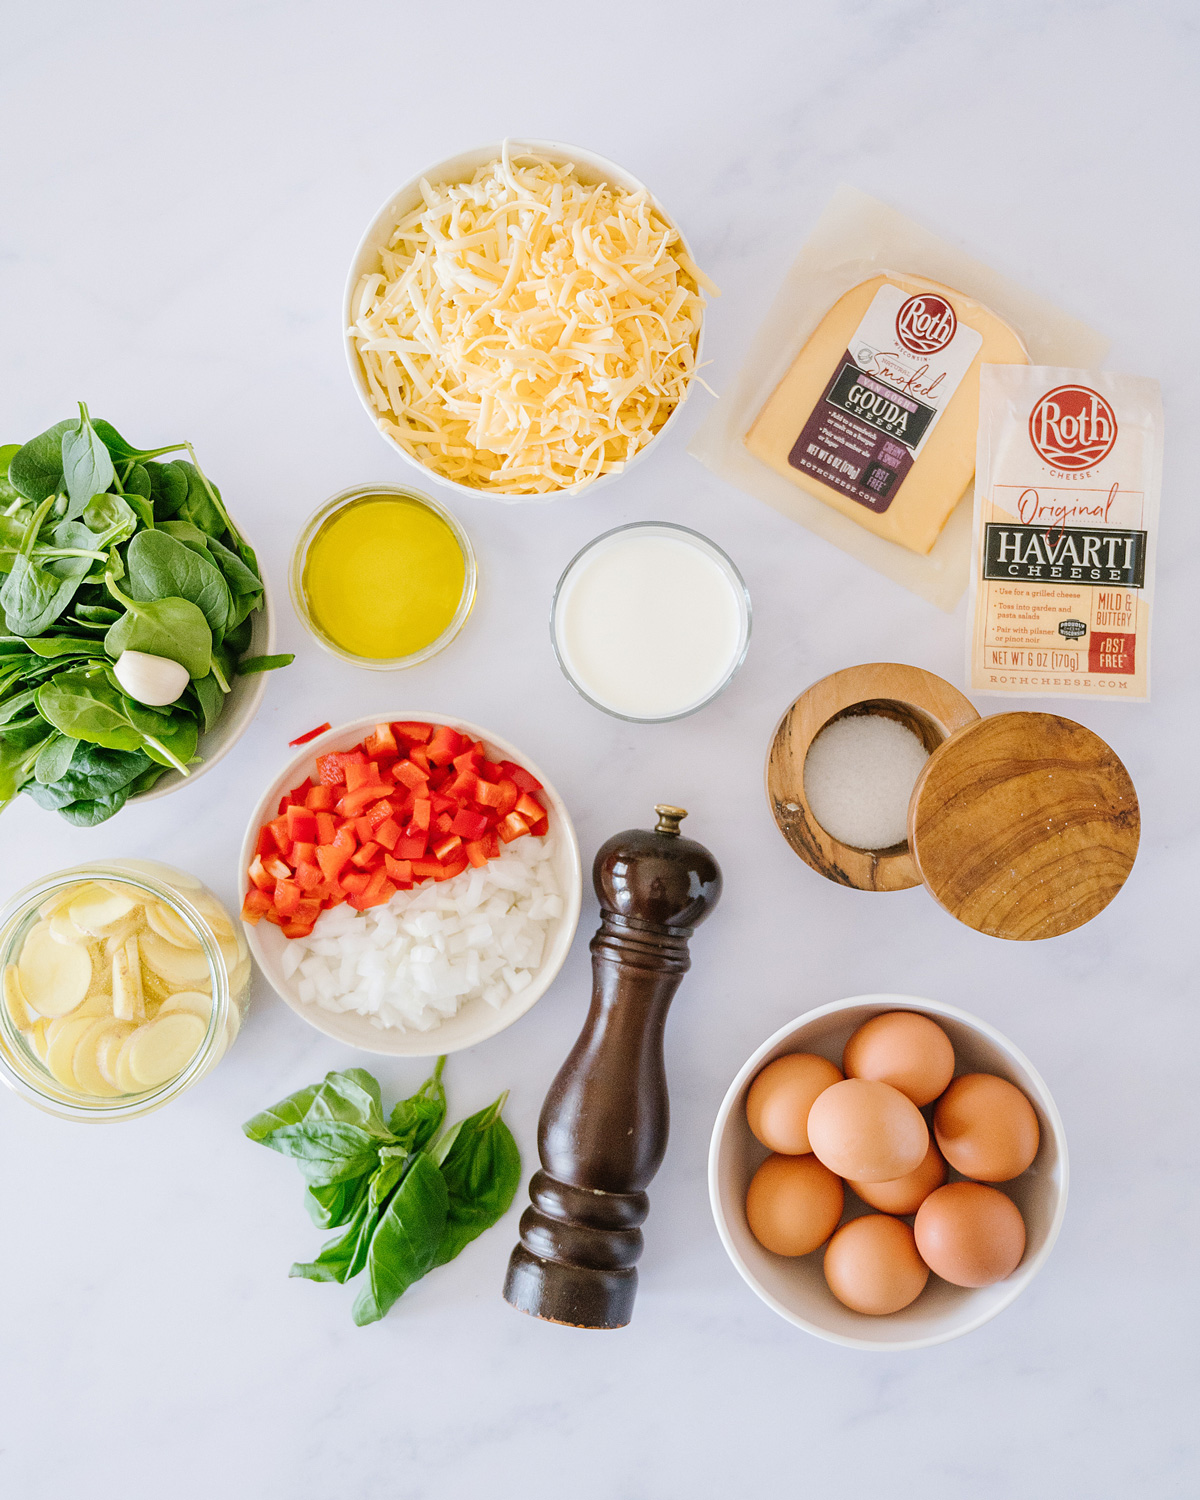
Ingredients //
My base frittata recipe only has a few ingredients that you most likely have right this minute. Olive oil, onion, eggs, milk, salt, and pepper. For this recipe, I also used Yukon Gold potatoes, red peppers, garlic, spinach, and two kinds of Roth cheese.
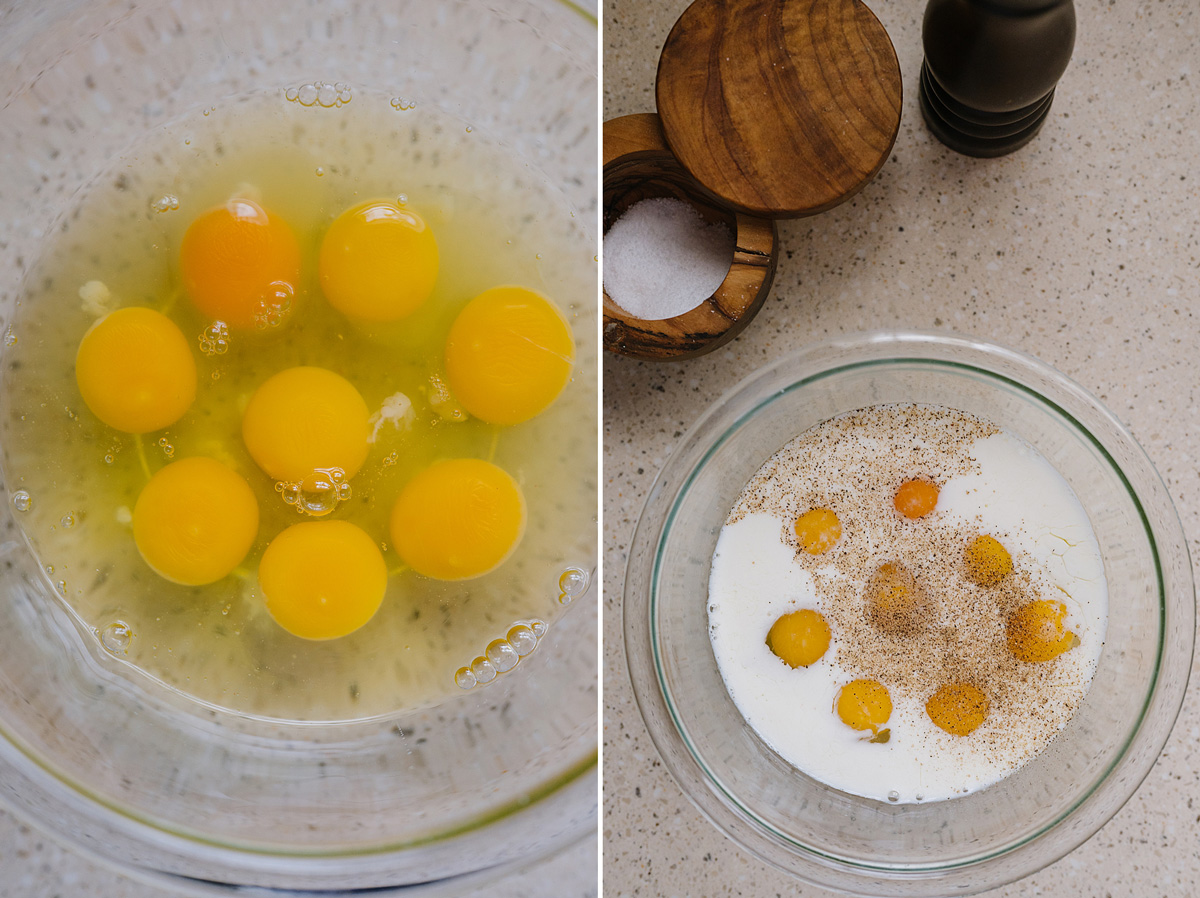
Eggs// I always buy organic large eggs. I think they are best and when they are the main protein source in a recipe, like in this one, I think it’s important to use the best eggs you can get your hands on.
Milk// I add a little milk to my egg mixture to make the eggs creamier. You can use half-and-half or if you have some heavy cream, use that. (I like to use up whatever dairy I have and I seem to always have a half carton of cream in my fridge.)
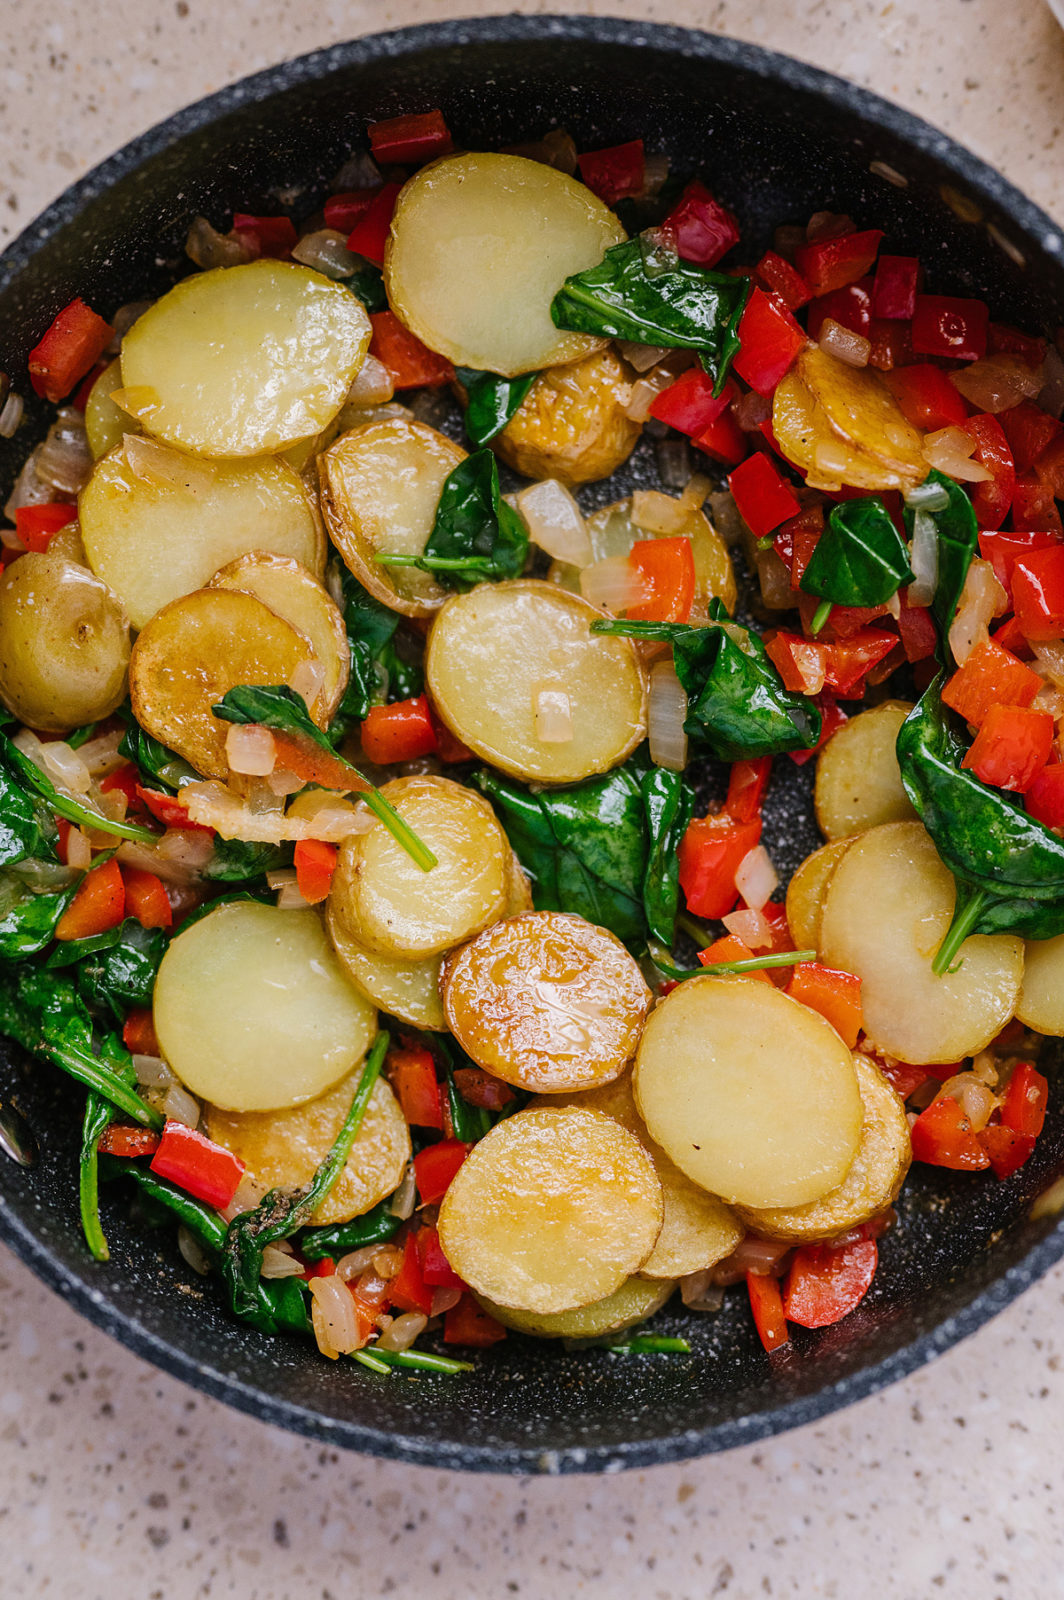
Yukon Gold potatoes // These are my favorite potato variety. They are golden in color, super creamy, and just a delicious potato. I used baby ones, but any size will work. Leftover roasted potatoes are perfect for this.
Roth Smoked Gouda cheese // Smoked Gouda has a just-right smoky flavor, is slightly sweet, and very creamy. This Gouda melts like a dream. Gouda is one of my favorite cheeses and I use it in as many recipes as I can. Smoked Gouda adds such a depth of flavor, it makes this recipe. Don’t sleep on smoked cheese, it is delicious on its own but really adds something amazing to any recipe that calls for cheese.
Sautéed onions // I think that sautéed onions are the basis of any delicious recipe. They add so much flavor and depth and you don’t need a lot to do the job.
How to Make // The Steps for Making Frittata //
This is such an easy baked frittata recipe. You sauté some vegetables, whisk some eggs and milk together, and then put it all together in an ovenproof pan. Top with cheese and bake until set and the cheese is gooey and melty.
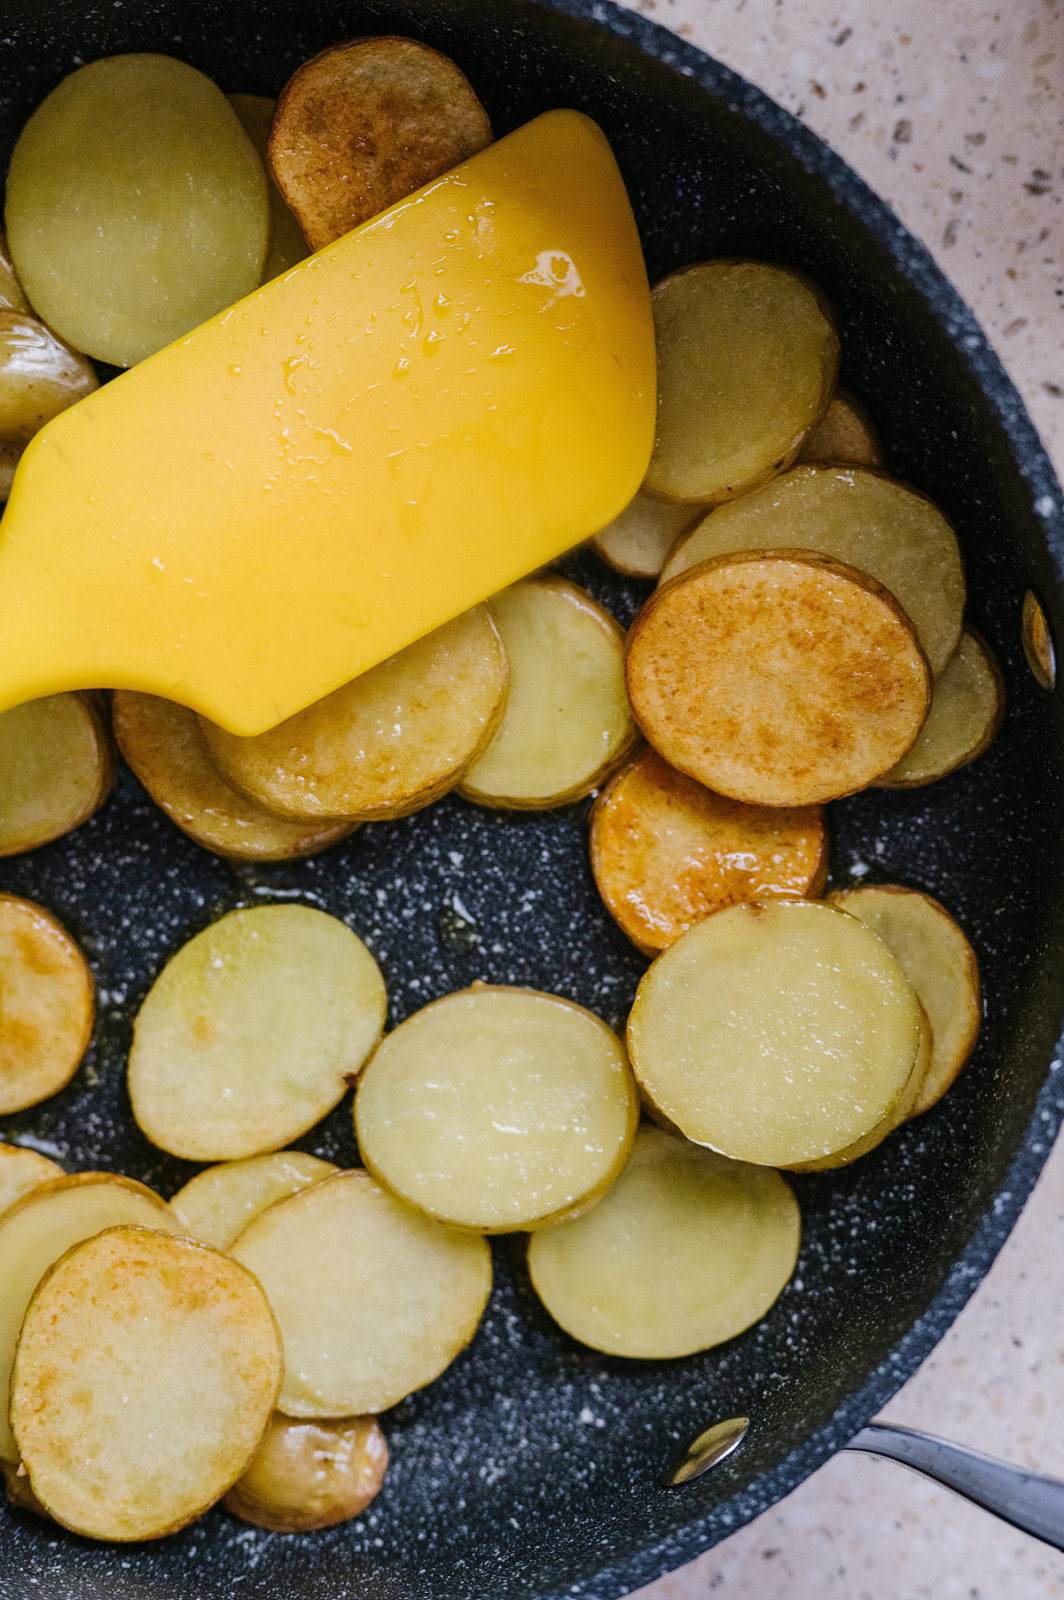
Add olive oil to an ovenproof sauté pan over medium-high heat. (Mine is 8 inches, but I normally make it in a little larger pan. I made two individual ones for lunch tomorrow.)
Add potatoes and cook for about 8 minutes, or until they start to soften and turn golden brown. Season with salt and pepper. Remove from the pan and set aside.
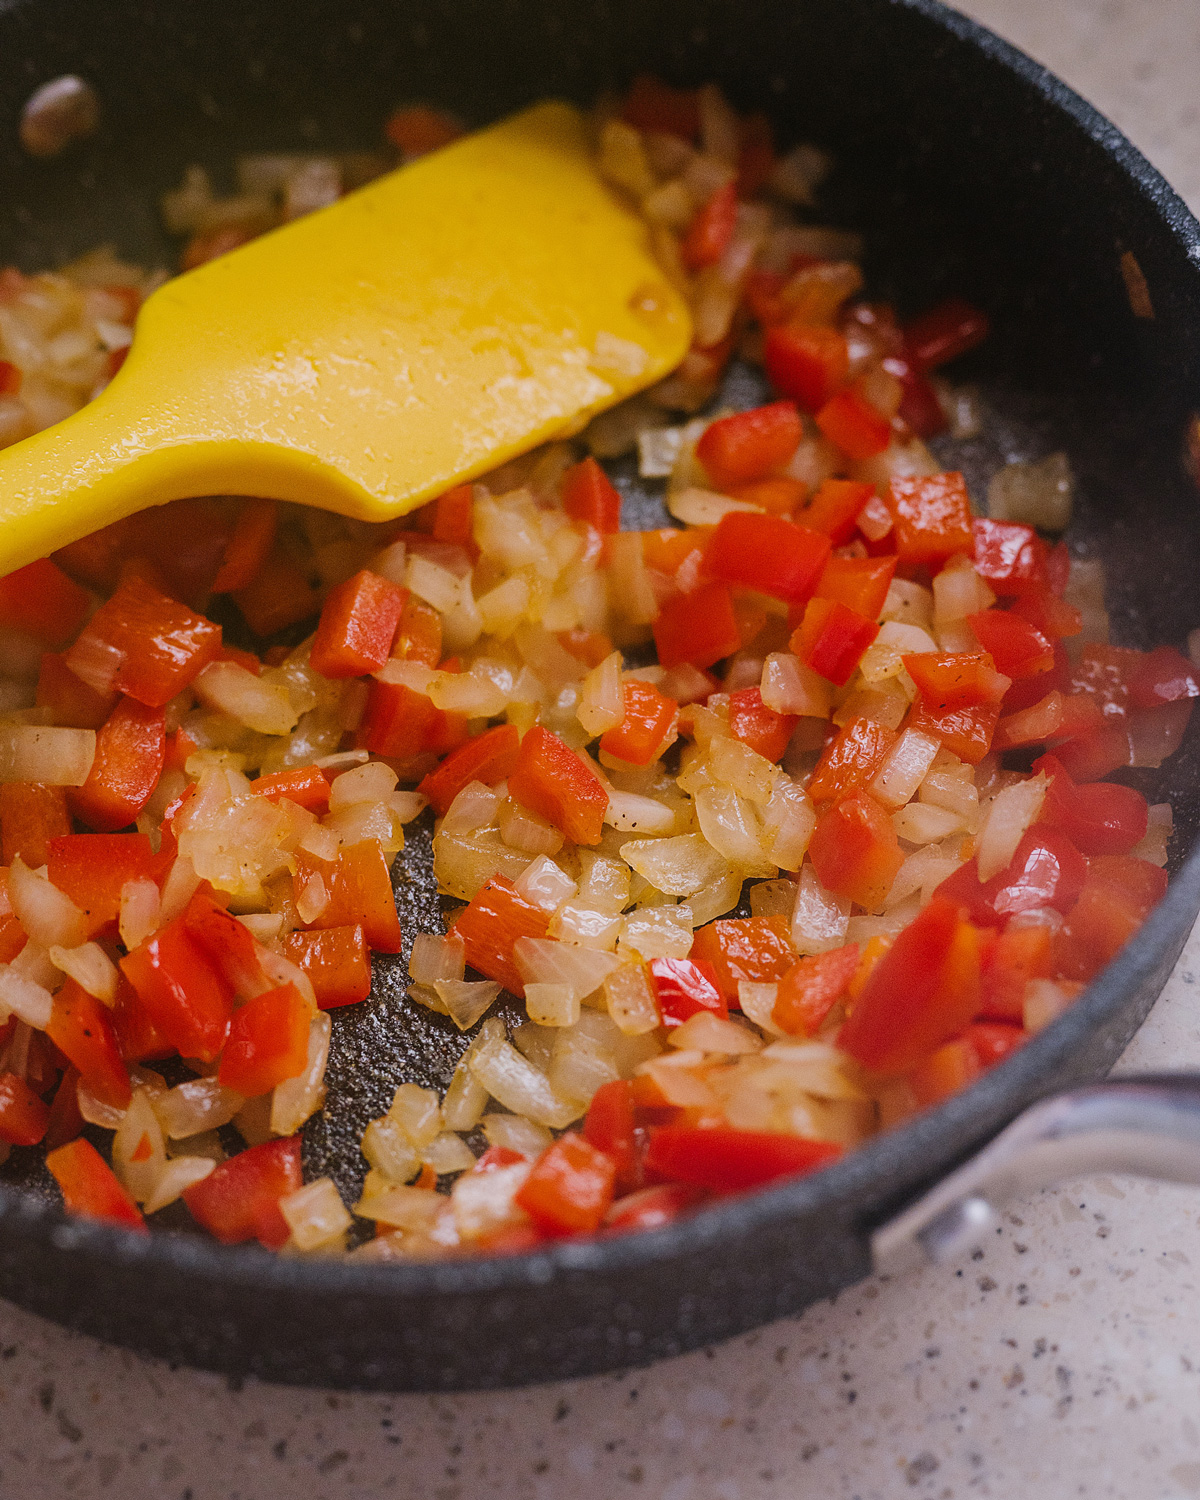
Add onions and red pepper and cook for 5 to 7 minutes or until they are soft and the onions are translucent.
Add spinach and minced garlic. Cook for about a minute, or until the spinach is wilted and the garlic is fragrant.
Remove the pan from the heat and add the potatoes back to the pan. Season well with salt and pepper.
Whisk eggs and milk together until combined. Season with salt and pepper.
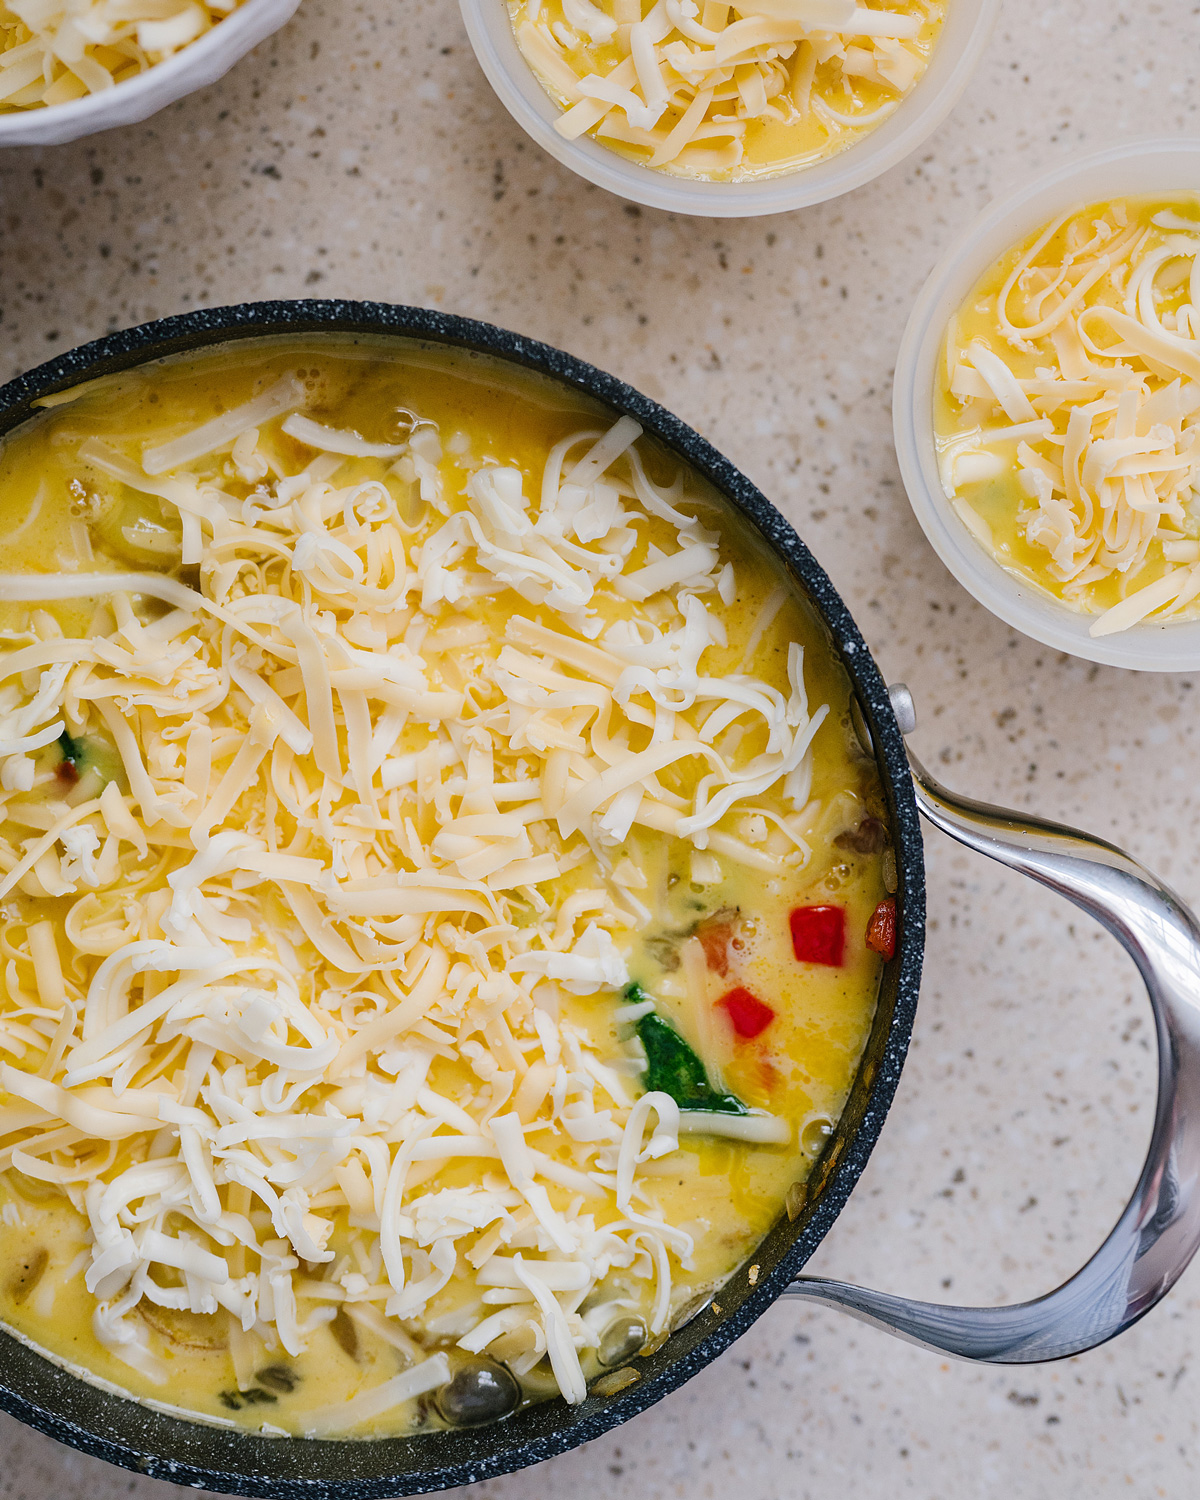
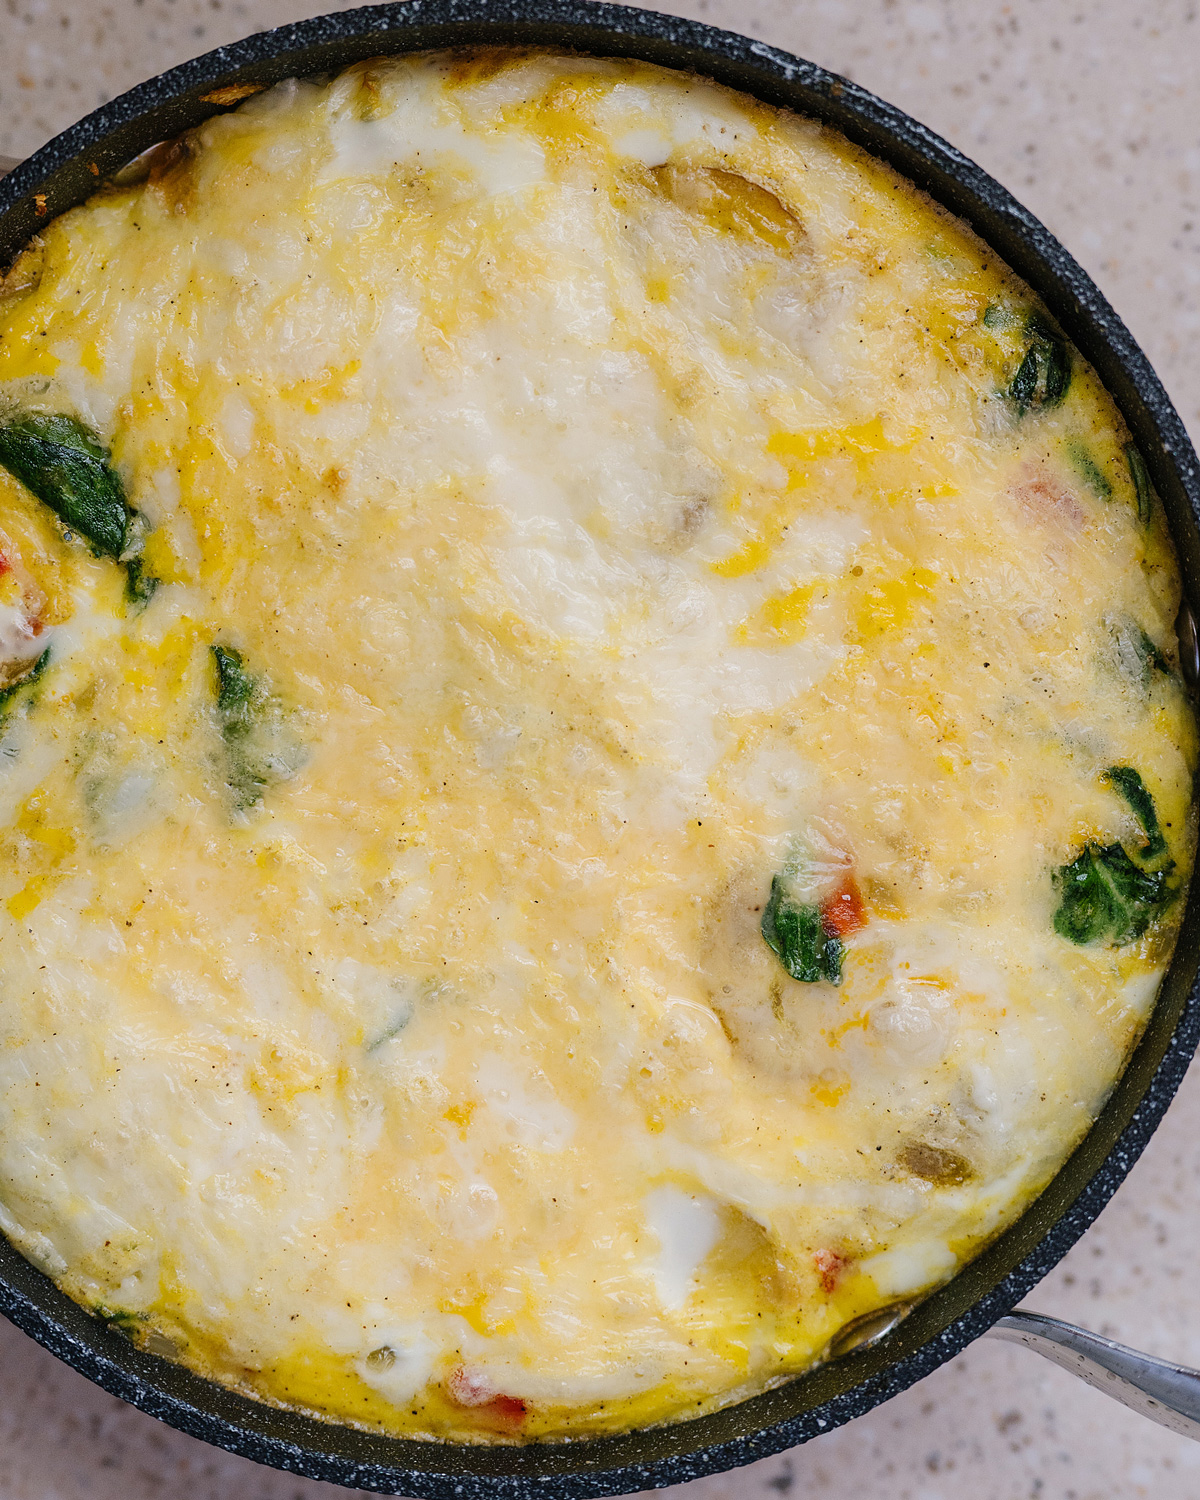
Pour the egg mixture into the pan and top with most of the cheese. I hold some back to add when it comes out of the oven.
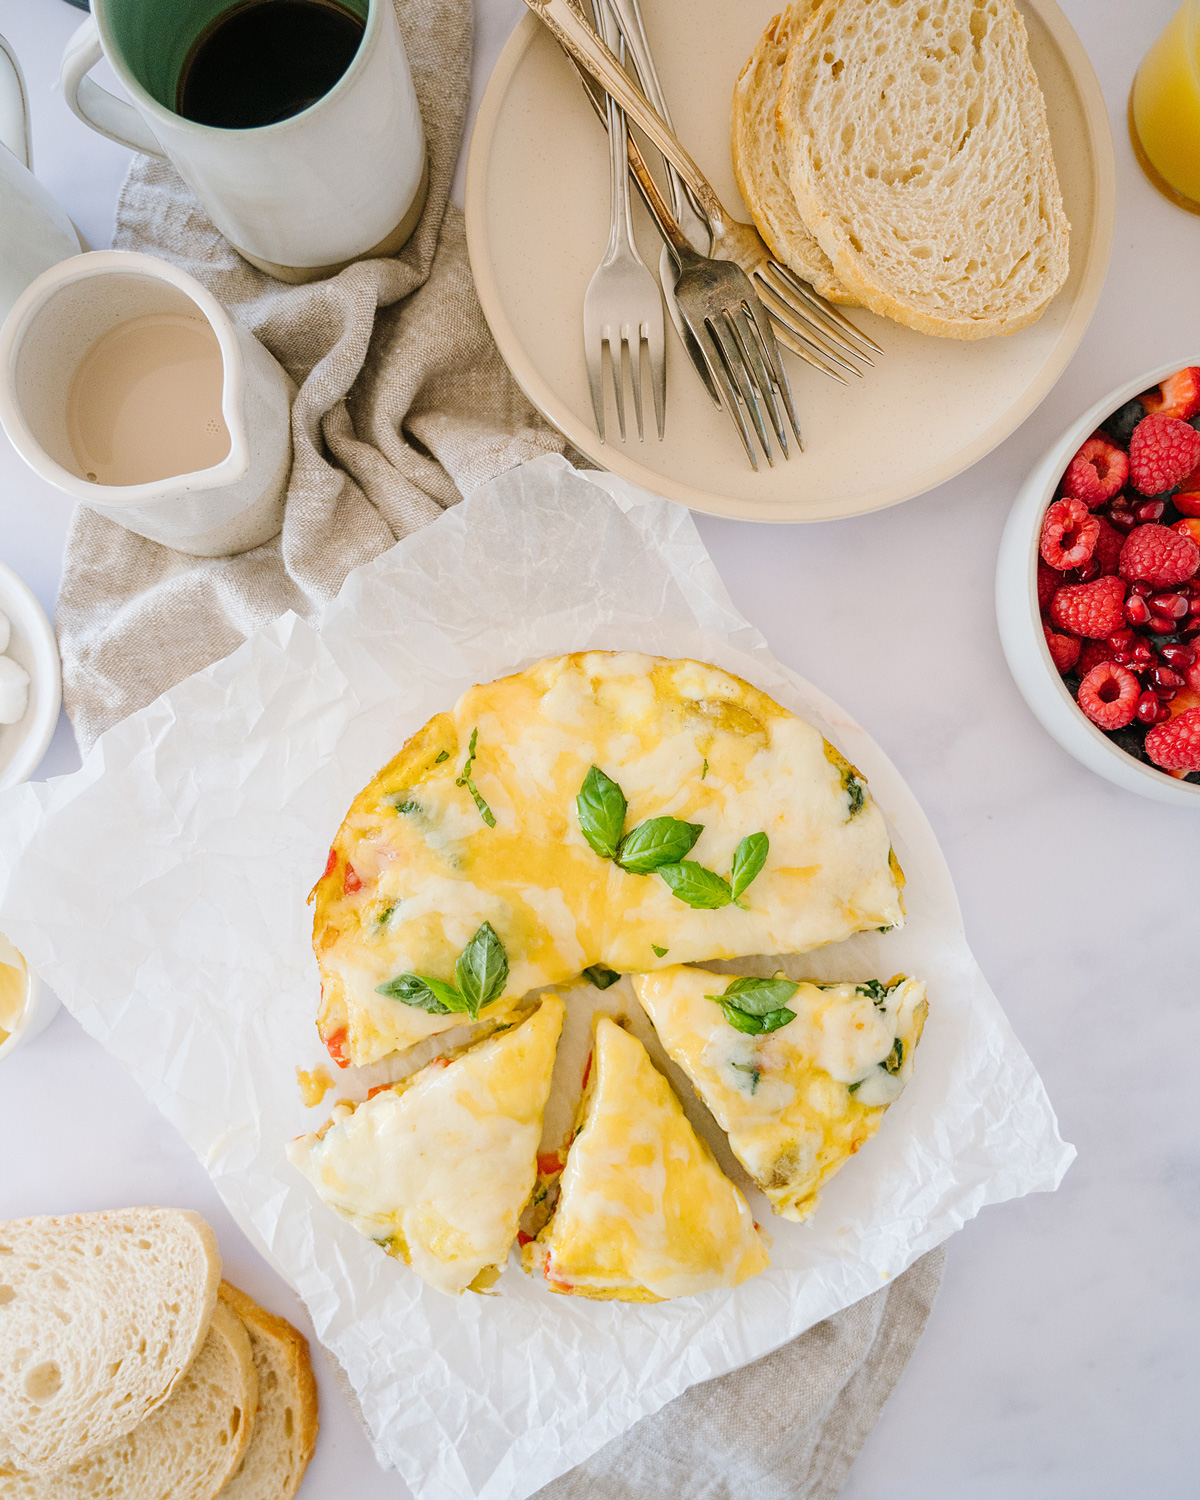
Add the pan to a preheated 350° F oven and bake until set, about 15 minutes. Let sit for 5 minutes, then remove from the pan and garnish with chopped basil.
What Makes This Frittata with Smoked Gouda, Havarti, Spinach, Potato, and Pepper So Good? //
This frittata recipe is so good. It’s so easy to make and such a good vehicle to carry flavor. Everyone in my house will eat it and it’s also great left over. So many things to love!
Frittata with Smoked Gouda and Havarti. How can that not be amazing? This is a marriage made in heaven, a stronger-flavored cheese that is balanced with a rich and creamy one, and both melt so well. You can also add the extra shredded cheese after it comes out of the oven and put it under the broiler for a minute to get those crispy, brown, cheesy bits.
The more cheese, the better if you ask me. This is a great way to use up any cheeses that you have in your cheese drawer. Shred up what you have and try all kinds of cheese combinations. It’s also great for a leftover cheese board after a party. (Remember those?)
Frittata can be served for breakfast, lunch, or dinner. It’s so versatile. I probably make it more for dinner than any other time of the day.
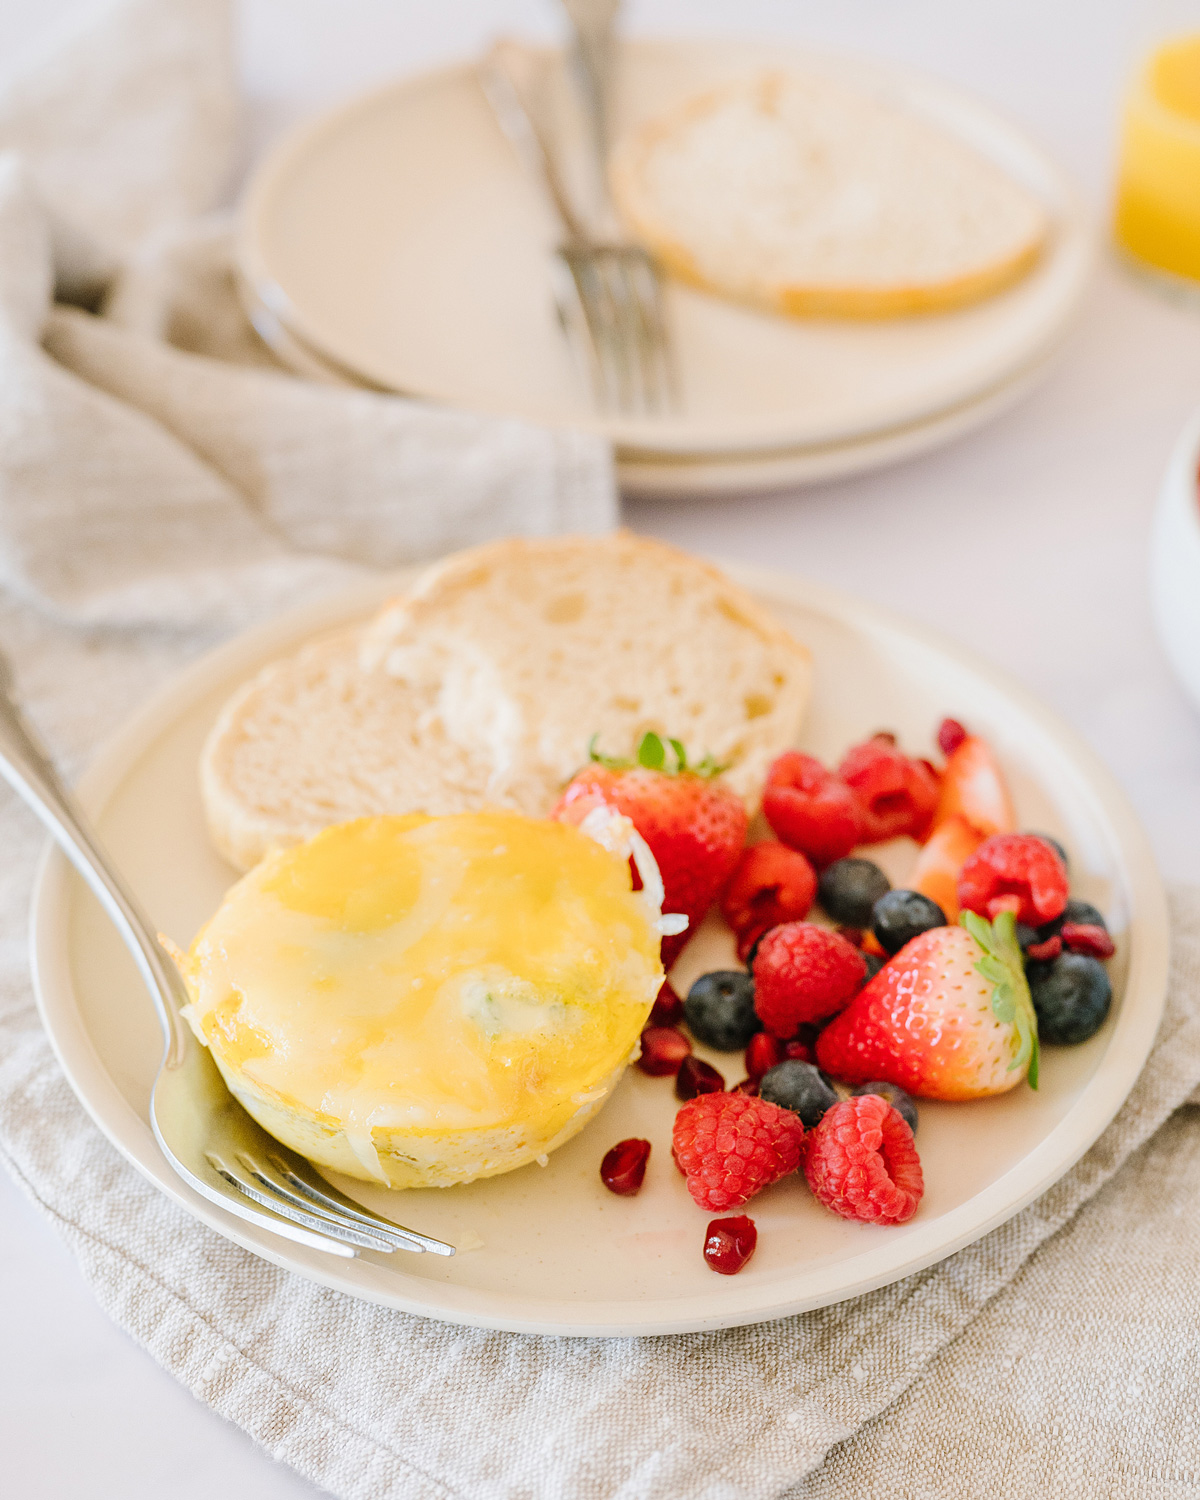
It’s great leftover and perfect in a lunchbox. I actually made a few individual ones in two silicone baking cups, but you could bake them in a well-greased muffin pan. Make sure to use a LOT of cooking spray, egg sticks like nothing else.
Serving Suggestions //
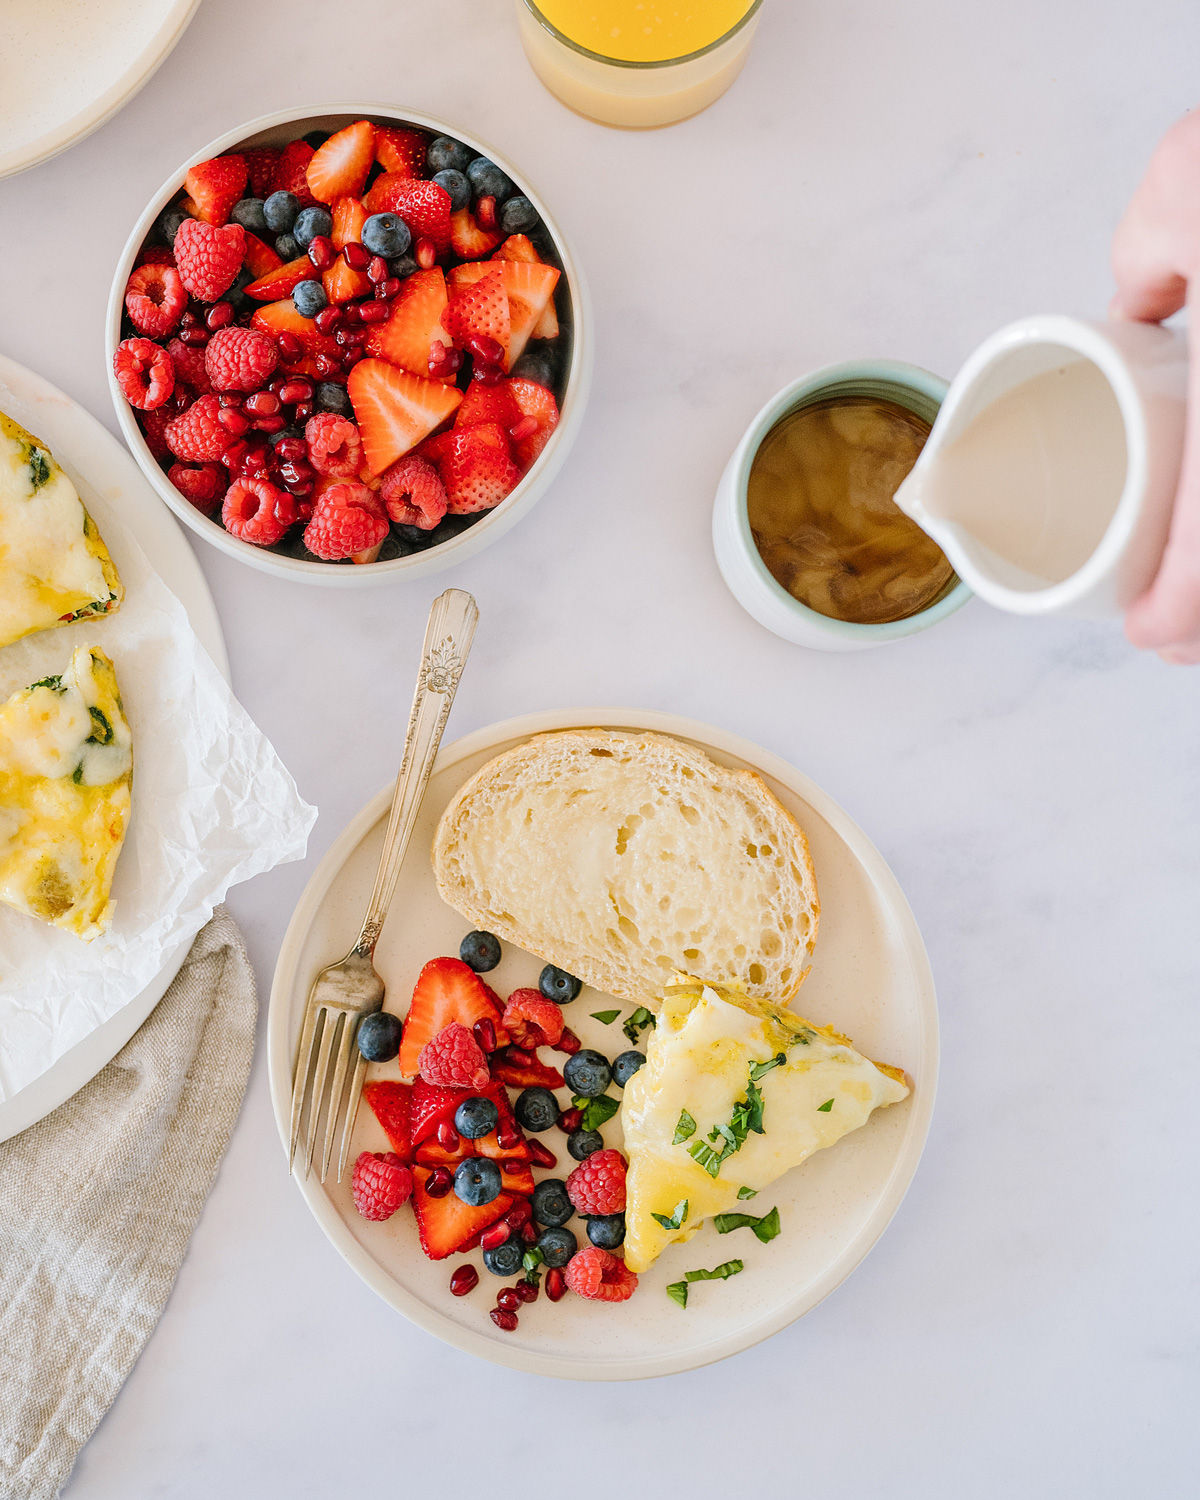
Frittata can be served all on its own and it’s great, but I like to round it out. For breakfast, I like to serve it with some toast and berries or a fruit salad.
For lunch or dinner, I like to serve it with a side salad or arugula dressed with some lemon juice and olive oil. Super simple.
How to Store & Reheat Leftovers //
This recipe serves 8, so I often have a piece or two for the next day.
Store the leftover pieces in an airtight container for up to 4 days in the refrigerator. It also freezes really well.
To reheat in the oven, cover the frittata with foil and reheat at 350° for 15 to 20 minutes. To reheat in the microwave, put on a plate and cover with a paper towel. Microwave for 15 to 30 seconds or until it is warm all the way through.
Tips for Making the BEST Frittata Ever //
Frittata is so easy to make, but there are a few things that will make it incredible.
Use a non-stick pan and plenty of oil. Eggs stick like nothing else. If you’ve ever made the mistake of not greasing a muffin tin enough and then baking eggs in them, you know what a pain it is to get that clean. So be generous with the olive oil.
Season at every stage. Add salt and pepper throughout the recipe. You want to layer and build seasoning. It makes a HUGE difference. Don’t wait until the last step to season, you want everything to taste great on it’s own.
Shred your own cheese. I used to buy a lot of bags of shredded cheese, but these days, I buy more bricks of cheese and use my grater attachment on my mixer to shred it myself. I get to use different kinds of cheese that I normally wouldn’t. Tip: put the cheese in the freezer for 10-20 minutes before you shred it.
Use a combination of cheeses. I always find that using more than one kind of cheese increases the overall cheesiness in recipes. Cheeses have different properties and flavor profiles. Using more than one cheese is a great way to get the best flavor and the next melt possible. Mix a spicy Jalapeño Havarti with Grand Cru® or the gorgeous melting Fontina with Buttermilk Blue®.
Soften the vegetables before you add the eggs. Sautéing your onions and vegetables before you add the egg mixture makes a huge difference in the end result. I know that the vegetables will cook in the oven, but the frittata will not taste anywhere near as good.
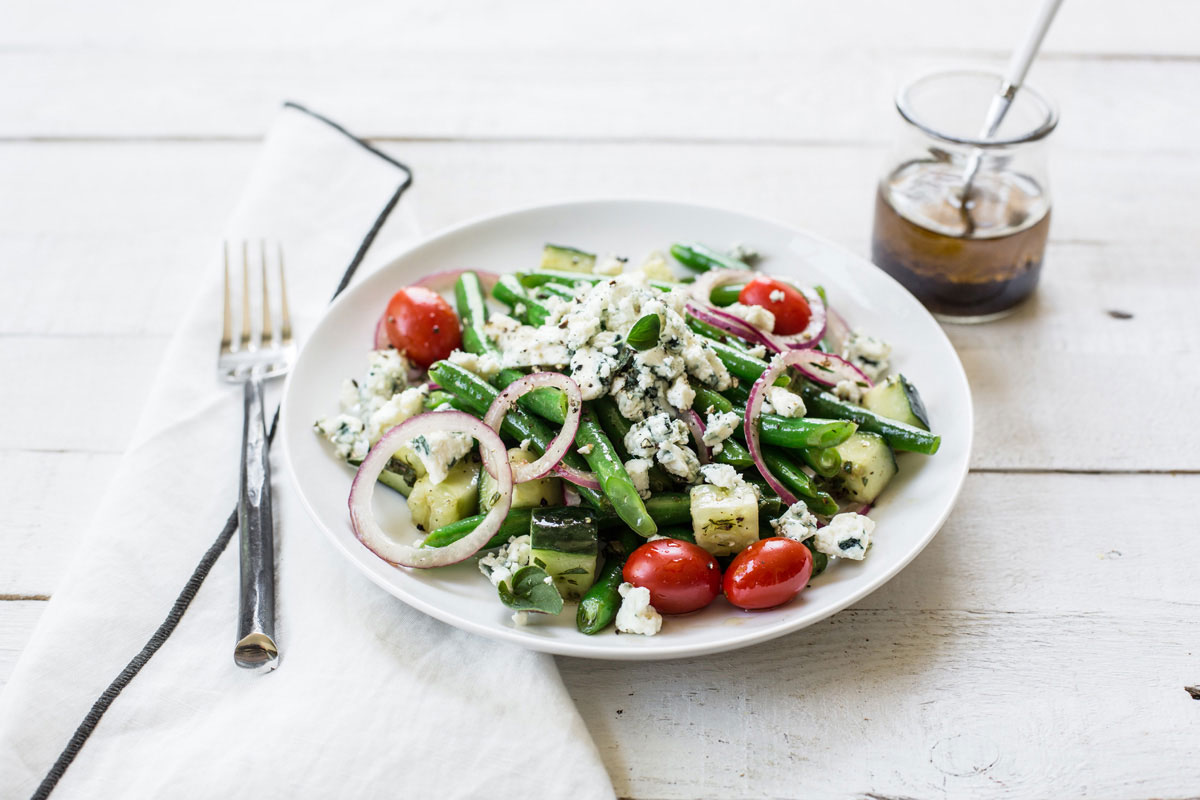
Whether you’re looking for ways to spice up your midday lunch routine or just a light dinner — these summer salad recipes are exactly what you need to keep up the energy to get out and enjoy the rest of summer!
Summer Cobb Salad with Homemade Jalapeño Ranch
This delicious Summer Cobb Salad tops our list as an all-around favorite for lunch or dinner. Featuring our Roth Dill Havarti and Buttermilk Blue® cheeses, this salad screams summer. Top with homemade Jalapeño Ranch dressing for an extra kick!
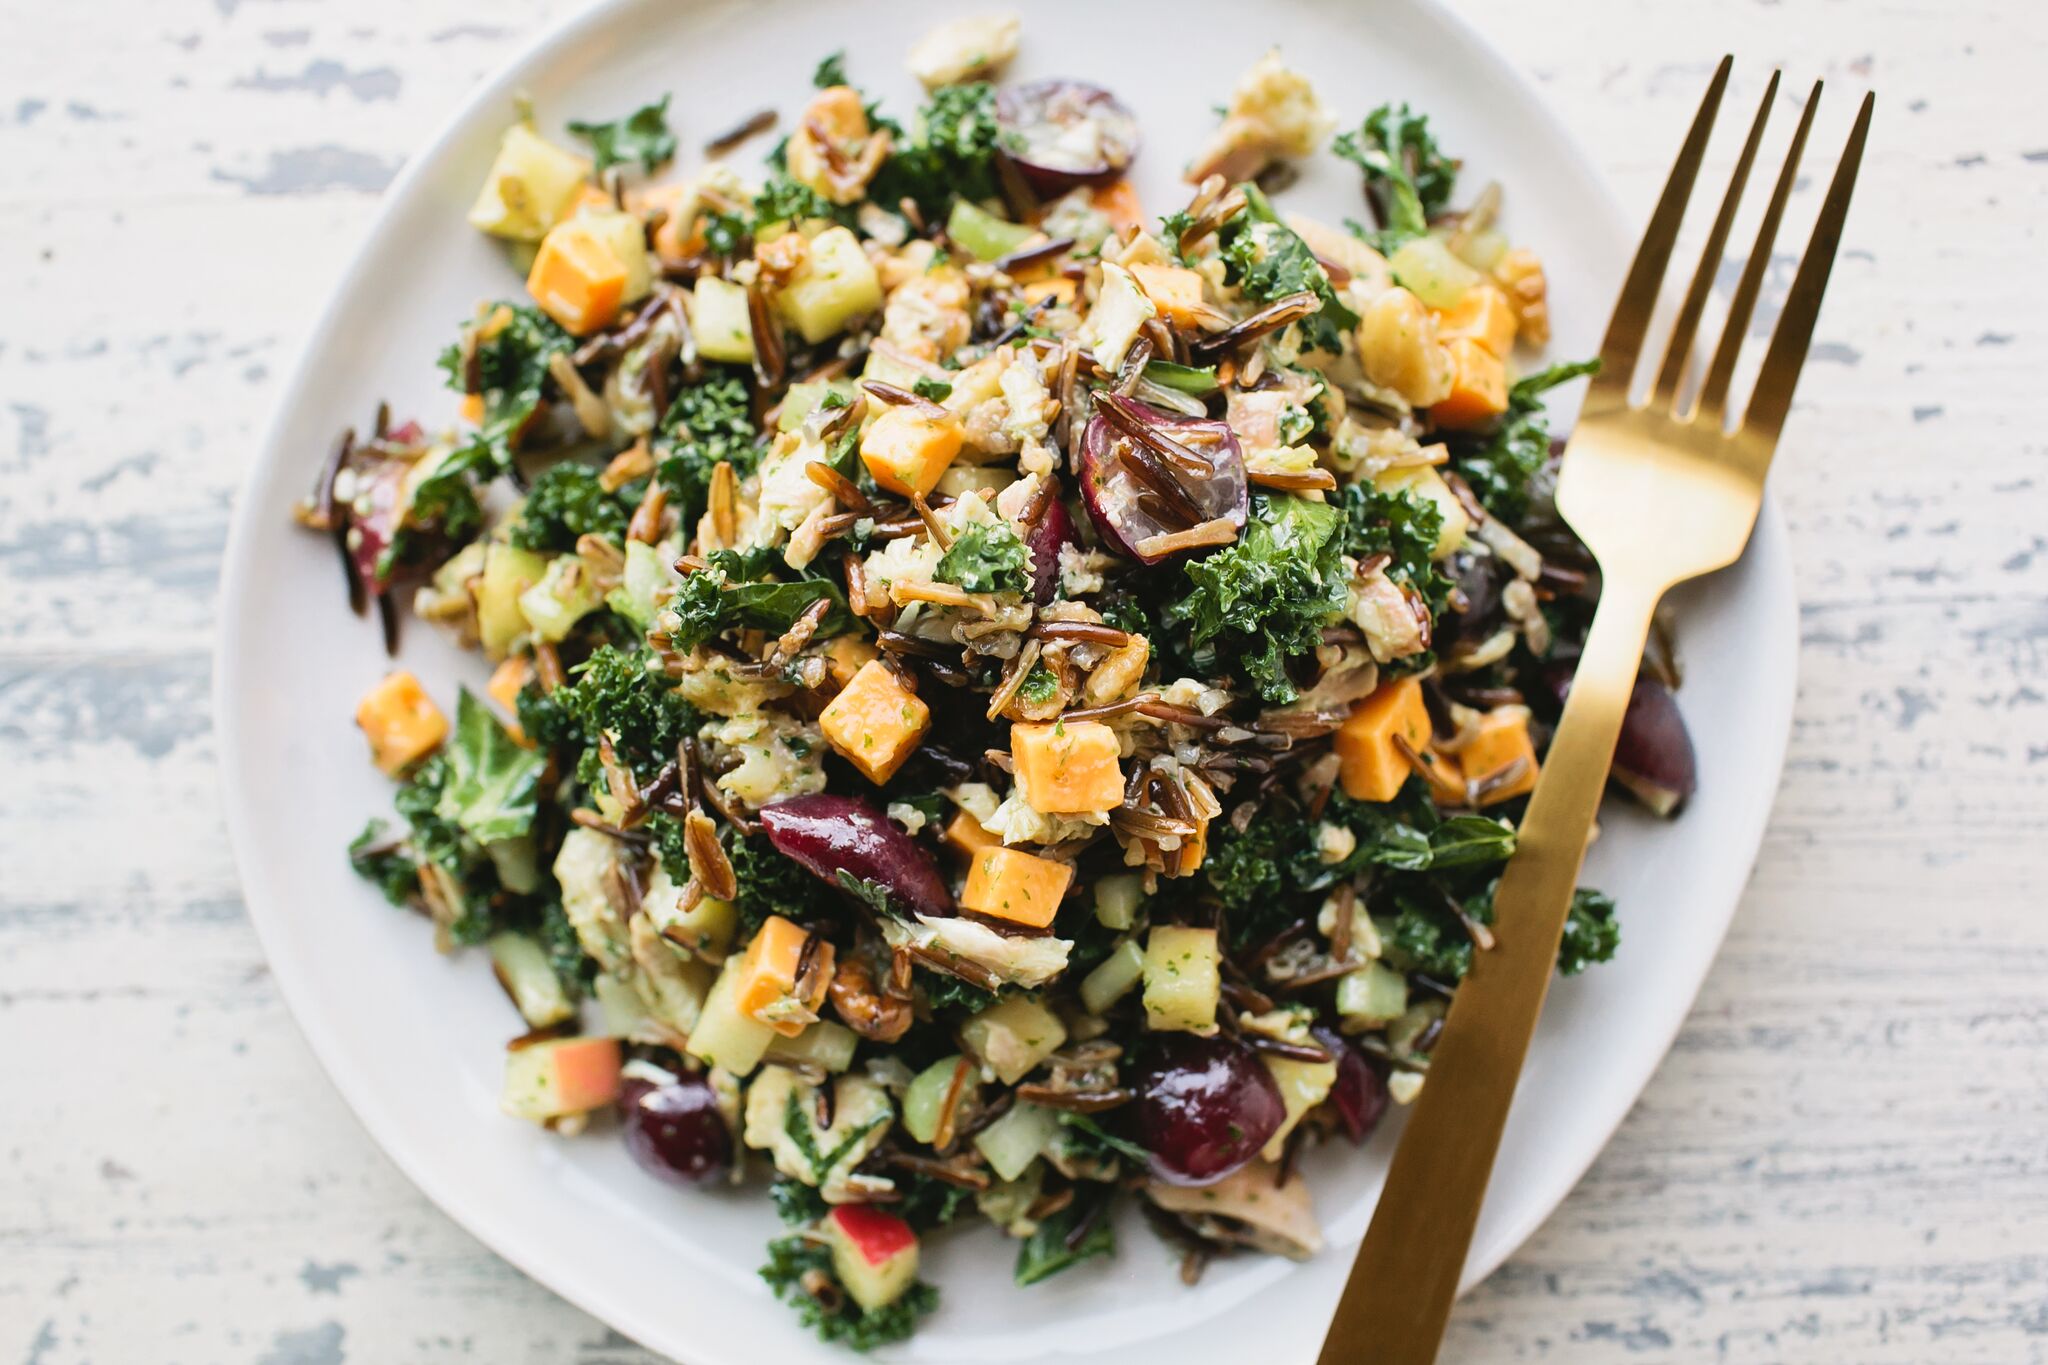
Wild Rice Kale Salad
This Wild Rice Kale Salad is the perfect mid-season salad. With kale, apples, grapes, and our Roth Prairie Sunset cheese, this salad combines tasty aspects of late spring, summer, and early fall for what’s surely to become a mealtime favorite.
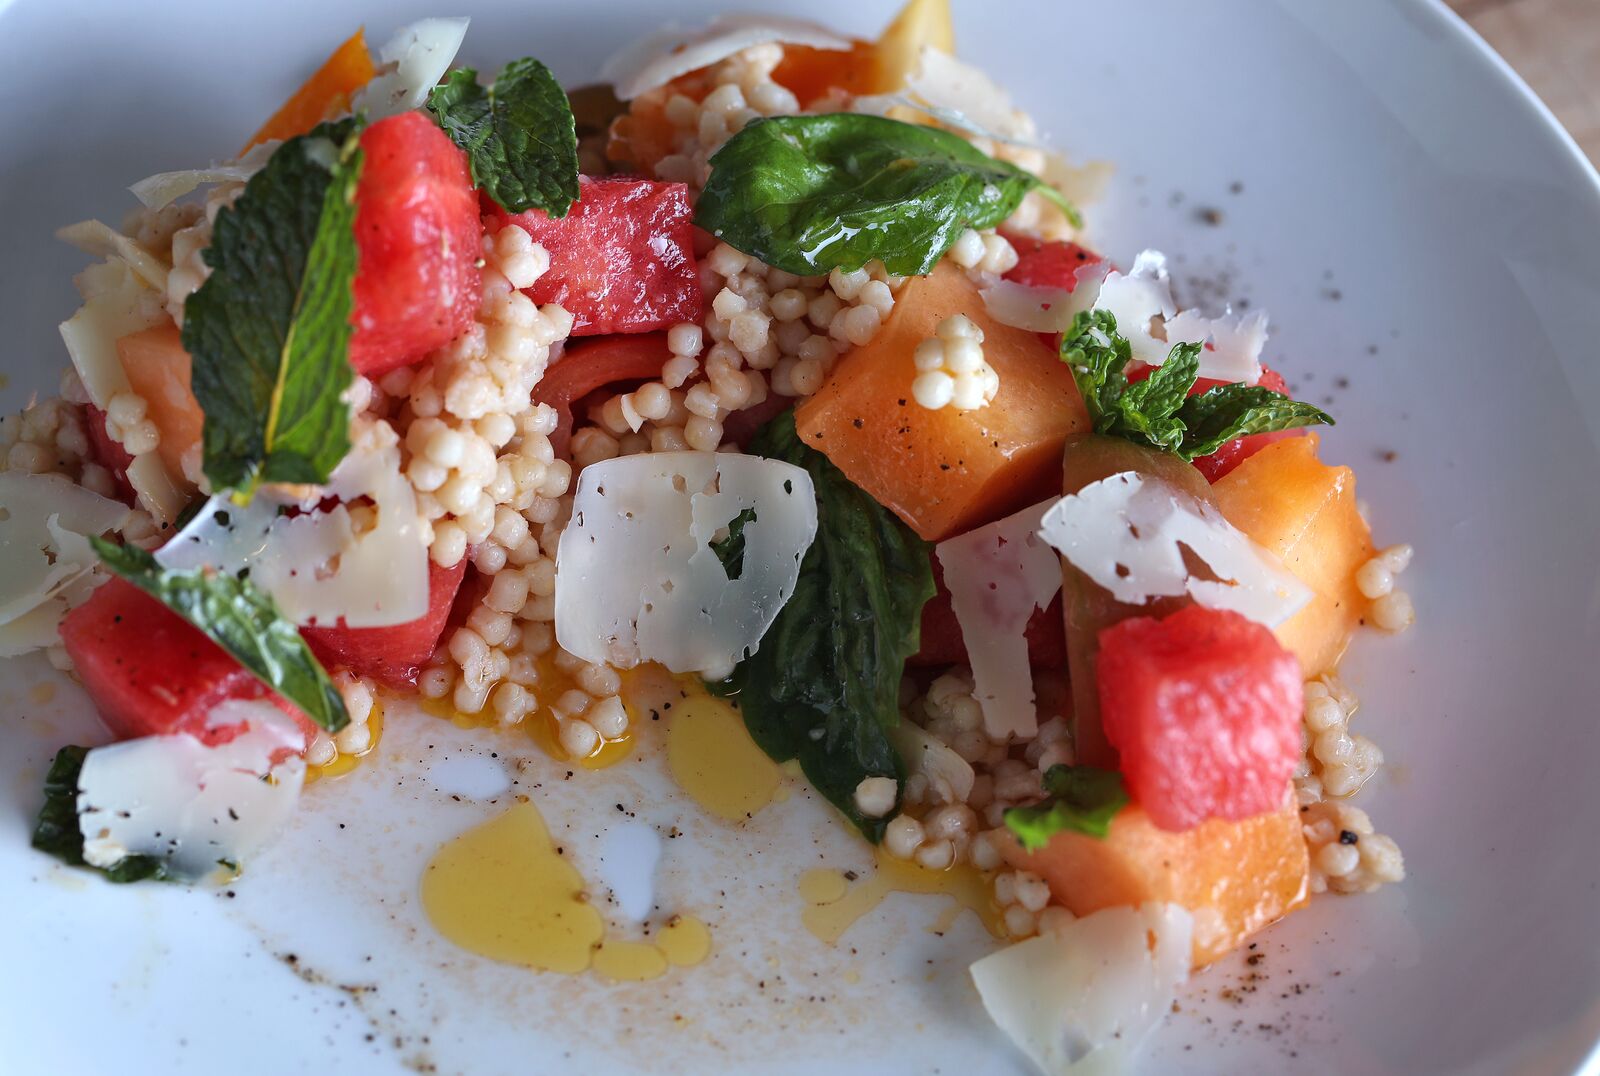
Tomato and Melon Salad
A perfect side salad or for a quick refreshing lunch, this Tomato and Melon Salad bursts with flavor. Featuring our Roth GranQueso® cheese, this salad is sure to please everyone from kids to adults!
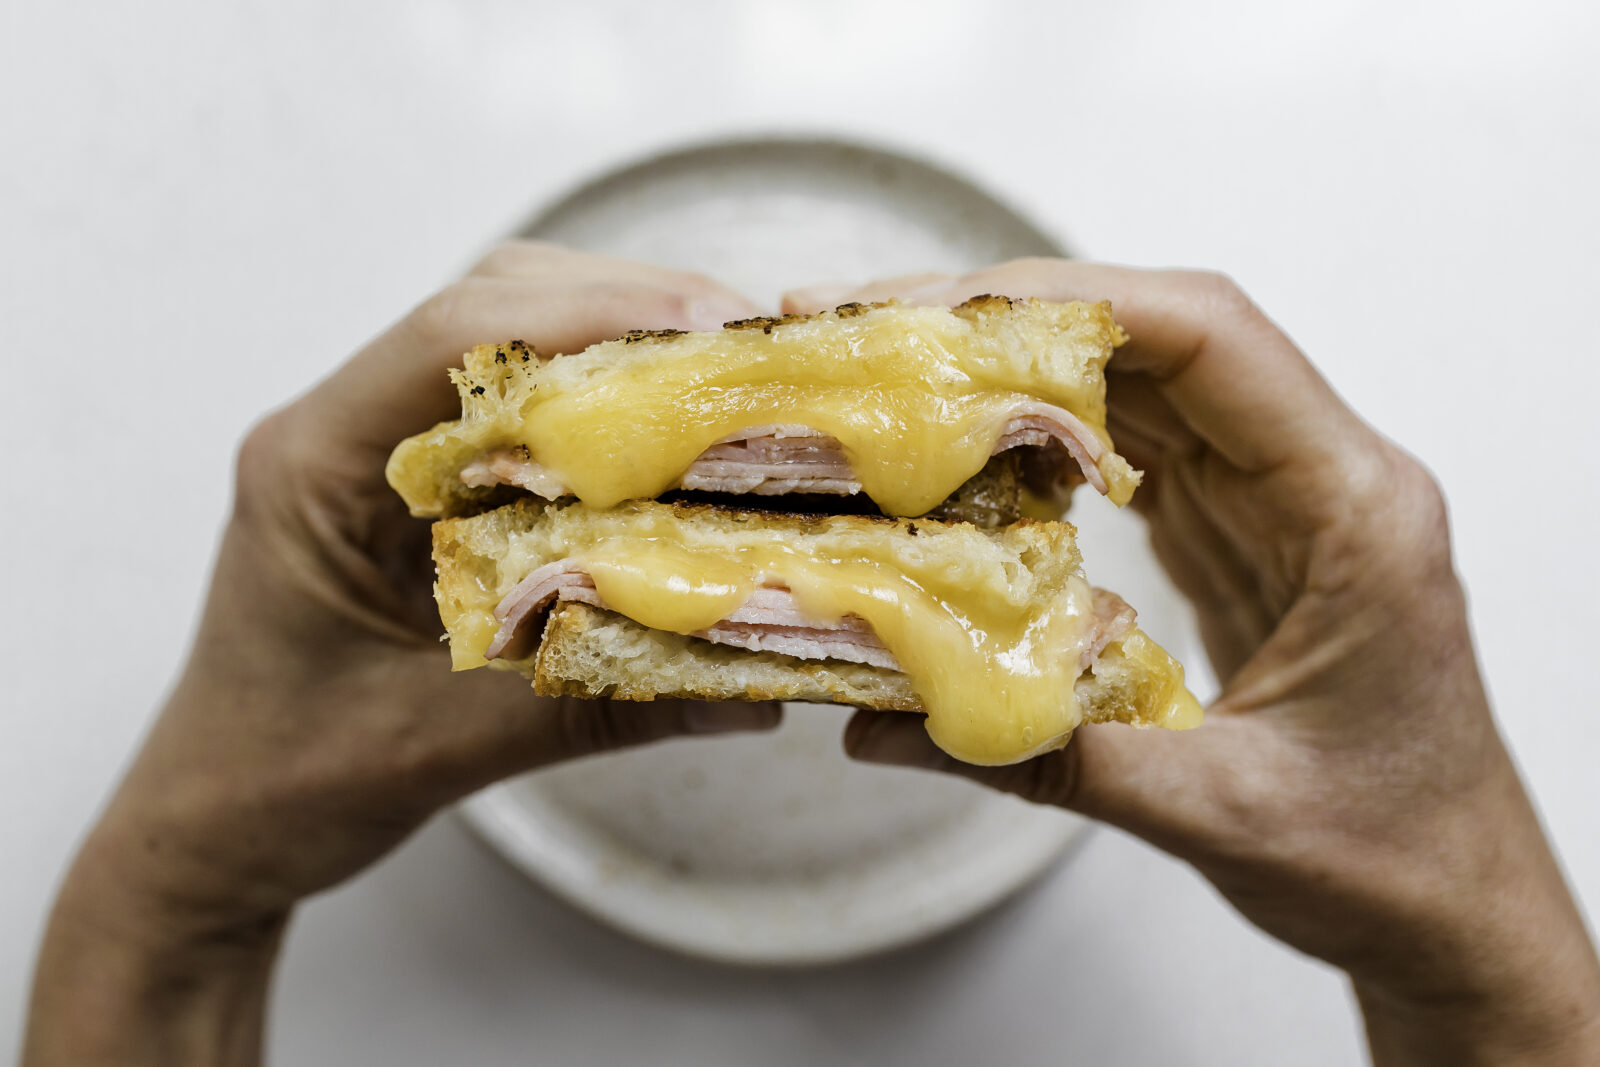
There’s nothing quite like the crusty, buttery, ooey gooey goodness of a perfectly done grilled cheese. Whether it’s a classic cheddar & tomato soup combo, an attempt to recreate grandma’s favorite, or a “grown-up” version with all the fancy fixings — the comfort of a grilled cheese sandwich is undeniable.
Use Good Bread: The perfect grilled cheese starts with the bread. Don’t skimp on this part. Find a fresh-baked loaf from your local bakery or grocery store. And if you’re really adventurous, rosemary or garlic herb varieties add a pop of flavor.
Don’t Over Butter: Some may say the more butter, the better, but there is such a thing as over-buttering. To avoid a greasy sandwich, we suggest about ½ tablespoon per slice of bread. Start by softening the butter for an even spread. Then, slather on the outsides of the bread to achieve that perfectly crisp, golden-brown crust.
Shred Your Cheese: Do not, we repeat, do NOT use sliced cheese for grilled cheese. First, it is best to bring your cheese up to room temperature before cooking your sandwich. Then, shredding the cheese will help ensure that it melts faster and more evenly. Keep in mind, certain cheeses melt easier than others. Mild, creamy cheeses like Havarti, Gouda, and a young cheddar are prime candidates for melty perfection. Or, consider a flavored variety like Dill Havarti for an extra flavor kick.
Grill on Medium Heat: When it comes to cooking, we want enough heat to toast the bread without burning it while fully melting the cheese all the way to the center. A skillet preheated to medium or medium-low is optimal (adjust yours accordingly). Start by placing one slice of buttered bread face down in the pan, top with shredded cheese. Add the second slice buttered side up. Cook 2-4 minutes per side until bread is golden brown and cheese is melted.
Get Creative: If you feel like upping the ante, add your favorite meats, veggies or spreads. Remember, the more fillings you add, the crustier the bread needs to be so it doesn’t get soggy. We suggest using lightly pre-toasted or day-old bread for heartier sandwiches.
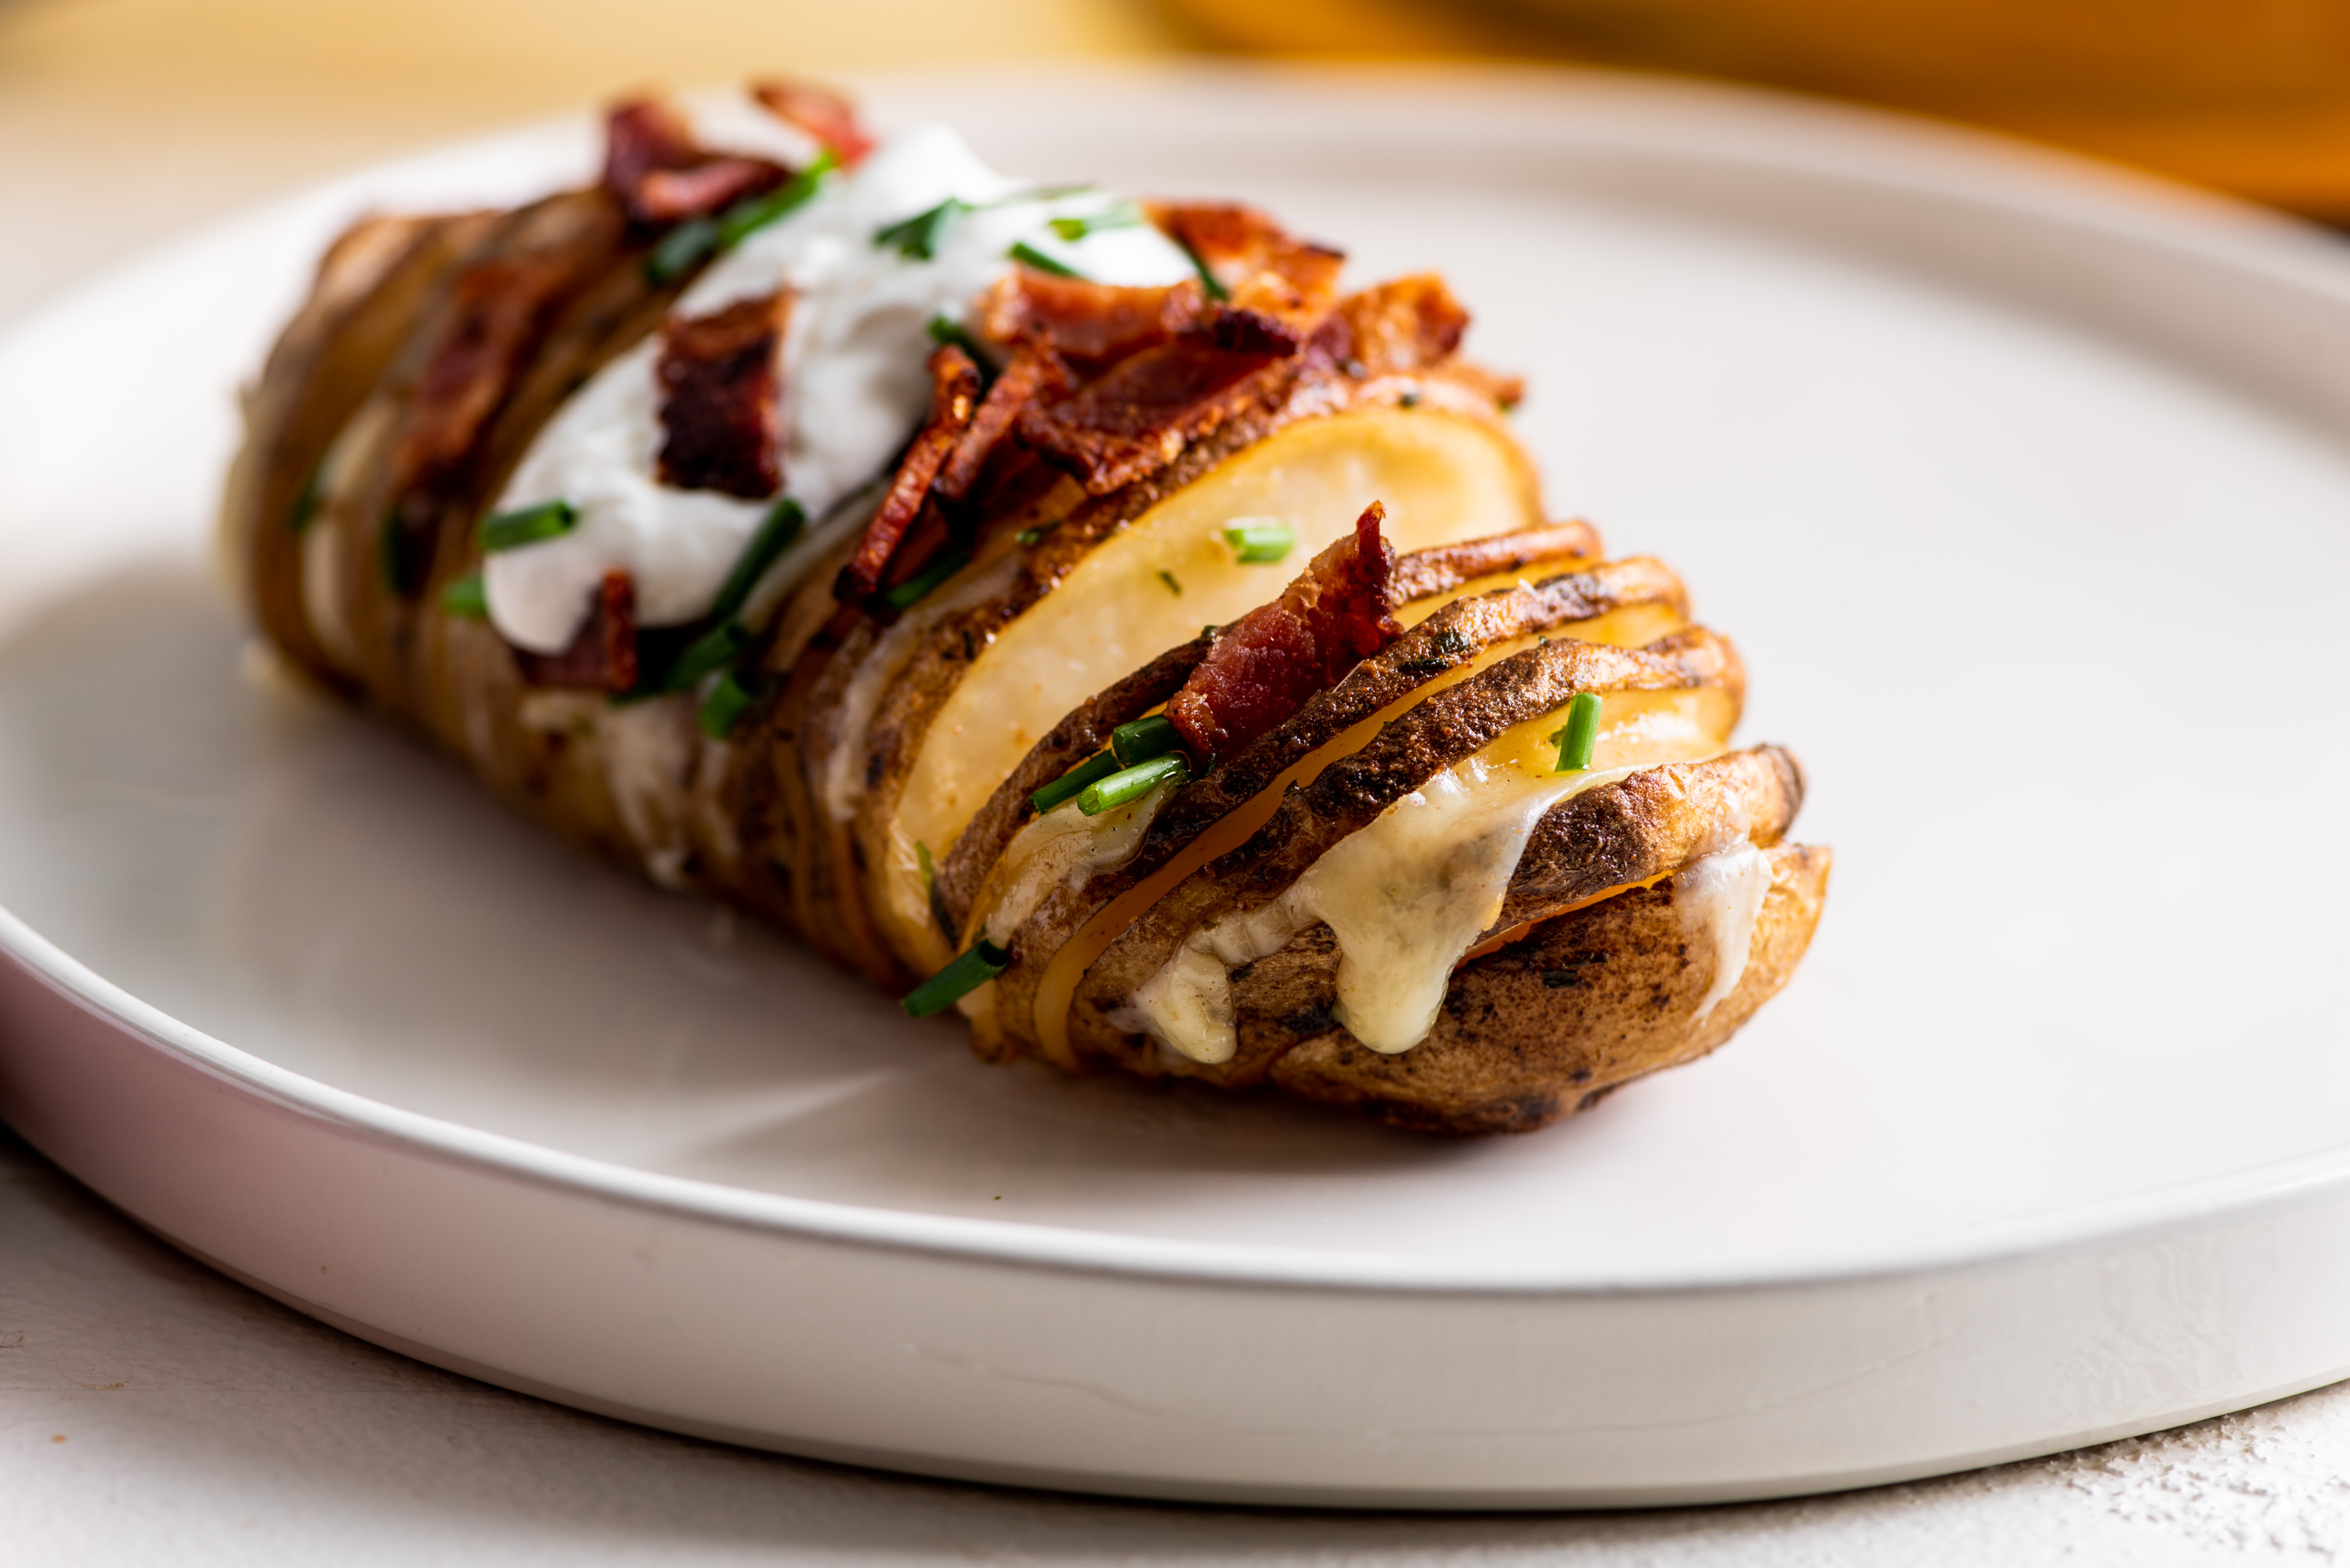
Between food allergies, preferences and conflicting tastes; coming up with a tasty holiday menu that will satisfy all your guests can be a daunting task. Luckily, there’s one humble ingredient everyone seems to agree on: POTATOES.
There is so much you can do with a good spud. And what makes a good spud an even better spud? CHEESE!
Easy Loaded Hasselback Potatoes: A potato chip + baked potato hybrid, these crispy Hasselback potatoes are as easy as it gets. Simply slice up your potatoes, brush with butter, and pop in the oven. For the last five minutes, add Grand Cru® for melty, cheesy goodness, then top with green onions, bacon, sour cream and ENJOY.
Cheesy Skillet Potatoes: The more cheese, the merrier! There’s a double dose of cheese melted into these layered skillet potatoes. Robust Grand Cru® and our extra creamy Havarti give these spuds that extra flair.
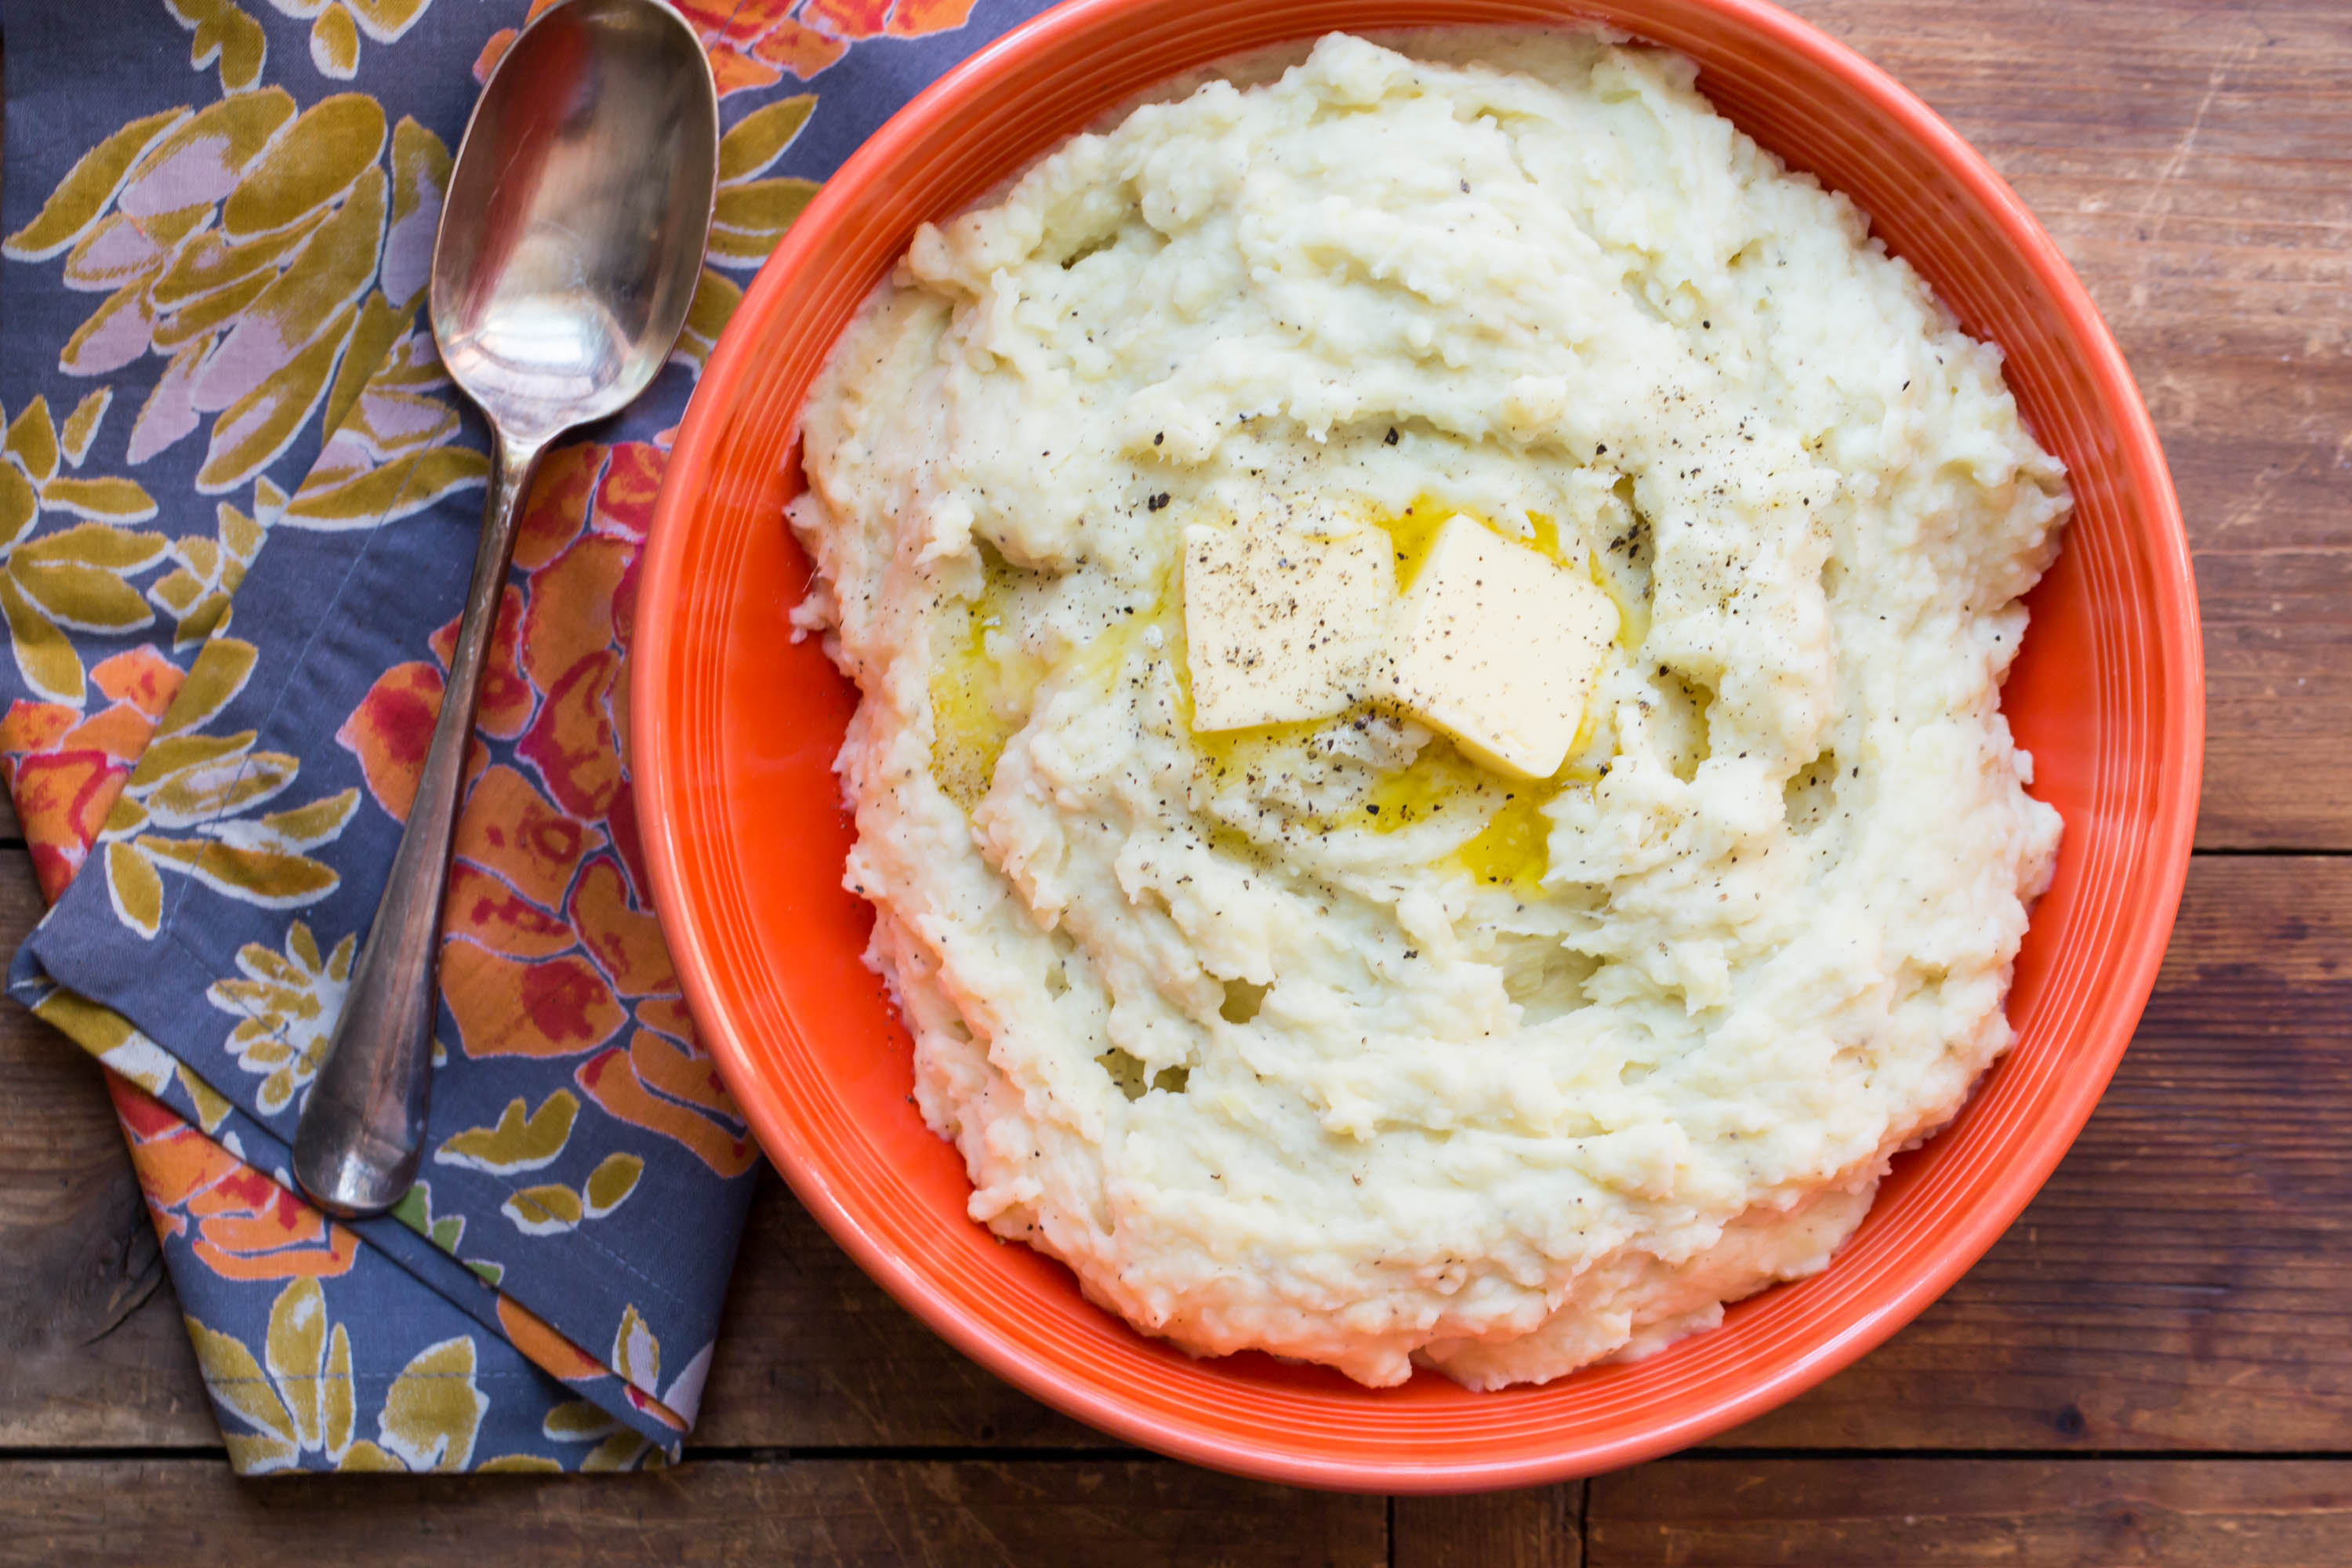
Cheesy Mashed Potatoes: A downright classic, mashed potatoes may just be THE ultimate comfort food. Try our extra cheesy version with smooth and creamy Fontina and nutty Grand Cru®.
Twice Baked Potatoes: Bake em’ twice, they’re double as nice! Twice-baked potatoes are a dish the whole family can pitch in on. Kids can scoop out the centers and fill with Prairie Sunset, broccoli and hot sauce (optional). This can be a fun, interactive dinner for the kids while lightening the load for you!
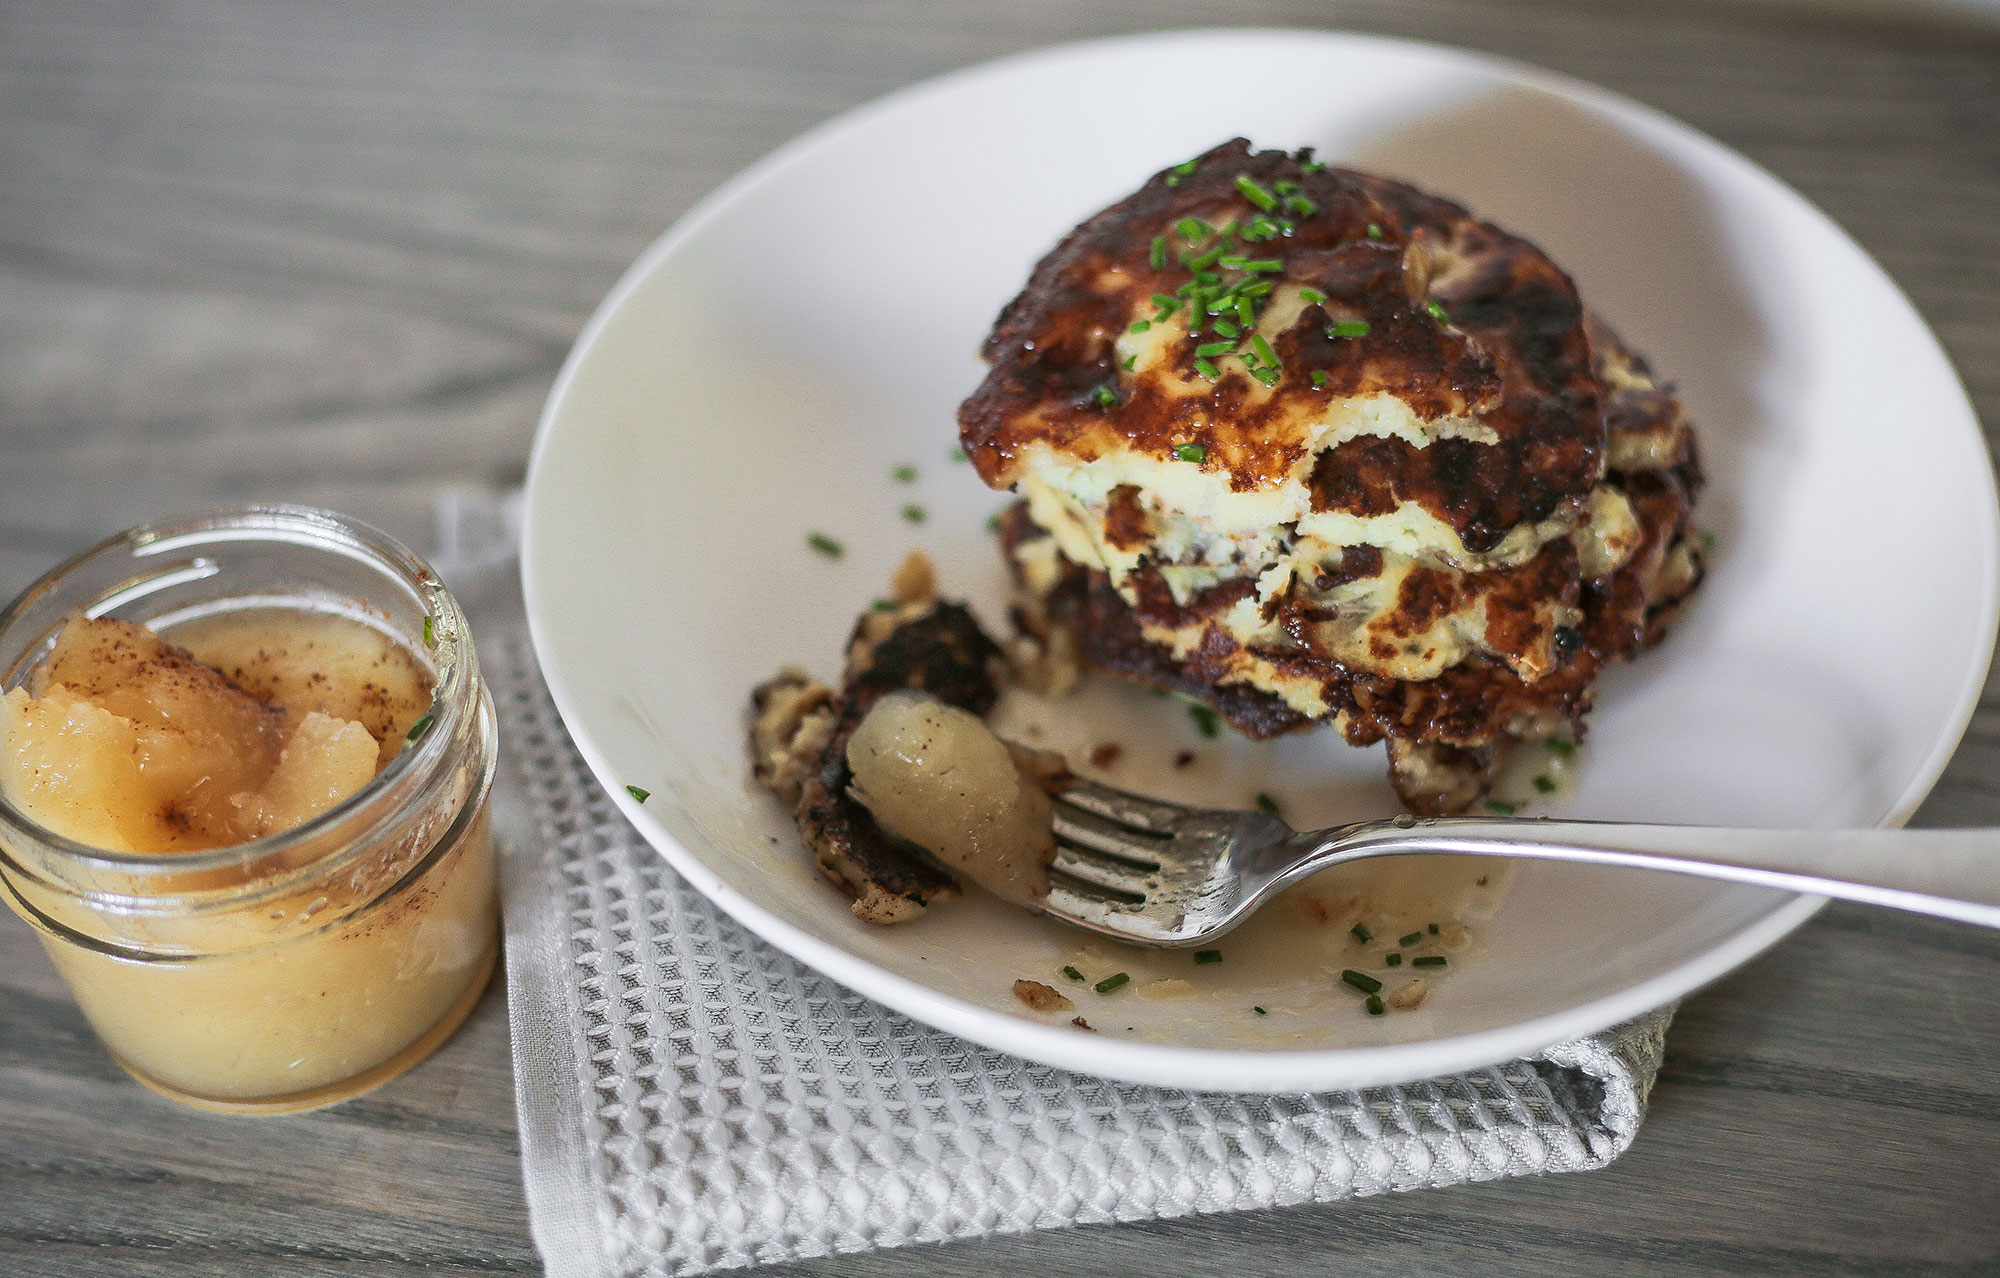
Mashed Potato Latkes: A take on your grandma’s traditional shredded potato latkes. Grab the applesauce and be warned: these Grand Cru®-laden mashed potato rendition could give grandma’s classic a run for her money.
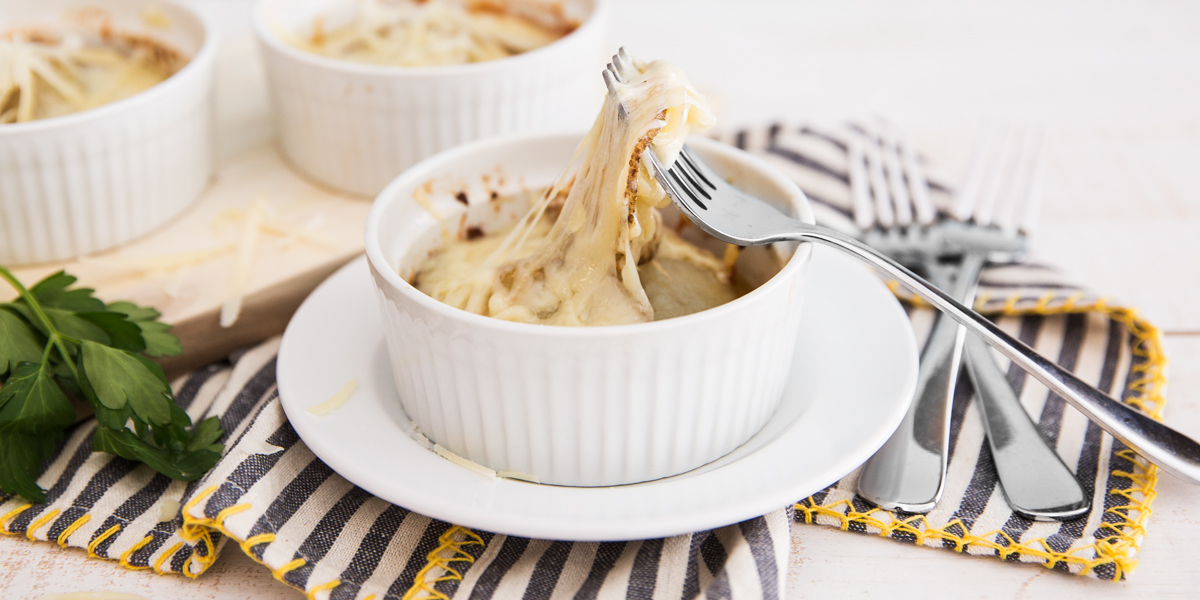
Swiss Ana Potatoes: Want a side of potatoes with your cheese? These thinly-sliced taters have been doused with mellow, nutty Grand Cru® and that’s not a bad thing. Little ramekins make these single-sized portions perfect to serve guests over Christmas.
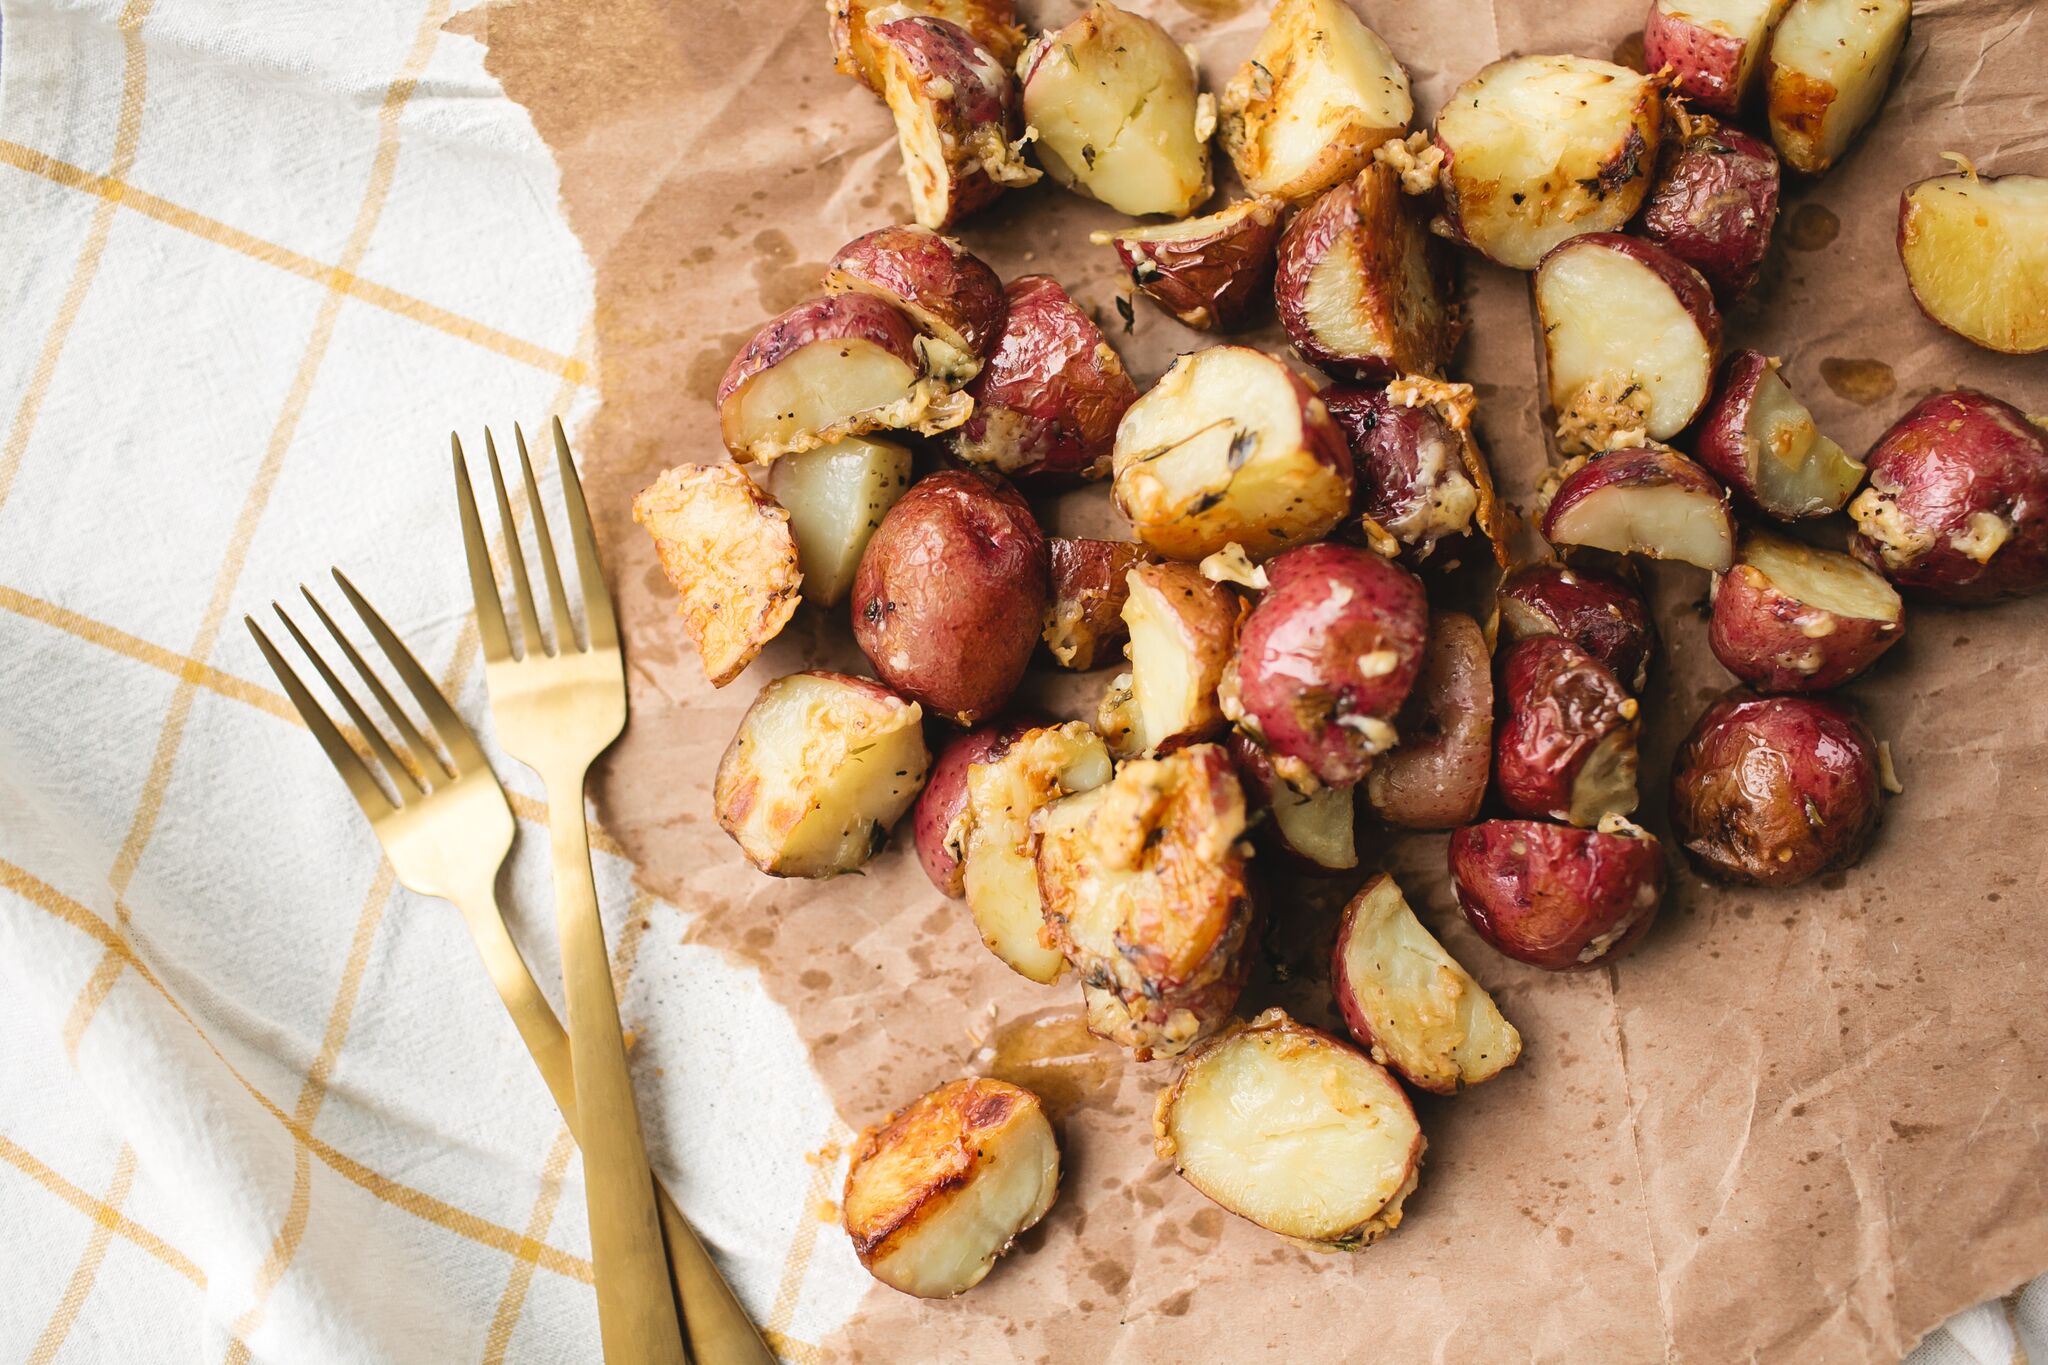
Roasted Potatoes WithGranQueso®: Simple and satisfying, this recipe goes with just about anything. Quarter your potatoes, toss with GranQueso® and roast for 45 minutes until golden and crispy.
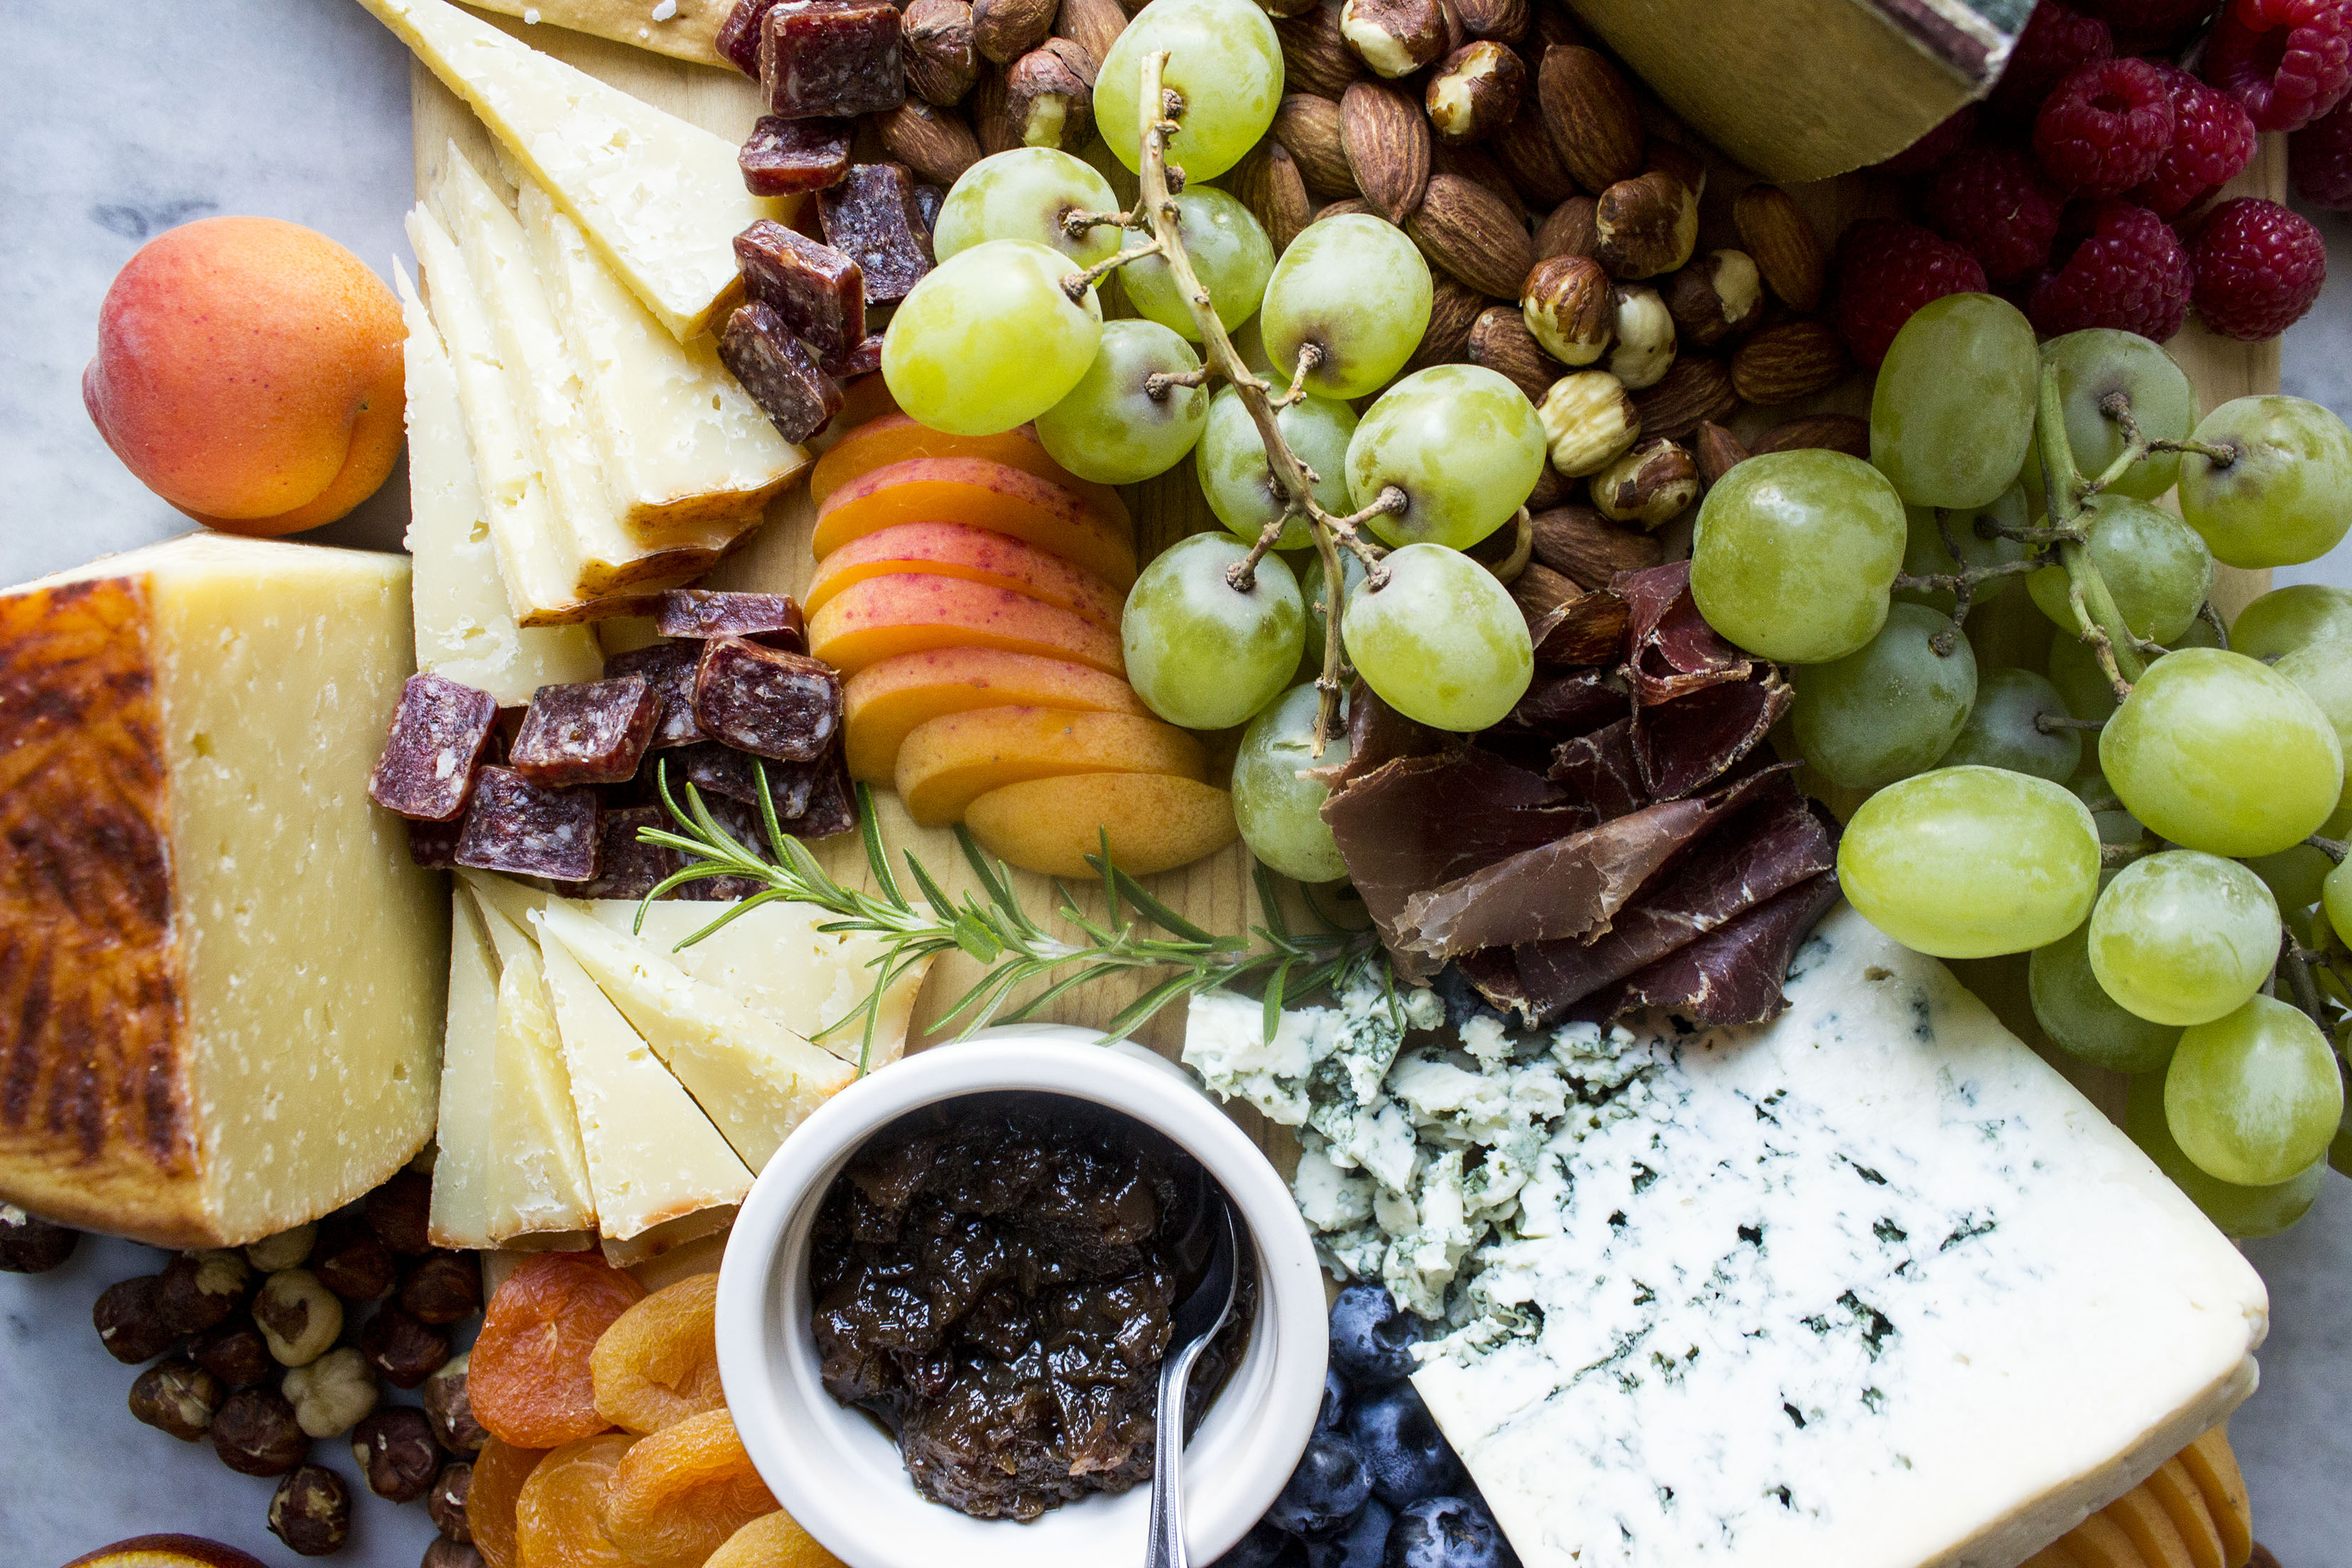
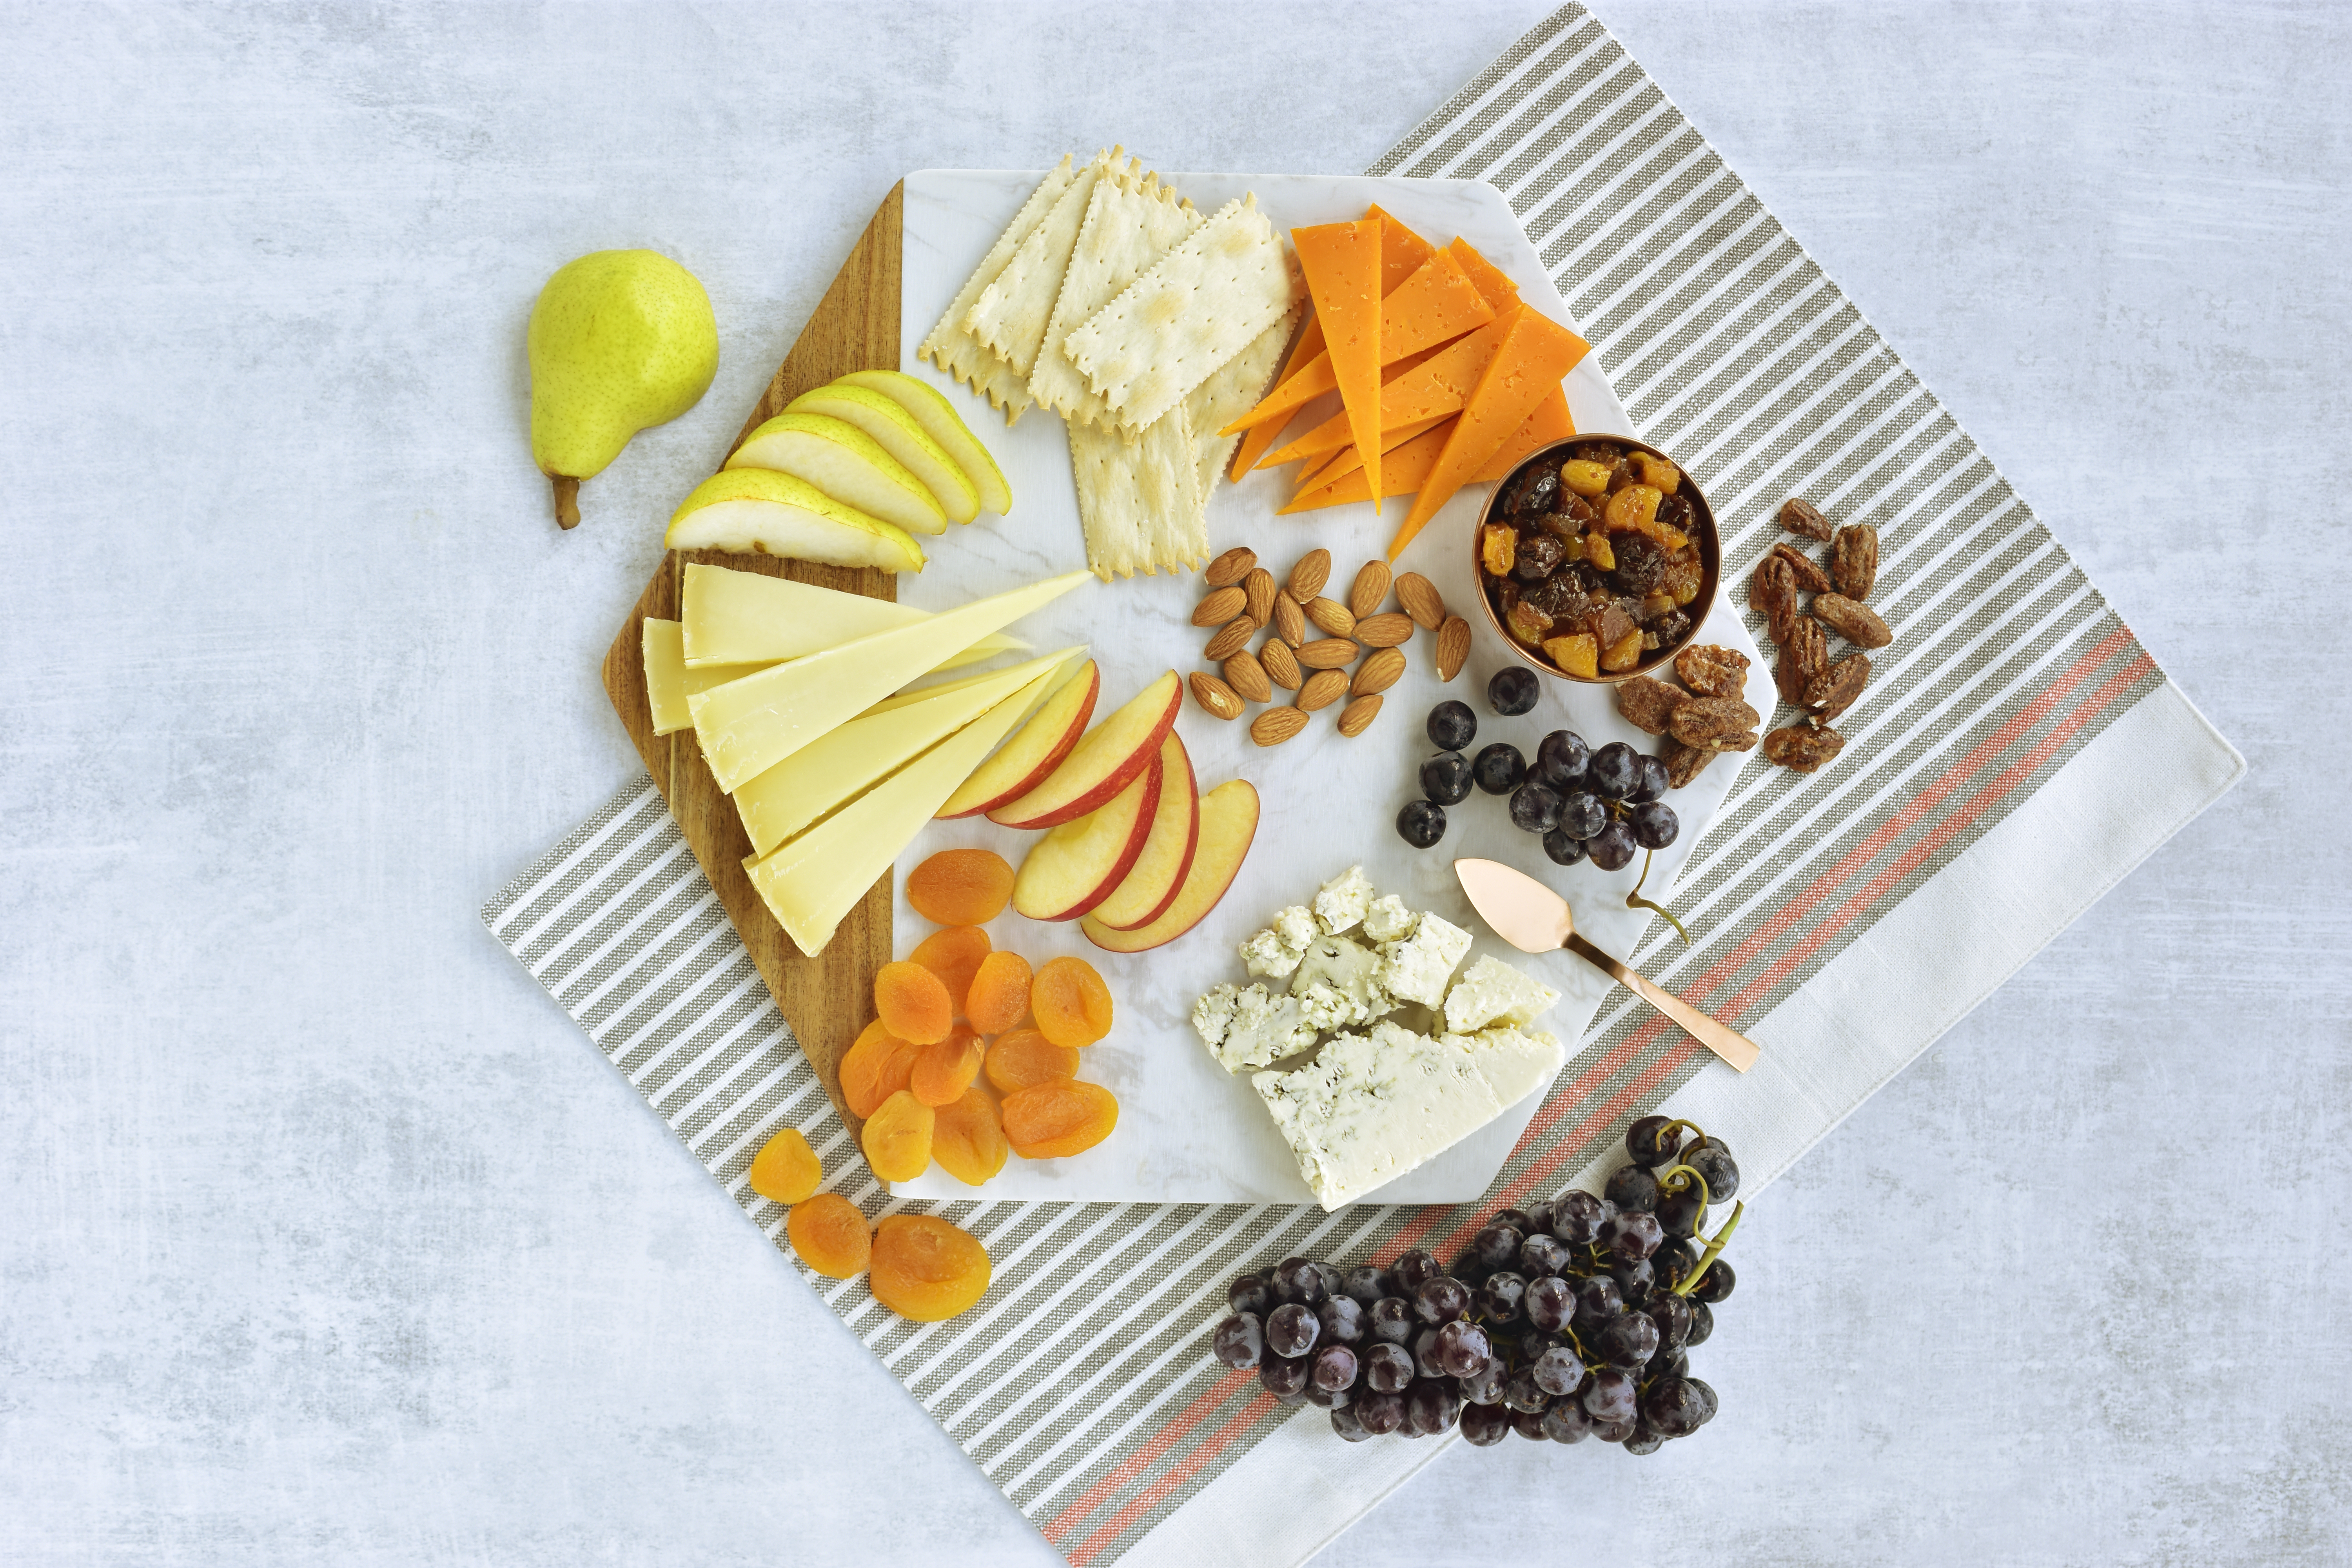
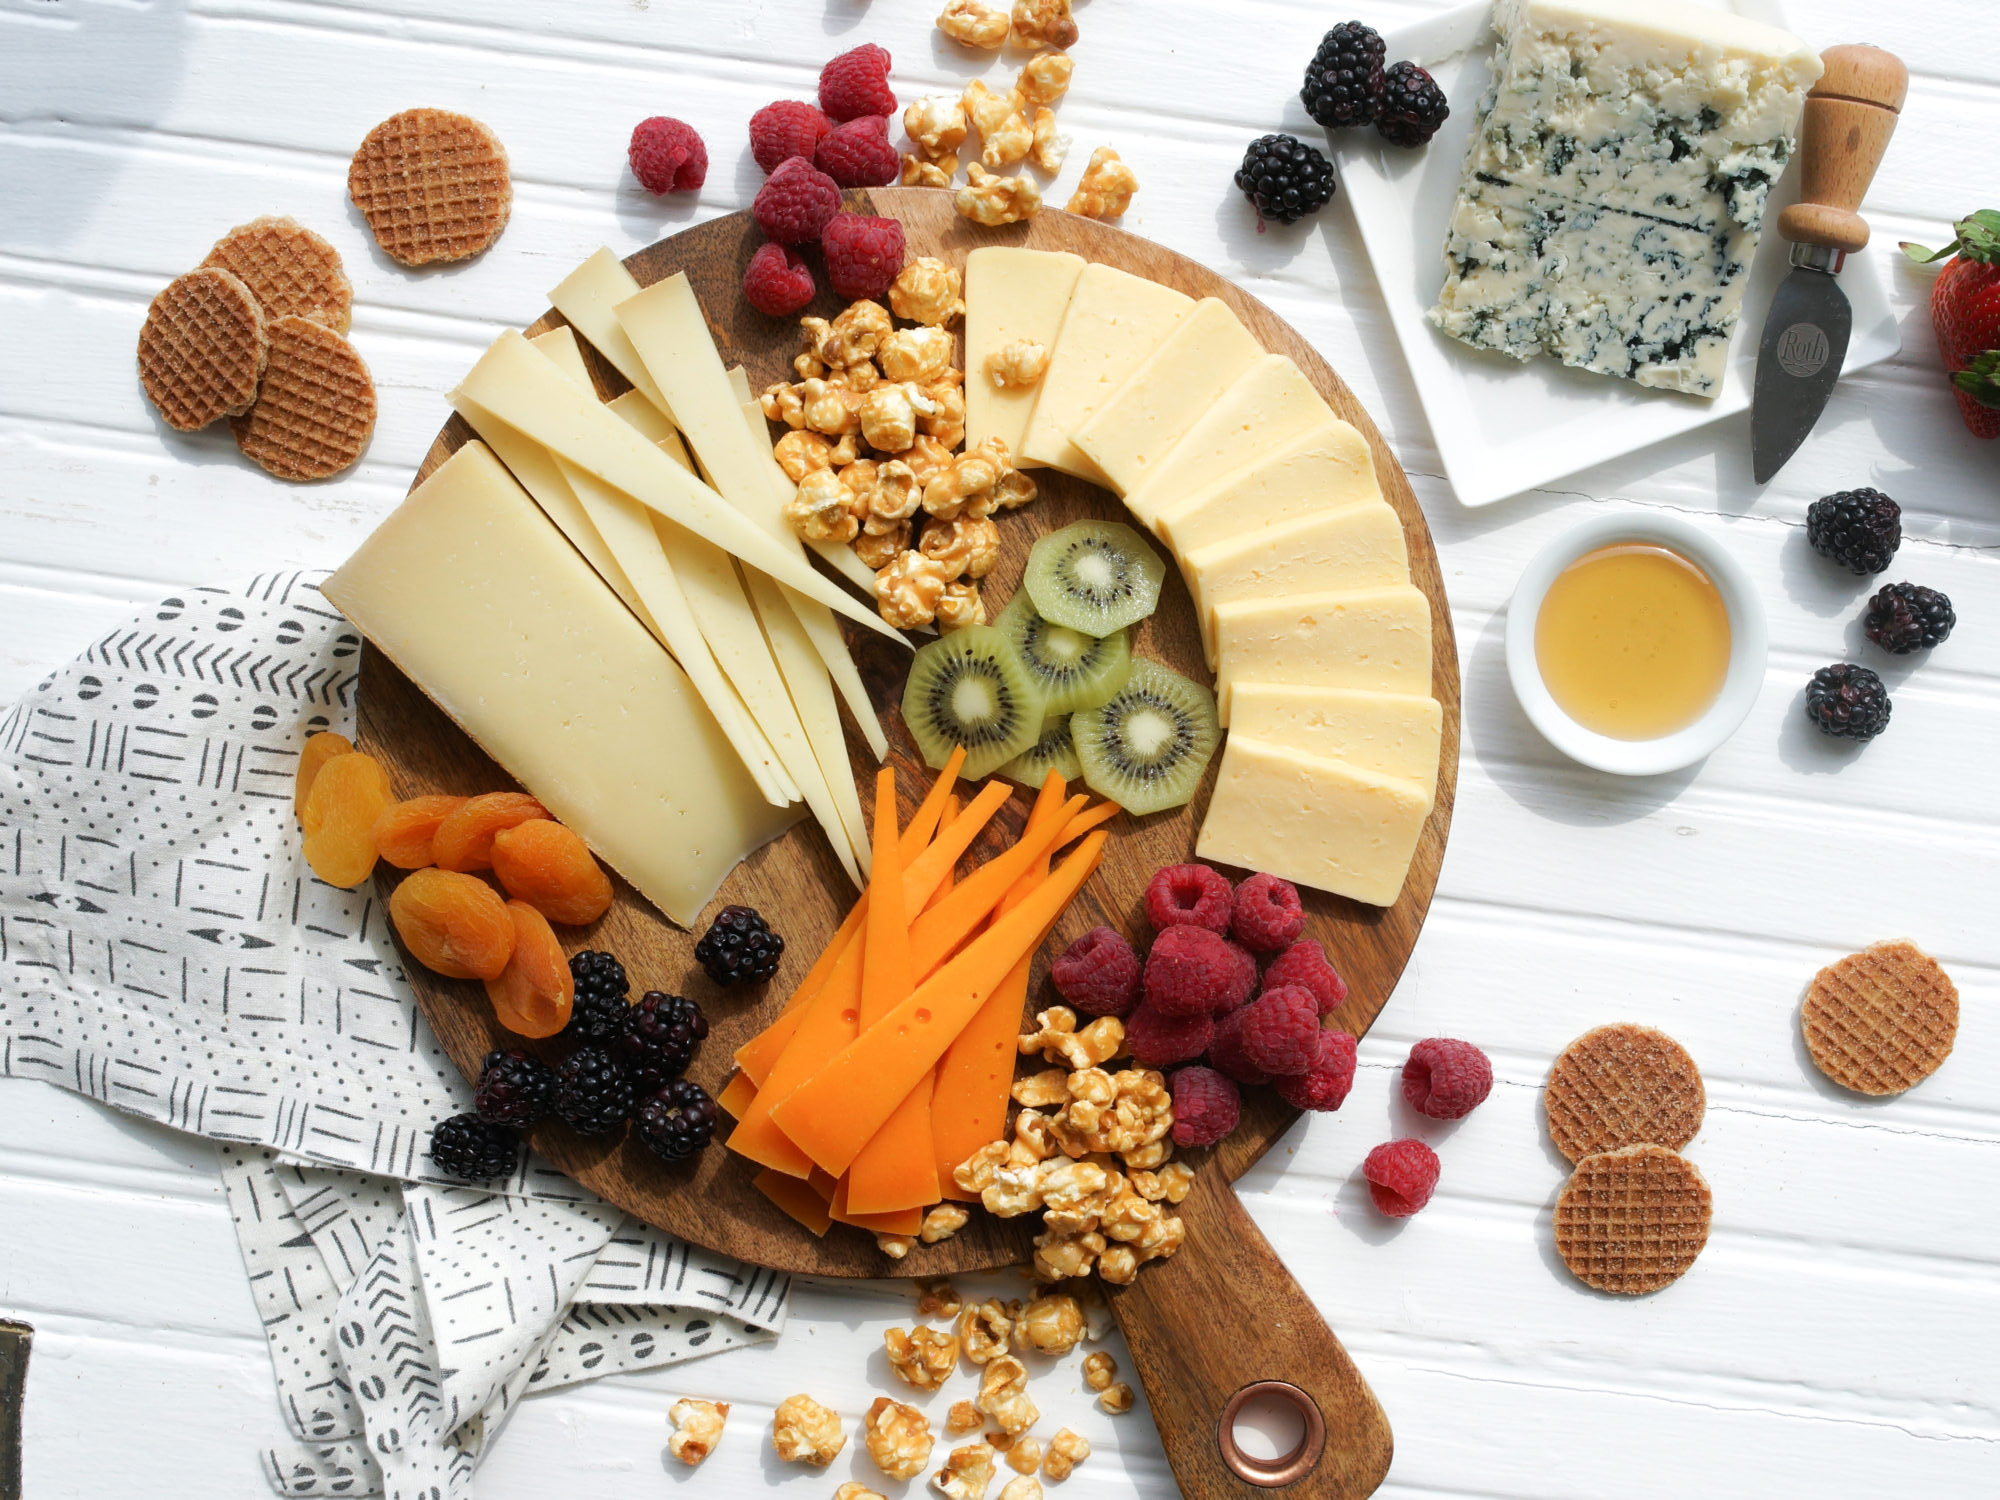
Fall is upon us and while we love pumpkin everything as much as the next person, we couldn’t let the season pass without taking advantage of the beautiful fruit available this time of year.
Fresh fruit like grapes, apples and pears, complement the flavors and colors of the cheese. Here we chose Grand Cru®, Buttermilk Blue® and stunning Prairie Sunset®. Dried fruit adds some additional sweetness, while spiced and plain nuts give the cheeseboard some texture.
To really elevate the fall flavors, try making this easy dried fruit mostarda.
Dried Fruit Mostarda
Ingredients:
1 cup dried apricots, chopped
1/4 cup dried cherries, coarsely chopped
1 shallot, minced
1/2 cup dry white wine
3 tablespoons white wine vinegar
3 tablespoons water
3 tablespoons sugar
1 teaspoon Dijon mustard
1 tablespoon unsalted butter
Directions: Combine apricots, cherries, shallot, wine, vinegar, water and sugar in a small saucepan over medium-high heat. Bring mixture to a boil and cook until liquid is absorbed and fruit softens, about 10 minutes. Stir in mustard and butter; reduce heat and simmer until mixture is jam-like, about 2 to 3 minutes.
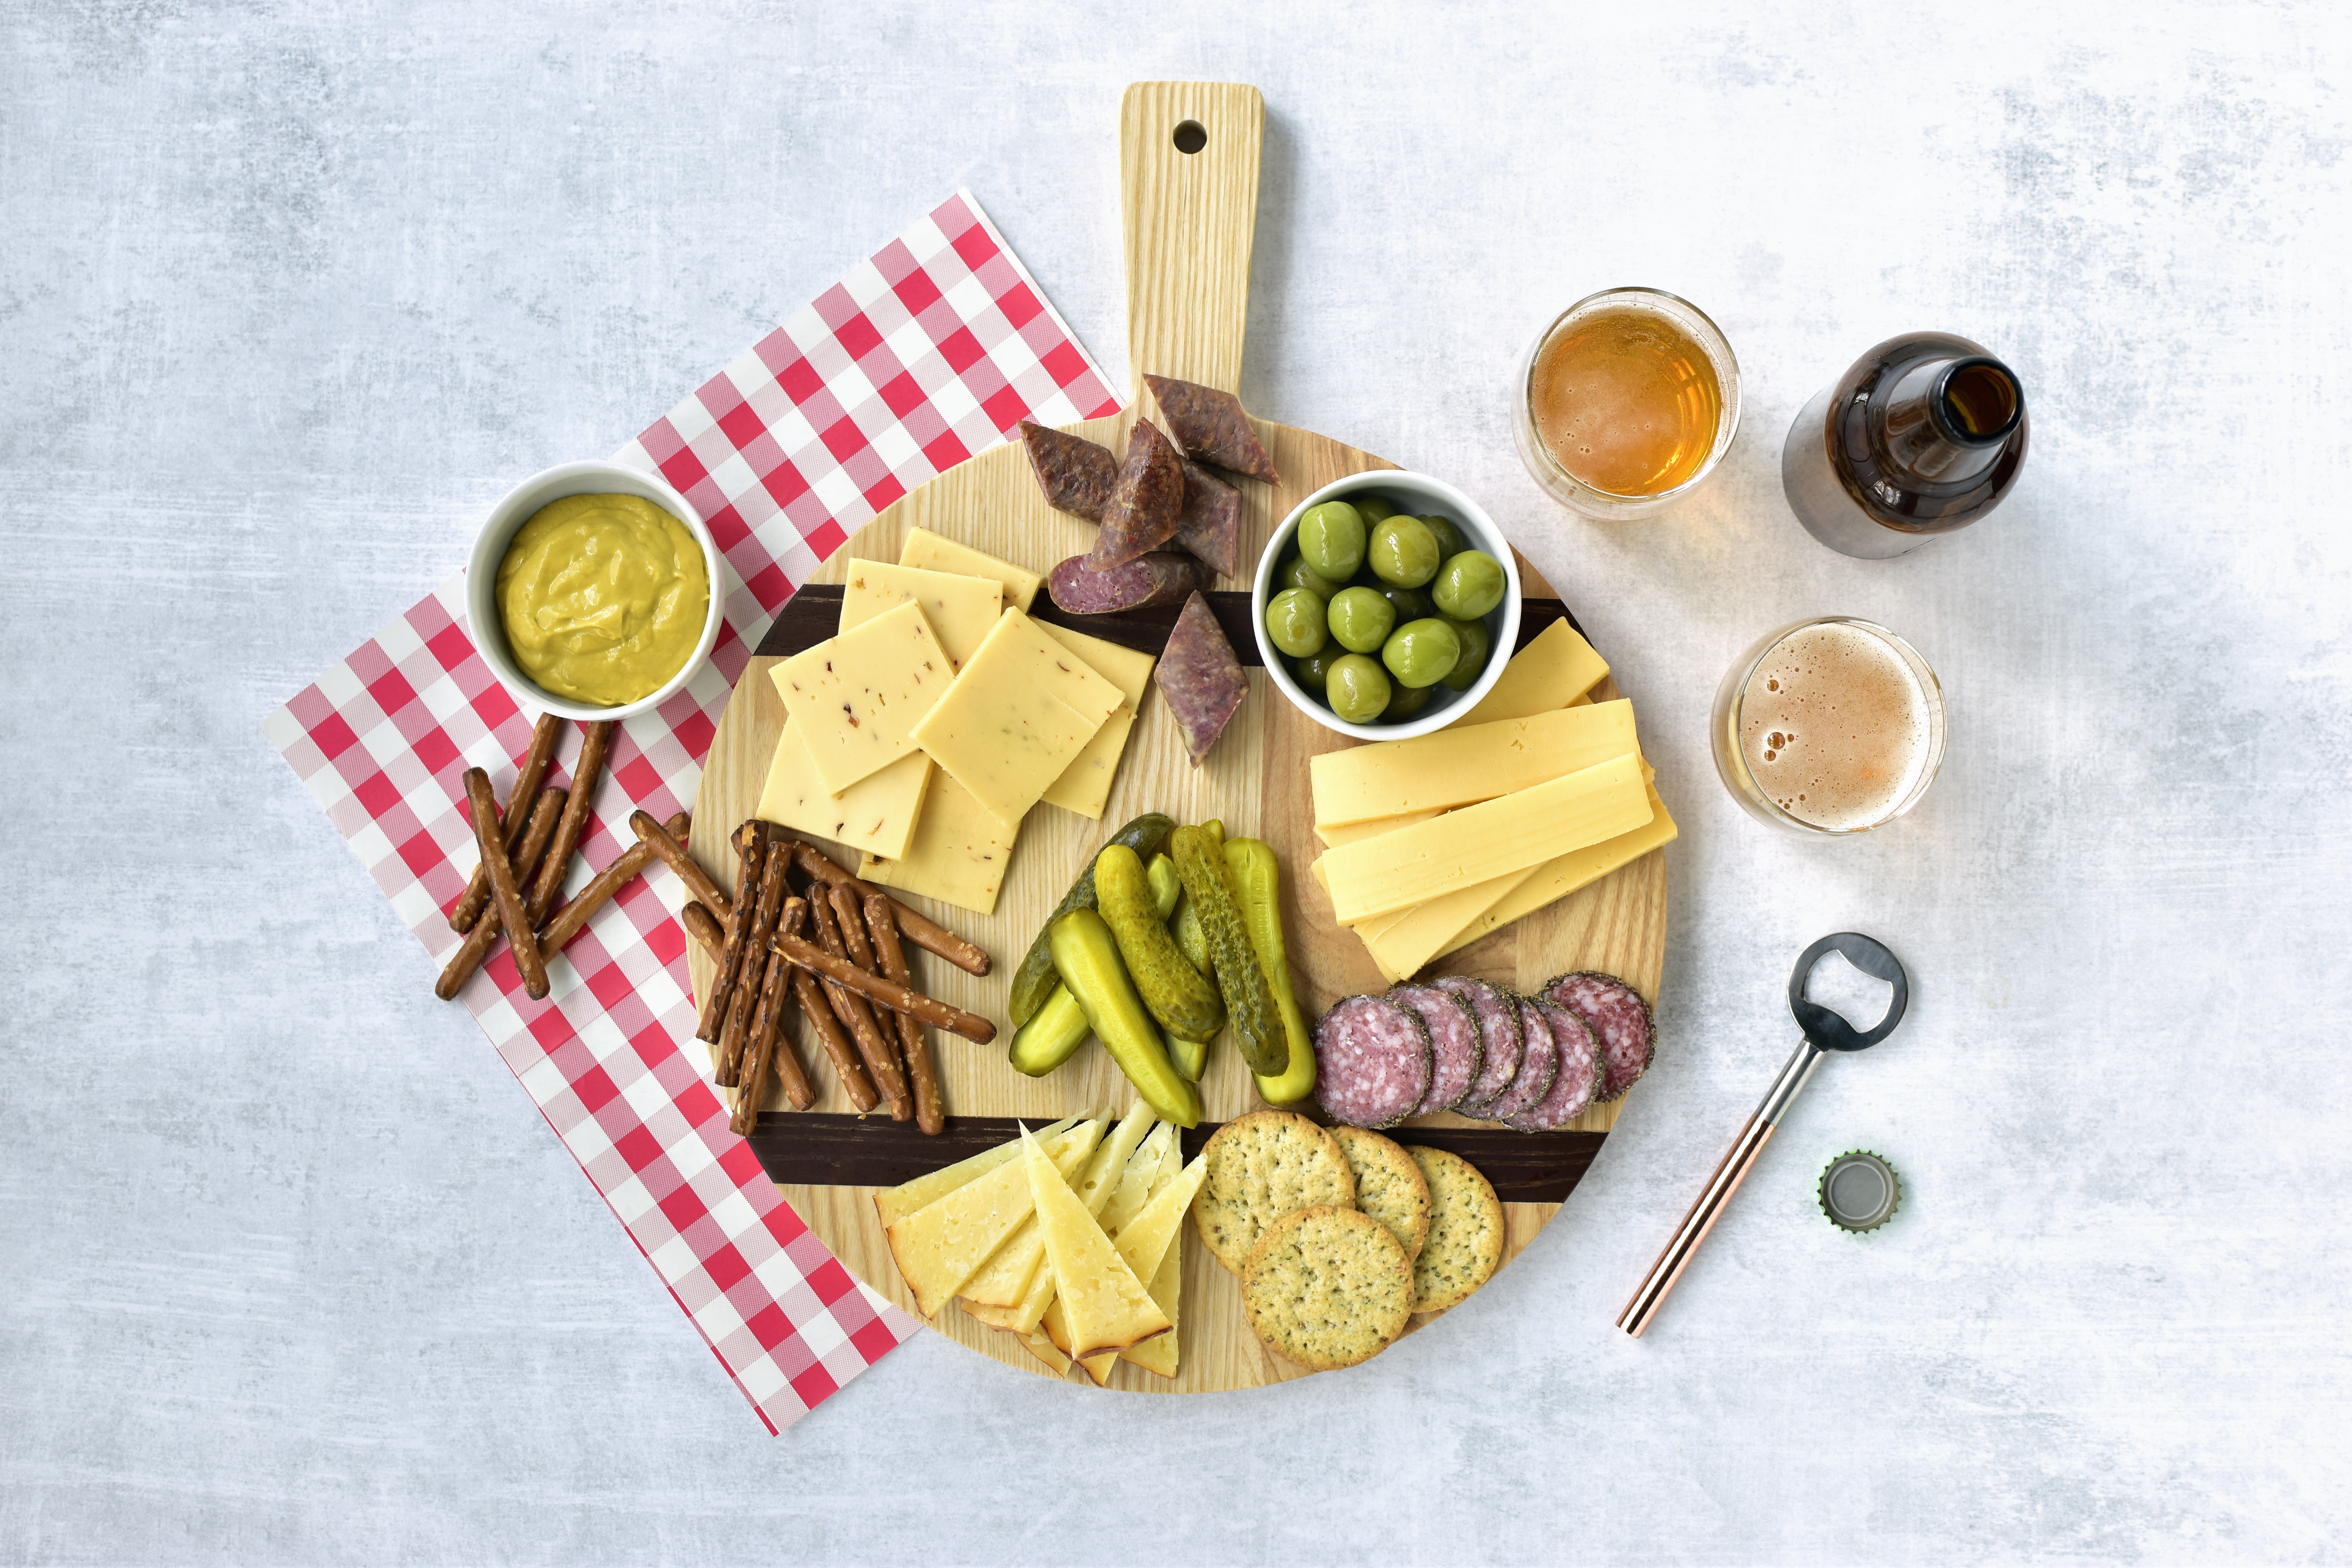
We’re in the midst of an action-packed football season. And that means plenty of tailgating and game day parties. We’re showing you how to put together a cheeseboard that will win any game day gathering.
Step One: Pick Your Cheese
The cheese is obviously the star of the board, so grab your favorites. We like a range of flavors, from bold & spicy 3 Chile Pepper Gouda to mild and buttery Butterkäse to slightly sweet GranQueso®.
Step Two: Add Your Charcuterie
Every game day needs some charcuterie meats. We chose Landjäger sausage and black pepper salami to add a bit of a kick.
Step Three: Fill Out Your Board
Pick out accompaniments to balance out the board. Some suggestions: Dijon mustard and pretzels for dipping, crackers, pickles and olives.
Step Four: Grab a Beverage& Cheer on Your Team
When it’s time for kick-off, grab your favorite beverage (here in Wisconsin we usually go for a beer), sit back and cheer your team to victory!
It’s hard to envision a fall without all things pumpkin. It’s an ingredient that can be used in more than just festive desserts or your favorite fall latte. We’ve gathered our favorite recipes featuring — you guessed it — PUMPKIN!
Pumpkin Fontina Biscuits: Oozing with creamy Fontina cheese, these biscuits do not disappoint. Put them on the table as the perfect side for all your holiday feasts.
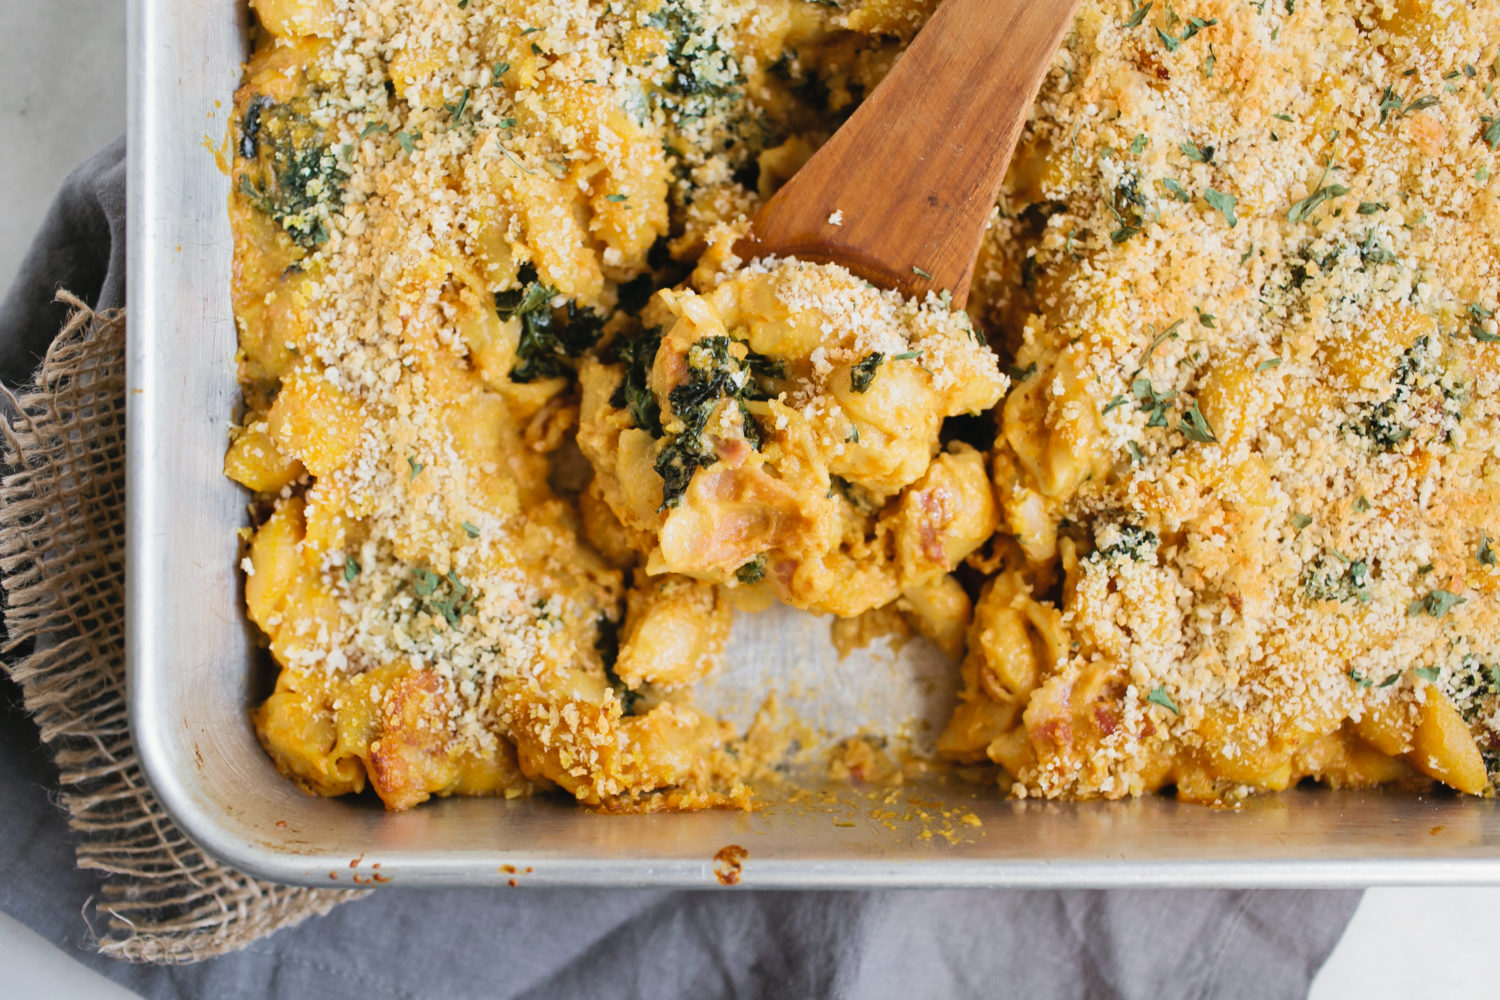
Pumpkin, Kale & Bacon Mac: Enrich your favorite comfort food with a little pumpkin, kale and bacon. The pumpkin adds a tasty contrast between sweet and savory. A perfect weeknight meal the whole family will enjoy. Featuring: Gouda and Grand Cru® or Grand Cru® Reserve
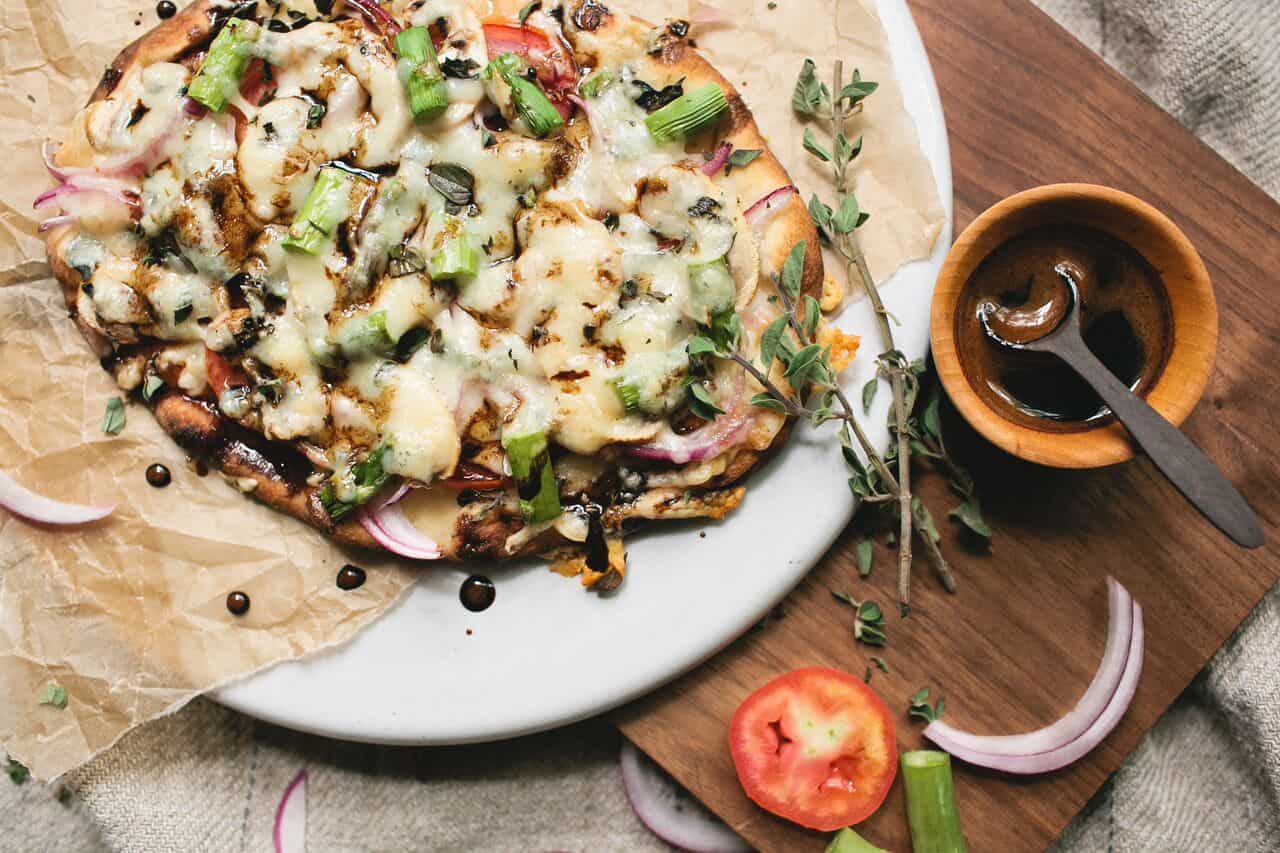
Grand Cru Pumpkin Flatbread: Alfredo and marinara, step aside. Its pumpkin’s time to shine. Leftover turkey or pumpkin puree? Spend a fun night in crafting this flatbread with pumpkin as the base. Featuring: Original Grand Cru®
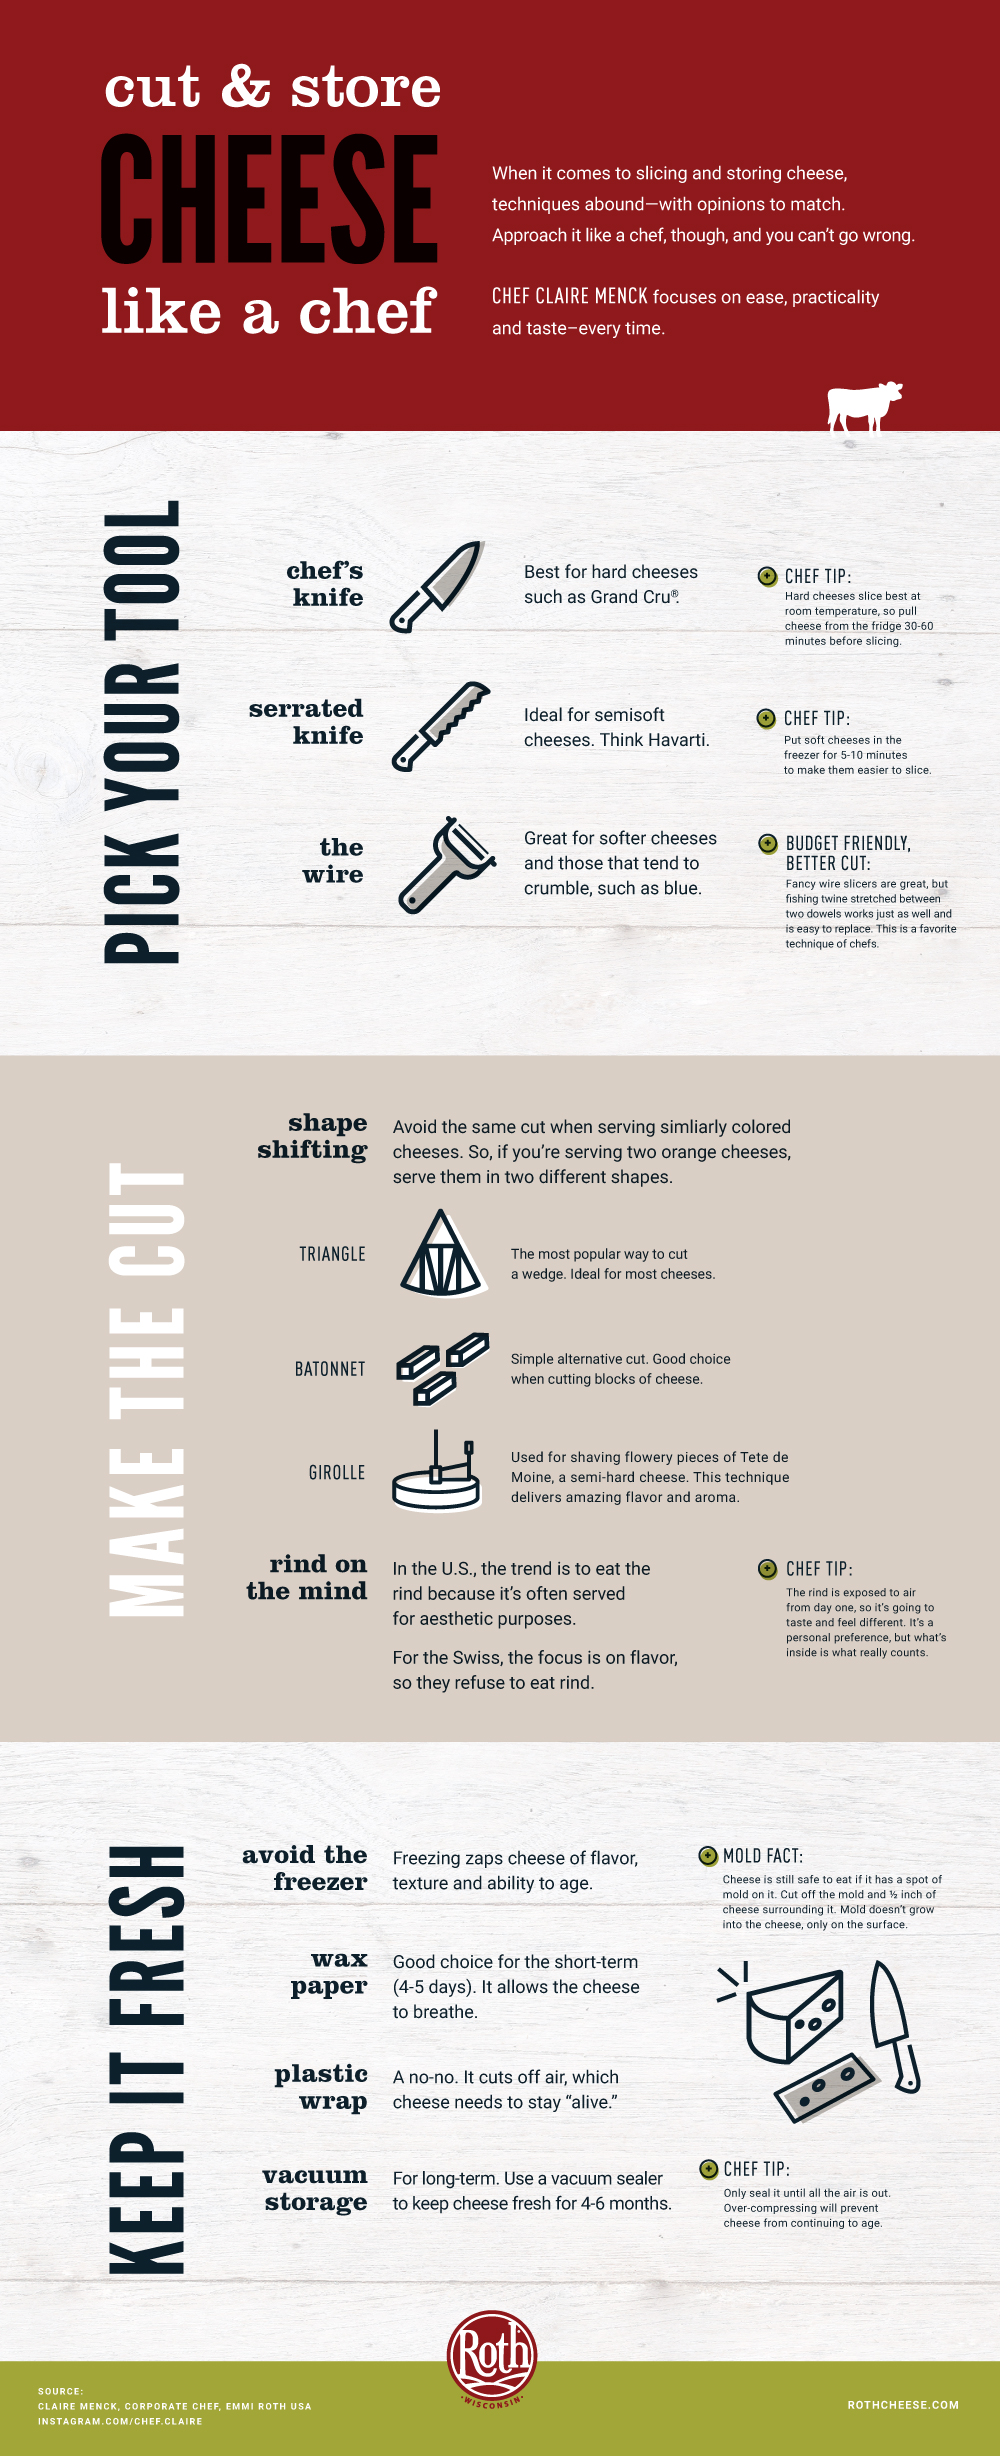
No gathering is complete without the right cheeseboard to spice up the party. But, how do you cut cheese so it looks like this?
We’re here to tell you how. And, it’s really quite easy!
First, go to your local grocer or cheese shop with an idea of how much cheese you’ll need. A good rule of thumb is to account for 3 to 4 ounces of cheese per guest if it is not being served as the main course. Each wedge of cheese will vary in size, but most are 4 to 8 ounces. Choose a variety of types and flavors. Ok, now let’s get started making that cheeseboard…
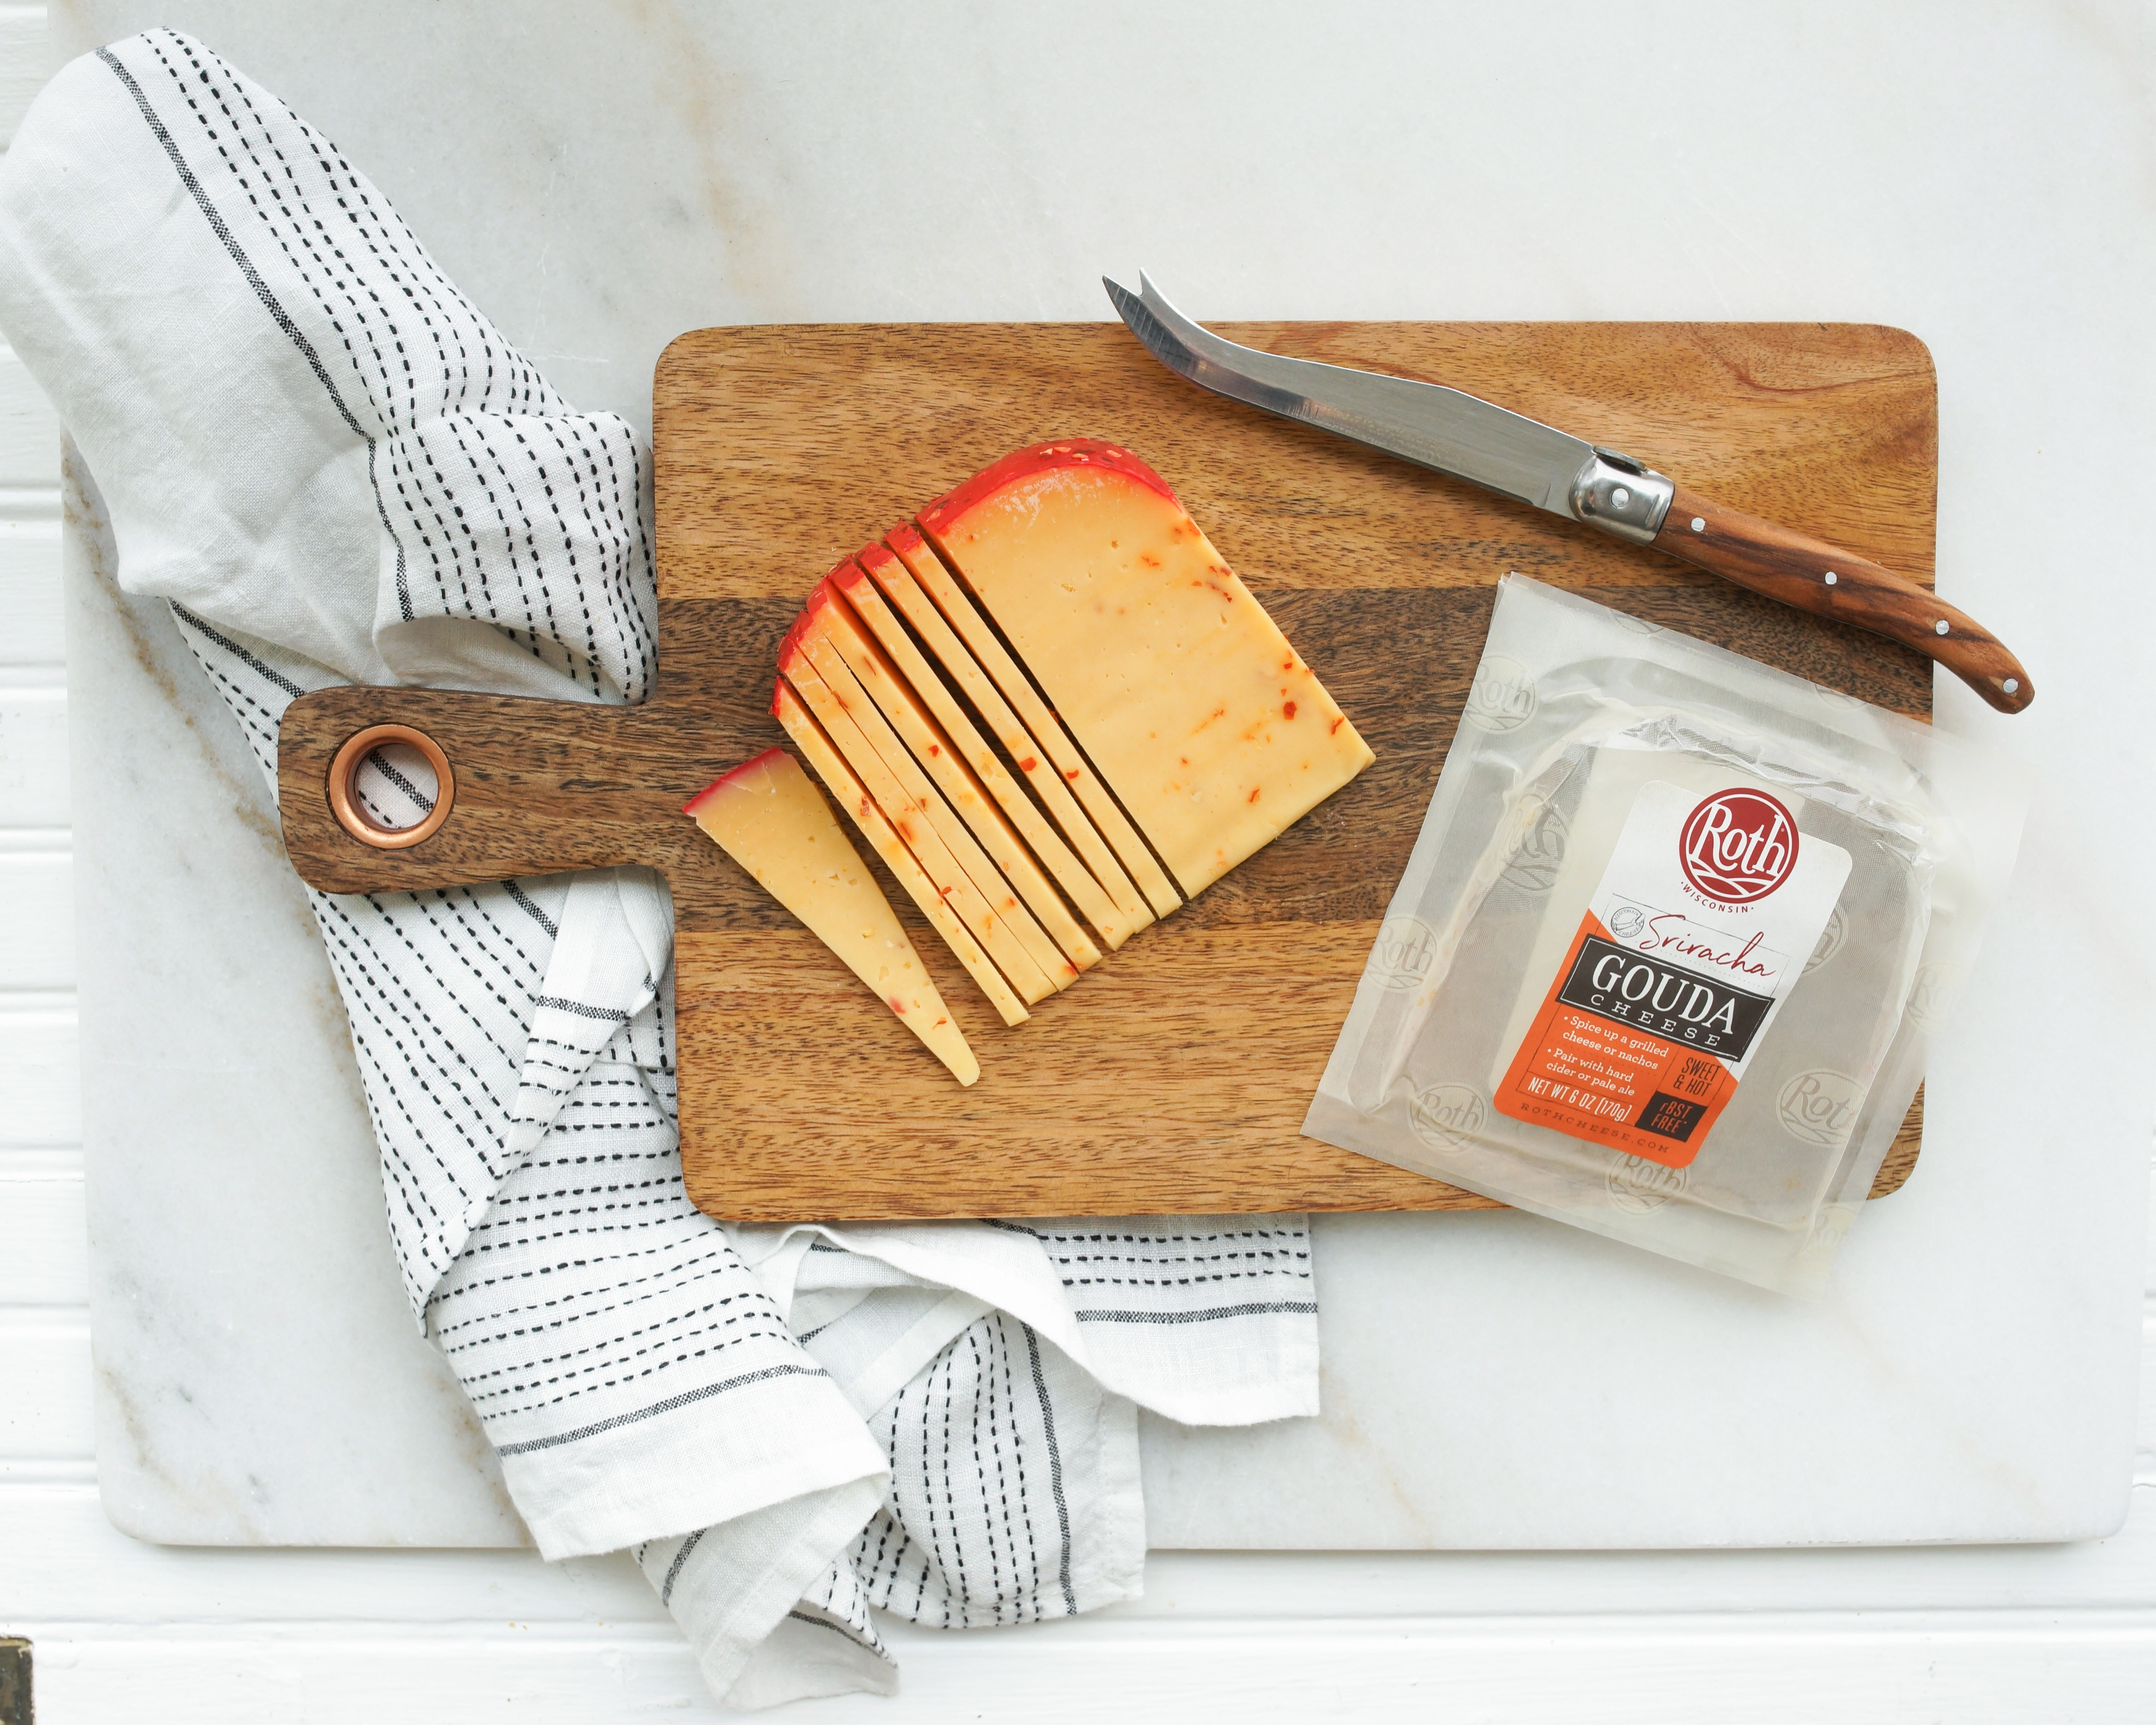
Cheese in Wedges
May of our cheeses, such as our Grand Cru® line and Sriracha Gouda come in wedges. A wedge of cheese may seem difficult to cut, but it’s one of the easiest. Lay the wedge on its flat side and begin slicing from top to bottom in thin slices. You will end up with beautiful triangles of cheese, which are also great for dipping into mustards or jams.
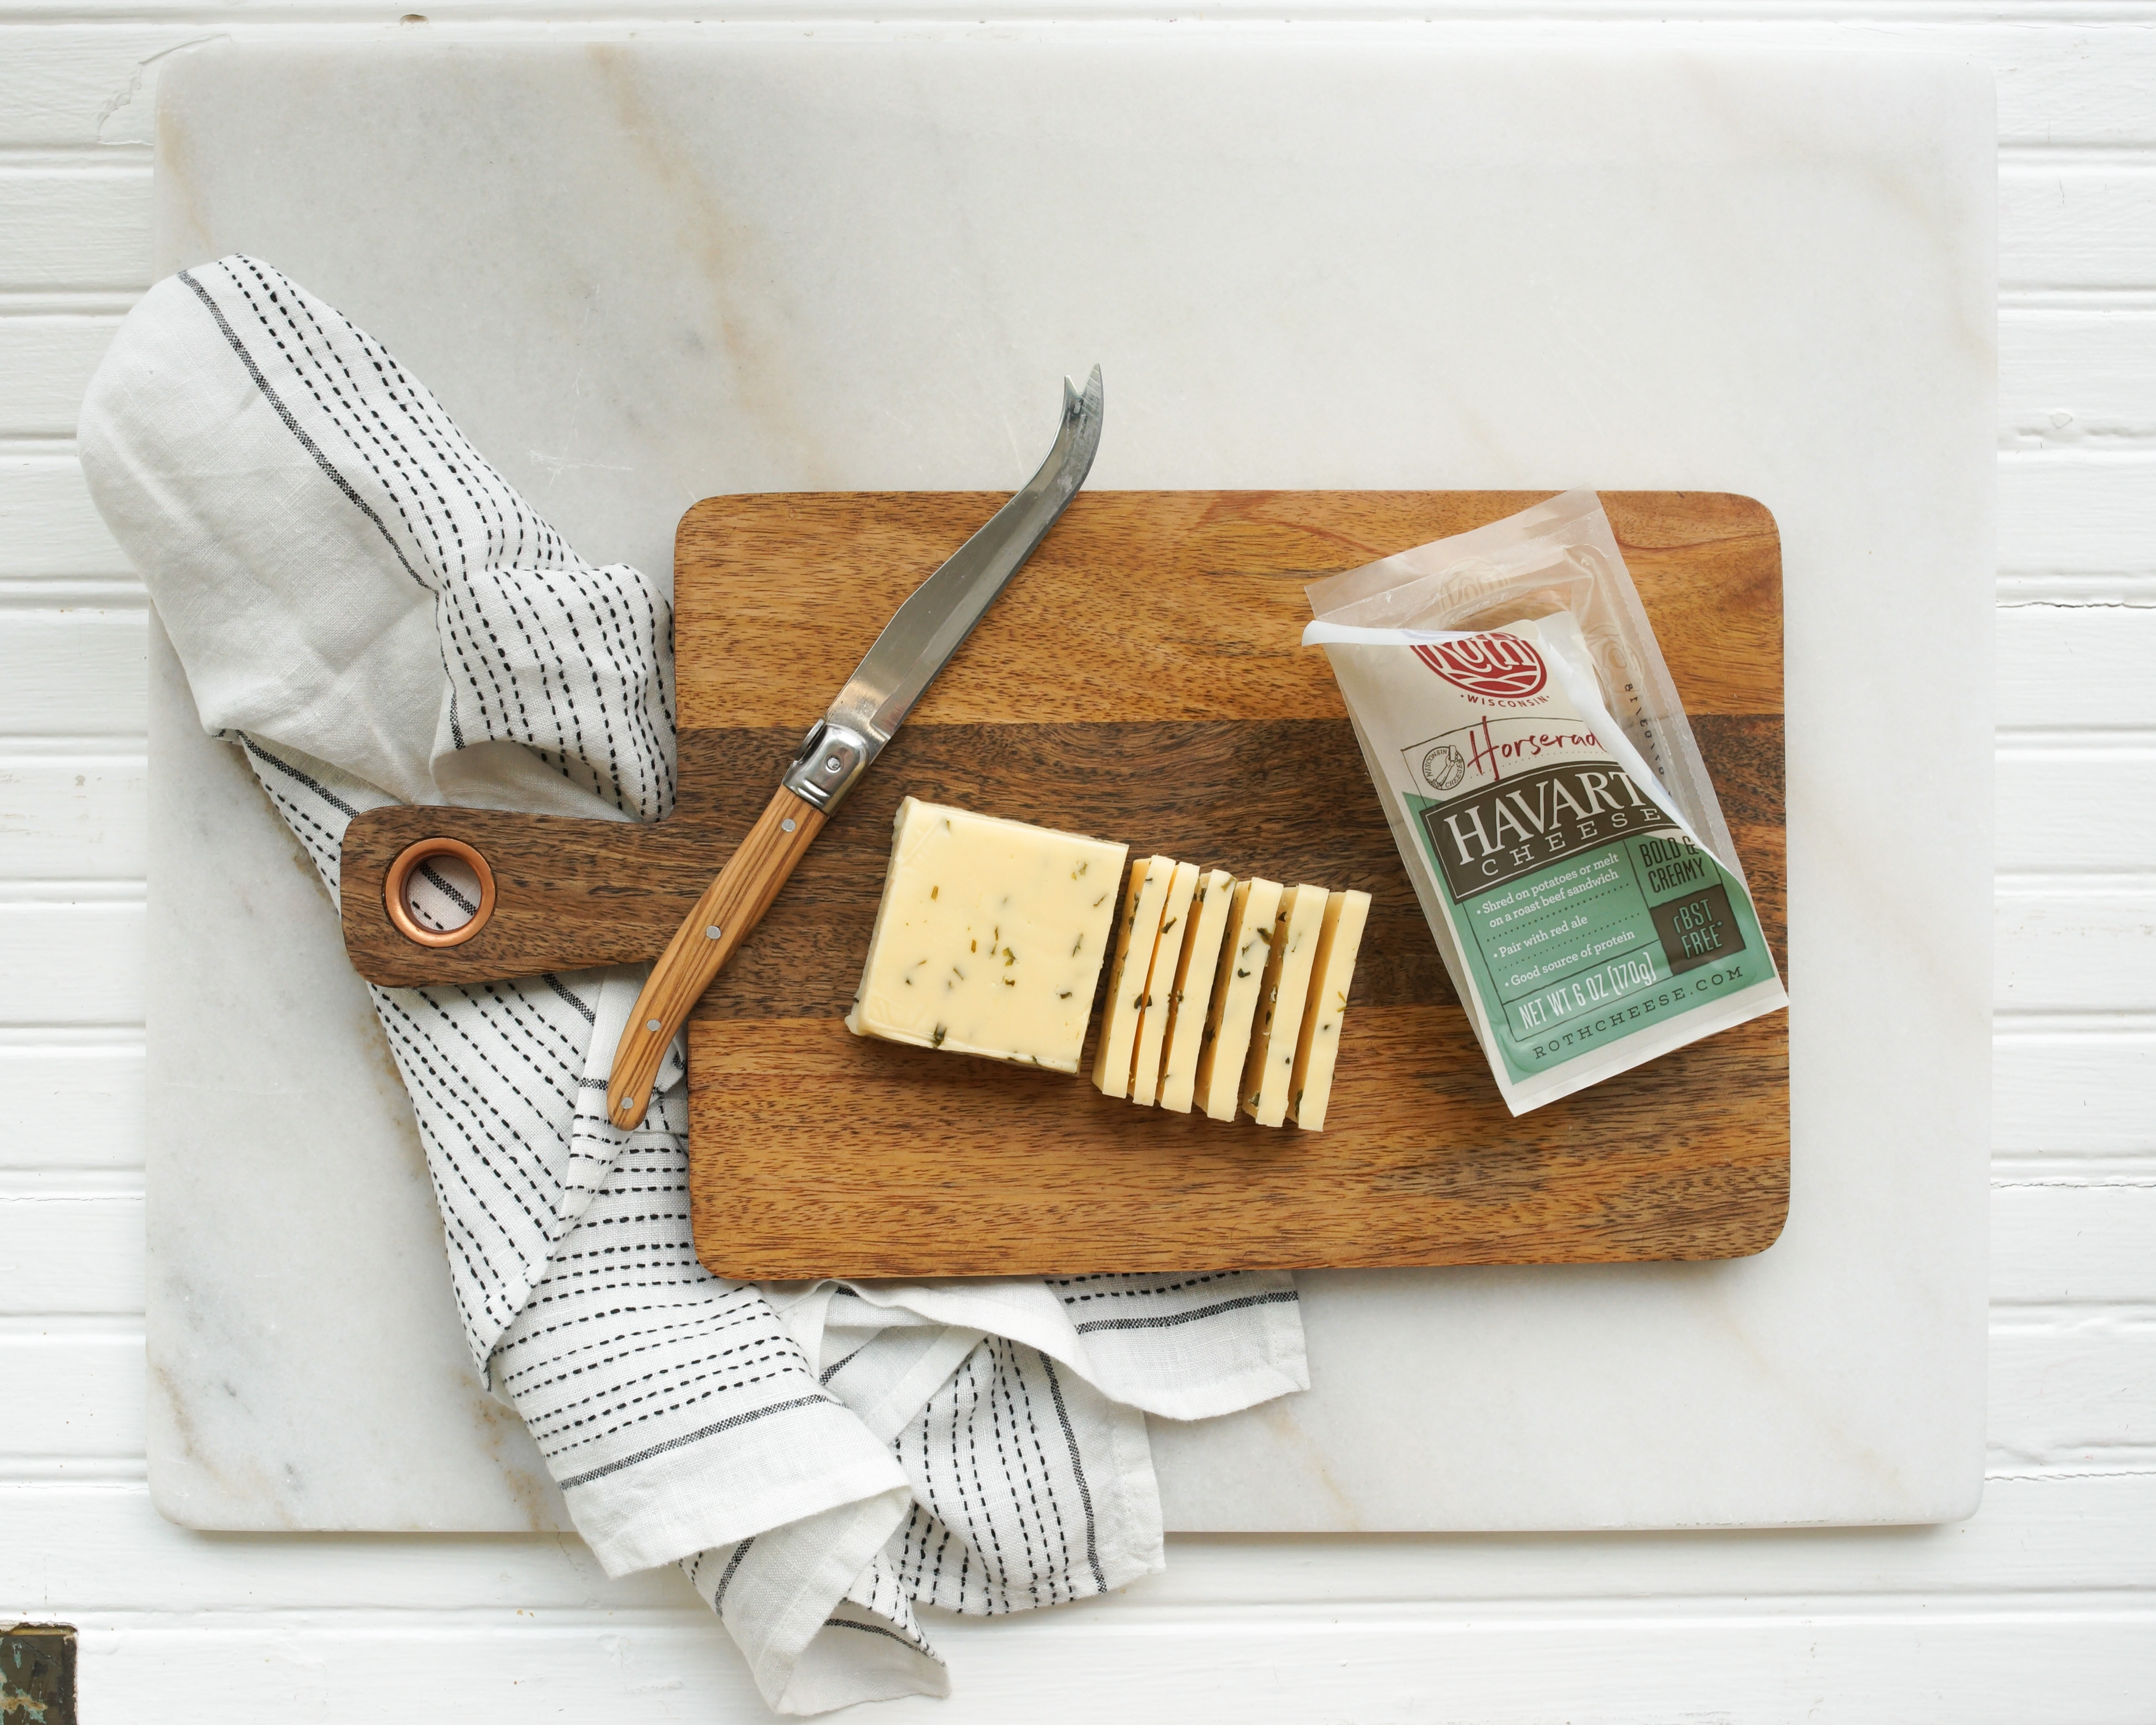
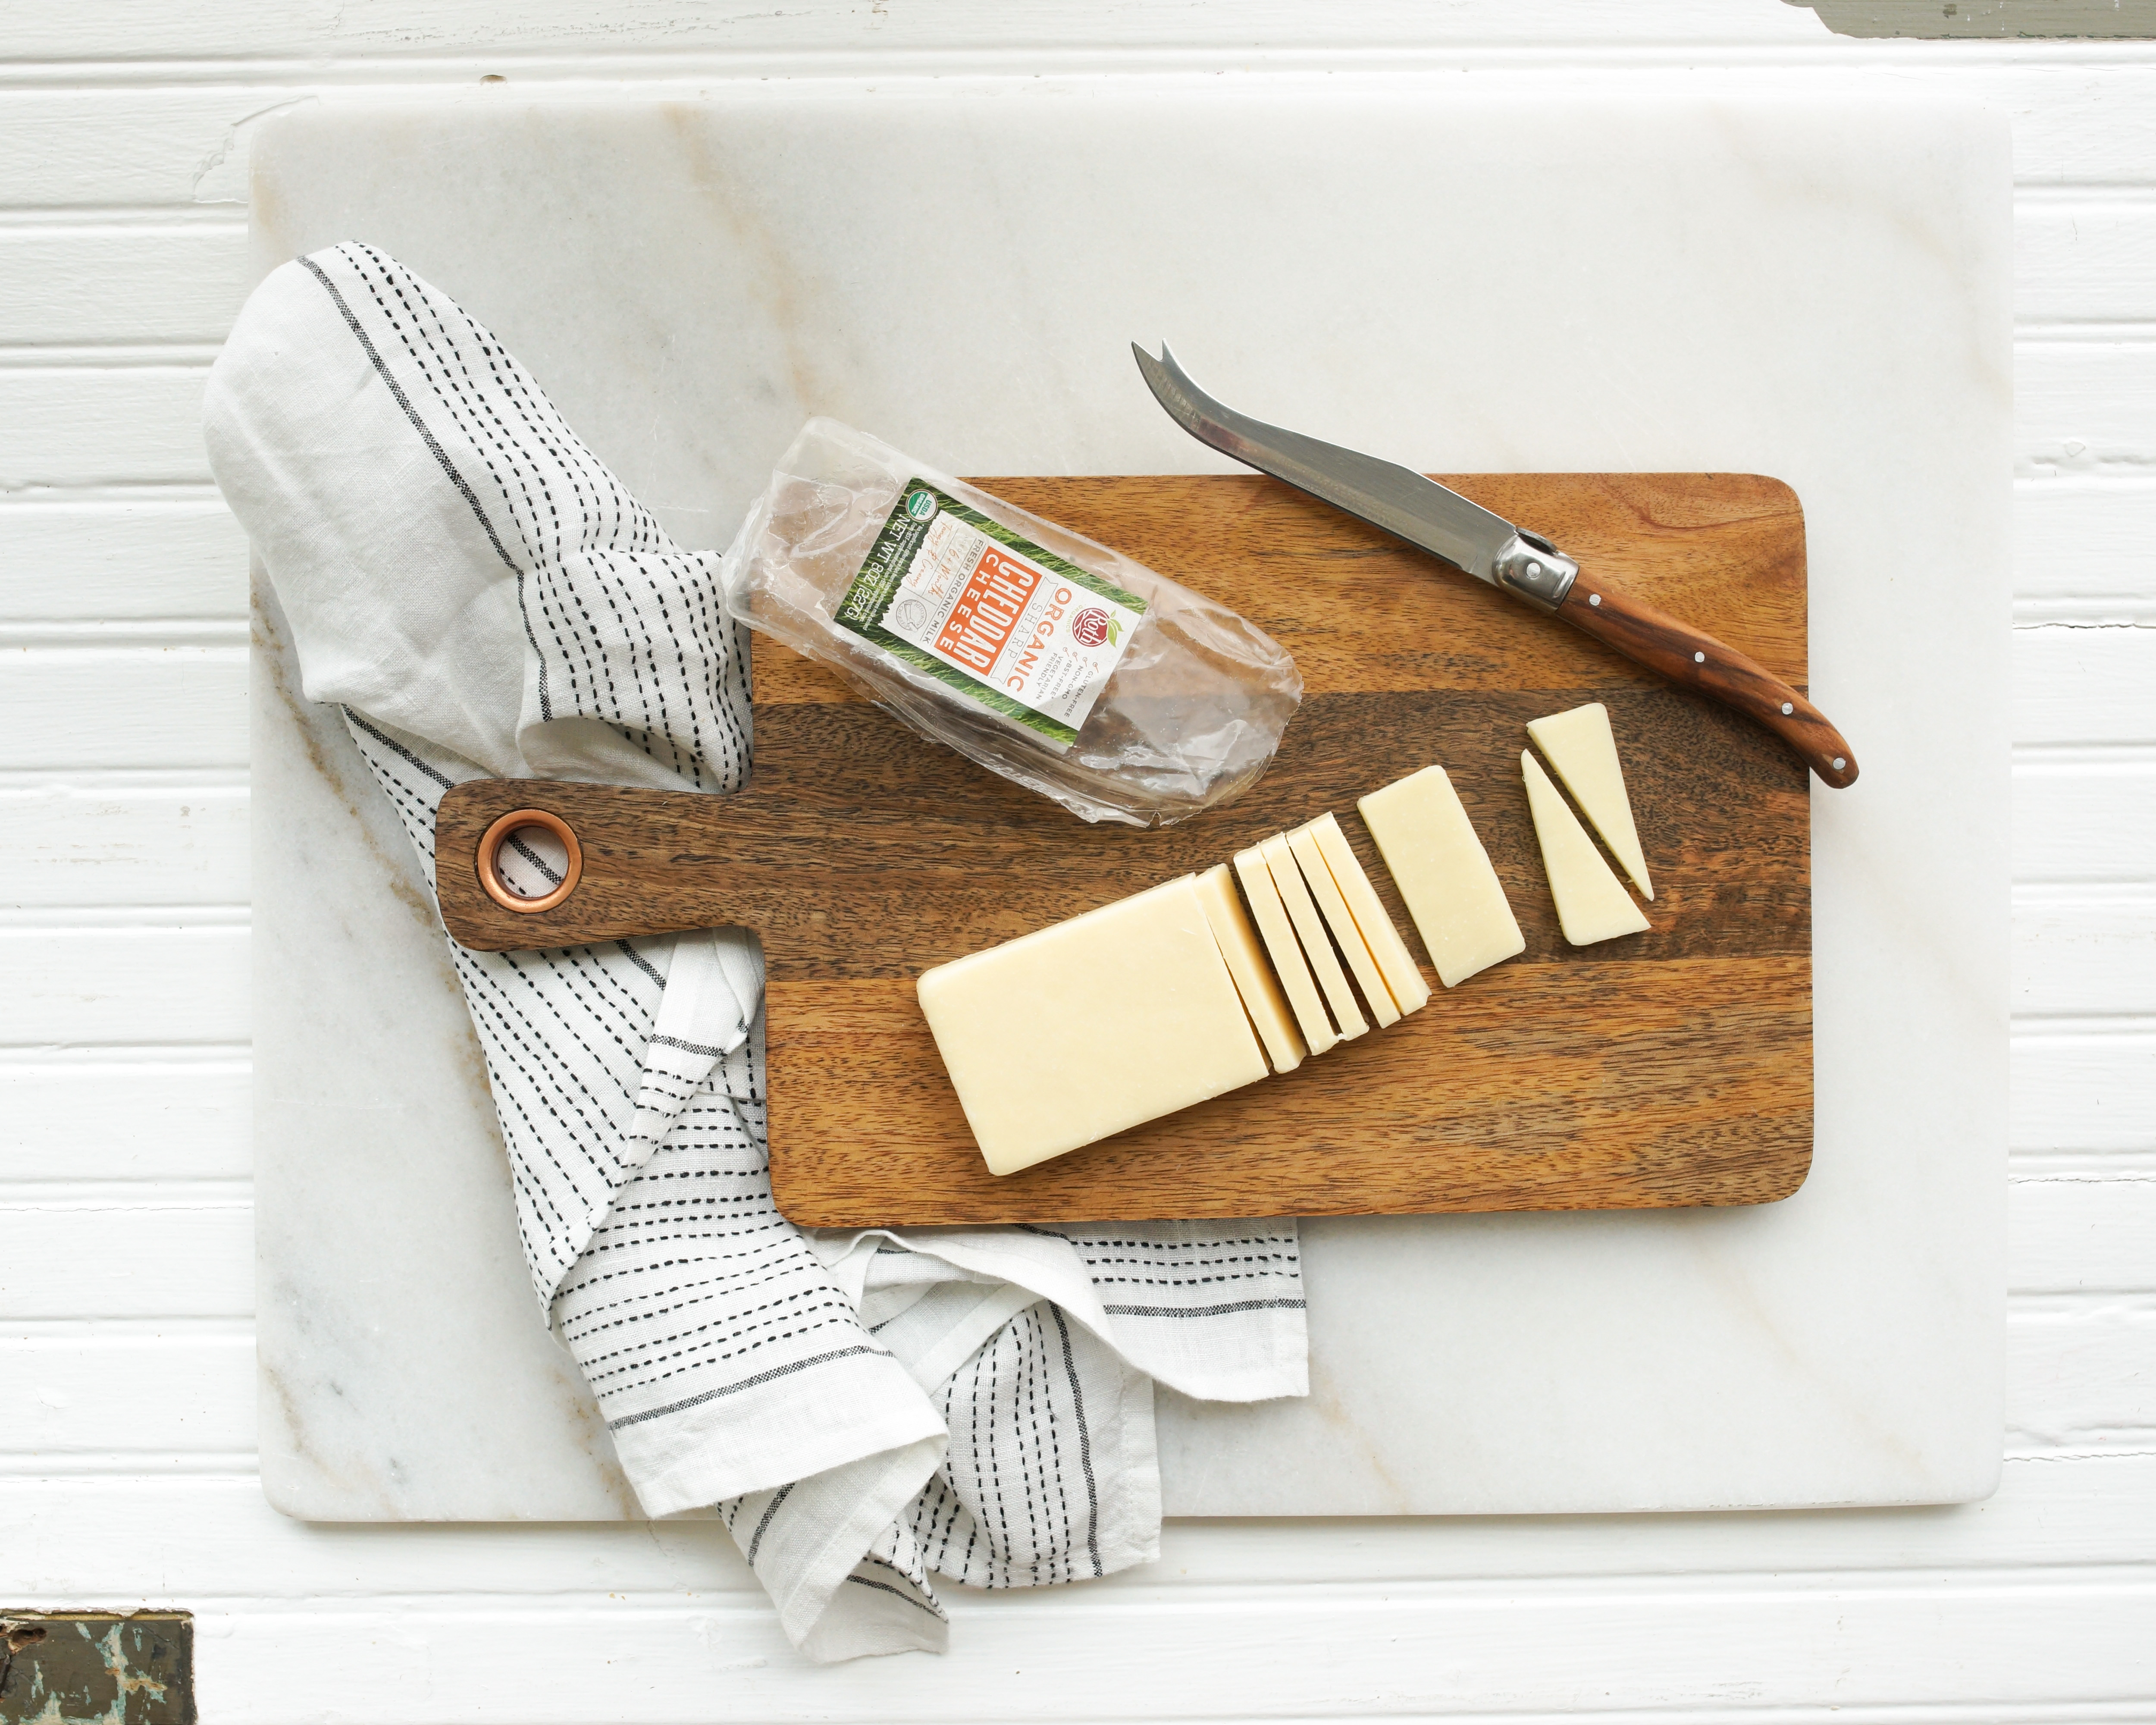
Cheese in Blocks
Cheeses such as our Havarti and Organic Sharp Cheddar come in rectangular blocks. Lay the cheese with it’s largest surface down and slice thinly into small rectangles. These small rectangles are perfect by themselves, on a cracker, or with a piece of fruit.
If you have many blocks of cheese on your board, try cutting half of them in a different way to create some visual appeal. What we like to do is take the rectangular slice you made above and cut it diagonally through the center, creating two triangles of cheese.
Next, arrange your cheese on your cheeseboard and add crackers, jam, fruits, nuts, veggies or more around them to make the perfect board!
We’ve all been there. You’re at a friend’s dinner party, and the cheese board with those odd looking knives comes out. Not wanting to commit a social faux pas, you shy away from it, or just stick to the knives you know. We’ll take a look at the most common cheese knives you’ll encounter at your next dinner party. Including what they’re for, and how to use them, so you can be fearless next time you approach the cheese board!
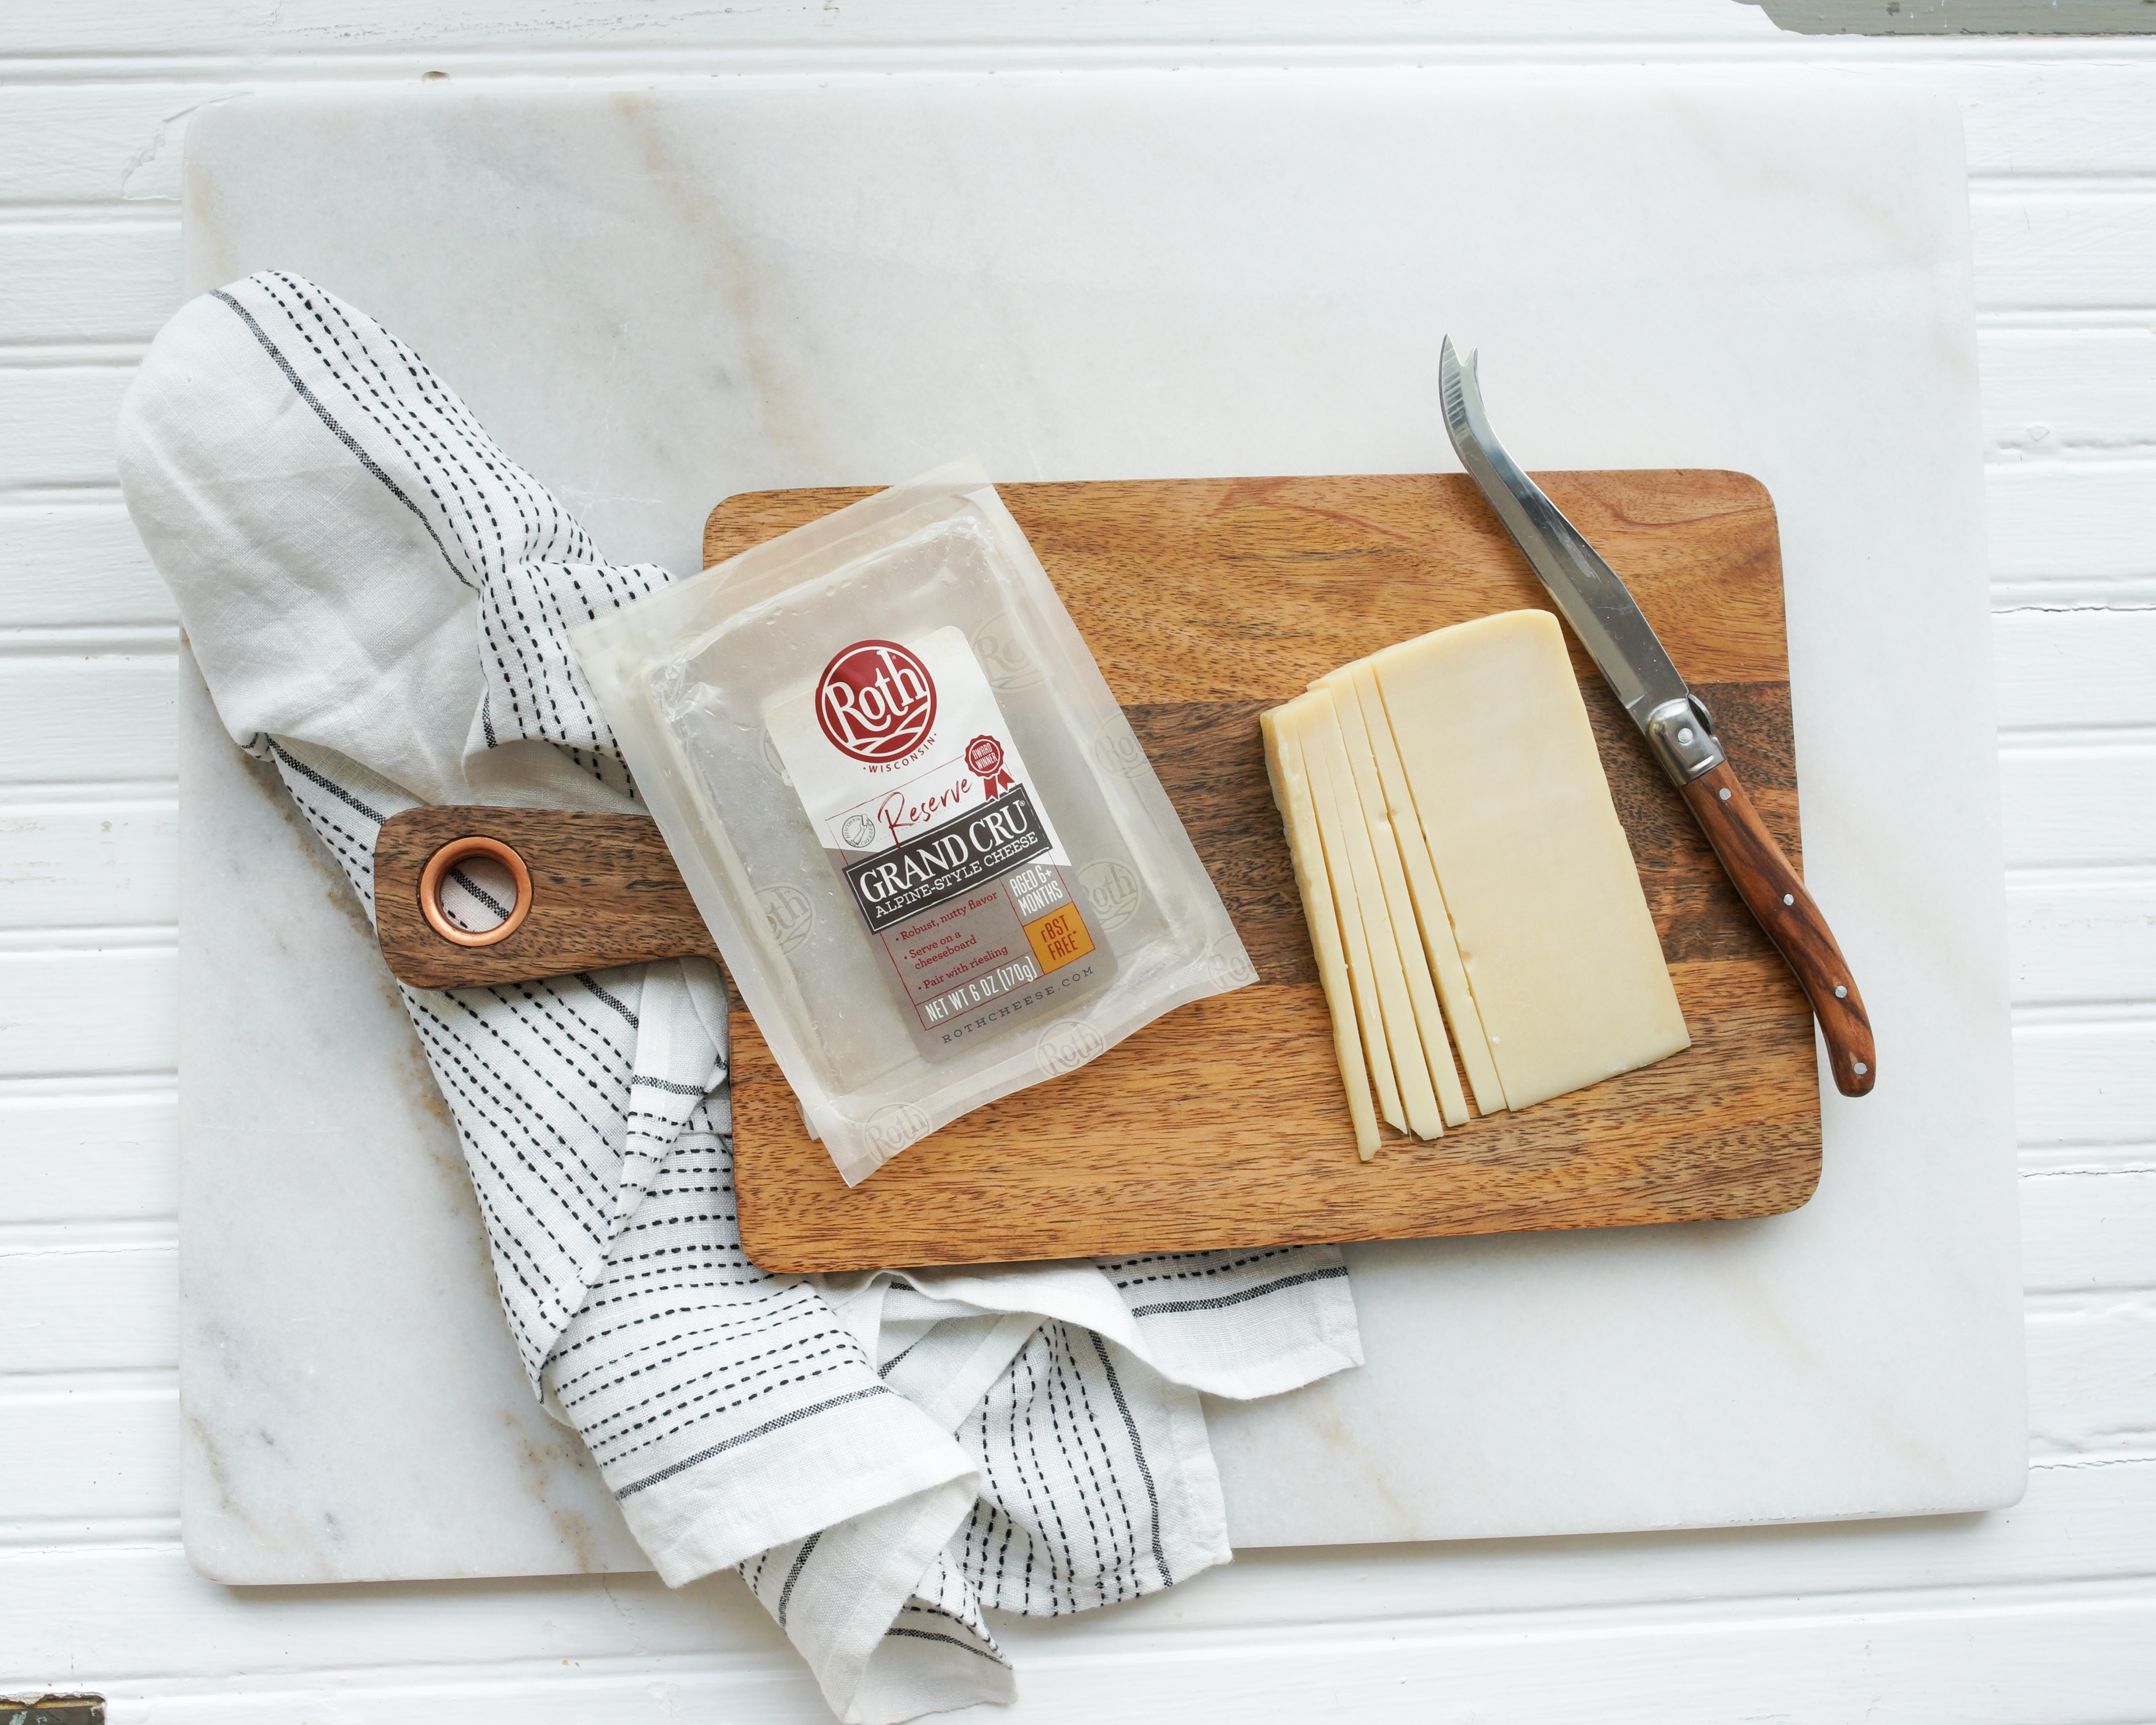
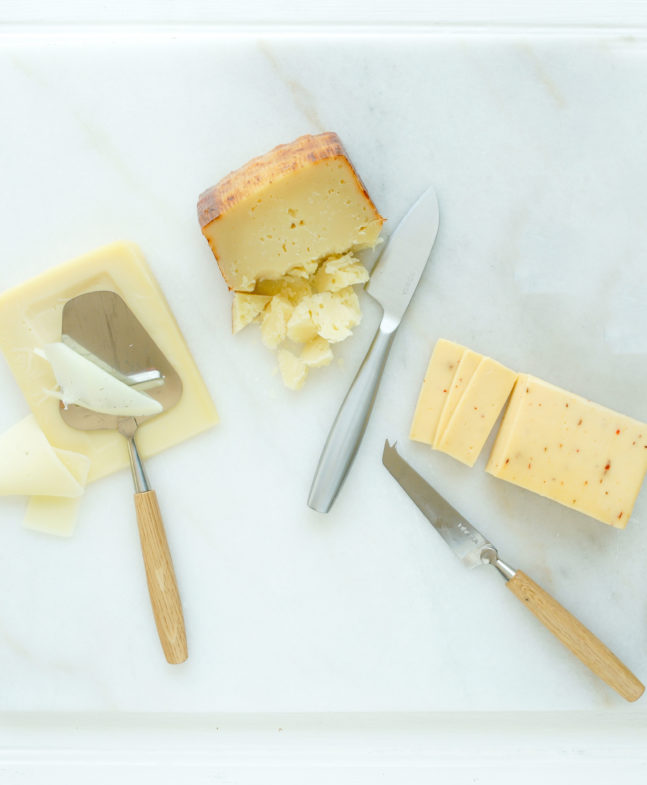
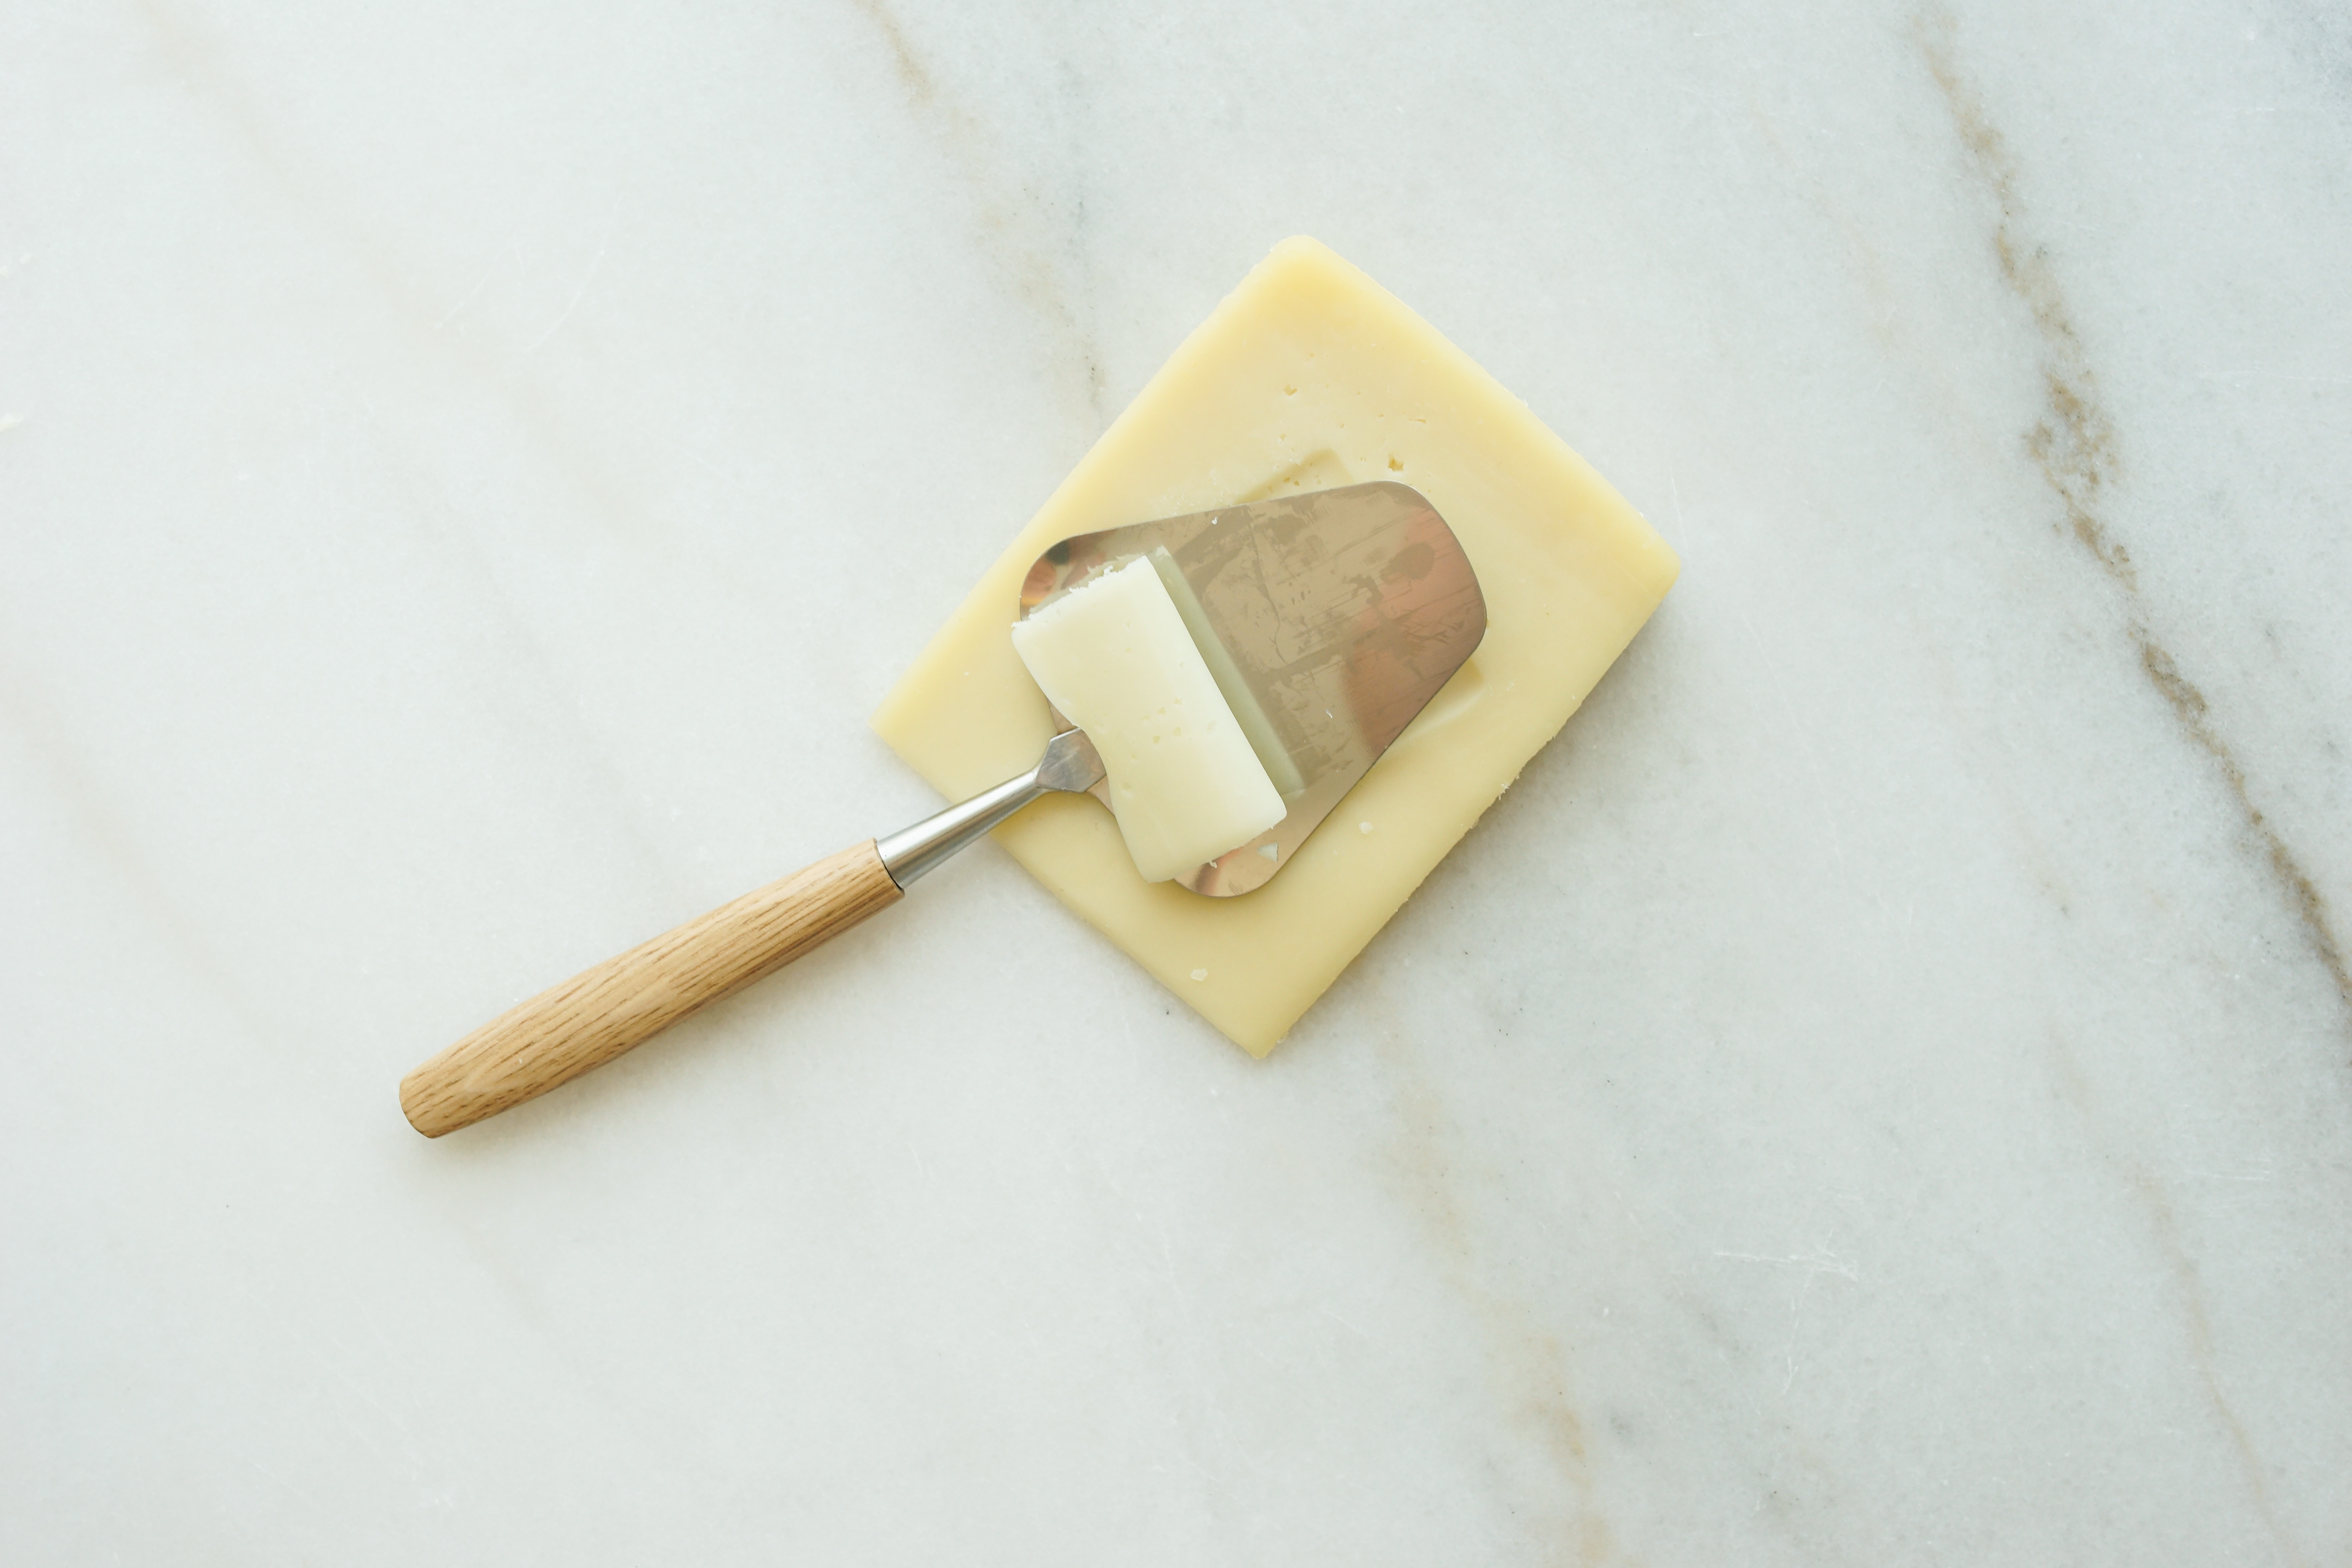
Cheese Plane
This is the triangle shaped knife with a slot in the middle. It’s called a cheese plane, and is meant for cutting hard and semi-hard cheese, like our Grand Cru®, into thin slices.
Parmesan Knife
A small knife with a wide base and skinny tip, the Parmesan Knife is a modest, but durable knife for cutting chunks of hard cheeses, like our GranQueso®.
The Classic Cheese Knife
This is the most common cheese knife you’ll encounter. As the name implies, it can be used on most soft to semi-hard cheeses (think most cheeses from Havarti to Grand Cru®). Often this knife will have a duller blade and a forked tip to assist in cutting and picking up the cheese for transfer to your plate.
Now you’ll be ready to emerge fearless next time you encounter these knives at a dinner party or even start putting together your own cheese plates!
Whether you’re just getting into creating your own cheese boards or are a self-proclaimed expert, we could all use some brushing up on the best practices to cut and prepare cheese for your next party.
Cheese Prep
When both buying and cutting cheese, a good rule of thumb is to account for one to two ounces of cheese per guest. Additionally, it is always easiest to cut cheese cold—so be sure to keep it in your refrigerator until just before you are ready to begin prep. Once you’re ready, grab your cheese and unwrap it on the cutting surface. Be sure not to leave it unwrapped for too long because the cheese will eventually dry out before you and your guests have a chance to properly enjoy it.
The Knife
Whether you’re planning to let your guests cut their own cheese from a wedge or cut it in advance for them, a good knife is essential to the process. We outline the best cheese knifes for different cheeses in our other blog post here. However, if you’re going to serve cheese pre-cut for your guests, a chef’s knife is a reliable choice. Just make sure to clean the knife after each cheese if you’re using it to cut multiple cheeses.
Cutting the cheese!
The options here are limitless. Besides allowing people to cut a cheese on their own, there are plenty of creative ways to cut cheese. With cheese slices and cubes typically the first options that people gravitate to. However, cutting cheese into triangles can be a fun and visually appealing way cut most cheeses as well. Meanwhile, soft cheeses should typically be left for people to cut on their own by putting out an appropriate size wedge. Don’t forget to re-wrap any unused cheese and return it to the refrigerator to make sure it doesn’t dry out. Additionally, when cheese served cold it tends to have a different texture and taste than it is supposed to. So make sure to let your cheese warm to room temperature before serving. That way you and your guests can enjoy the cheese and all the wonderful flavors it has to share.
Hopefully, these quick tips will make your cheese board and party planning experience even smoother and your guests’ cheese experience even more fantastic!
If you like spicy cheese, Sriracha Gouda may be your new best friend. It’s made with Sriracha chili sauce and rubbed with crushed red peppers to make its unique rind and bold flavor. You’ll get a creamy texture like a traditional Dutch-style Gouda, but with a kick of heat.
And we know what you’re thinking: what do I eat with this spicy little devil? Pair it with cool and sweet flavors to balance the heat. Here are some of our favorite combos:
Crackers: Crackers are a classic pairing, and clean your palette after a bite of spicy cheese.
Berries: Cool, sweet fruits like raspberries or strawberries balance out the spicy flavor.
Olives: Enjoy them side by side with the cheese or skewer on a pick for a surprisingly tasty snack.
Honey: Serve it on a cheeseboard next to a bowl of honey for a sweet/spicy combo you’ll crave.
Berry Cider: The sweet flavors of cider complement spicy cheeses.
Rosé: Even though they range in sweetness level, you can pick your favorite to balance out the Sriracha flavor.
IPA: These beers have bold and distinct flavors that combine stand up well next to this bold cheese.
And when you really want to go spicy, add it to your favorite recipes, like:
Chili: Spice up a mild chili or even give a hot chili recipe some extra flavor.
Tacos: You can’t go wrong with adding a little extra heat.
Quesadillas: It’ll take a sad homemade quesadilla to the next level.
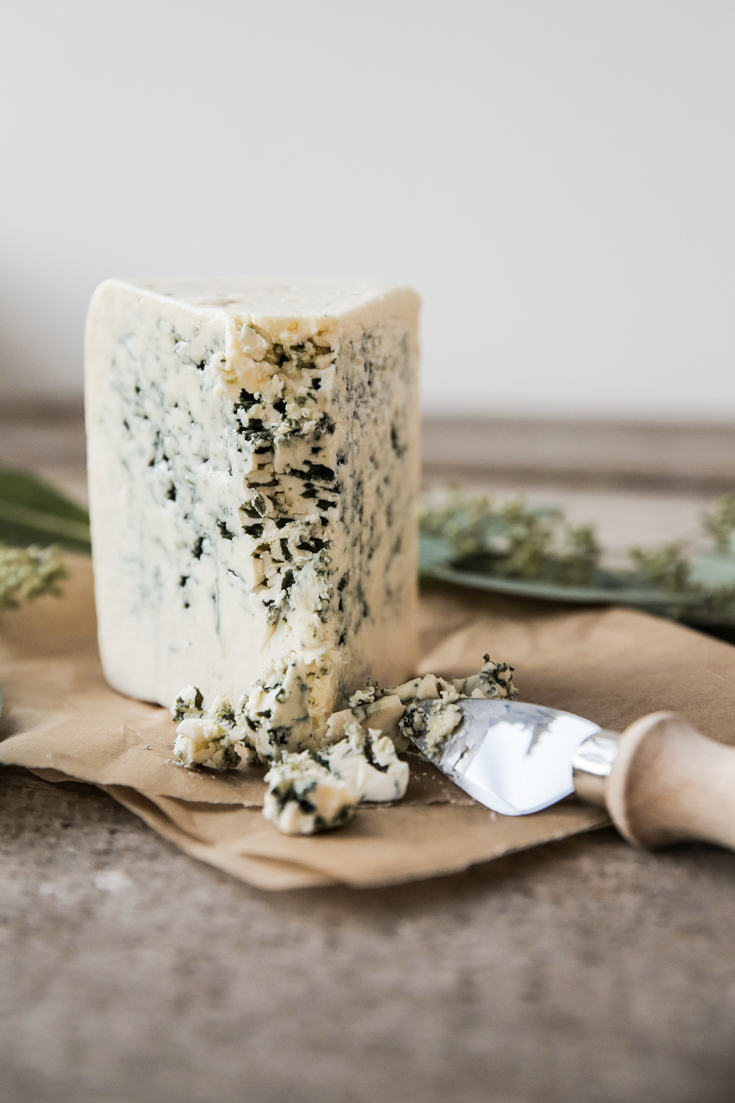
Whether you’re hosting a party at your house with your closet friends and family or looking for new creative ways to use cheese in your weekly dinner plans, blue cheese is the answer. It adds big flavor and is one of the most versatile cheeses you’ll find — eat it on a cheeseboard, crumbled, spread or melted.
Here are five different ways to enjoy blue cheese:
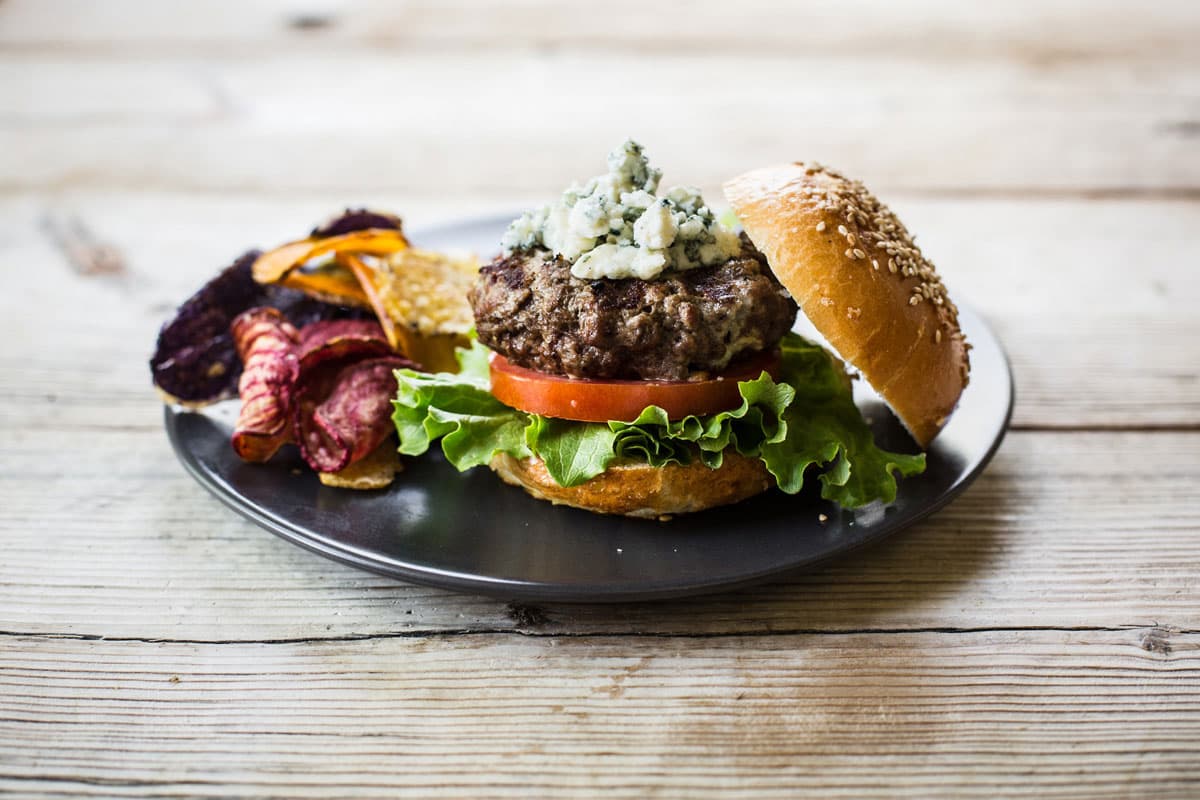
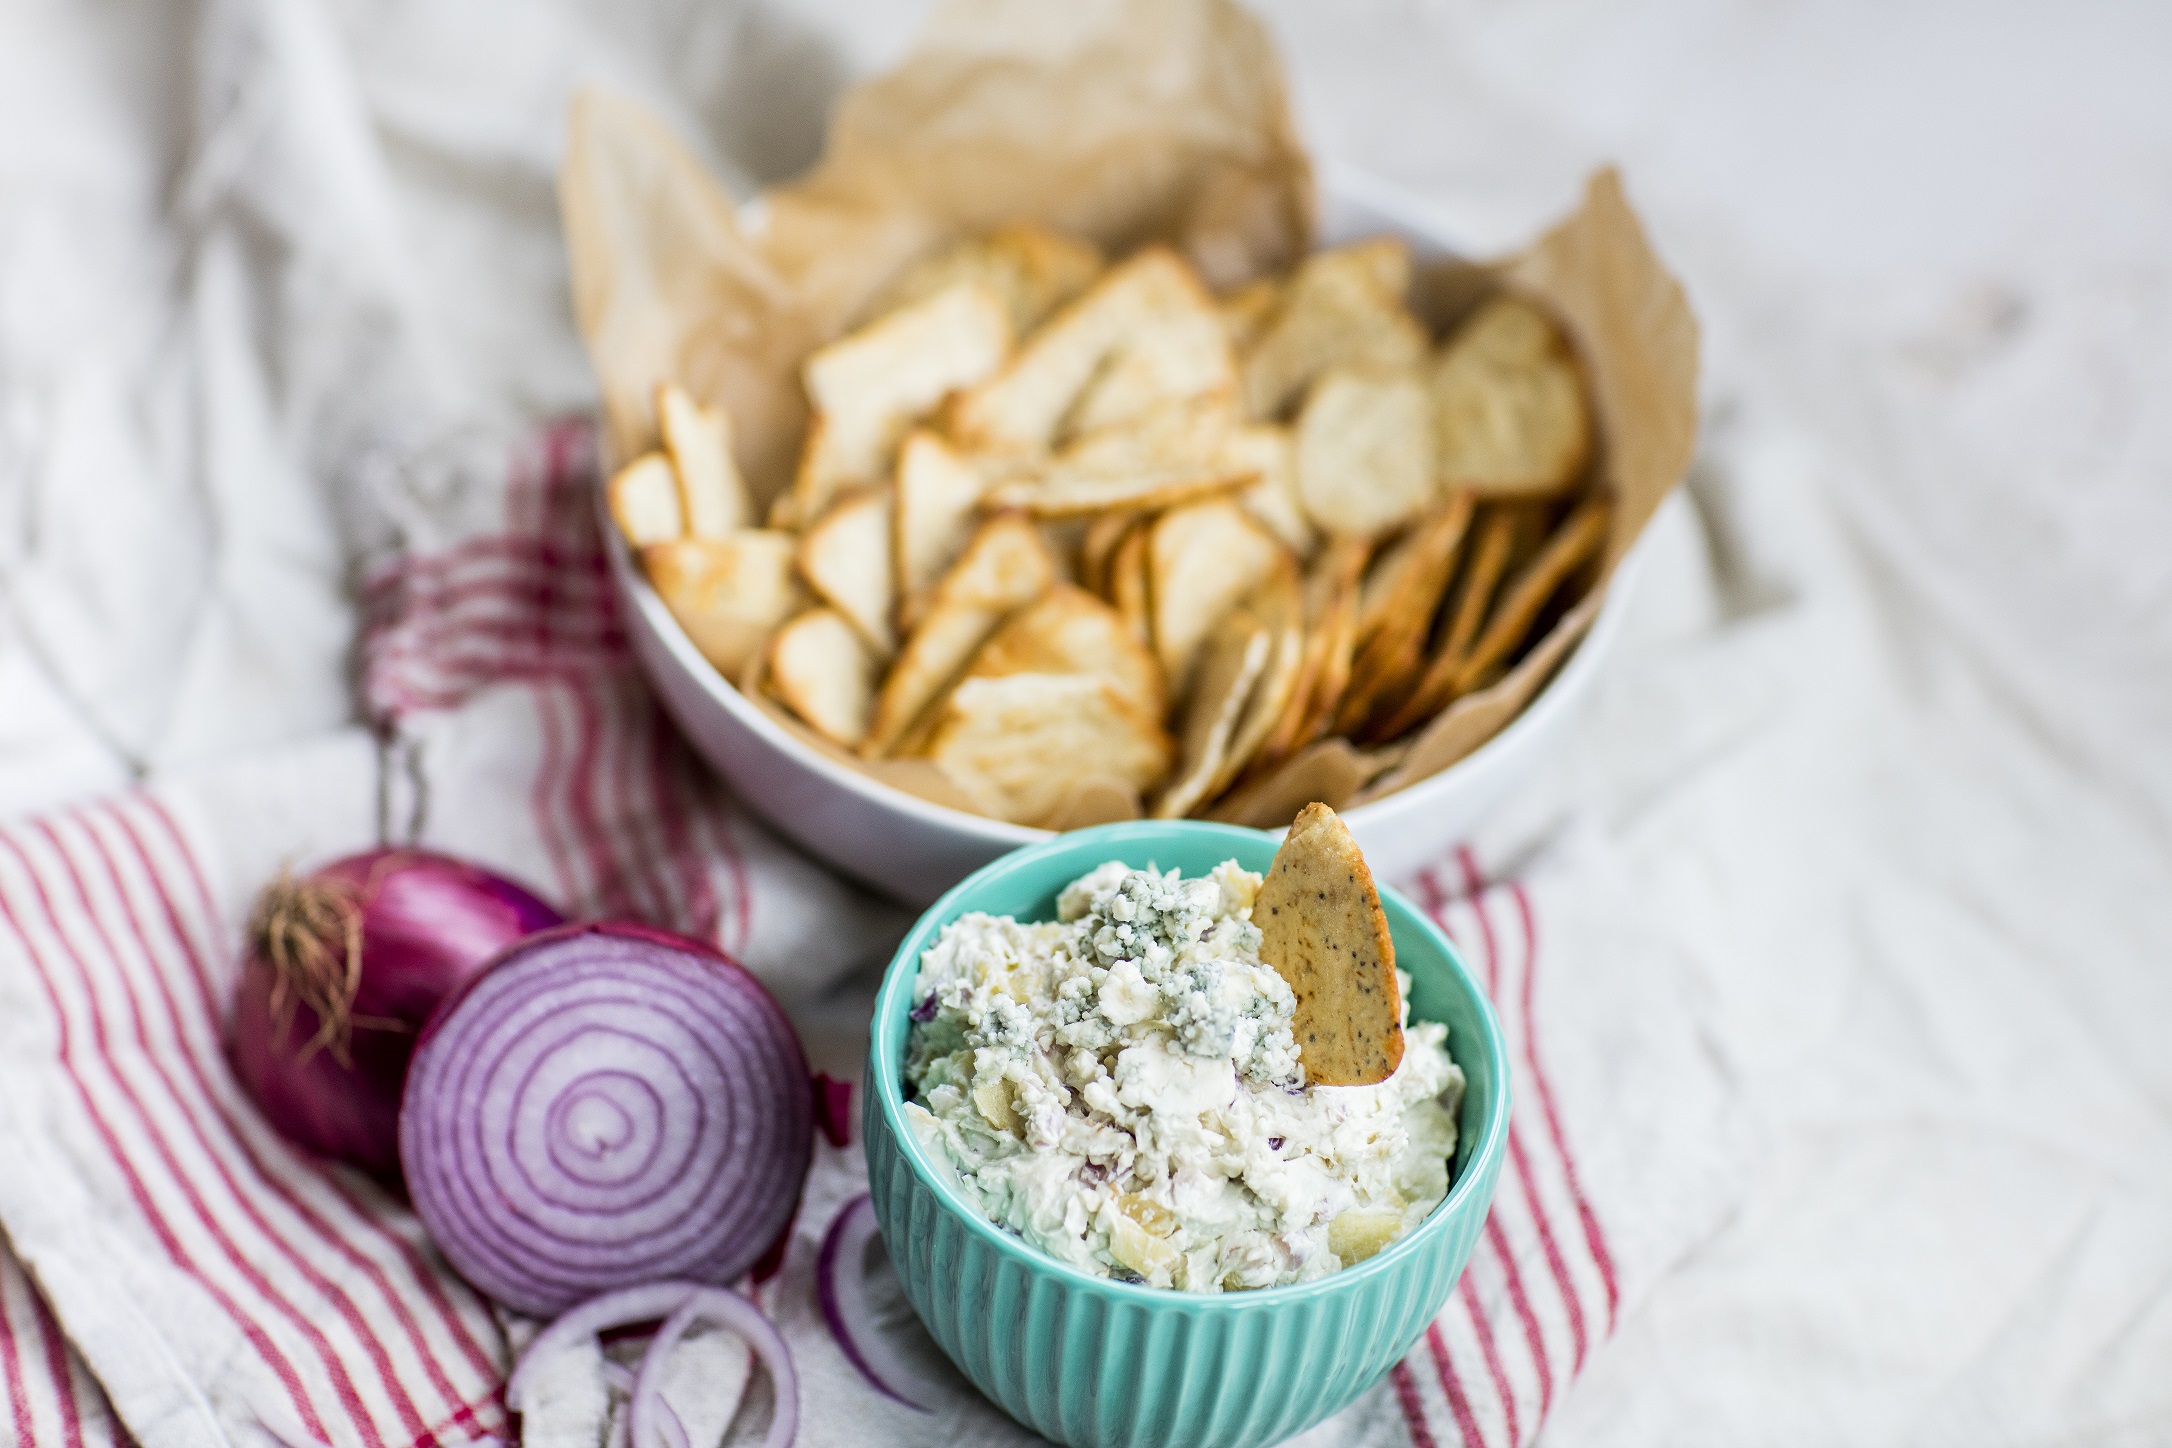
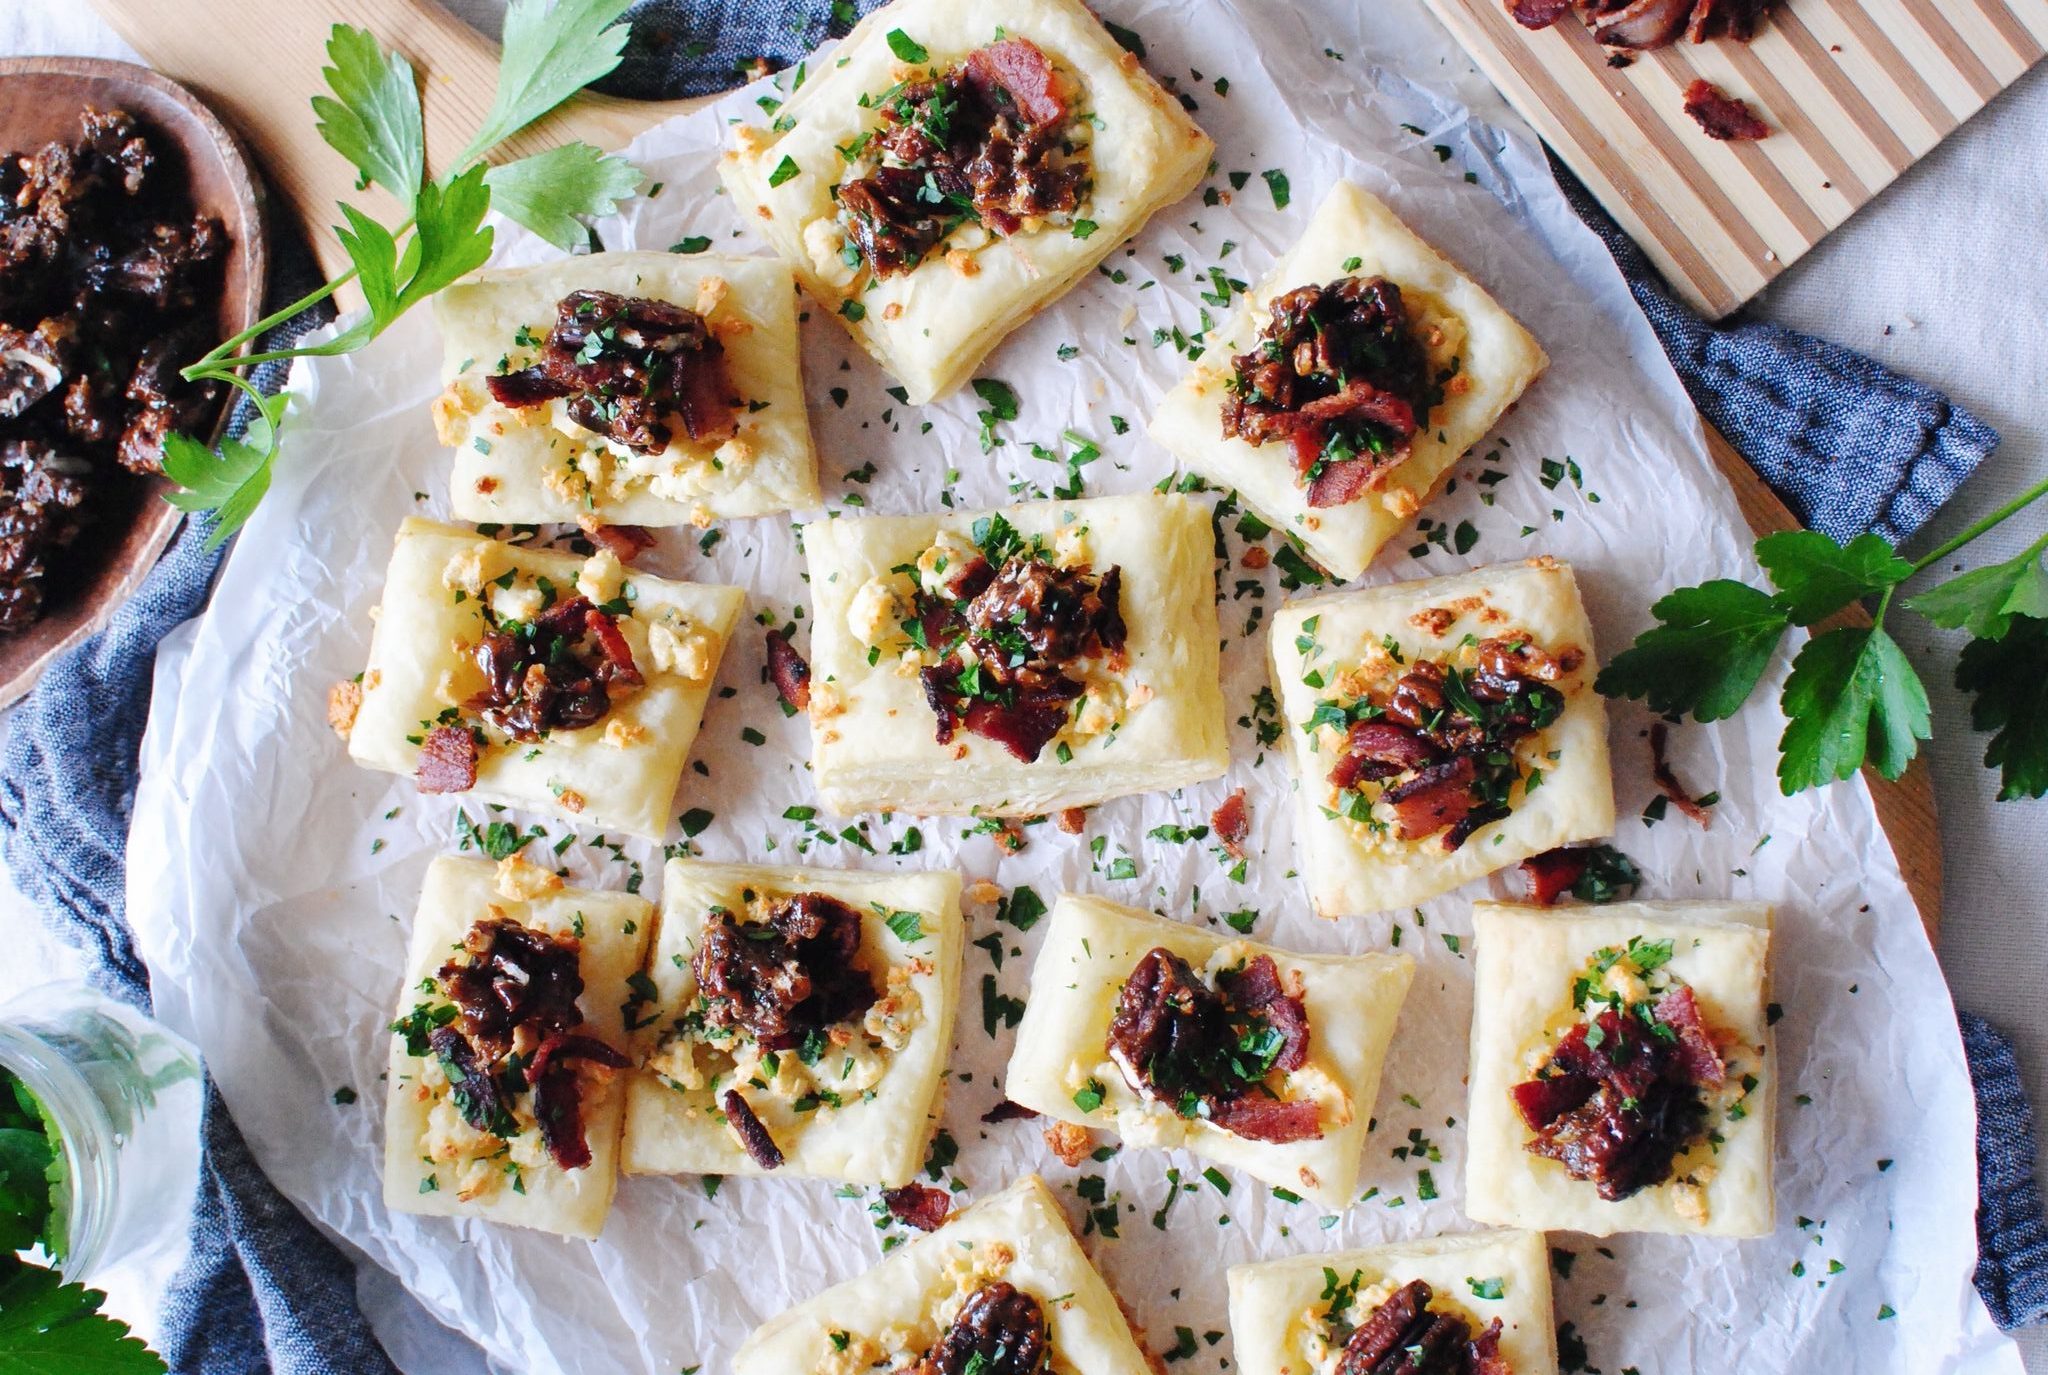
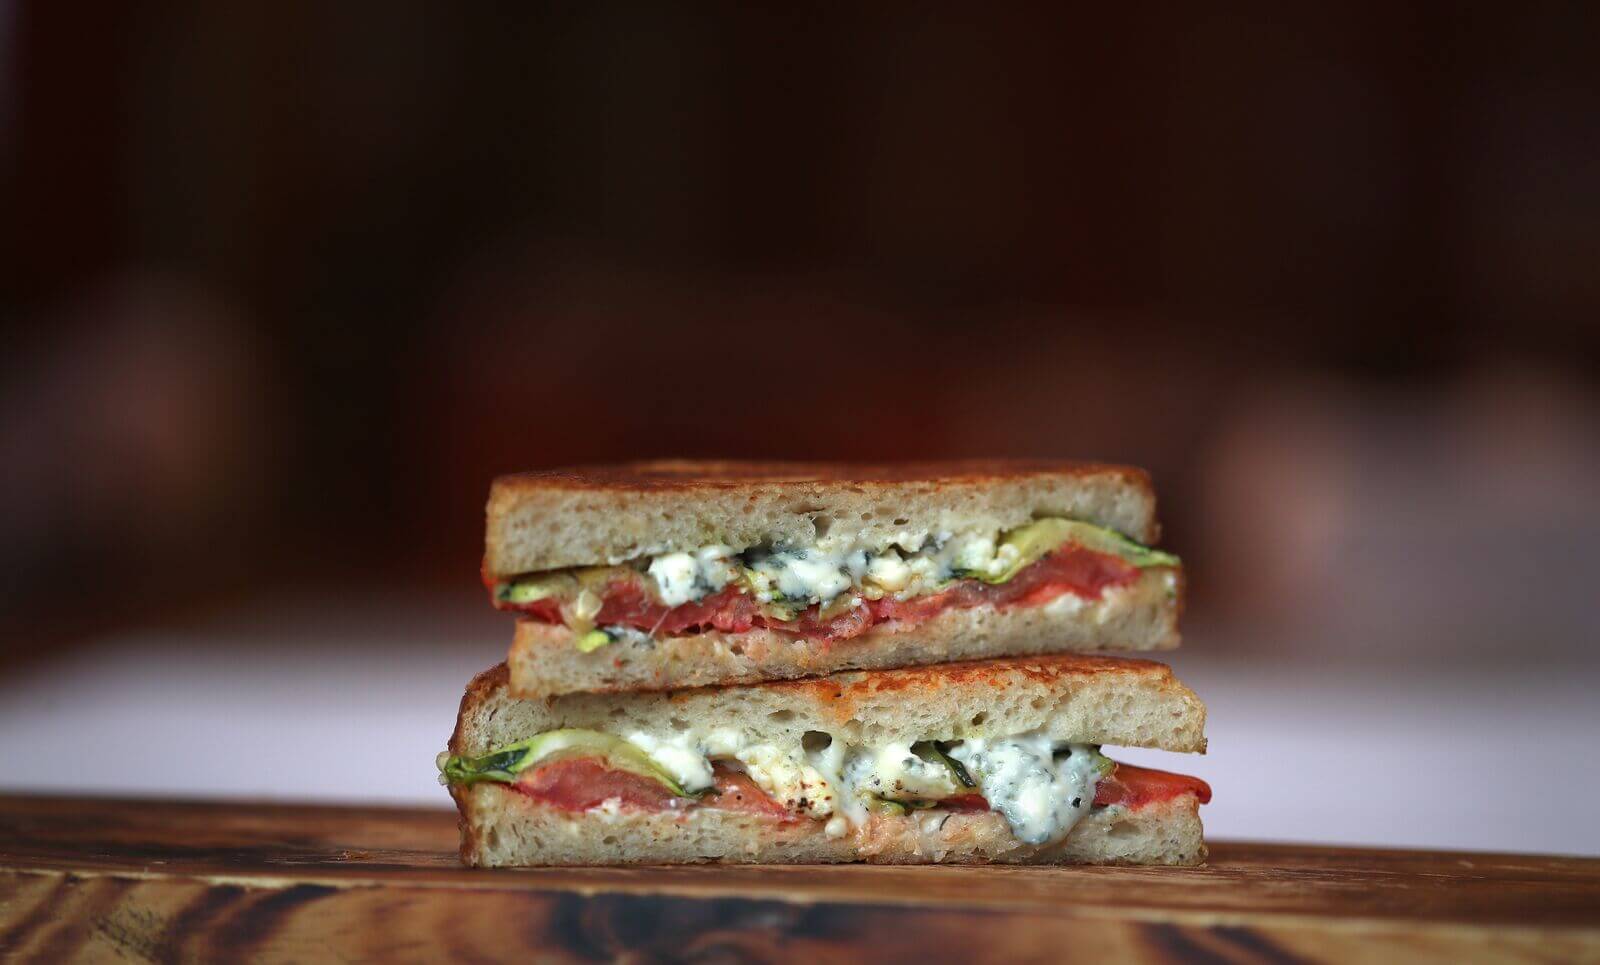
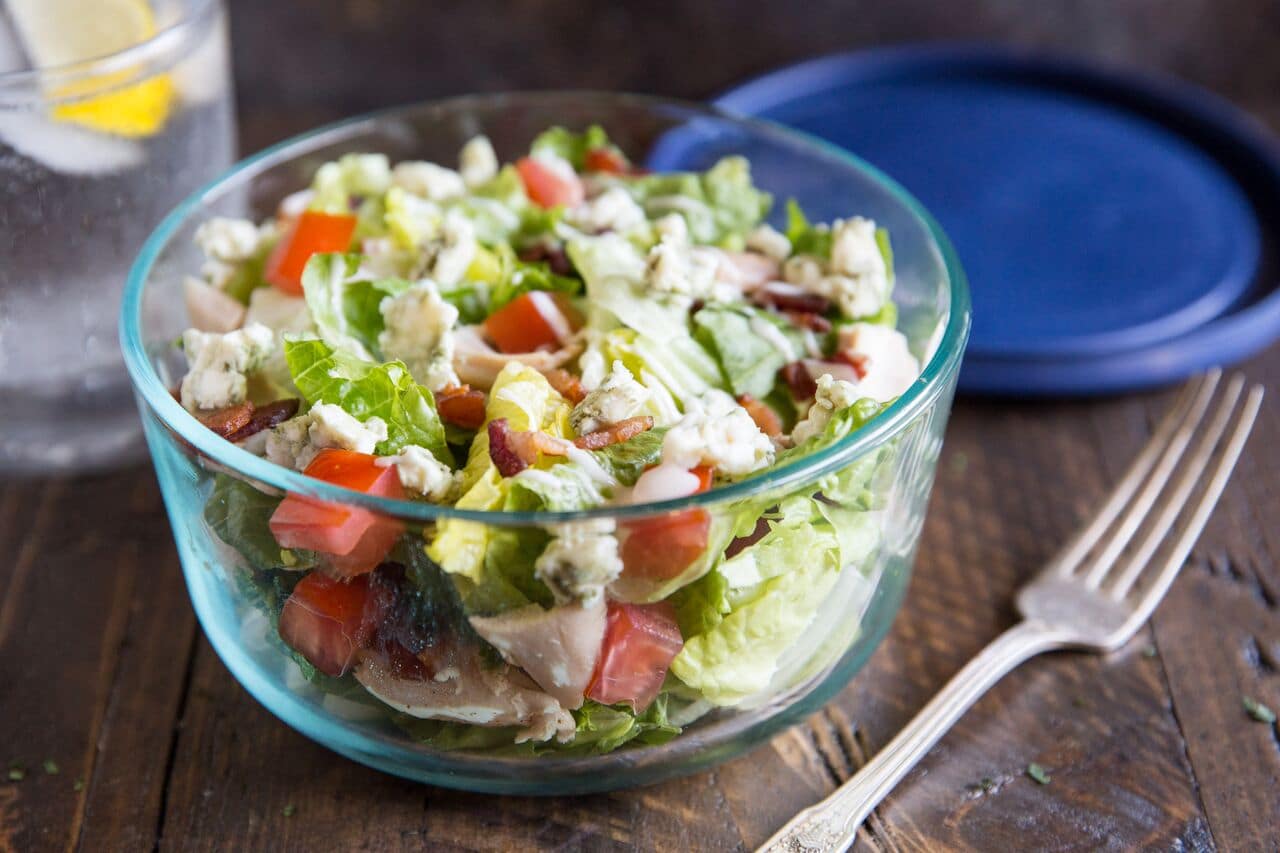
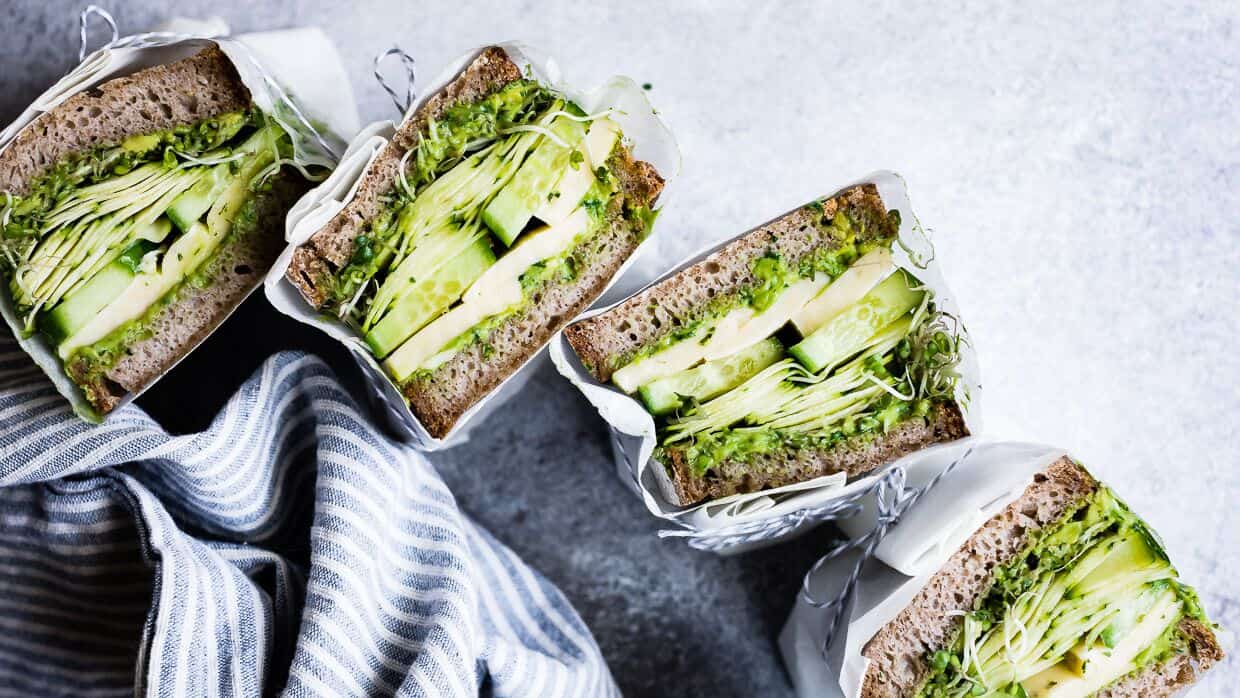
1. Melt on Top of a Burger: One of the most common and delicious ways to enjoy blue cheese is to crumble and melt it on top of a burger. One of our favorite burger recipes is our Moody Blue Slider made with our delicately smoked Moody Blue® recipes 2. Make a Dip: Another easy way to use blue cheese is it turn it into a cheesy dip! This Pear & Buttermilk Blue® Dip incorporates our Original Buttermilk Blue® cheese along with five other simple ingredients for a dip that’s perfect for a crowd. 3. Make a Dessert: Blue cheese typically isn’t the first thing you think of when making dessert or sweet appetizers, but it’s tangy and savory flavor adds depth to a variety of sweet dishes. These Blue Cheese, Bacon, and Candied Pecan Puff Pastry Bites are a perfect example! 4. Melt in a Grilled Cheese: Any cheese can be melted in a grilled cheese. Yes, even blue! This Buttermilk Blue® Melt made with our Buttermilk Blue® cheese, zucchini and tomatoes is a new spin on your favorite comfort food. 5. Top a Salad: The creamy taste and texture of blue cheese is perfect on top of fresh, crispy lettuce. This Chicken BLT Salad uses blue cheese to add creaminess to the usual bacon, lettuce, and tomato combo.
Flatbreads are a must-have for your recipe collection. They’re ridiculously easy to make and are versatile enough to make as an appetizer, light lunch, or even a fun dinner. These are some of our all-time favorite flatbread recipes!
Whether it’s a weekday or the weekend, your lunch plans don’t have to be boring. These five recipes are some of Roth fans’ all-time favorites and trust us, you won’t be disappointed.
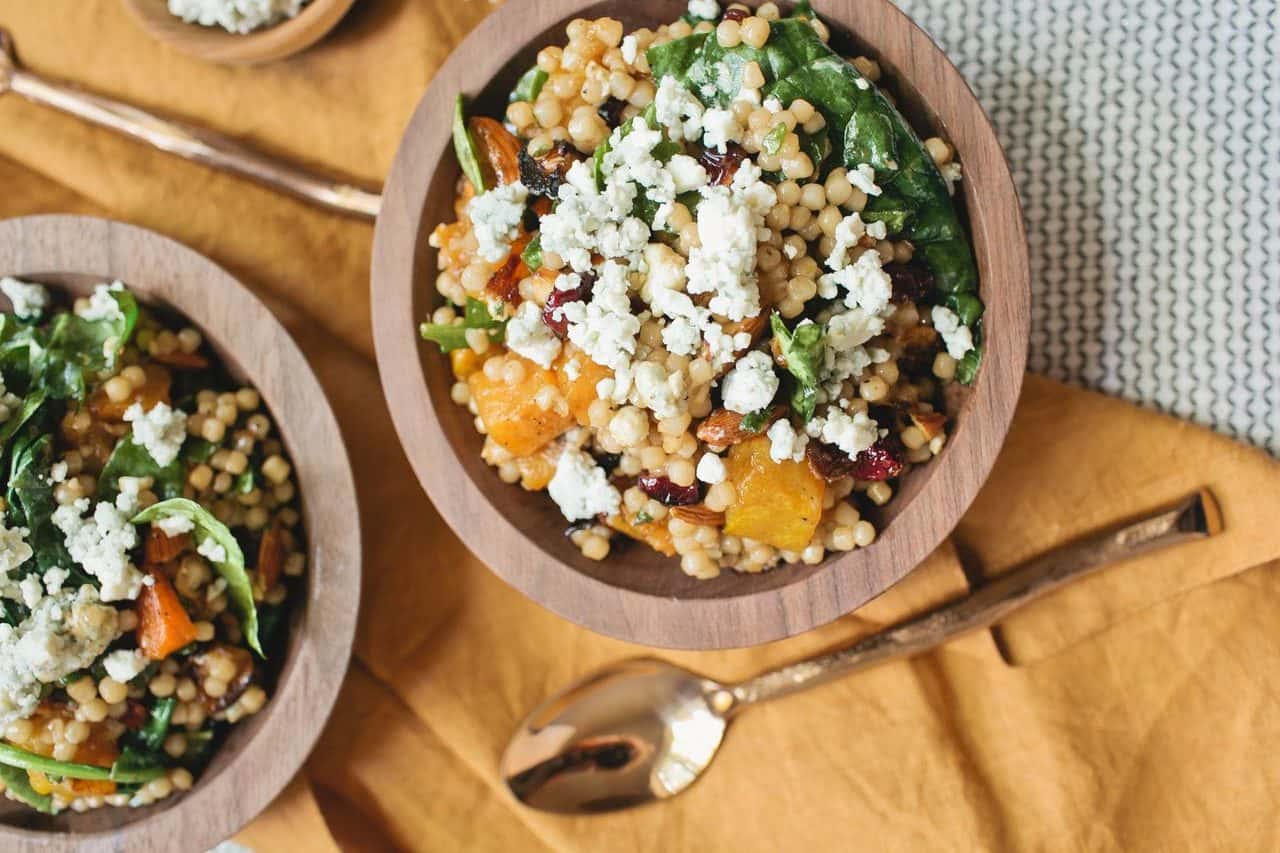
Harvest Couscous Salad: Although this salad is a fall favorite, it can be enjoyed anytime throughout the year. Plus, it features our tangy, but mellow Buttermilk Blue® cheese.
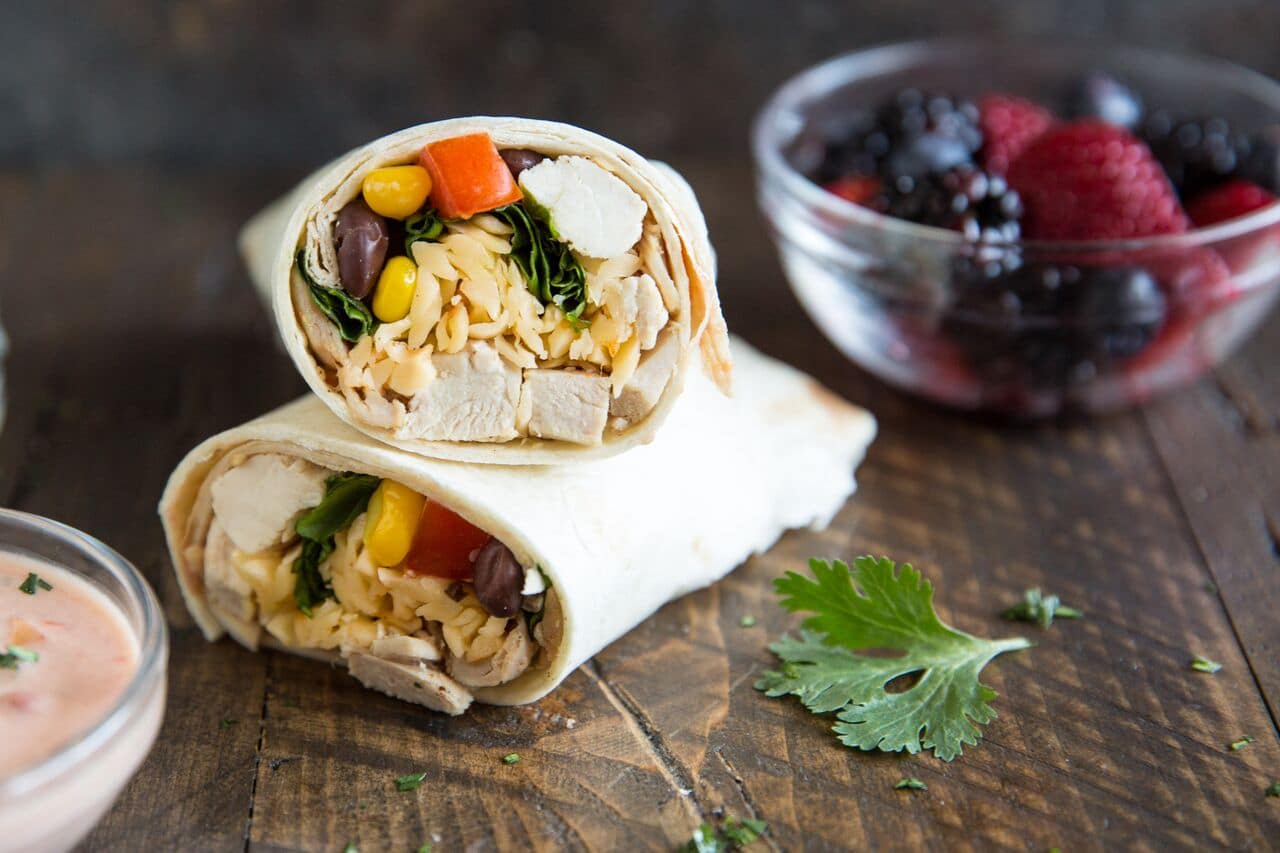
Southwest Chicken Wrap: Layered with chicken, spicy 3 Chile Pepper Gouda cheese, lettuce, tomato, and beans, this makes a tasty, nutritious lunch that will keep you full all afternoon!
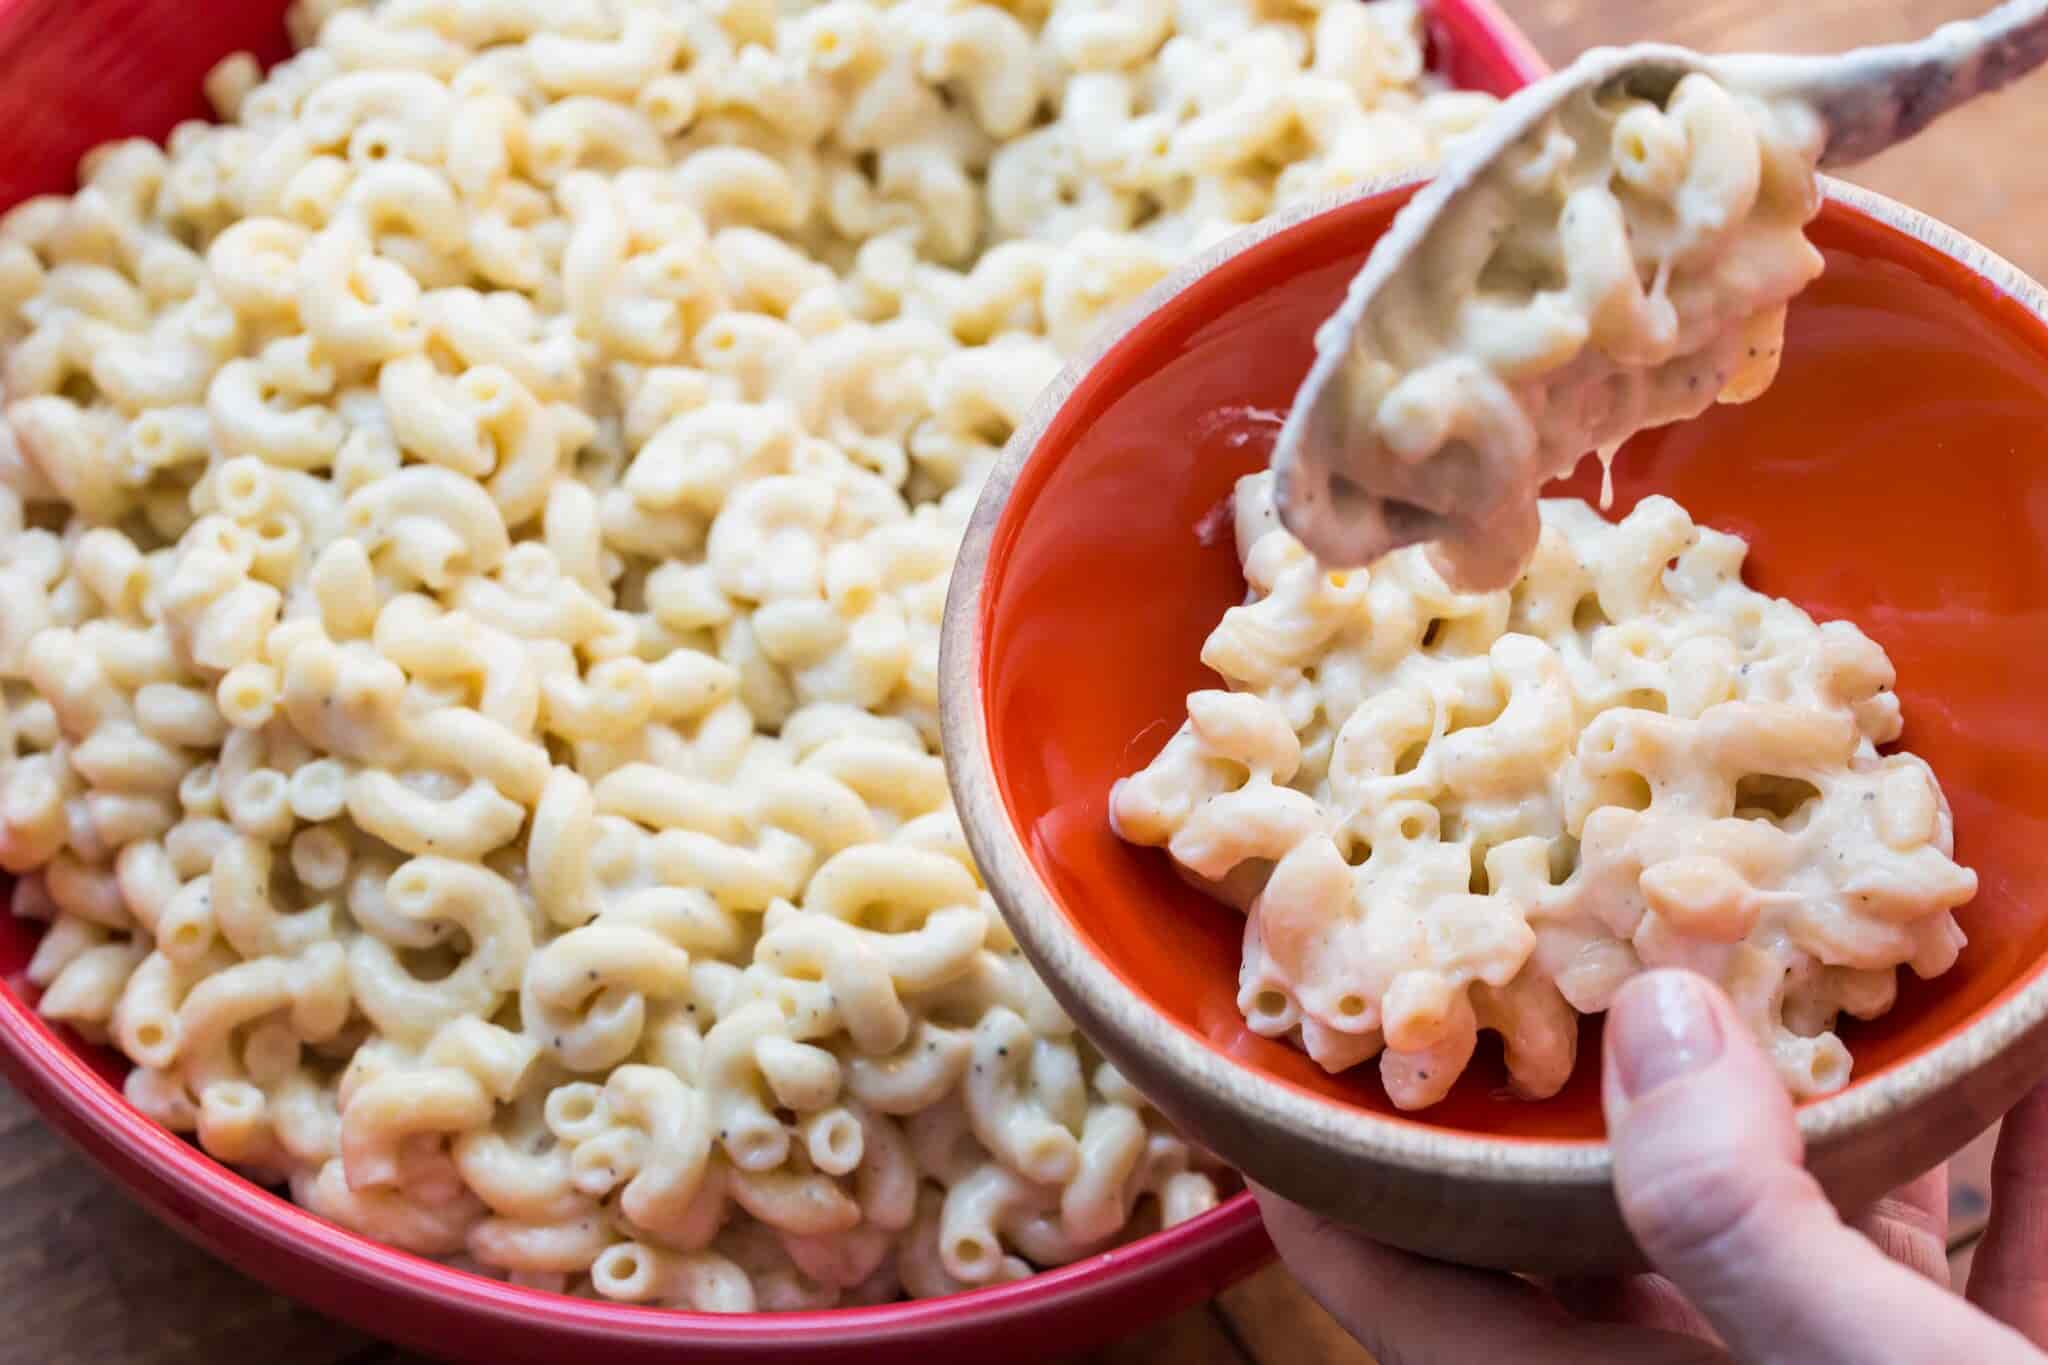
Four Cheese Stovetop Macaroni: Nothing is more delicious or satisfying than making your own mac and cheese, and it’s surprisingly easy. Four amazing cheeses: Havarti, Organic Cheddar, Butterkäse, and Grand Cru®, work together to make this the ultimate, decadent, creamy stovetop mac and cheese.
Chicken BLT Salad: Our Buttermilk Blue® cheese crumbles and ranch dressing add a creaminess to the usual bacon, lettuce, and tomato salad combo.
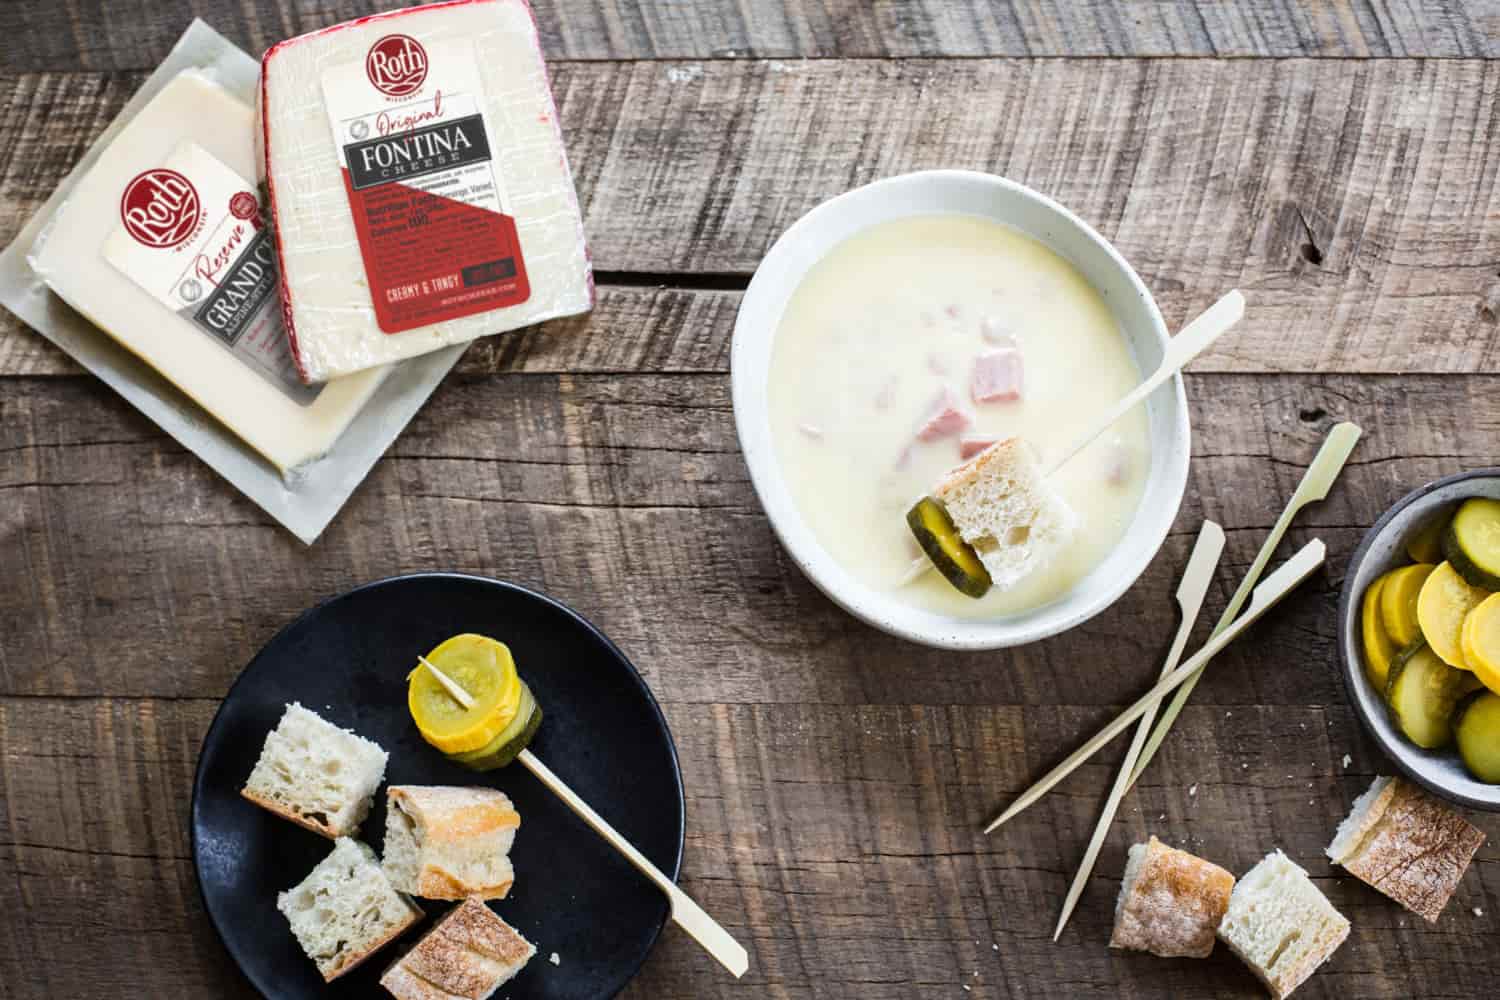
Fondue is a communal dish that brings friends and family together. There’s just something about a pot of bubbling, gooey cheese that makes people smile! On National Fondue Day, we’re sharing our top tips to make sure your next fondue gathering goes smoothly.
Remember to Stir
Fondue needs to be stirred frequently to keep the cheese from separately or sticking to the bottom of the pot. Use a piece of bread or other accompaniment to stir the fondue in a figure-eight pattern to help keep the fondue smooth.
Twirl Your Fork
Once you’ve stirred and dunked your food, lift your fork and twirl it over the pot to allow the excess gooey cheese to drip back into the pot.
Play Nice With Your Guests
Remember everyone is trying to get their fill of the cheesy goodness so have patience. Also, your fondue fork is for dipping only! Make sure to remove your food and use your dinner fork for eating.
Think About Pairings
We love to serve a chilled dry Riesling with our fondue. It pairs perfectly with our classic House Fondue recipe. A light beer can also make a great pairing.
Whether you consider yourself a cheese expert or are just beginning your cheese education, the number of varieties, styles, techniques and terms can be overwhelming! We’re breaking down some of the most common cheese jargon, terminology and buzz to help you feel like a cheese master.
Affinage – The art of finishing cheese as it ages to bring it to maturity; the process helps influence the flavor, texture and body of the cheese. This is typically done in a cellar or cave.
Brine – A salt and water solution that is used to wash some cheese varieties during the final steps in the cheesemaking process. The brine serves several purposes – it stops the bacteria to ensure the cheese cures properly, it can help add flavor, and the brine pulls moisture from the surface of the cheese allowing a rind to begin to form.
Buttery – A term used to describe the flavor of certain cheeses that are either high in fat or have a slightly sweet flavor and creamy texture (for example, Roth Havarti).
Casein – The key protein in milk that coagulates during the cheesemaking process with the addition of rennet.
Earthy – A term used to describe the flavor of cheese varieties with rustic, grassy flavors and aromas (for example, Roth’s Private Reserve).
Hand-Rubbed – The process of rubbing the exterior of a cheese with spices or other seasonings to create a flavorful rind (for example: Roth GranQueso®).
Mouthfeel – The physical sensations caused by cheese (or any food!) in the mouth. This sensory attribute helps determine the overall flavor of cheese.
Piquant – A term used to describe the pleasantly sharp or spicy flavors of cheese (for example, Roth Buttermilk Blue®).
Rennet – An enzyme added to help coagulate milk during the cheesemaking process.
Rind – The outer surface on a cheese that helps create a seal and lock in moisture during the aging process.
Smear Ripened – A type of washed rind cheese that is also smeared with a bacteria solution to encourage uniform growth of the desired bacteria as the cheese ages.
Whey – The liquid in milk that separates from the curds during the cheesemaking process.
Washed Rind – A process of ripening in which the rind of the cheese is washed with whey, brine or other liquid (such as wine or beer) to add flavor to the cheese and produce a firm rind.
Cheese is easy to love, but tricky to master, so we’re always on the hunt for great cheese tips. How much should you grate? When do you wrap it in plastic? What do you serve at a party? We’ve gathered questions from cheese lovers throughout the years and put together this handy list of expert cheese tips to help you buy, store, and use your favorite food to it’s fullest potential.
COOKING
4-6 ounces of cheese = 1 cup, shredded
For the perfect melt, GRATE your cheese before making a grilled cheese sandwich
When cooking, add your cheese last to preserve flavor
SERVING
Limit your cheeses to no more than 3-5 different varieties on a cheese board. Too many can get expensive and overwhelming.
Do NOT, we repeat, DO NOT serve cheese right out of the refrigerator. Cheese is the best taste and texture at room temperature, so make your cheese board ahead of time and let it sit on the counter for a bit.
BUT, cold cheese is easier to cut than warm cheese. So, prep, then bring to room temperature.
Hard cheeses should not be sliced, but rather broken into small pieces. Use a short knife with a triangular blade.
How much cheese should you serve at a party? If serving the cheese hors-d’oeuvre, plan on 1 to 2 ounces of each cheese per person.
STORING
What should you wrap your cheese with? The answer: it depends on the cheese! Cheese ages and perfects by air exposure, so each cheese needs different exposure to air to stay tasting it’s best once it’s at your house, too.
Blue cheese: plastic wrap
Hard aged cheeses (like Grand Cru): parchment or wax paper
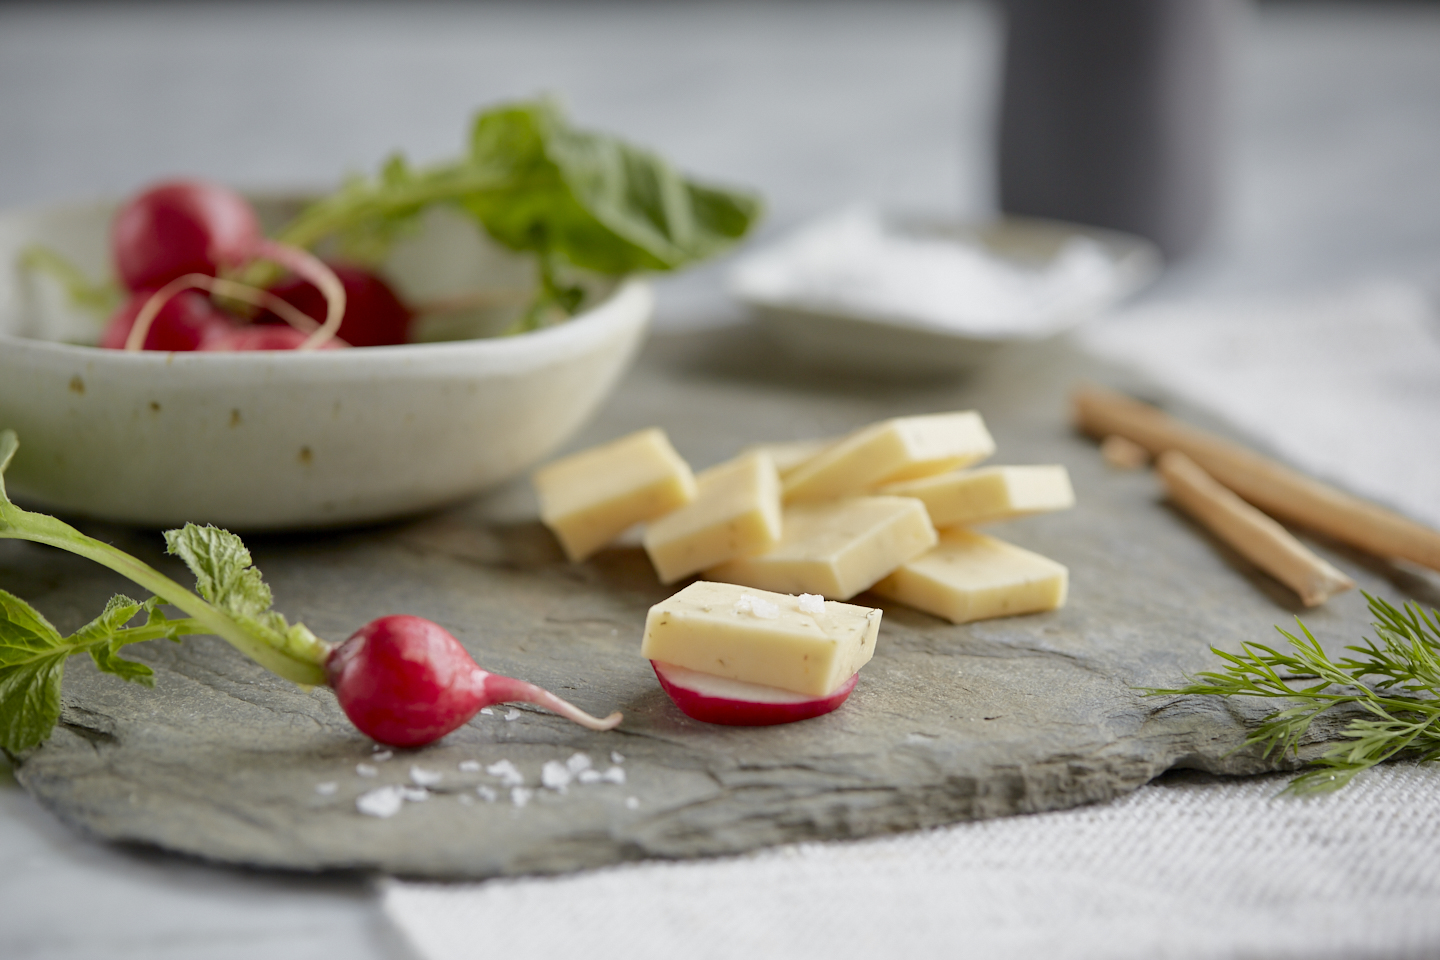
Looking for an easy appetizer or new twist on your plain ol’ cheeseboard? Top a radish slice with a square slice of Roth Havarti cheese, then sprinkle the top with coarse sea salt. Try many Havarti flavors like Dill (pictured), Jalapeño or Original.
What you’ll need: 1 package (6 or 8 ounce) Roth Havarti cheese
1 bunch fresh radishes
Coarse sea salt, for topping
How to do it 1. Slice radishes into disks
2. Slice Havarti into strips, then cut into squares
3. Top radish slices with Havarti slices and sprinkle with sea salt. Or, place Havarti squares and radishes on a cheeseboard for quests to assemble their own pairings.
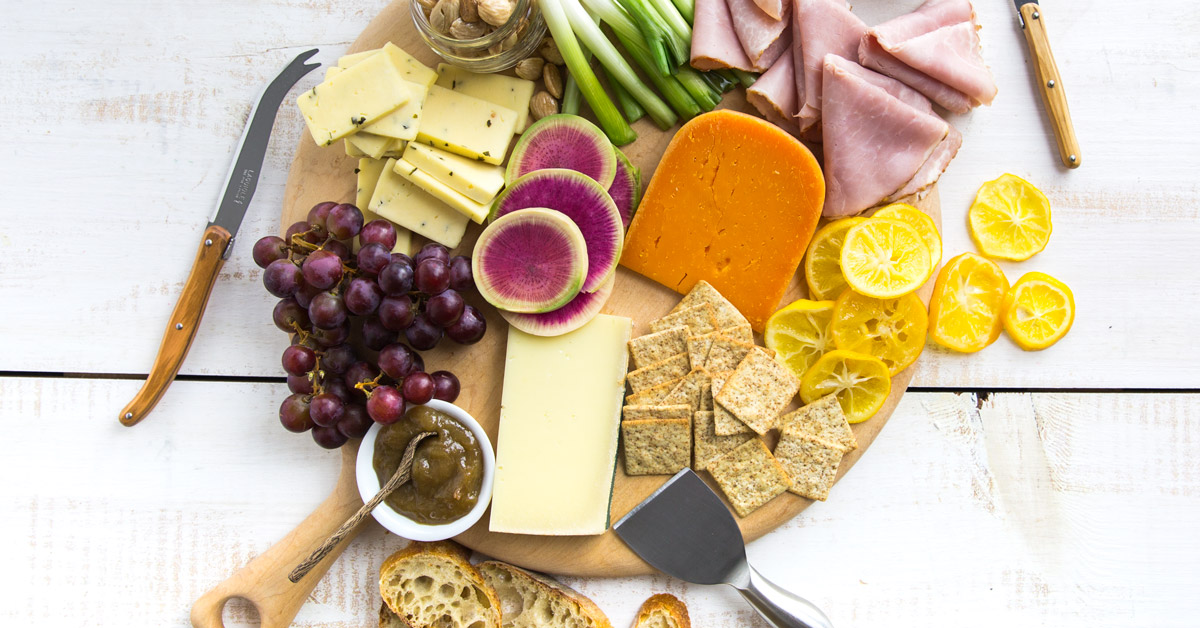
It’s finally Spring! Whether you’re making a cheese board for a party, a shower, or just because, you might as well make it as lovely, tasty, and seasonal as possible. Here’s our latest inspiration:
STEP 1: Choose your cheese
We recommend starting with a creamy, flavored Havarti. Roth Horseradish Havarti has just enough kick without overpowering your palate. Plus, it pairs especially well with seasonal ham.
Next, add a nice, nutty alpine-style cheese. Alpine-style cheeses, like Roth Grand Cru, have a rich, complex flavor and appeals to just about any party-goer. Plus, it pairs beautifully with nuts, fruits, and ham—which makes it a perfect partner for this spring board.
Add a pop of color with a mild cheddar or American Original cheese. Roth Prairie Sunset is a perfect choice for spring. It is slightly sweet with a hint of butterscotch, and so approachable that it tastes great in just about any combination.
Step 2: Pair with Accompaniments
Have fun adding color to your cheese board with seasonal vegetables, fruit, and nuts. Here are some ideas:
Marcona almonds: These simple salted, slightly oily almonds provide a great crunch between bites.
Pickled spring onions: You can make these a few days in advance in the fridge by putting trimmed spring onions into a simple brine—a quick search for pickled spring onions or scallions will turn up dozens of tasty options.
Grapes: Pick your favorite variety—we love the color of red grapes against the color of the Prairie Sunset.
Rhubarb jam: Nothing says spring like rhubarb!
Beauty heart radishes: Peppery-sweet and oh-so-pretty, these radishes may look boring from the outside, but when you slice them, they’re show-stoppers. Great on a sliced baguette with ham and your choice of cheese.
Candied Meyer Lemon: Meyer lemons have a distinctive taste—less sour than regular lemons, with a slightly floral aroma. If you can’t find them candied, you can make your own! Martha Stewart’s version calls for simmering sliced lemons in a simple syrup for 30 minutes, letting them cool, then laying them out on a rack.
Step 3: Add a Base
Bulk up your cheese board with meats, crackers and bread. For spring, we love:
Country ham: Salty country ham is a great choice for a cheese board, but an unctuous liver pâté would be lovely, too.
Whole wheat crackers and sliced baguette: These serve as the perfect base for stacking up adventurous cheese board combos.


 Cheese Plane
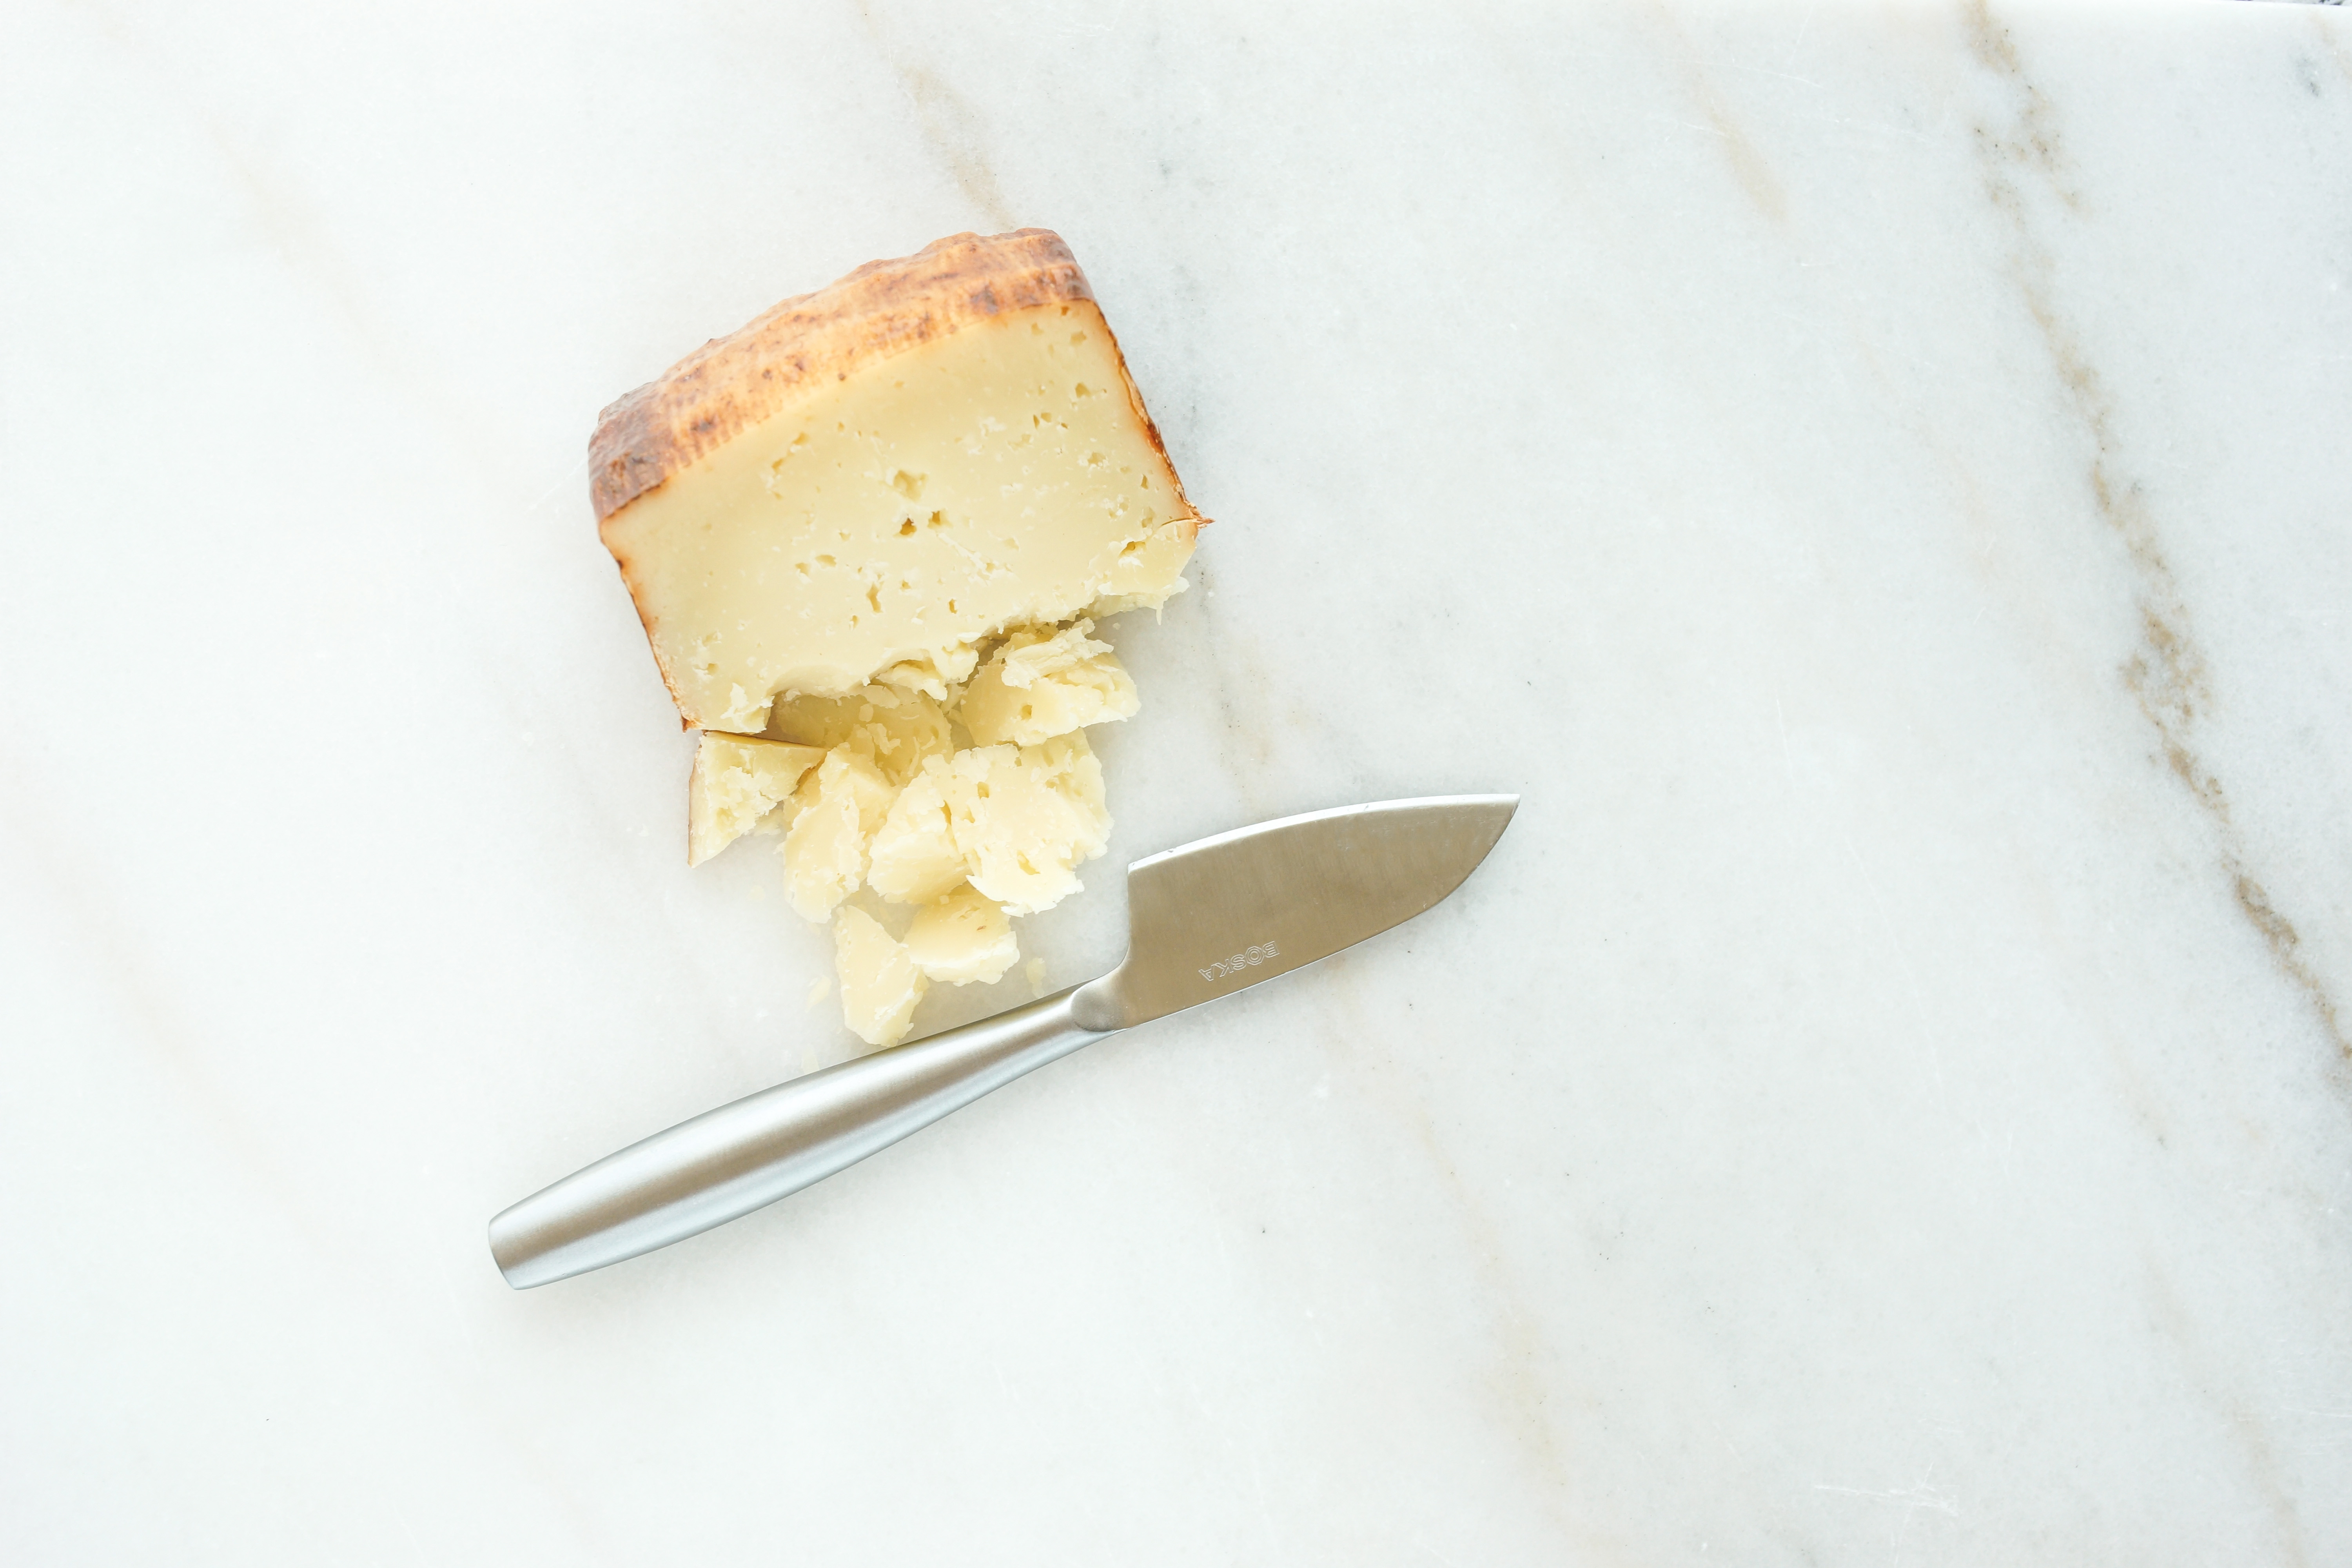 Parmesan Knife
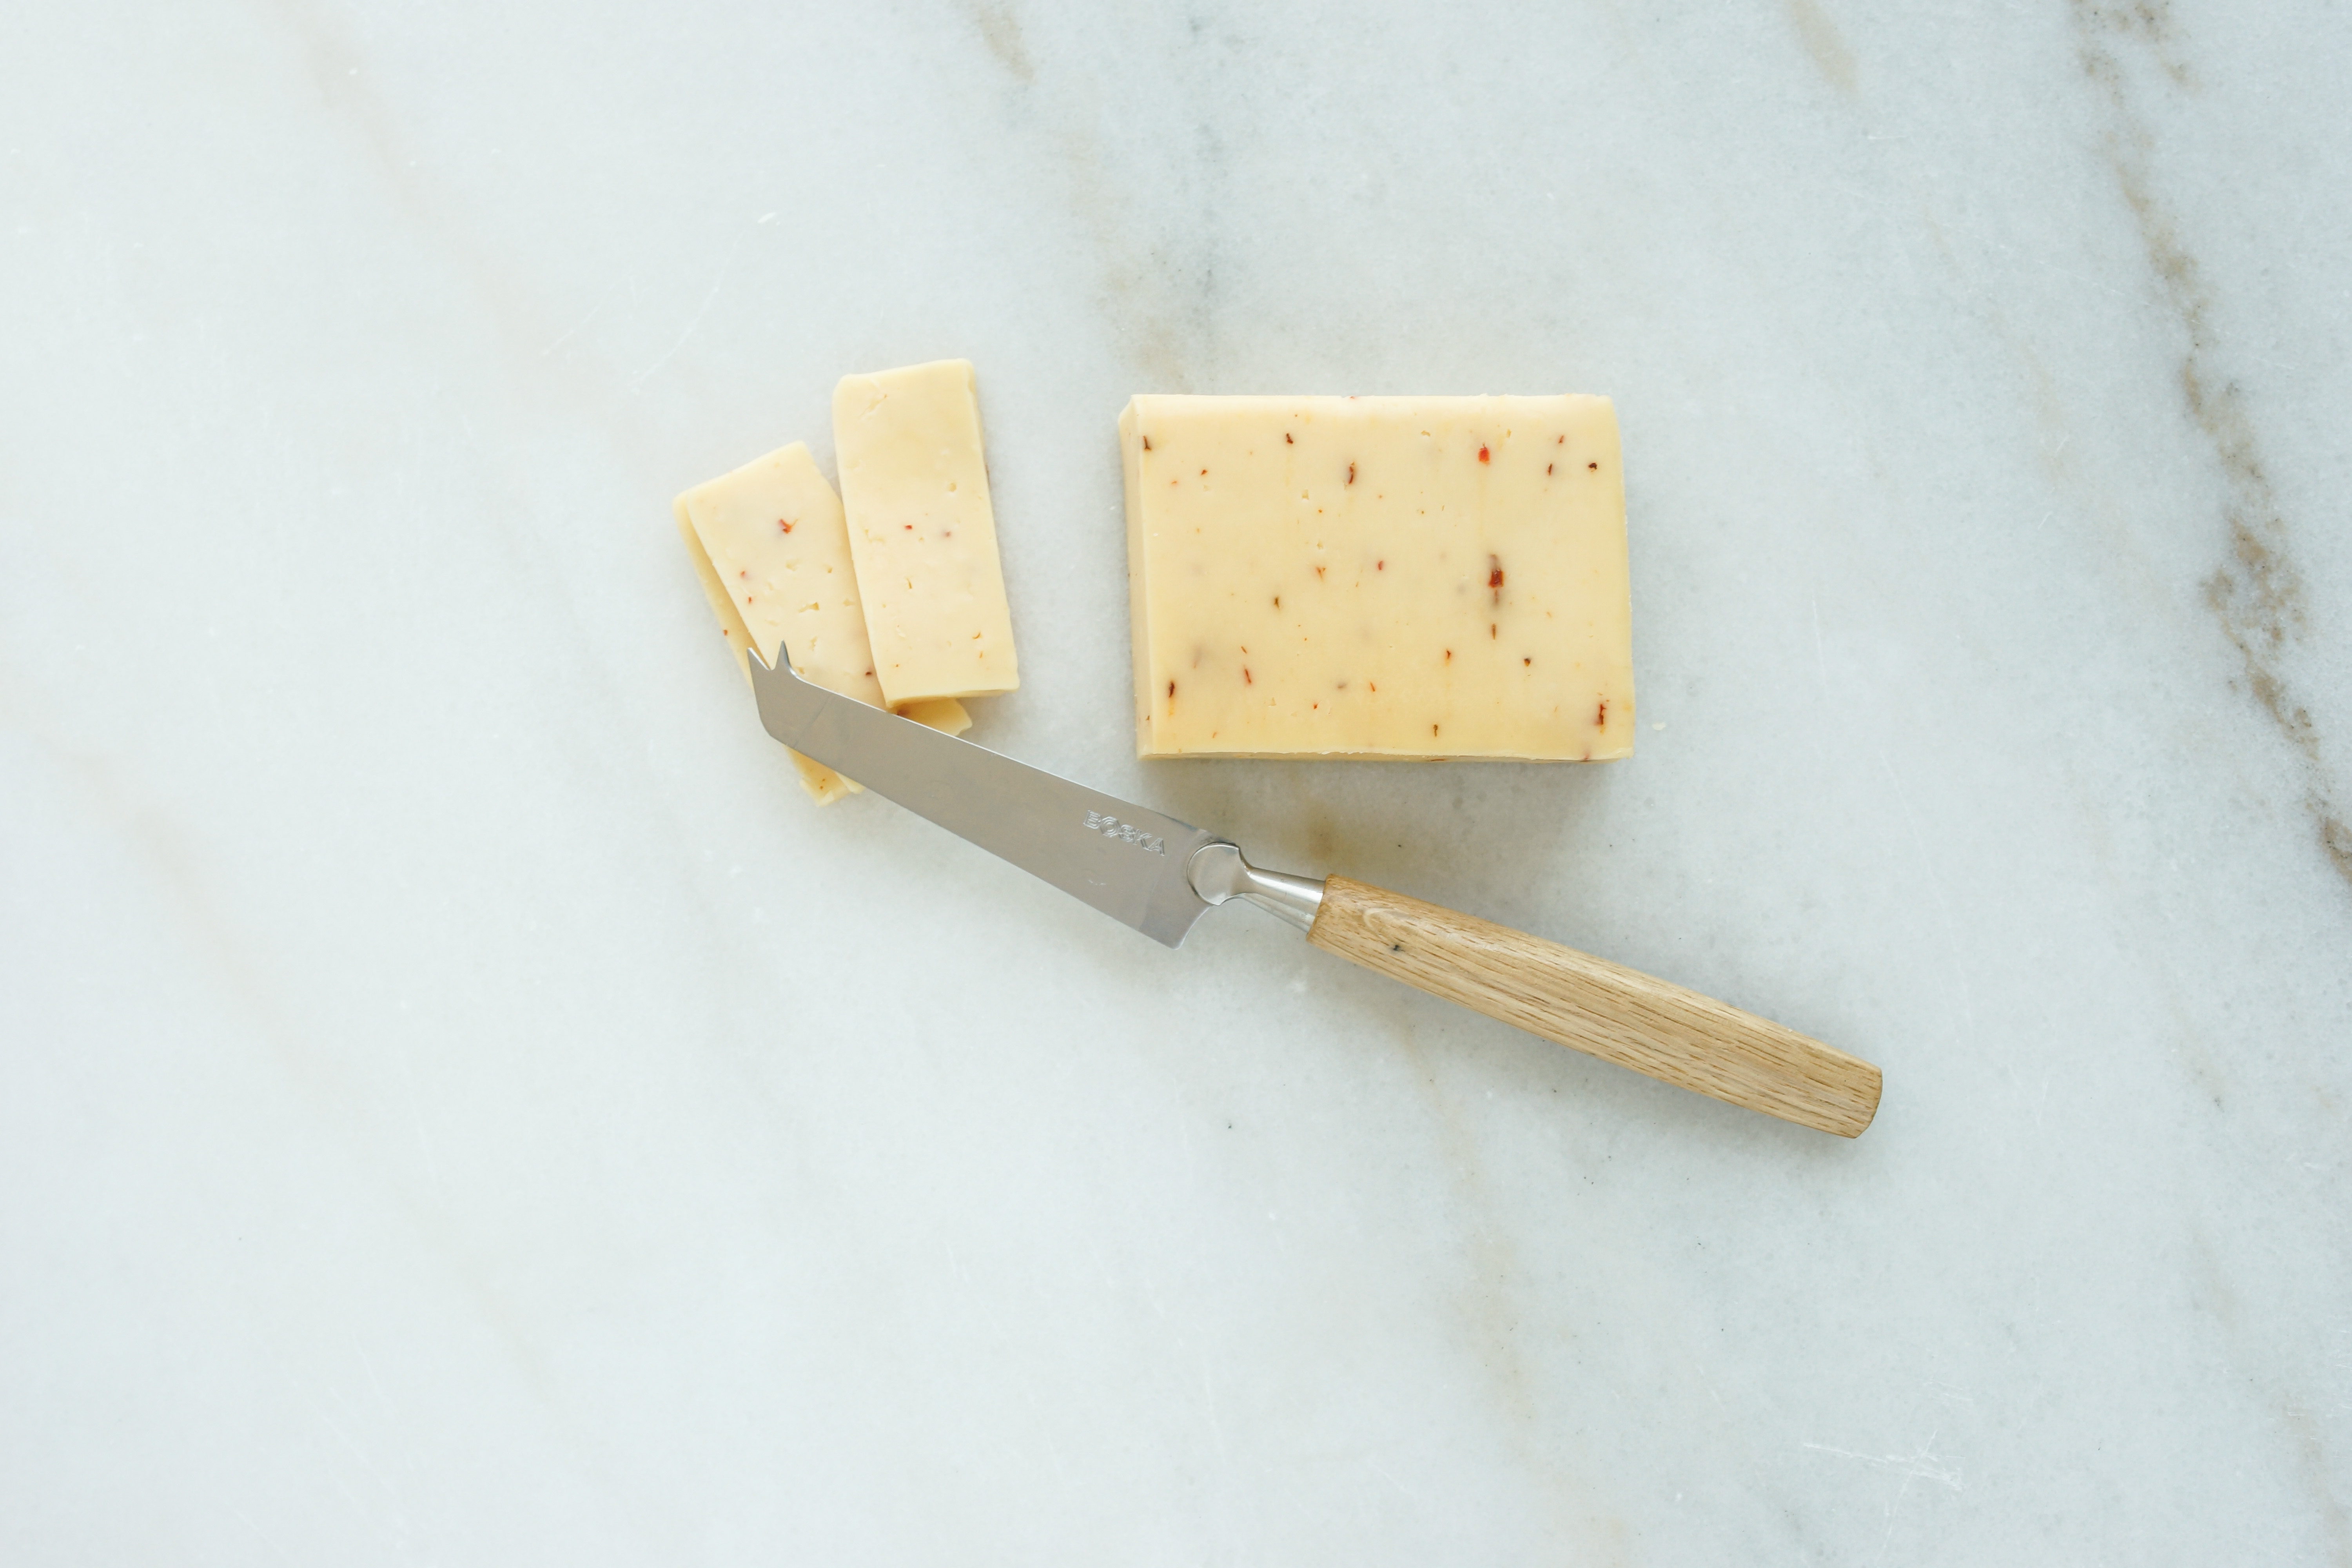 The Classic Cheese Knife